
Dollar Tree Cleaning Supplies: Unlock the secrets to a sparkling home without breaking the bank! Have you ever looked at your overflowing cleaning supply cabinet and felt a pang of guilt knowing how much you’ve spent on products promising the moon? I know I have! But what if I told you that you could achieve the same level of clean, freshness, and hygiene using items readily available at your local Dollar Tree?
For generations, resourceful homemakers have sought clever ways to stretch their budgets. From using vinegar and baking soda (staples in many cultures for centuries) to repurposing old rags, the spirit of DIY cleaning is deeply ingrained in our history. Today, that spirit lives on, and the Dollar Tree offers a treasure trove of affordable options to help you embrace it.
In this article, I’m going to share my favorite Dollar Tree cleaning supplies hacks and DIY recipes that will transform your cleaning routine. We’ll explore how to create effective all-purpose cleaners, tackle stubborn stains, and even freshen up your home with delightful scents, all while keeping your wallet happy. Because let’s face it, a clean home shouldn’t cost a fortune. Let’s dive in and discover the power of budget-friendly cleaning!

DIY All-Purpose Cleaner Using Dollar Tree Supplies
Hey there, fellow DIY enthusiasts! I’m always on the lookout for ways to save money and be a little more eco-friendly, and that often leads me straight to my local Dollar Tree. You might be surprised at the cleaning power you can unlock with just a few inexpensive items! Today, I’m going to share my favorite recipe for an all-purpose cleaner that you can whip up using mostly Dollar Tree finds. It’s effective, smells great (you can customize the scent!), and won’t break the bank.
What You’ll Need: The Dollar Tree Shopping List
Before we get started, let’s gather our supplies. Here’s what you’ll need to grab from the Dollar Tree (or similar discount store):
* **White Vinegar:** This is our workhorse! Vinegar is a fantastic natural cleaner and disinfectant.
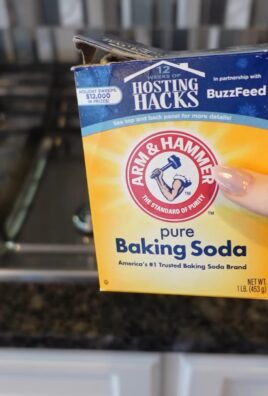
* **Baking Soda:** A gentle abrasive and deodorizer.
* **Lemon Juice (Optional):** Adds a fresh scent and extra cleaning power. You can use bottled lemon juice from the Dollar Tree or fresh lemons if you have them on hand.
* **Dish Soap:** Helps to cut through grease and grime. Look for a basic, clear dish soap.
* **Essential Oil(s) (Optional):** For fragrance. Lavender, tea tree, lemon, and eucalyptus are all great choices for cleaning.
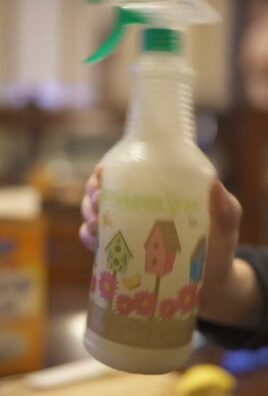
* **Spray Bottle:** To store and dispense your cleaner.
* **Measuring Cups and Spoons:** For accurate measurements.
* **Funnel (Optional):** Makes pouring liquids into the spray bottle easier.
* **Water:** Tap water is fine!
Step-by-Step Instructions: Mixing Your All-Purpose Cleaner
Okay, let’s get down to business! This recipe is super simple, and you can adjust the amounts to suit your preferences.
1. **Prepare Your Spray Bottle:** Make sure your spray bottle is clean and dry. This will prevent any contamination of your cleaner.
2. **Add White Vinegar:** Pour 1 cup of white vinegar into the spray bottle. Vinegar is a natural disinfectant and helps to remove grime and hard water stains.
3. **Add Baking Soda:** Carefully add 1 tablespoon of baking soda to the spray bottle. Be prepared for a little fizzing! The baking soda will react with the vinegar, creating carbon dioxide. This helps to loosen dirt and debris. Add it slowly to avoid overflow.
4. **Add Dish Soap:** Add 1 tablespoon of dish soap to the mixture. The dish soap will help to cut through grease and grime, making your cleaner even more effective.
5. **Add Lemon Juice (Optional):** If you’re using lemon juice, add 1/4 cup to the spray bottle. Lemon juice adds a fresh scent and extra cleaning power.
6. **Add Essential Oils (Optional):** If you’re using essential oils, add 10-20 drops to the spray bottle. Choose your favorite scents! Lavender, tea tree, lemon, and eucalyptus are all great choices for cleaning.
7. **Top with Water:** Fill the rest of the spray bottle with water, leaving a little space at the top.
8. **Shake Well:** Secure the spray bottle lid tightly and shake well to combine all the ingredients.
Using Your DIY All-Purpose Cleaner
Now that you’ve made your all-purpose cleaner, it’s time to put it to work!
1. **Spray:** Spray the cleaner onto the surface you want to clean.
2. **Let it Sit:** Let the cleaner sit for a few minutes to allow it to penetrate the dirt and grime.
3. **Wipe Clean:** Wipe the surface clean with a damp cloth or sponge.
4. **Dry:** If necessary, dry the surface with a clean cloth.
Where to Use Your All-Purpose Cleaner
This all-purpose cleaner is great for a variety of surfaces, including:
* **Countertops:** Clean up spills and messes on your kitchen and bathroom countertops.
* **Sinks:** Remove soap scum and water stains from your sinks.
* **Toilets:** Disinfect and clean your toilets.
* **Showers and Tubs:** Remove soap scum and mildew from your showers and tubs.
* **Floors:** Mop your floors with this cleaner for a sparkling clean. (Test in an inconspicuous area first, especially on delicate surfaces like hardwood.)
* **Appliances:** Clean the exterior of your appliances, such as your refrigerator, oven, and dishwasher.
* **Windows and Mirrors:** Achieve streak-free shine on your windows and mirrors.
Important Safety Tips
While this cleaner is made with natural ingredients, it’s still important to take some safety precautions:
* **Test in an Inconspicuous Area:** Before using the cleaner on a large surface, test it in an inconspicuous area to make sure it doesn’t damage the surface.
* **Avoid Contact with Eyes:** Avoid contact with eyes. If contact occurs, rinse thoroughly with water.
* **Keep Out of Reach of Children:** Keep the cleaner out of reach of children and pets.
* **Do Not Mix with Bleach:** Never mix this cleaner with bleach, as it can create harmful fumes.
* **Ventilation:** Ensure good ventilation when using the cleaner.
Troubleshooting and Customization
Sometimes things don’t go exactly as planned. Here are a few troubleshooting tips and ways to customize your cleaner:
* **Too Much Fizzing:** If your cleaner fizzes too much when you add the baking soda, add it more slowly or use less baking soda.
* **Not Cleaning Effectively:** If your cleaner isn’t cleaning effectively, try adding more vinegar or dish soap.
* **Smell:** If you don’t like the smell of vinegar, add more essential oils or lemon juice. You can also try using a different type of vinegar, such as apple cider vinegar.
* **Cloudy Cleaner:** Your cleaner might appear cloudy, this is normal and doesn’t affect its cleaning power.
Alternative Recipes and Variations
Want to experiment? Here are a few variations on the basic recipe:
* **Borax Boost:** Add 1 tablespoon of Borax for extra cleaning power, especially for tough stains. Be sure to wear gloves when handling Borax.
* **Tea Tree Power:** Increase the amount of tea tree oil for its antibacterial and antifungal properties. This is great for bathrooms and areas prone to mold.
* **Citrus Blast:** Combine lemon, orange, and grapefruit essential oils for a bright and uplifting scent.
* **Lavender Calm:** Use lavender essential oil for a relaxing and calming scent. Perfect for bedrooms and living areas.
* **Eucalyptus Fresh:** Eucalyptus essential oil provides a refreshing and invigorating scent, ideal for kitchens and bathrooms.
Why This Works: The Science Behind the Clean
Let’s break down why these simple ingredients pack such a cleaning punch:
* **Vinegar:** Acetic acid in vinegar is a mild acid that helps dissolve mineral deposits, grease, and grime. It also has antibacterial properties.
* **Baking Soda:** A mild abrasive that helps scrub away dirt and deodorize surfaces. It neutralizes odors and helps to loosen stubborn stains.
* **Dish Soap:** Surfactants in dish soap reduce surface tension, allowing water to spread more easily and lift away dirt and grease.
* **Lemon Juice:** Citric acid in lemon juice is a natural cleaner and deodorizer. It also has antibacterial properties and can help to brighten surfaces.
* **Essential Oils:** Besides adding fragrance, some essential oils have antibacterial, antifungal, and antiviral properties.
Storage and Shelf Life
Store your DIY all-purpose cleaner in a cool, dark place. It should last for several months. Over time, the scent of the essential oils may fade, but the cleaning power will remain.
Cost Breakdown: Saving Money with DIY
Let’s take a look at how much you can save by making your own all-purpose cleaner:
* **Dollar Tree White Vinegar:** $1.25
* **Dollar Tree Baking Soda:** $1.25
* **Dollar Tree Dish Soap:** $1.25
* **Dollar Tree Lemon Juice (Optional):** $1.25
* **Dollar Tree Essential Oil (Optional):** $1.25
* **Dollar Tree Spray Bottle:** $1.25
For around $7.50 (or less if you already have some ingredients), you can make a large batch of all-purpose cleaner that will last for weeks or even months. Compare that to the cost of commercial cleaners, and you’ll see the savings add up quickly!
Final Thoughts: Embrace the DIY Cleaning Life!
I hope you enjoyed this DIY all-purpose cleaner recipe! It’s a simple, affordable, and effective way to keep your home clean and fresh. Plus, it’s a great way to reduce your reliance on harsh chemicals and contribute to a more sustainable lifestyle. So, grab your supplies from the Dollar Tree and get ready to experience the joy of DIY cleaning! Happy cleaning!
Conclusion
So, there you have it! Unlocking the potential of Dollar Tree cleaning supplies to create effective and budget-friendly cleaning solutions is not just a smart move for your wallet, it’s a testament to resourcefulness and a step towards a more sustainable lifestyle. We’ve shown you how to transform everyday items from Dollar Tree into powerful cleaners that rival their expensive counterparts.
Why is this DIY approach a must-try? Because it empowers you to take control of your cleaning routine. You know exactly what ingredients are going into your solutions, avoiding harsh chemicals and unnecessary additives often found in commercial products. This is especially beneficial for those with sensitivities or allergies. Plus, the satisfaction of creating something effective from inexpensive materials is incredibly rewarding.
Beyond the basic recipes we’ve outlined, the possibilities are truly endless. Experiment with different essential oils to customize the scents of your cleaners. Add a touch of lemon juice to your all-purpose cleaner for extra degreasing power. Infuse your vinegar with citrus peels for a more pleasant aroma. Consider adding borax (if you are comfortable using it) to your laundry booster for an extra cleaning punch. The key is to start with the foundational recipes and then adapt them to suit your specific needs and preferences.
Don’t be afraid to get creative and personalize your cleaning arsenal. For example, if you find that your shower cleaner needs a little extra oomph, try adding a tablespoon of baking soda to the mix. Or, if you prefer a more natural scent, experiment with different combinations of essential oils like lavender, tea tree, or eucalyptus. Remember to always test your DIY cleaners in an inconspicuous area first to ensure they don’t damage the surface.
We understand that transitioning to DIY cleaning can seem daunting at first, but we promise it’s easier than you think. With a few simple ingredients and a little bit of experimentation, you’ll be well on your way to creating a cleaner, healthier home without breaking the bank.
We are confident that these DIY cleaning solutions using Dollar Tree cleaning supplies will revolutionize your cleaning routine. They are effective, affordable, and environmentally friendly. But don’t just take our word for it – try them out for yourself!
We encourage you to embark on this DIY cleaning adventure and discover the amazing potential of Dollar Tree products. Once you’ve tried these recipes, we’d love to hear about your experience. Share your tips, tricks, and variations in the comments below. Let’s build a community of resourceful cleaners who are passionate about saving money and creating a healthier home environment. What are your favorite combinations? Did you find any unexpected uses for these DIY solutions? Let us know! Your feedback will help others discover the joy and benefits of DIY cleaning.
Remember, cleaning doesn’t have to be a chore. With these simple and affordable DIY solutions, you can transform it into a fun and rewarding experience. So, grab your Dollar Tree cleaning supplies, put on some music, and get ready to create a cleaner, healthier, and more sustainable home. We can’t wait to hear about your success!
Frequently Asked Questions (FAQ)
Are these DIY cleaning solutions as effective as store-bought cleaners?
Yes, in many cases, they can be just as effective, and sometimes even more so! The effectiveness depends on the specific recipe and the type of cleaning you’re doing. For example, vinegar is a powerful disinfectant and degreaser, while baking soda is a great abrasive cleaner. By combining these ingredients strategically, you can create solutions that tackle a wide range of cleaning tasks. Many commercial cleaners rely on harsh chemicals that can be harmful to your health and the environment. DIY solutions offer a safer and more natural alternative without sacrificing cleaning power. However, it’s important to note that some commercial cleaners may contain specialized ingredients for specific tasks, such as removing stubborn stains or killing certain types of bacteria. In these cases, you may need to experiment with different DIY recipes or consider using a commercial cleaner for those specific situations.
What safety precautions should I take when making and using these DIY cleaners?
Safety is paramount when working with any cleaning solution, even DIY ones. Always wear gloves to protect your skin from irritation. Avoid mixing bleach with vinegar or ammonia, as this can create toxic fumes. Work in a well-ventilated area to minimize exposure to fumes. Keep all cleaning solutions out of reach of children and pets. Clearly label all containers to avoid accidental ingestion or misuse. When using essential oils, be sure to research their safety precautions, as some can be harmful to pets or pregnant women. Always test your DIY cleaners in an inconspicuous area first to ensure they don’t damage the surface. If you experience any irritation or allergic reaction, discontinue use immediately.
Can I use these DIY cleaners on all surfaces?
Not all surfaces are created equal, so it’s important to be mindful of what you’re cleaning. Vinegar, for example, is acidic and can damage natural stone surfaces like marble and granite. Baking soda can scratch delicate surfaces. Always test your DIY cleaners in an inconspicuous area first to ensure they don’t cause any damage. For delicate surfaces, consider using a milder cleaner like diluted dish soap or a mixture of water and essential oils. Research the specific cleaning requirements of different surfaces before using any cleaning solution, whether it’s DIY or commercial.
How long will these DIY cleaning solutions last?
The shelf life of your DIY cleaning solutions will depend on the ingredients used. Solutions containing water are more prone to bacterial growth and should be used within a few weeks. Solutions containing vinegar or alcohol will last longer due to their preservative properties. To extend the shelf life of your DIY cleaners, store them in airtight containers in a cool, dark place. Avoid storing them in direct sunlight or near heat sources. If you notice any changes in color, odor, or consistency, discard the solution. It’s always best to make smaller batches of DIY cleaners to ensure they are used within a reasonable timeframe.
Are Dollar Tree cleaning supplies really as good as more expensive brands?
While the concentration or specific formulations might differ slightly, the active ingredients in Dollar Tree cleaning supplies are often the same as those in more expensive brands. The key is understanding how to use them effectively. For example, a bottle of Dollar Tree bleach contains the same active ingredient (sodium hypochlorite) as a bottle of name-brand bleach. The difference may be in the concentration, but you can adjust the amount you use accordingly. By combining Dollar Tree cleaning supplies with other inexpensive ingredients like vinegar, baking soda, and essential oils, you can create powerful and cost-effective cleaning solutions. The perceived difference in quality often comes down to marketing and branding, rather than a significant difference in cleaning power.
Can I use essential oils in all of these recipes? Which ones are best?
Yes, essential oils can be a wonderful addition to your DIY cleaning solutions, adding a pleasant scent and providing additional cleaning benefits. Some essential oils, like tea tree, lavender, eucalyptus, and lemon, have antibacterial, antifungal, and antiviral properties. However, it’s important to use essential oils safely and responsibly. Always dilute essential oils before using them, as they can be irritating to the skin and mucous membranes. Avoid using essential oils around pets or pregnant women without first researching their safety precautions. Some essential oils are toxic to pets, while others can affect hormone levels during pregnancy. When choosing essential oils for cleaning, consider their scent and their cleaning properties. Lemon and orange essential oils are great for degreasing, while tea tree and lavender essential oils are effective disinfectants. Experiment with different combinations to find your favorite scents and cleaning blends.
What if I don’t have all the ingredients listed in the recipes?
Don’t worry! The beauty of DIY cleaning is that you can often substitute ingredients based on what you have on hand. For example, if you don’t have white vinegar, you can use apple cider vinegar instead. If you don’t have baking soda, you can use washing soda. If you don’t have a specific essential oil, you can use another one with similar properties. The key is to understand the purpose of each ingredient and find a suitable alternative. If you’re unsure about a substitution, do some research online or consult with a DIY cleaning expert. Remember, the goal is to create a cleaning solution that works for you, so don’t be afraid to experiment and adapt the recipes to your needs.
How do I store my DIY cleaning solutions?
Proper storage is essential for maintaining the effectiveness and safety of your DIY cleaning solutions. Store them in airtight containers to prevent evaporation and contamination. Clearly label each container with the name of the solution and the date it was made. This will help you avoid confusion and ensure you use the solutions within a reasonable timeframe. Store your DIY cleaning solutions in a cool, dark place away from direct sunlight and heat sources. This will help prevent the ingredients from degrading and maintain their potency. Keep all cleaning solutions out of reach of children and pets. Consider using spray bottles or squeeze bottles for easy dispensing. Avoid storing your DIY cleaning solutions in metal containers, as some ingredients can react with metal.
Leave a Comment