
DIY problem solvers, that’s what we all secretly aspire to be, right? Imagine this: your tomato plants are wilting, your herbs are looking lackluster, or pesky aphids are throwing a garden party on your prized roses. Instead of rushing to the store for expensive solutions, what if you could tackle these challenges with simple, ingenious hacks using items you probably already have at home? That’s the power of DIY gardening, and I’m here to share some game-changing tricks that will transform your green space.
Gardening, in its essence, has always been about resourcefulness. From ancient civilizations using companion planting to maximize yields to resourceful Victorian gardeners repurposing household items, the spirit of “making do” has been woven into the very fabric of horticulture. Today, with a growing emphasis on sustainability and a desire to connect with nature, DIY gardening is experiencing a vibrant resurgence.
But why do you need these DIY problem solvers? Because gardening shouldn’t be a constant battle against pests, diseases, and nutrient deficiencies. It should be a joyful, rewarding experience. These hacks are designed to save you time, money, and frustration, allowing you to focus on the pure pleasure of nurturing your plants and enjoying the fruits (and vegetables!) of your labor. I’m excited to show you how to turn everyday items into powerful tools for a thriving garden. Let’s get our hands dirty!
DIY Problem Solvers: Clever Hacks to Make Life Easier
Okay, let’s dive into some seriously useful DIY hacks that’ll solve everyday problems around your house. I’m talking about those little annoyances that you just accept, but secretly drive you crazy. Well, no more! Get ready to unleash your inner MacGyver.
Unclogging Drains Like a Pro (Without Harsh Chemicals!)
Forget those expensive and environmentally unfriendly drain cleaners. This method uses simple household ingredients and a little elbow grease.
What You’ll Need:
* 1 cup baking soda
* 2 cups white vinegar
* Boiling water
* A plunger (optional, but helpful)
* Rubber gloves (to protect your hands)
Step-by-Step Instructions:
1. Clear the Area: First things first, remove any standing water from the sink or tub. You want the baking soda and vinegar to directly attack the clog, not just sit on top of water.
2. Baking Soda Blast: Pour the 1 cup of baking soda down the drain. Try to get as much of it down the drain opening as possible.
3. Vinegar Volcano: Now, slowly pour the 2 cups of white vinegar down the drain after the baking soda. You’ll hear a fizzing sound – that’s the chemical reaction working its magic! Let this mixture sit for at least 30 minutes, or even better, overnight. The longer it sits, the more time it has to break down the clog.
4. Boiling Water Flush: After the waiting period, carefully pour a pot of boiling water down the drain. This will help flush away the loosened debris. Be careful not to splash yourself with the boiling water.
5. Plunge if Needed: If the drain is still slow, use a plunger to create suction and dislodge any remaining blockage. Make sure there’s enough water in the sink or tub to cover the cup of the plunger.
6. Repeat if Necessary: Sometimes, a stubborn clog requires a second attempt. Repeat steps 2-5 if the drain is still not flowing freely.
Why this works: The baking soda and vinegar create a chemical reaction that produces carbon dioxide gas. This gas helps to break down grease, hair, and other common clog culprits. The boiling water then flushes everything away.
Reviving Dull Wood Furniture with a Simple DIY Polish
Is your wood furniture looking a little lackluster? Don’t rush out to buy expensive furniture polish. You can make your own with just a few ingredients you probably already have.
What You’ll Need:
* 1/2 cup olive oil
* 1/4 cup white vinegar or lemon juice (vinegar is great for general cleaning, lemon juice adds a nice scent)
* A clean, soft cloth (microfiber works best)
* A spray bottle (optional, but makes application easier)
Step-by-Step Instructions:
1. Mix the Polish: In a bowl or spray bottle, combine the olive oil and white vinegar (or lemon juice). If using a bowl, whisk the ingredients together until they are well combined. If using a spray bottle, shake well to mix.
2. Test in an Inconspicuous Area: Before applying the polish to the entire piece of furniture, test it in a small, hidden area to make sure it doesn’t damage the finish. Apply a small amount of the polish to the test area, let it sit for a few minutes, and then wipe it away with a clean cloth. Check for any discoloration or damage.
3. Apply the Polish: If the test area looks good, you can proceed to polish the rest of the furniture. If you’re using a spray bottle, lightly spray the polish onto the furniture. If you’re using a bowl, dip a clean cloth into the polish and apply it to the furniture in a thin, even layer.
4. Buff to a Shine: Using a clean, dry cloth, buff the furniture in a circular motion until it shines. This will remove any excess polish and bring out the natural beauty of the wood.
Important Note: This polish is best suited for finished wood furniture. Avoid using it on unfinished wood, as the oil can soak in and cause staining.
Making Your Own All-Purpose Cleaner
Commercial cleaners can be harsh and full of chemicals you can’t even pronounce. This DIY all-purpose cleaner is effective, safe, and smells great!
What You’ll Need:
* 1 cup white vinegar
* 1 cup water
* 10-20 drops of your favorite essential oil (lemon, lavender, tea tree, and eucalyptus are all great choices)
* A spray bottle
Step-by-Step Instructions:
1. Combine Ingredients: In a spray bottle, combine the white vinegar and water.
2. Add Essential Oils: Add 10-20 drops of your favorite essential oil. The essential oil will not only add a pleasant scent but also provide additional cleaning and disinfecting properties.
3. Shake Well: Shake the spray bottle well to ensure that the ingredients are thoroughly mixed.
4. Spray and Wipe: Spray the cleaner onto the surface you want to clean and wipe it down with a clean cloth or paper towel.
Tips and Tricks:
* For extra cleaning power, add a tablespoon of baking soda to the mixture.
* Avoid using this cleaner on marble or granite surfaces, as the vinegar can etch the stone.
* Store the cleaner in a cool, dark place to preserve the potency of the essential oils.
Removing Scratches from Wood Furniture
Those pesky scratches on your wood furniture can be an eyesore. Here’s a simple trick to minimize their appearance.
What You’ll Need:
* Walnuts (yes, really!)
* A soft cloth
Step-by-Step Instructions:
1. Find a Walnut: Grab a walnut from your pantry.
2. Rub the Scratch: Break the walnut in half and rub the meat of the walnut along the scratch in a back-and-forth motion. Apply gentle pressure. The natural oils in the walnut will help to fill in the scratch and disguise it.
3. Buff the Area: After rubbing the walnut on the scratch, use a soft cloth to buff the area. This will remove any excess oil and blend the repaired area with the surrounding wood.
How it Works: The oils and natural color of the walnut help to conceal the scratch, making it less noticeable. This is a great quick fix for minor scratches.
Freshening Up Your Mattress
Mattresses can harbor dust mites, odors, and allergens. Here’s how to give your mattress a refresh.
What You’ll Need:
* Baking soda
* Essential oils (optional, for scent)
* A vacuum cleaner with an upholstery attachment
* A sieve or shaker
Step-by-Step Instructions:
1. Strip the Bed: Remove all bedding, including sheets, blankets, and pillows.
2. Sprinkle Baking Soda: Generously sprinkle baking soda over the entire surface of the mattress. If you want to add a pleasant scent, mix a few drops of your favorite essential oil with the baking soda before sprinkling it on the mattress.
3. Let it Sit: Allow the baking soda to sit on the mattress for at least 30 minutes, or even better, for several hours. The baking soda will absorb odors, moisture, and allergens.
4. Vacuum Thoroughly: Use a vacuum cleaner with an upholstery attachment to thoroughly vacuum the entire surface of the mattress. Make sure to get into all the nooks and crannies.
5. Flip and Repeat: Flip the mattress over and repeat steps 2-4 on the other side.
Why this works: Baking soda is a natural deodorizer and absorbent. It helps to draw out moisture, odors, and allergens from the mattress, leaving it feeling fresh and clean.
Removing Sticky Residue
Sticky residue from labels, tape, or stickers can be a pain to remove. Here’s a simple solution.
What You’ll Need:
* Coconut oil (or any vegetable oil)
* A clean cloth or paper towel
Step-by-Step Instructions:
1. Apply Oil: Apply a generous amount of coconut oil (or other vegetable oil) to the sticky residue.
2. Let it Sit: Allow the oil to sit on the residue for several minutes. This will help to soften the adhesive.
3. Wipe Away: Use a clean cloth or paper towel to wipe away the oil and the sticky residue. You may need to scrub gently to remove stubborn residue.
4. Clean the Surface: Once the residue is removed, clean the surface with soap and water to remove any remaining oil.
Why this works: The oil helps to dissolve the adhesive, making it easier to remove.
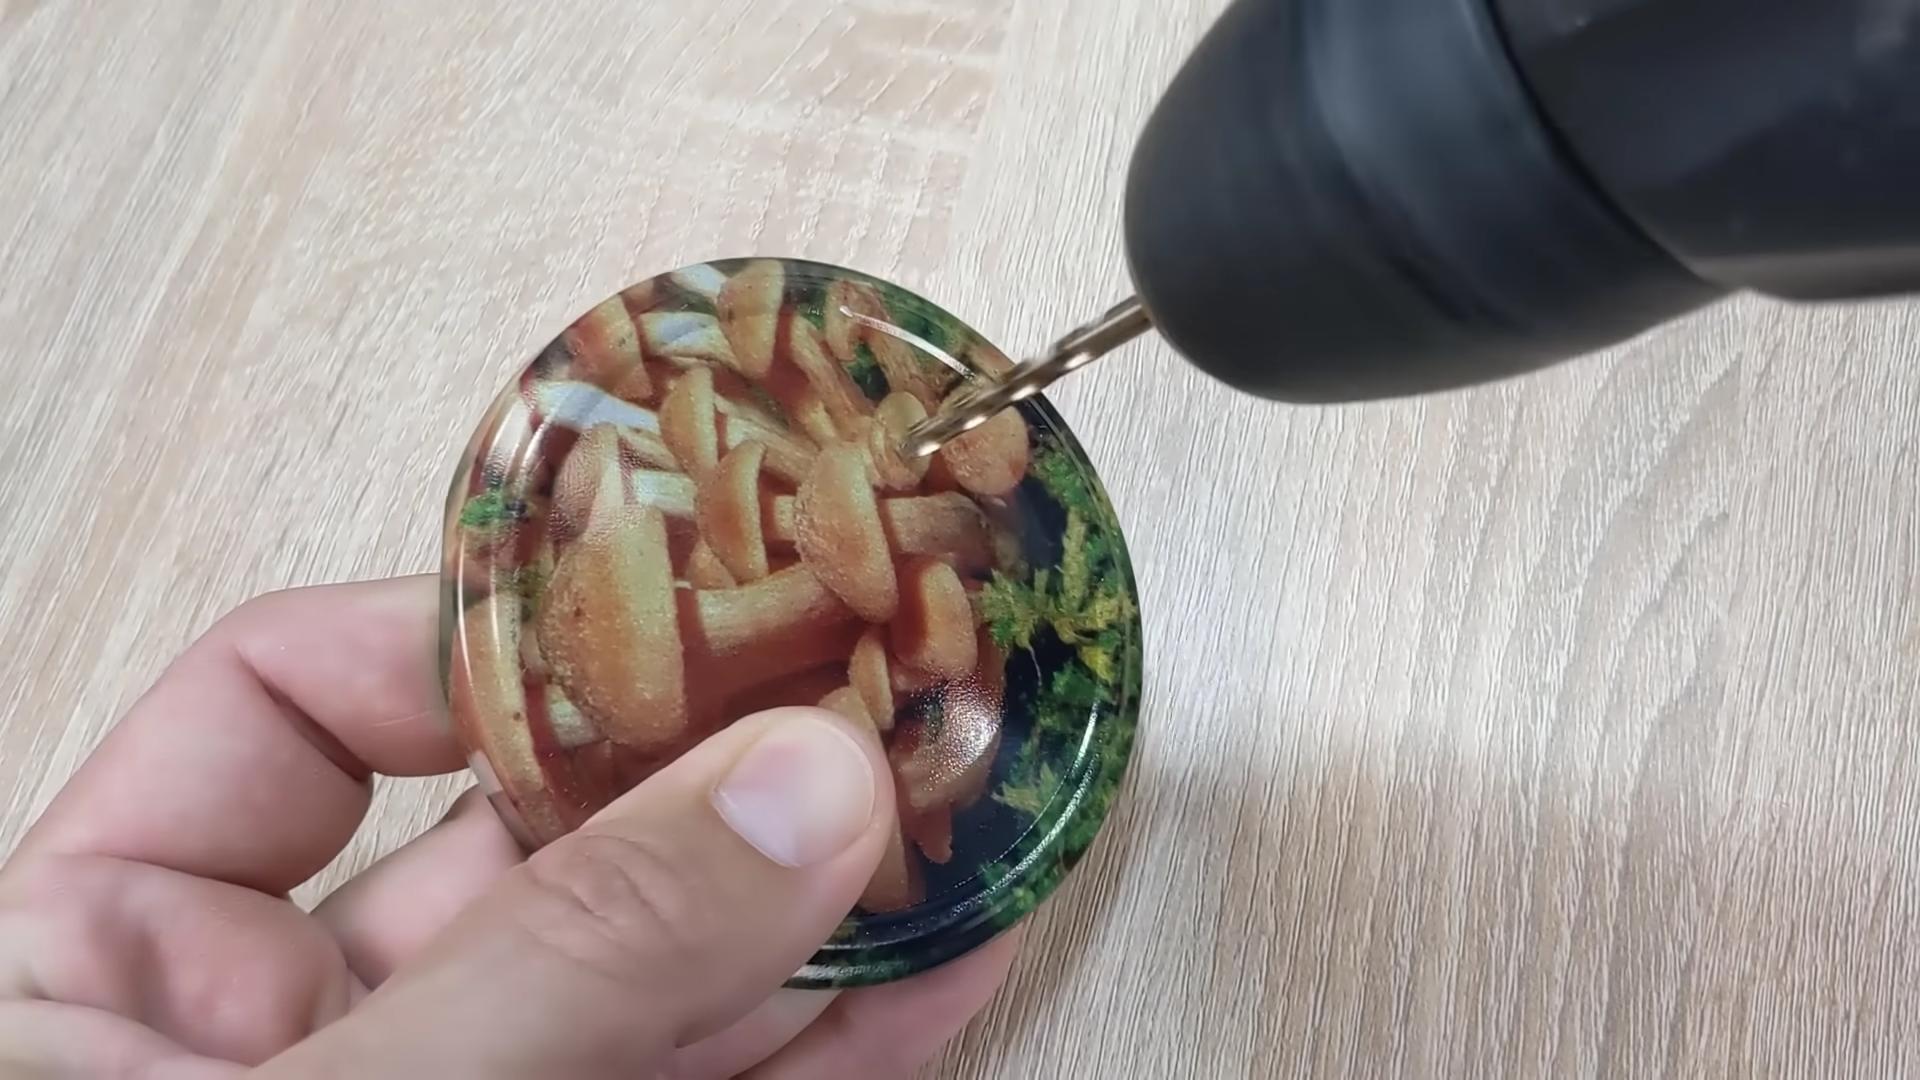
DIY Phone Stand
Need a quick phone stand? This is a super easy one using
Conclusion
So, there you have it! This simple yet incredibly effective DIY trick is more than just a quick fix; it’s a game-changer for anyone looking to streamline their life and tackle everyday annoyances with ingenuity. We’ve shown you how to create a powerful, versatile solution using readily available materials, saving you time, money, and frustration.
Why is this a must-try? Because it empowers you to take control. Instead of being at the mercy of expensive store-bought products or feeling helpless when faced with a minor inconvenience, you can confidently whip up a solution that’s tailored to your specific needs. It’s about resourcefulness, creativity, and the satisfaction of knowing you can handle anything life throws your way.
But don’t stop there! The beauty of this DIY approach lies in its adaptability. Feel free to experiment with different ingredients and techniques to find what works best for you. For example, if you’re dealing with a particularly stubborn problem, consider adding a small amount of baking soda for extra cleaning power. Or, if you prefer a more natural scent, incorporate a few drops of your favorite essential oil. Lavender, lemon, and tea tree oil are all excellent choices, offering both fragrance and added benefits.
Another variation to consider is the application method. While we’ve focused on a spray bottle for ease of use, you could also create a paste for tackling tougher stains or a concentrated solution for soaking items. The possibilities are truly endless!
This DIY problem solver is not just about fixing things; it’s about fostering a mindset of innovation and self-reliance. It’s about looking at everyday challenges as opportunities to learn, create, and improve. And it’s about sharing your knowledge and experiences with others.
We wholeheartedly encourage you to give this DIY trick a try. We’re confident that you’ll be amazed by its effectiveness and versatility. And more importantly, we want to hear about your experiences! Share your tips, variations, and success stories in the comments below. Let’s build a community of DIY enthusiasts who are passionate about finding creative solutions to everyday problems.
Don’t just take our word for it – experience the difference for yourself. Embrace the power of DIY and unlock a world of possibilities. You’ll be surprised at what you can accomplish with a little ingenuity and a few simple ingredients. So, gather your supplies, roll up your sleeves, and get ready to transform the way you approach everyday challenges. This DIY problem solver is waiting to be discovered by you!
Frequently Asked Questions
What kind of problems can this DIY solution actually solve?
This is a great question! The versatility of this DIY solution is one of its biggest strengths. It can be used for a wide range of cleaning and maintenance tasks around the house. Think of it as an all-purpose cleaner, stain remover, and deodorizer all rolled into one. Some specific examples include:
* **Cleaning kitchen surfaces:** Countertops, stovetops, sinks, and even inside the microwave can benefit from a quick spray and wipe.
* **Removing bathroom grime:** Soap scum, hard water stains, and mildew can be tackled with this solution.
* **Freshening up fabrics:** Use it to deodorize carpets, upholstery, and even clothing (always test in an inconspicuous area first).
* **Cleaning windows and mirrors:** Achieve streak-free shine without harsh chemicals.
* **Polishing stainless steel:** Restore the luster to your appliances and fixtures.
* **Removing sticky residue:** From labels, tape, or other adhesives.
* **General disinfecting:** While not a substitute for hospital-grade disinfectants, it can help reduce germs on surfaces.
The key is to experiment and see what works best for your specific needs. Remember to always test the solution in an inconspicuous area before applying it to a larger surface.
Is this DIY solution safe to use around children and pets?
Safety is paramount, especially when it comes to products used around children and pets. While this DIY solution is generally considered safer than many commercially available cleaners, it’s still important to take precautions.
The ingredients used are typically non-toxic in small quantities. However, ingestion or prolonged exposure could cause irritation. Here are some guidelines to follow:
* **Keep the solution out of reach of children and pets:** Store it in a secure location where they cannot access it.
* **Use in a well-ventilated area:** This will help minimize any potential respiratory irritation.
* **Avoid spraying directly on children or pets:** If you need to clean something that they frequently come into contact with, spray the solution on a cloth and then wipe the surface.
* **Rinse thoroughly after cleaning:** This is especially important for surfaces that children or pets might lick or chew on.
* **Consider using milder ingredients:** If you’re particularly concerned about safety, you can reduce the concentration of the solution or substitute ingredients with gentler alternatives. For example, you could use distilled white vinegar instead of a stronger cleaning agent.
If you have any concerns about the safety of this solution for your specific situation, it’s always best to consult with a pediatrician or veterinarian.
How long does this DIY solution last?
The shelf life of this DIY solution depends on the ingredients used and how it’s stored. In general, it’s best to use it within a few weeks to a month for optimal effectiveness.
Here are some factors that can affect its longevity:
* **Ingredients:** Solutions containing fresh ingredients, such as lemon juice, may have a shorter shelf life than those made with shelf-stable ingredients like vinegar.
* **Storage:** Store the solution in a cool, dark place away from direct sunlight and heat. This will help prevent the ingredients from degrading.
* **Container:** Use an airtight container to prevent evaporation and contamination. A dark-colored bottle can also help protect the solution from light.
To ensure the solution is still effective, give it a sniff before each use. If it smells off or has changed color, it’s best to discard it and make a fresh batch. It’s always better to be safe than sorry!
Can I use essential oils in this DIY solution, and if so, which ones are best?
Absolutely! Adding essential oils to this DIY solution is a fantastic way to enhance its cleaning power and add a pleasant scent. Essential oils have various properties that can be beneficial for cleaning, such as antibacterial, antifungal, and antiviral effects.
Here are some of the best essential oils to use in this DIY solution:
* **Lemon:** A natural degreaser and disinfectant with a refreshing citrus scent.
* **Tea Tree:** Known for its powerful antibacterial and antifungal properties.
* **Lavender:** A calming and relaxing scent with antiseptic properties.
* **Eucalyptus:** A strong disinfectant with a refreshing scent that can help clear sinuses.
* **Peppermint:** A refreshing and invigorating scent with antibacterial properties.
* **Orange:** A natural degreaser with a cheerful citrus scent.
When using essential oils, it’s important to use them sparingly. A few drops are usually enough to add fragrance and cleaning power. Also, be sure to use pure, high-quality essential oils for the best results.
Before using any essential oil, it’s a good idea to do a patch test to check for any allergic reactions. And as with any cleaning product, keep essential oils out of reach of children and pets.
What if I don’t have all the ingredients listed in the recipe? Can I substitute anything?
Flexibility is key when it comes to DIY! If you’re missing an ingredient, don’t worry – there are often substitutions you can make.
Here are some common substitutions:
* **Vinegar:** If you don’t have white vinegar, you can use apple cider vinegar or lemon juice as a substitute. However, keep in mind that apple cider vinegar may have a stronger scent.
* **Dish soap:** Any mild dish soap will work. You can also use castile soap as a more natural alternative.
* **Baking soda:** If you don’t have baking soda, you can try using washing soda instead. However, washing soda is more alkaline and can be more abrasive, so use it with caution.
* **Essential oils:** If you don’t have a specific essential oil on hand, you can substitute it with another essential oil that has similar properties. For example, if you don’t have lemon essential oil, you could use orange essential oil instead.
When making substitutions, it’s important to consider the properties of the ingredients and how they might affect the final product. If you’re unsure, it’s always best to test the solution in an inconspicuous area before applying it to a larger surface.
Leave a Comment