
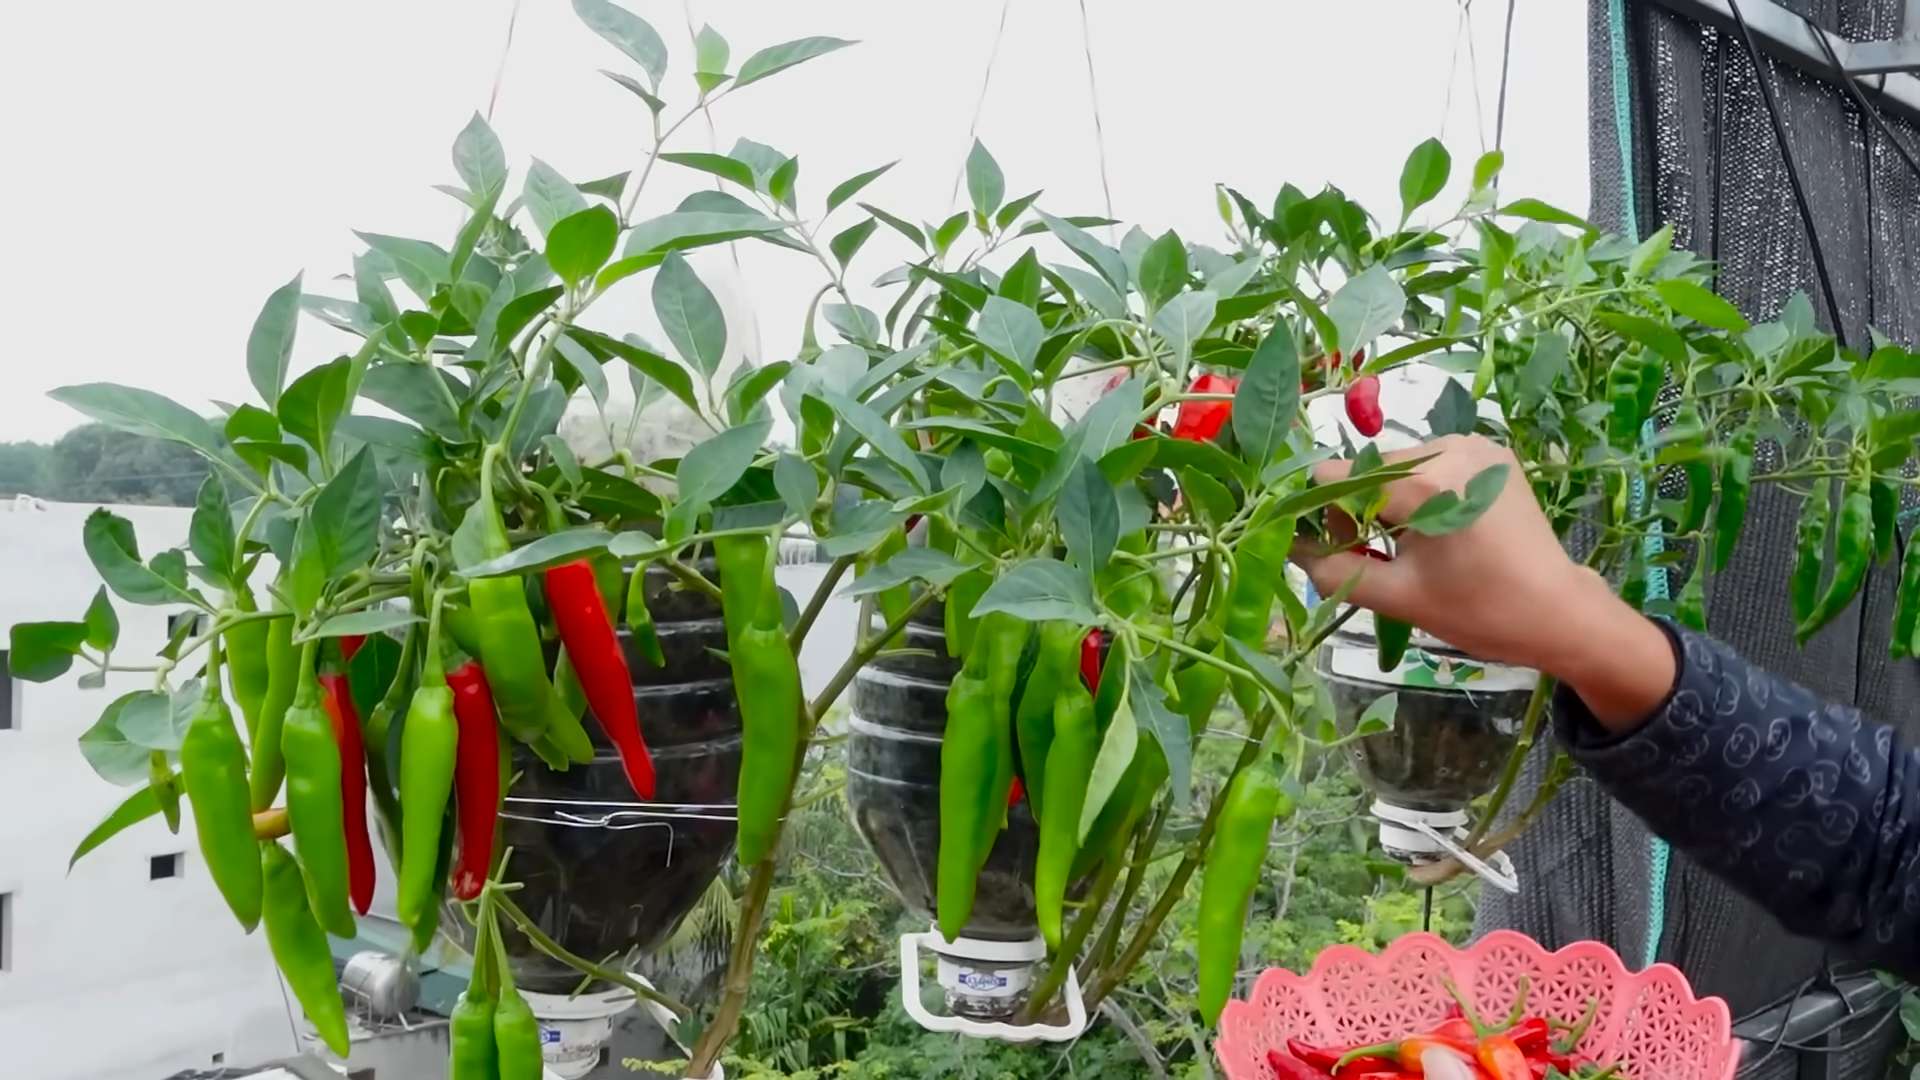
DIY chili harvest boost – sounds like a superpower, right? Well, in a way, it is! Imagine transforming your humble chili pepper plants into veritable fountains of fiery goodness. That’s precisely what we’re diving into today. For centuries, chili peppers have been prized not only for their culinary kick but also for their medicinal properties and even their role in cultural rituals. From ancient Mesoamerica, where they were first cultivated, to the bustling spice markets of Asia, chilies have always held a special place.
But let’s be honest, sometimes our chili plants need a little nudge to reach their full potential. Maybe you’re seeing fewer peppers than you hoped, or perhaps they’re just not as vibrant and plump as you’d like. That’s where this DIY chili harvest boost comes in. I’m going to share some simple, effective, and totally doable tricks that will have you harvesting a bumper crop of chilies in no time. These aren’t complicated, expensive solutions; they’re clever hacks using things you probably already have around the house. So, get ready to unleash the chili-growing guru within you and prepare for a harvest that will set your taste buds ablaze!
Supercharge Your Chili Harvest: A DIY Guide to Bumper Crops!
Okay, chili lovers, listen up! Are you tired of your chili plants teasing you with a few measly peppers? Do you dream of a harvest so abundant you’ll be swimming in salsa? Well, I’m here to tell you that a bountiful chili harvest is totally achievable, even if you don’t have a green thumb the size of Texas. This guide is packed with DIY tips and tricks I’ve learned over the years to coax my chili plants into overdrive. Get ready to be amazed!
Understanding Your Chili Plants’ Needs
Before we dive into the DIY hacks, let’s quickly cover the basics. Knowing what your chili plants crave is half the battle.
* Sunlight: Chili plants are sun worshippers! They need at least 6-8 hours of direct sunlight per day. If you’re growing them indoors, invest in a good grow light.
* Watering: Consistent watering is key, but avoid overwatering. Soggy roots are a chili plant’s worst enemy. Water deeply when the top inch of soil feels dry.
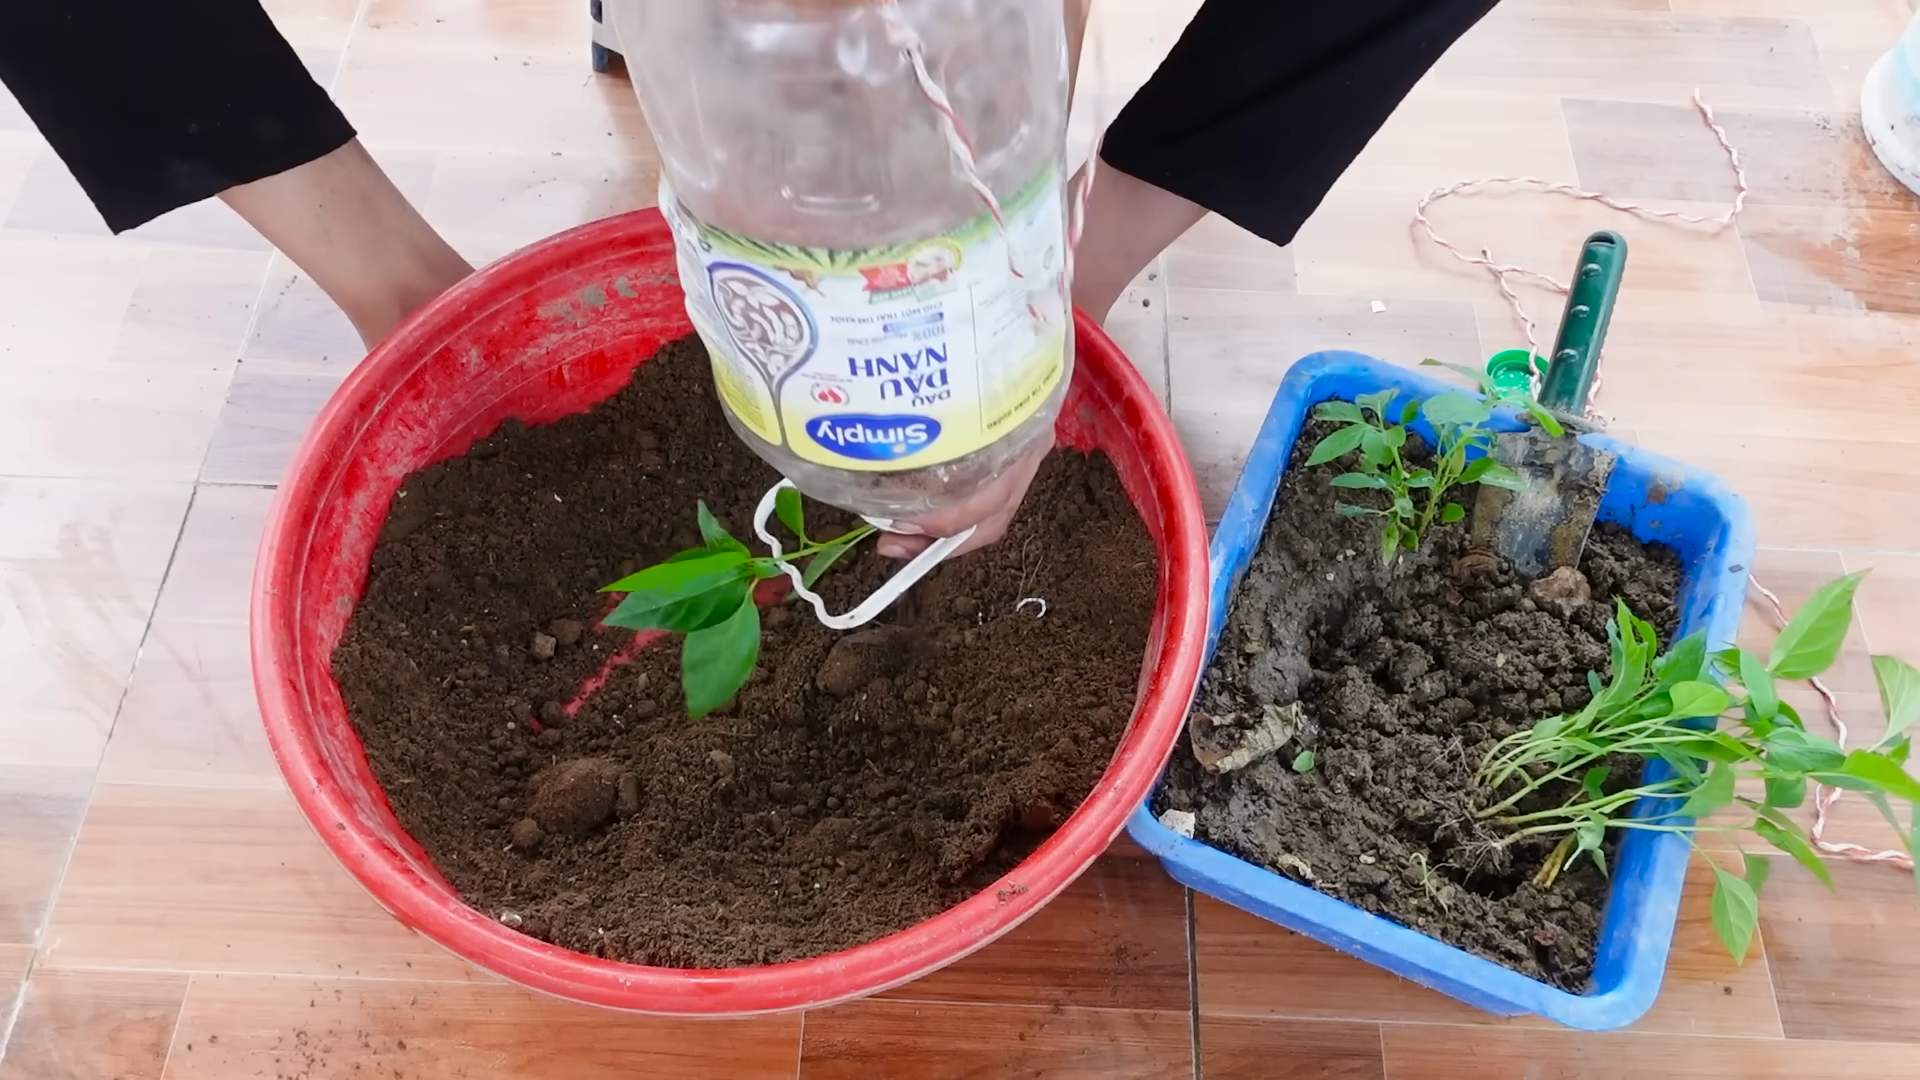
* Soil: Well-draining soil is crucial. A mix of potting soil, compost, and perlite works wonders.
* Nutrients: Chili plants are heavy feeders, especially when they start producing peppers. Regular fertilization is a must.
* Temperature: Chili plants thrive in warm temperatures (70-85°F). Protect them from frost and extreme heat.
DIY Hack #1: Epsom Salt Magic
Epsom salt (magnesium sulfate) is a gardener’s secret weapon. Magnesium helps plants absorb nutrients, while sulfur is essential for chlorophyll production. This translates to greener leaves, stronger stems, and more peppers!
How to Use Epsom Salt:
1. Foliar Spray: Mix 1 tablespoon of Epsom salt per gallon of water. Pour the solution into a spray bottle.
2. Application: Spray the leaves of your chili plants every two weeks, preferably in the morning or evening to avoid leaf burn. Make sure to coat both the tops and undersides of the leaves.
3. Soil Drench: Alternatively, you can dissolve 2 tablespoons of Epsom salt in a gallon of water and use it to water your chili plants every month.
Why This Works: The magnesium in Epsom salt helps your plants produce more chlorophyll, which is essential for photosynthesis. More photosynthesis means more energy for your plants to produce peppers. The sulfur also helps with nutrient uptake, ensuring your plants get all the good stuff they need.
DIY Hack #2: The Banana Peel Booster
Don’t toss those banana peels! They’re packed with potassium, a vital nutrient for flowering and fruit production. This is a fantastic way to recycle and give your chili plants a natural boost.
How to Use Banana Peels:
1. Banana Peel Tea: This is my favorite method. Collect banana peels (fresh or dried).
2. Preparation: Place the peels in a jar or container and cover them with water. Let them steep for 2-3 days.
3. Application: Strain the liquid and use it to water your chili plants. Dilute the tea with water if it’s too strong (it should be a light brown color). I usually dilute it 1:1 with water.
4. Buried Treasure: You can also bury banana peels directly in the soil around your chili plants. The peels will decompose and release potassium into the soil. Chop the peels into smaller pieces to speed up the decomposition process.
5. Compost Addition: Add banana peels to your compost pile. They’ll enrich your compost with potassium and other beneficial nutrients.
Why This Works: Potassium is crucial for flower development and fruit set. By providing your chili plants with a steady supply of potassium, you’re encouraging them to produce more flowers, which will eventually turn into peppers.
DIY Hack #3: Coffee Grounds for the Win
Coffee grounds are a fantastic source of nitrogen, which is essential for healthy foliage growth. They also improve soil drainage and aeration. Plus, they’re free!
How to Use Coffee Grounds:
1. Collection: Collect used coffee grounds from your coffee maker. Make sure they’re cool and dry.
2. Application: Sprinkle a thin layer of coffee grounds around the base of your chili plants. Gently work them into the soil.
3. Composting: Add coffee grounds to your compost pile. They’re a great source of nitrogen for your compost.
4. Coffee Ground Tea: Steep used coffee grounds in water for a few days, then use the strained liquid to water your chili plants. Dilute the tea with water to avoid burning the roots.
Important Note: Coffee grounds are acidic, so use them sparingly, especially if your soil is already acidic. Test your soil pH regularly to ensure it’s within the optimal range for chili plants (6.0-6.8).
Why This Works: Nitrogen is essential for healthy leaf growth. Strong, healthy leaves are better able to photosynthesize, providing your plants with the energy they need to produce peppers. Coffee grounds also improve soil structure, making it easier for your plants to absorb nutrients.
DIY Hack #4: Blossom End Rot Prevention
Blossom end rot (BER) is a common problem in chili plants, especially during hot weather. It’s caused by a calcium deficiency, which can be exacerbated by inconsistent watering.
How to Prevent Blossom End Rot:
1. Consistent Watering: Water your chili plants deeply and regularly, especially during hot weather. Avoid letting the soil dry out completely.
2. Calcium Supplement: Add calcium to the soil. You can use crushed eggshells, bone meal, or a calcium supplement specifically designed for plants.
3. Eggshell Power: Collect eggshells, rinse them thoroughly, and let them dry completely. Crush them into a fine powder using a blender or food processor. Sprinkle the eggshell powder around the base of your chili plants and gently work it into the soil.
4. Foliar Calcium Spray: If you’re already seeing signs of blossom end rot, you can use a foliar calcium spray. Mix calcium chloride (available at garden centers) with water according to the package directions and spray the affected plants.
5. Soil Testing: Get your soil tested to determine its calcium levels. This will help you determine how much calcium to add.
Why This Works: Calcium is essential for cell wall development. A calcium deficiency can lead to weak cell walls, which can cause blossom end rot. Consistent watering helps your plants absorb calcium from the soil.
DIY Hack #5: Pruning for Pepper Power
Pruning your chili plants can encourage them to produce more peppers. By removing unnecessary foliage, you’re allowing your plants to focus their energy on pepper production.
How to Prune Your Chili Plants:
1. Remove Suckers: Suckers are small shoots that grow from the base of the plant or from the joints between the main stem and the branches. Remove these suckers to encourage the plant to focus its energy on pepper production.
2. Pinch Back Growing Tips: Pinching back the growing tips of the branches can encourage the plant to branch out and produce more flowers.
3. Remove Yellowing or Damaged Leaves: Remove any yellowing or damaged leaves to prevent them from draining energy from the plant.
4. Air Circulation: Prune the inner branches to improve air circulation and prevent fungal diseases.
When to Prune: Prune your chili plants in the early morning or late evening to avoid stressing them during the hottest part of the day.
Why This Works: Pruning redirects the plant’s energy towards pepper production. Removing suckers and unnecessary foliage allows the plant to focus its resources on developing flowers and peppers.
DIY Hack #6: Companion Planting for Chili Champions
Companion planting involves growing different plants together to benefit each other. Certain plants can help repel pests, attract pollinators, or improve soil conditions for your chili plants.
Good Companion Plants for Chili Plants:
* Basil: Repels aphids, whiteflies, and other pests.
* Marigolds: Repel nematodes and other soil pests.
* Carrots: Improve soil drainage and aeration.
* Onions and Garlic: Repel aphids and other pests.
* Tomatoes: Provide shade for chili plants in hot climates.
How to Implement Companion Planting:
1. Plant Selection: Choose companion plants that are compatible with your chili plants and that will benefit them in some way.
2. Placement: Plant the companion plants around your chili plants, making sure they don’t overcrowd them.
3. Observation: Observe your plants regularly to see how they’re interacting with each other.
Why This Works: Companion planting can help protect your chili plants from pests and diseases, improve soil conditions, and attract pollinators, all of which can lead to a more abundant harvest.
DIY Hack #7: The Power of Pollination
Conclusion
So, there you have it! This simple, yet incredibly effective, DIY chili harvest boost is more than just a gardening hack; it’s a game-changer for anyone serious about maximizing their chili pepper yield. We’ve walked you through the process, highlighting the science behind why it works and providing you with a straightforward method to implement it in your own garden.
Why is this a must-try? Because it addresses a fundamental limitation in chili pepper production: nutrient availability. By providing a readily accessible and targeted nutrient boost, you’re essentially giving your plants the fuel they need to produce an abundance of those fiery fruits. Forget relying solely on general-purpose fertilizers that might not deliver the specific nutrients your chili plants crave. This DIY approach allows for precision feeding, ensuring your plants get exactly what they need, when they need it.
Beyond the increased yield, this DIY chili harvest boost can also lead to healthier, more robust plants. Stronger plants are naturally more resistant to pests and diseases, reducing the need for potentially harmful chemical interventions. You’ll be rewarded with vibrant, thriving chili plants that are bursting with flavor and heat.
But the beauty of this method lies in its adaptability. Feel free to experiment with variations to suit your specific needs and preferences. For example, if you’re growing organically, consider using compost tea as the base for your nutrient solution. You can also tailor the nutrient mix to the specific variety of chili peppers you’re growing. Some varieties might benefit from a slightly higher phosphorus content, while others might prefer a boost in potassium. Don’t be afraid to research the specific needs of your chili peppers and adjust the recipe accordingly.
Another variation to consider is the frequency of application. While we recommend applying the boost every two weeks during the fruiting stage, you might find that your plants benefit from more frequent applications, especially if they’re growing in poor soil. Keep a close eye on your plants and adjust the frequency as needed. Look for signs of nutrient deficiencies, such as yellowing leaves or stunted growth, and adjust your feeding schedule accordingly.
Remember, gardening is all about experimentation and learning. This DIY chili harvest boost is a fantastic starting point, but don’t be afraid to tweak and refine the recipe to find what works best for you and your chili plants.
We are confident that this DIY chili harvest boost will significantly improve your chili pepper harvest. It’s a cost-effective, environmentally friendly, and incredibly rewarding way to maximize your yield and enjoy an abundance of delicious, homegrown chili peppers.
So, what are you waiting for? Give this DIY trick a try and witness the difference it can make in your chili pepper garden. We’re eager to hear about your experiences! Share your results, variations, and any tips you discover along the way in the comments section below. Let’s build a community of chili pepper enthusiasts who are passionate about maximizing their harvests and sharing their knowledge with others. Let us know what kind of chili you are growing and what kind of results you are getting. We are excited to see what you come up with!
FAQ
What exactly is this DIY chili harvest boost, and what does it do?
This DIY chili harvest boost is a homemade fertilizer solution designed to provide chili pepper plants with the specific nutrients they need during the fruiting stage to maximize their yield. It typically consists of a base liquid (like water or compost tea) mixed with specific nutrients, such as Epsom salts (magnesium sulfate) and other readily available fertilizers. The boost helps the plants produce more flowers, develop larger and more numerous chili peppers, and improve the overall health and vigor of the plants. It’s a targeted approach to fertilization, ensuring your chili plants get the right nutrients at the right time.
How often should I apply this DIY chili harvest boost?
We generally recommend applying the DIY chili harvest boost every two weeks during the fruiting stage of your chili pepper plants. The fruiting stage is when the plants are actively producing chili peppers. However, the frequency can be adjusted based on your specific growing conditions and the needs of your plants. If you notice signs of nutrient deficiencies, such as yellowing leaves or stunted growth, you might need to apply the boost more frequently. Conversely, if your plants seem to be thriving, you might be able to reduce the frequency of application. Monitor your plants closely and adjust the feeding schedule accordingly.
What are the key ingredients in this DIY chili harvest boost, and why are they important?
The key ingredients typically include:
* **Epsom Salts (Magnesium Sulfate):** Magnesium is essential for chlorophyll production, which is vital for photosynthesis. It also helps the plants absorb other nutrients more effectively. A magnesium deficiency can lead to yellowing leaves and reduced fruit production.
* **Other Fertilizers (e.g., balanced liquid fertilizer diluted):** These provide essential macronutrients like nitrogen (N), phosphorus (P), and potassium (K), which are crucial for overall plant growth, flower development, and fruit production. The specific NPK ratio will depend on the type of chili pepper you’re growing and the stage of growth.
The specific ratios and ingredients can be adjusted based on your soil conditions and the needs of your plants.
Can I use this DIY chili harvest boost on other plants besides chili peppers?
While this boost is specifically formulated for chili peppers, it can potentially be used on other fruiting plants, such as tomatoes, peppers, and eggplants. However, it’s important to understand that different plants have different nutrient requirements. Before applying the boost to other plants, research their specific needs and adjust the recipe accordingly. For example, tomatoes might benefit from a slightly different NPK ratio than chili peppers. It’s always a good idea to test the boost on a small area of the plant first to ensure it doesn’t cause any adverse effects.
Is this DIY chili harvest boost safe for organic gardening?
Whether this boost is suitable for organic gardening depends on the ingredients you use. If you use only organic-certified ingredients, such as compost tea, organic fertilizers, and Epsom salts, then it can be considered organic. However, if you use synthetic fertilizers, it will not be considered organic. Always check the labels of your ingredients to ensure they are certified organic if you’re aiming for an organic gardening approach.
What are some signs that my chili pepper plants need a nutrient boost?
Some common signs of nutrient deficiencies in chili pepper plants include:
* **Yellowing leaves (especially between the veins):** This can indicate a magnesium or nitrogen deficiency.
* **Stunted growth:** This can be a sign of a general nutrient deficiency.
* **Poor flowering or fruit set:** This can indicate a phosphorus deficiency.
* **Small or misshapen chili peppers:** This can be a sign of a potassium deficiency.
* **Leaf curl or discoloration:** This can indicate a variety of nutrient deficiencies or imbalances.
If you notice any of these signs, it’s a good idea to test your soil to determine the specific nutrient deficiencies and adjust your feeding accordingly.
Can I over-fertilize my chili pepper plants with this DIY boost?
Yes, it is possible to over-fertilize your chili pepper plants, even with a DIY boost. Over-fertilization can lead to nutrient toxicity, which can damage the plants and reduce their yield. Signs of over-fertilization include:
* **Leaf burn (browning or scorching of the leaf tips and edges):**
* **Wilting:**
* **Salt buildup on the soil surface:**
* **Reduced growth:**
To avoid over-fertilization, always follow the recommended application rates and frequencies. Monitor your plants closely for signs of nutrient toxicity and adjust your feeding accordingly. It’s always better to under-fertilize than to over-fertilize.
Where can I find the ingredients for this DIY chili harvest boost?
The ingredients for this DIY chili harvest boost are readily available at most garden centers, hardware stores, and online retailers. Epsom salts can be found in the pharmacy section of many stores. Look for fertilizers that are specifically formulated for fruiting plants or vegetables. Compost tea can be made at home or purchased from a garden center.
What if I don’t have time to make my own DIY chili harvest boost? Are there any alternatives?
If you don’t have time to make your own DIY chili harvest boost, there are several commercially available fertilizers that are specifically formulated for chili peppers or fruiting plants. Look for fertilizers that contain a balanced NPK ratio and also include micronutrients like magnesium, calcium, and iron. Follow the instructions on the fertilizer label carefully to avoid over-fertilization. Organic options are also available.
How should I store the leftover DIY chili harvest boost?
Store any leftover DIY chili harvest boost in a cool, dark place in a tightly sealed container. This will help prevent the nutrients from degrading and keep the solution fresh. It’s best to use the solution within a few weeks of mixing it. Label the container with the date you mixed the solution so you know how old it is.
Leave a Comment