
Cultivate Chili Peppers Anywhere, even if you think you don’t have the space or the green thumb! Have you ever dreamed of adding a fiery kick to your meals with homegrown chilies, but felt limited by a small apartment balcony or a shady backyard? Well, dream no more! This DIY guide is your passport to pepper paradise, unlocking the secrets to growing these vibrant and flavorful fruits regardless of your location.
Chili peppers have a rich history, dating back thousands of years in the Americas, where they were not only a staple food but also held significant cultural and medicinal value. From ancient Aztec rituals to modern-day culinary traditions, chilies have always been more than just a spice. Today, we’re bringing that legacy to your home!
I know what you’re thinking: “I’ve tried gardening before, and it didn’t go so well.” But trust me, this isn’t your average gardening guide. We’re focusing on simple, effective DIY tricks and hacks that will empower you to cultivate chili peppers anywhere – from sunny windowsills to compact patios. Imagine the satisfaction of harvesting your own fresh chilies, knowing exactly where they came from and how they were grown. Plus, you’ll save money, reduce your carbon footprint, and impress your friends with your newfound gardening prowess. So, let’s get started and turn your space into a chili pepper haven!
Cultivate Chili Peppers Anywhere: A DIY Guide to Container Gardening
Hey there, fellow chili enthusiasts! Ever dreamt of having a fiery stash of homegrown chili peppers right at your fingertips, regardless of whether you have a sprawling garden or just a sunny balcony? Well, dream no more! This guide will walk you through the exciting journey of growing chili peppers in containers, allowing you to enjoy fresh, spicy goodness no matter where you live. I’ve personally used these techniques for years, and trust me, the satisfaction of harvesting your own peppers is unbeatable.
Choosing Your Chili Pepper Variety
Before we dive into the nitty-gritty, let’s talk about chili pepper varieties. The world of chili peppers is vast and diverse, ranging from mild bell peppers to scorching habaneros. Choosing the right variety is crucial for success and personal enjoyment.
* Consider your spice tolerance: Are you a seasoned chili head who craves intense heat, or do you prefer a milder kick? This will significantly influence your choice.
* Think about your climate: Some chili peppers thrive in hot, humid conditions, while others are more tolerant of cooler temperatures. Research which varieties are best suited for your region.
* Container size matters: Smaller chili pepper varieties, like Thai peppers or ornamental peppers, are ideal for smaller containers. Larger varieties, like jalapenos or bell peppers, will need larger pots.
* Popular choices for containers: Jalapenos, Serrano peppers, Thai peppers, Habaneros (for experienced growers), Bell peppers, Poblano peppers, and ornamental peppers.
Gathering Your Supplies
Now that you’ve chosen your chili pepper variety, it’s time to gather the necessary supplies. Here’s a comprehensive list:
* Chili pepper seeds or seedlings: You can start from seeds or purchase seedlings from a local nursery. Starting from seeds gives you more control over the process, but seedlings offer a head start.
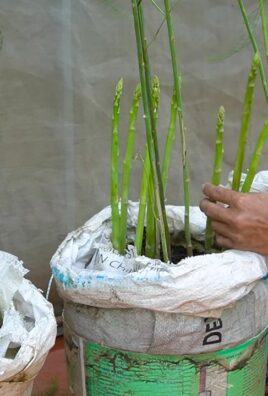
* Containers: Choose containers that are at least 12 inches in diameter and depth for smaller varieties, and 18 inches or larger for larger varieties. Make sure the containers have drainage holes.
* Potting mix: Use a high-quality potting mix specifically formulated for containers. Avoid using garden soil, as it can become compacted and hinder drainage.
* Fertilizer: Choose a balanced fertilizer with a ratio of 10-10-10 or 5-10-5. You can also use a slow-release fertilizer.
* Watering can or hose: For watering your chili plants.
* Trowel or small shovel: For planting and transplanting.
* Gardening gloves: To protect your hands.
* Optional: Plant labels, stakes or cages (for support), mulch (to retain moisture).
Planting Your Chili Peppers
Alright, let’s get our hands dirty! This section will guide you through the planting process, whether you’re starting from seeds or transplanting seedlings.
Starting from Seeds
1. Sow the seeds: Fill small seed trays or pots with seed-starting mix. Moisten the mix and sow the seeds about ¼ inch deep.
2. Provide warmth and moisture: Cover the trays or pots with a plastic dome or plastic wrap to create a humid environment. Place them in a warm location, ideally between 70-80°F (21-27°C).
3. Germination: Keep the soil consistently moist but not waterlogged. The seeds should germinate in 7-14 days.
4. Provide light: Once the seedlings emerge, remove the plastic cover and provide them with plenty of light. A sunny windowsill or grow lights will work well.
5. Thinning: If you sowed multiple seeds in each cell, thin them out to one seedling per cell once they have a few true leaves.
6. Harden off: Before transplanting the seedlings outdoors, you need to harden them off. This involves gradually exposing them to outdoor conditions over a period of 7-10 days. Start by placing them in a sheltered location for a few hours each day, gradually increasing the amount of time they spend outdoors.
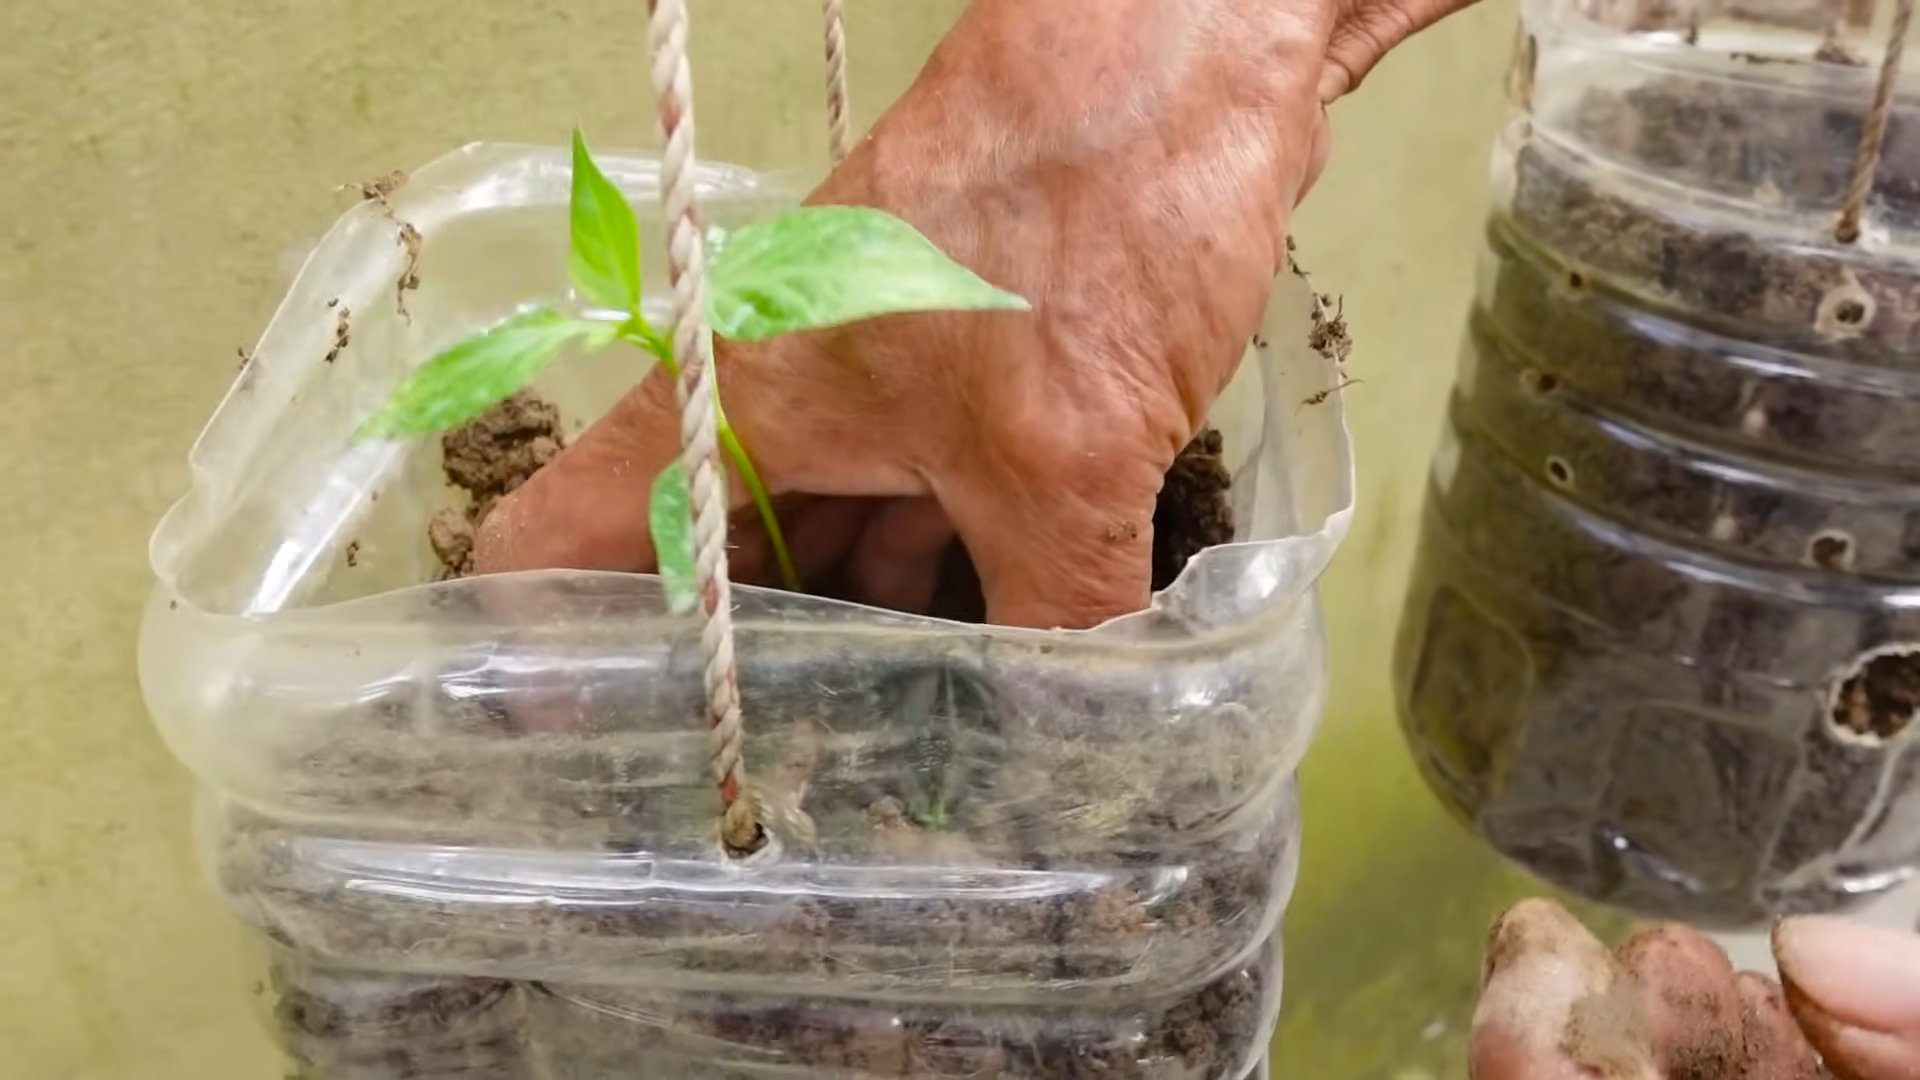
Transplanting Seedlings
1. Prepare the container: Fill the container with potting mix, leaving a few inches of space at the top.
2. Dig a hole: Dig a hole in the center of the container that is large enough to accommodate the root ball of the seedling.
3. Remove the seedling: Gently remove the seedling from its pot, being careful not to damage the roots.
4. Place the seedling: Place the seedling in the hole and backfill with potting mix. Gently firm the soil around the base of the plant.
5. Water thoroughly: Water the plant thoroughly after transplanting.
Caring for Your Chili Peppers
Now that your chili peppers are planted, it’s time to provide them with the care they need to thrive.
* Watering: Water your chili peppers regularly, especially during hot, dry weather. The soil should be consistently moist but not waterlogged. Check the soil moisture by sticking your finger into the soil. If the top inch feels dry, it’s time to water.
* Fertilizing: Fertilize your chili peppers every 2-3 weeks with a balanced fertilizer. Follow the instructions on the fertilizer package.
* Sunlight: Chili peppers need at least 6-8 hours of sunlight per day. Place your containers in a sunny location.
* Temperature: Chili peppers thrive in warm temperatures, ideally between 70-85°F (21-29°C). Protect them from frost.
* Support: As your chili peppers grow, they may need support. Use stakes or cages to prevent them from falling over.
* Pruning: Pruning can help to improve air circulation and encourage bushier growth. Remove any dead or yellowing leaves. You can also pinch off the tips of the branches to encourage branching.
* Pest and disease control: Keep an eye out for pests and diseases. Common pests include aphids, spider mites, and whiteflies. Common diseases include fungal infections. Treat any problems promptly with appropriate organic or chemical controls. I’ve found that a simple spray of soapy water can often deter aphids.
Troubleshooting Common Problems
Even with the best care, you may encounter some problems along the way. Here are some common issues and how to address them:
* Yellowing leaves: This can be caused by overwatering, underwatering, nutrient deficiencies, or pests. Check the soil moisture and adjust your watering accordingly. Fertilize your plants with a balanced fertilizer. Inspect the leaves for pests.
* Blossom drop: This is when the flowers fall off the plant without producing fruit. It can be caused by temperature stress, lack of pollination, or nutrient deficiencies. Ensure your plants are getting enough sunlight and water. Hand-pollinate the flowers by gently shaking the plant or using a small brush to transfer pollen from one flower to another.
* Stunted growth: This can be caused by poor soil, lack of sunlight, or pests. Repot your plants in fresh potting mix. Ensure they are getting enough sunlight. Inspect the plants for pests.
* Pest infestations: Treat pest infestations promptly with appropriate organic or chemical controls. Neem oil is a good organic option for many pests.
Harvesting Your Chili Peppers
The moment you’ve been waiting for! Harvesting your chili peppers is the most rewarding part of the process.
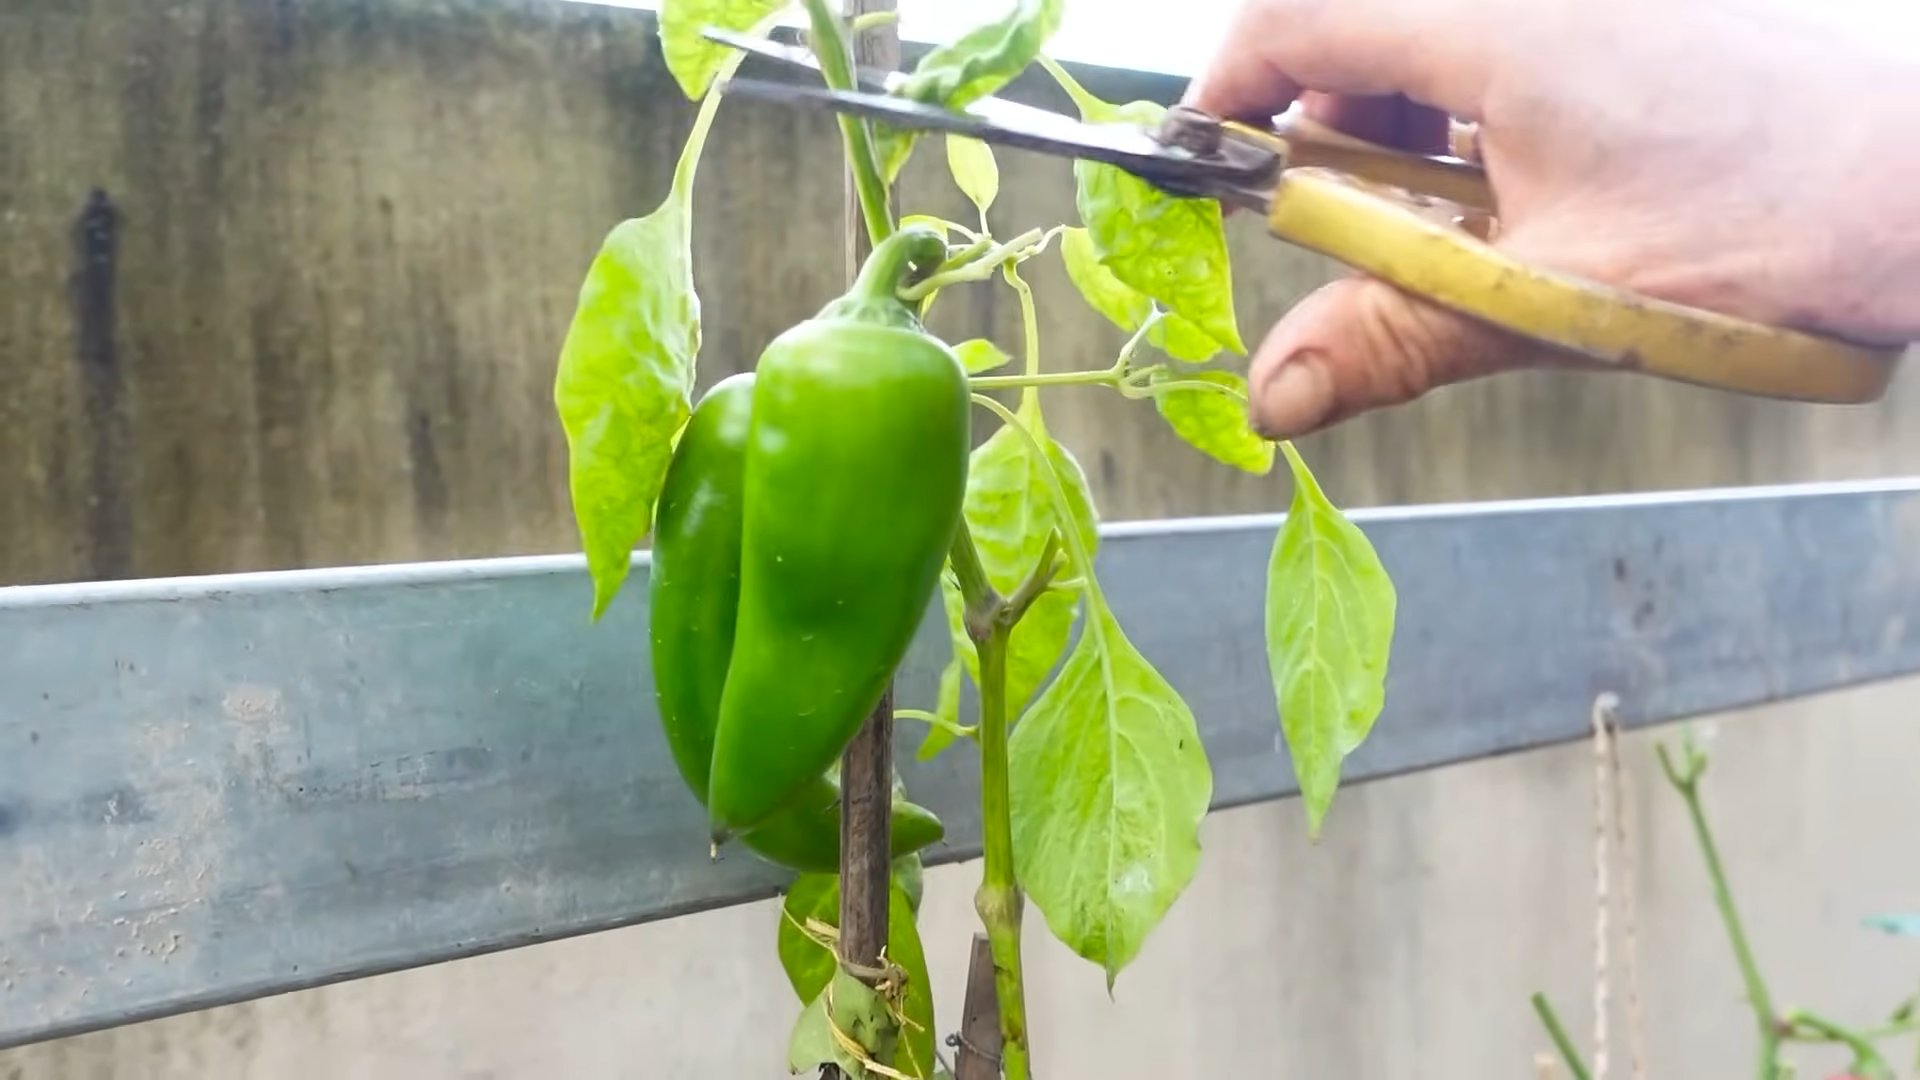
* When to harvest: The timing of harvest depends on the variety of chili pepper. Generally, chili peppers are ready to harvest when they have reached their mature size and color.
* How to harvest: Use scissors or pruning shears to cut the peppers from the plant. Be careful not to damage the plant.
* Handling hot peppers: Wear gloves when handling hot peppers to avoid skin irritation. Avoid touching your eyes or face after handling hot peppers.
Enjoying Your Harvest
Congratulations! You’ve successfully grown your own chili peppers. Now it’s time to enjoy the fruits (or peppers!) of your labor.
* Fresh use: Use your fresh chili peppers in your favorite recipes. Add them to salsas, sauces, stews, and stir-fries.
* Drying: Dry your chili peppers for long-term storage. You can dry them in a dehydrator, oven, or by hanging them in a dry, well-ventilated area.
* Pickling: Pickle your chili peppers for a tangy and spicy treat.
* Freezing: Freeze your chili peppers for later use. Simply wash and dry them, then place them in freezer bags.
Extra Tips for Success
Here are a few extra tips to help you succeed in growing chili peppers in containers:
* Choose the right container size: Using the correct size container is crucial for the health and productivity of your chili plants.
* Use high-quality potting mix: Avoid using garden soil, as it can become compacted and hinder drainage.
*
Conclusion
So, there you have it! Cultivating chili peppers anywhere, regardless of your space constraints or gardening experience, is not only achievable but also incredibly rewarding. This DIY approach empowers you to enjoy fresh, flavorful chilies right at your fingertips, adding a fiery kick to your culinary creations. We’ve walked you through the essential steps, from selecting the right varieties to providing optimal growing conditions, ensuring your chili pepper plants thrive.
Why is this DIY trick a must-try? Because it democratizes access to fresh produce. No longer are you limited by the availability of specific chili varieties at your local grocery store. You become the master of your own chili pepper destiny, choosing the heat level, flavor profile, and even the aesthetic appeal of your plants. Imagine the satisfaction of harvesting your own Scotch Bonnets for a jerk chicken marinade, or adding a sprinkle of homegrown cayenne pepper to your morning eggs. The possibilities are endless!
Beyond the sheer convenience and control, this DIY project offers a therapeutic connection to nature. Nurturing a plant from seed to harvest is a deeply satisfying experience, providing a sense of accomplishment and grounding in our increasingly fast-paced world. Plus, chili pepper plants are visually stunning, adding a touch of vibrant color and personality to any space.
Ready to take your chili pepper cultivation to the next level? Consider these variations and suggestions:
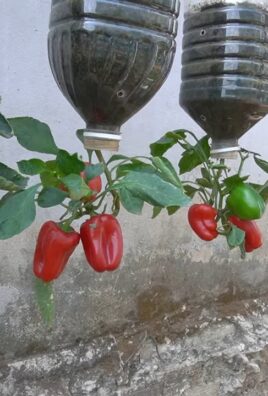
* Experiment with different containers: While we’ve focused on pots, you can also explore hanging baskets, vertical gardens, or even repurposed containers like old buckets or tires. Just ensure adequate drainage.
* Explore companion planting: Basil, tomatoes, and carrots are excellent companions for chili peppers, helping to deter pests and improve growth.
* Try different growing mediums: While potting mix is a great starting point, you can also experiment with coco coir, perlite, or even hydroponics for a more advanced approach.
* Create a chili pepper garden journal: Document your progress, track your successes and failures, and learn from your experiences. This will help you refine your techniques and become a chili pepper growing expert.
* Seed Saving: Once you have successfully grown your chili peppers, consider saving the seeds from your best plants to ensure you have a continuous supply for future seasons. This is a great way to preserve your favorite varieties and adapt them to your local climate.
We are confident that with a little patience and care, you can successfully cultivate chili peppers anywhere. Don’t be afraid to experiment, learn from your mistakes, and most importantly, have fun!
Now, we want to hear from you! Have you tried this DIY trick? What challenges did you face? What successes did you celebrate? Share your experiences, tips, and photos in the comments below. Let’s create a community of chili pepper enthusiasts and inspire others to embark on this rewarding journey. Your insights could be invaluable to someone just starting out. So, grab your seeds, get your hands dirty, and let’s cultivate chili peppers anywhere together!
Frequently Asked Questions (FAQ)
What are the best chili pepper varieties to grow in containers?
Choosing the right chili pepper variety is crucial for successful container gardening. Compact varieties like Thai peppers, habaneros, jalapeños, and cayenne peppers are excellent choices as they tend to be more manageable in smaller spaces. However, don’t let that limit you! You can also grow larger varieties like bell peppers or even some of the larger chili varieties, but you’ll need to provide a larger container and potentially some support for the plant as it grows. Consider your climate and personal preferences when making your selection. If you live in a cooler climate, opt for varieties that mature quickly. If you prefer mild heat, jalapeños or poblano peppers are a good starting point. For those who crave intense spice, habaneros or Scotch Bonnets will deliver the fiery kick you desire.
How much sunlight do chili pepper plants need?
Chili pepper plants are sun-loving creatures and require at least 6-8 hours of direct sunlight per day to thrive. Insufficient sunlight can lead to leggy growth, reduced flowering, and smaller, less flavorful peppers. If you’re growing your chili peppers indoors, supplement natural light with grow lights to ensure they receive adequate illumination. Position your plants near a south-facing window for maximum sunlight exposure. If you notice your plants stretching towards the light, rotate them regularly to promote even growth.
What type of soil is best for chili pepper plants?
Chili pepper plants prefer well-draining, nutrient-rich soil. A high-quality potting mix specifically formulated for vegetables is an excellent choice. Avoid using garden soil, as it can be too heavy and compact, hindering drainage and root development. You can also amend your potting mix with compost or other organic matter to improve its fertility and water-retention capacity. Ensure the soil pH is slightly acidic to neutral, ideally between 6.0 and 7.0.
How often should I water my chili pepper plants?
Watering frequency depends on several factors, including the size of the container, the climate, and the type of soil. As a general rule, water your chili pepper plants when the top inch of soil feels dry to the touch. Avoid overwatering, as this can lead to root rot. Ensure the container has adequate drainage holes to prevent water from accumulating at the bottom. During hot, dry weather, you may need to water your plants more frequently. Conversely, during cooler, wetter periods, you can reduce the watering frequency.
How often should I fertilize my chili pepper plants?
Chili pepper plants are heavy feeders and benefit from regular fertilization. Start fertilizing your plants a few weeks after transplanting them into their final containers. Use a balanced fertilizer with an NPK ratio of 10-10-10 or 14-14-14. Follow the instructions on the fertilizer packaging for application rates. You can also use organic fertilizers like compost tea or fish emulsion. Fertilize your plants every 2-3 weeks during the growing season. Reduce or stop fertilizing during the dormant season.
What are some common pests and diseases that affect chili pepper plants?
Chili pepper plants can be susceptible to various pests and diseases, including aphids, spider mites, whiteflies, blossom-end rot, and fungal diseases. Regularly inspect your plants for signs of infestation or disease. Treat any problems promptly with appropriate insecticides or fungicides. You can also use organic pest control methods like neem oil or insecticidal soap. Ensure good air circulation around your plants to prevent fungal diseases.
How do I prevent blossom-end rot in my chili pepper plants?
Blossom-end rot is a common problem in chili pepper plants, characterized by a dark, leathery spot on the bottom of the fruit. It is caused by a calcium deficiency, often due to inconsistent watering. To prevent blossom-end rot, ensure your plants receive consistent watering and avoid letting the soil dry out completely. You can also add calcium to the soil by incorporating bone meal or crushed eggshells.
When should I harvest my chili peppers?
The timing of harvest depends on the variety of chili pepper and your personal preference. Most chili peppers are ready to harvest when they have reached their mature color and size. The color will vary depending on the variety, from green to red, yellow, or orange. You can also harvest chili peppers when they are still green, but they will be less flavorful and less spicy. Use pruning shears or scissors to cut the peppers from the plant, leaving a small stem attached.
Can I overwinter my chili pepper plants?
Yes, you can overwinter your chili pepper plants to enjoy them for multiple seasons. Before the first frost, prune your plants back to about 6-8 inches tall and transplant them into smaller containers. Bring them indoors and place them in a sunny location. Water them sparingly and avoid fertilizing them during the winter months. In the spring, gradually acclimate them to outdoor conditions before transplanting them back into their larger containers.
Leave a Comment