
Cucumber garden boost: Want to unlock the secret to overflowing baskets of crisp, juicy cucumbers this season? I’m here to tell you, it’s easier than you think! Forget struggling with stunted growth and disappointing yields. This isn’t just another gardening article; it’s your personal guide to transforming your cucumber patch into a thriving, productive paradise.
For centuries, cucumbers have been a staple in gardens worldwide, dating back to ancient India. They’ve been prized not only for their refreshing taste but also for their versatility in culinary and medicinal applications. But even with their long history, many gardeners still face challenges in achieving optimal cucumber growth. That’s where these DIY tricks come in!
Let’s face it, nobody wants to spend time and effort on a garden only to be met with lackluster results. You deserve a bountiful harvest of delicious cucumbers, and I’m going to show you exactly how to get it. These simple, yet effective, cucumber garden boost hacks will help you overcome common cucumber growing obstacles, from improving pollination to preventing diseases. Get ready to impress your friends and family with your gardening prowess and enjoy a summer filled with fresh, homegrown cucumbers!
Supercharge Your Cucumber Harvest: A DIY Garden Boost!
Hey fellow gardeners! Are you dreaming of overflowing baskets of crisp, juicy cucumbers? I know I am! And while cucumbers are relatively easy to grow, sometimes they need a little extra *oomph* to really thrive. That’s where this DIY garden boost comes in. I’ve been using this method for years, and it consistently gives me a bumper crop of cucumbers. It’s all about providing them with the right nutrients and a little bit of extra love. So, let’s get started!
What You’ll Need
Before we dive into the nitty-gritty, let’s gather our supplies. This is a pretty simple recipe, so you probably already have most of these items on hand.
* **Epsom Salts:** This is the star of the show! Epsom salts are magnesium sulfate, and magnesium is crucial for cucumber growth. It helps with chlorophyll production (making those leaves nice and green!), nutrient absorption, and overall plant health.
* **Baking Soda:** Baking soda (sodium bicarbonate) can help to slightly raise the pH of the soil around your cucumber plants. Cucumbers prefer a slightly alkaline soil, and baking soda can give them a little boost in that direction. It also acts as a mild fungicide, helping to prevent powdery mildew, a common cucumber problem.
* **Ammonia-Free Dish Soap:** This acts as a surfactant, helping the mixture to better adhere to the leaves of your cucumber plants. It also helps to break down the surface tension of the water, allowing the nutrients to be absorbed more easily. Make sure it’s ammonia-free! Ammonia can harm your plants.
* **Water:** Good old H2O! This is our carrier for all the other ingredients.
* **Spray Bottle or Garden Sprayer:** You’ll need something to apply the mixture to your cucumber plants. A simple spray bottle works well for smaller gardens, but a garden sprayer is more efficient for larger areas.
* **Measuring Spoons and Cups:** For accurate mixing.
* **Gloves (Optional):** While not strictly necessary, gloves can help protect your hands from any potential irritation.
The Magic Ratio: Getting the Mix Right
Okay, now for the secret sauce! The key to this DIY garden boost is getting the proportions just right. Here’s what I use:
* 1 tablespoon of Epsom salts
* 1 tablespoon of baking soda
* 1/2 teaspoon of ammonia-free dish soap
* 1 gallon of water
Important Note: This is a general guideline. If you have very young cucumber plants, you might want to start with a slightly weaker solution (e.g., half the amount of Epsom salts and baking soda). You can always increase the strength later if needed.
Step-by-Step Instructions: Mixing and Application
Alright, let’s get mixing and spraying!
1. **Prepare the Water:** Fill your spray bottle or garden sprayer with one gallon of water. Make sure the water is at room temperature. Cold water can shock your plants.
2. **Add the Epsom Salts:** Add one tablespoon of Epsom salts to the water. Stir well until the Epsom salts are completely dissolved. This is important! Undissolved Epsom salts can clog your sprayer.
3. **Add the Baking Soda:** Next, add one tablespoon of baking soda to the water. Again, stir well until the baking soda is completely dissolved. You might notice a little fizzing when you add the baking soda – that’s normal!
4. **Add the Dish Soap:** Finally, add 1/2 teaspoon of ammonia-free dish soap to the water. Stir gently to avoid creating too many bubbles. Remember, we just want the dish soap to act as a surfactant, not to create a soapy mess.
5. **Mix Thoroughly:** Give the entire mixture a good stir to ensure that all the ingredients are evenly distributed.
6. **Test the Spray (Optional):** Before spraying your entire cucumber patch, it’s always a good idea to test the mixture on a small area of one plant. This will allow you to see if there are any adverse reactions. Wait 24 hours and check for any signs of leaf burn or discoloration. If everything looks good, you can proceed with spraying the rest of your plants.
7. **Spray Your Cucumber Plants:** Now for the fun part! Using your spray bottle or garden sprayer, thoroughly spray your cucumber plants, making sure to coat both the tops and bottoms of the leaves. Pay special attention to the undersides of the leaves, as this is where many pests like to hide.
8. **Spray in the Morning or Evening:** It’s best to spray your cucumber plants in the morning or evening, when the sun is not as intense. This will help to prevent leaf burn. Avoid spraying during the hottest part of the day.
9. **Repeat Every Two Weeks:** For best results, repeat this process every two weeks throughout the growing season. This will help to keep your cucumber plants healthy and productive.
Troubleshooting and Tips for Success
Even with the best intentions, things don’t always go according to plan. Here are a few troubleshooting tips and extra advice to help you get the most out of this DIY garden boost:
* **Leaf Burn:** If you notice any signs of leaf burn (brown or yellow spots on the leaves), reduce the strength of the solution. You can also try spraying your plants less frequently.
* **Powdery Mildew:** If you’re struggling with powdery mildew, you can increase the amount of baking soda in the solution to 1.5 tablespoons per gallon of water.
* **Pest Control:** While this DIY garden boost is not a pesticide, it can help to deter some pests. The dish soap can help to suffocate small insects like aphids.
* **Soil Testing:** Before using this DIY garden boost, it’s always a good idea to test your soil. This will help you to determine if your soil is deficient in any nutrients. You can purchase a soil testing kit at most garden centers.
* **Watering:** Make sure to water your cucumber plants regularly, especially during hot, dry weather. Cucumbers need plenty of water to thrive.
* **Sunlight:** Cucumbers need at least six hours of sunlight per day. Choose a sunny location for your cucumber plants.
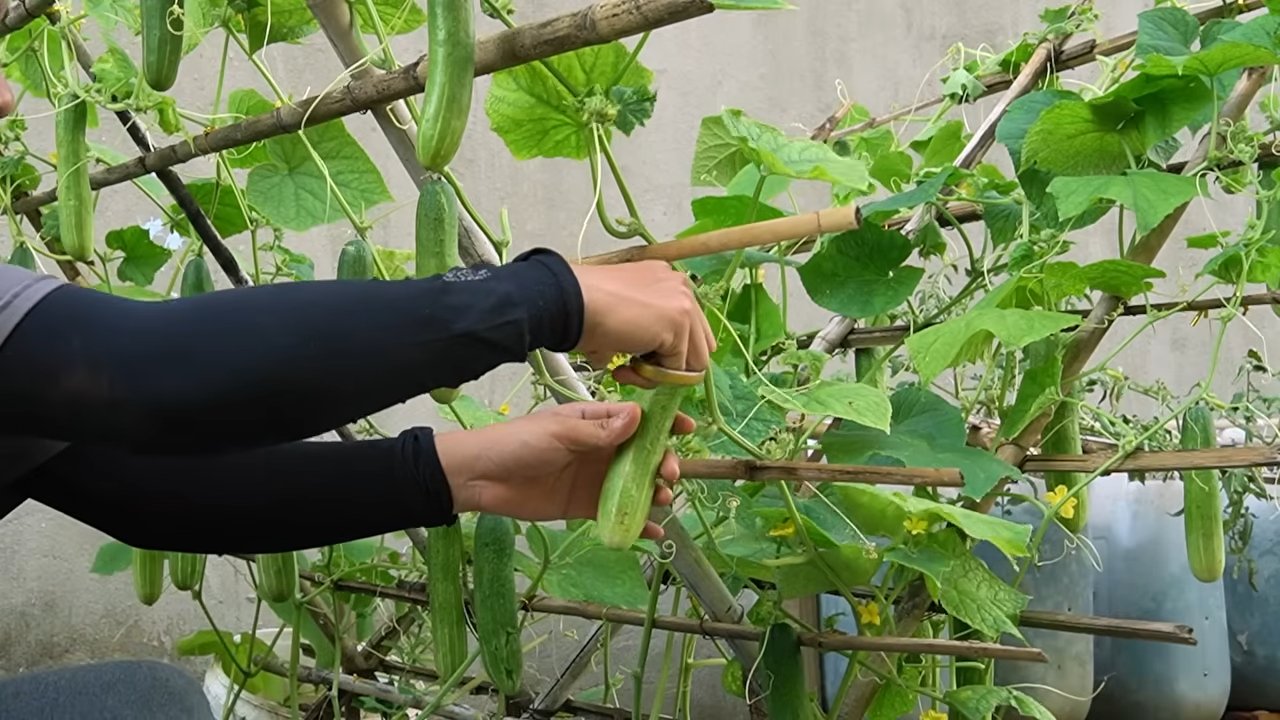
* **Support:** Provide your cucumber plants with some type of support, such as a trellis or fence. This will help to keep the fruits off the ground and prevent them from rotting.
* Observation is Key: Pay close attention to your cucumber plants. Look for any signs of stress, such as yellowing leaves, stunted growth, or pest infestations. The sooner you identify a problem, the easier it will be to fix it.
* Don’t Overdo It: While this DIY garden boost is beneficial, it’s important not to overdo it. Too much of a good thing can be harmful to your plants. Stick to the recommended dosage and frequency.
* Organic Gardening: If you’re committed to organic gardening, make sure to use organic Epsom salts and ammonia-free dish soap.
Why This Works: The Science Behind the Boost
So, why does this DIY garden boost work so well? Let’s break down the science behind each ingredient:
* **Epsom Salts (Magnesium Sulfate):** Magnesium is essential for chlorophyll production, which is the process by which plants convert sunlight into energy. Magnesium also helps plants to absorb other nutrients, such as nitrogen and phosphorus. A magnesium deficiency can lead to yellowing leaves, stunted growth, and reduced fruit production.
* **Baking Soda (Sodium Bicarbonate):** Baking soda can help to raise the pH of the soil, making it more alkaline. Cucumbers prefer a slightly alkaline soil (pH 6.0-6.8). Baking soda also has antifungal properties, which can help to prevent powdery mildew.
* **Ammonia-Free Dish Soap:** Dish soap acts as a surfactant, which helps the mixture to better adhere to the leaves of your cucumber plants. This allows the nutrients to be absorbed more easily. The dish soap also helps to break down the surface tension of the water, making it easier for the mixture to spread evenly over the leaves.
Beyond the Boost: Other Ways to Help Your Cucumbers Thrive
While this DIY garden boost is a great way to give your cucumbers a little extra help, there are other things you can do to ensure a bountiful harvest:
* **Choose the Right Variety:** There are many different varieties of cucumbers to choose from. Some varieties are better suited for pickling, while others are better for slicing. Choose a variety that is well-suited to your climate and growing conditions.
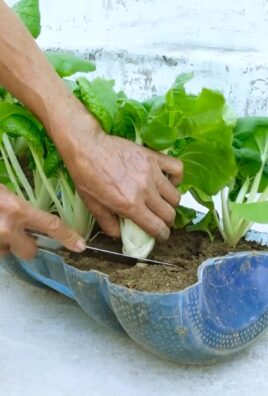
* **Prepare the Soil:** Cucumbers need well-drained soil that is rich in organic matter. Before planting, amend your soil with compost or other organic matter.
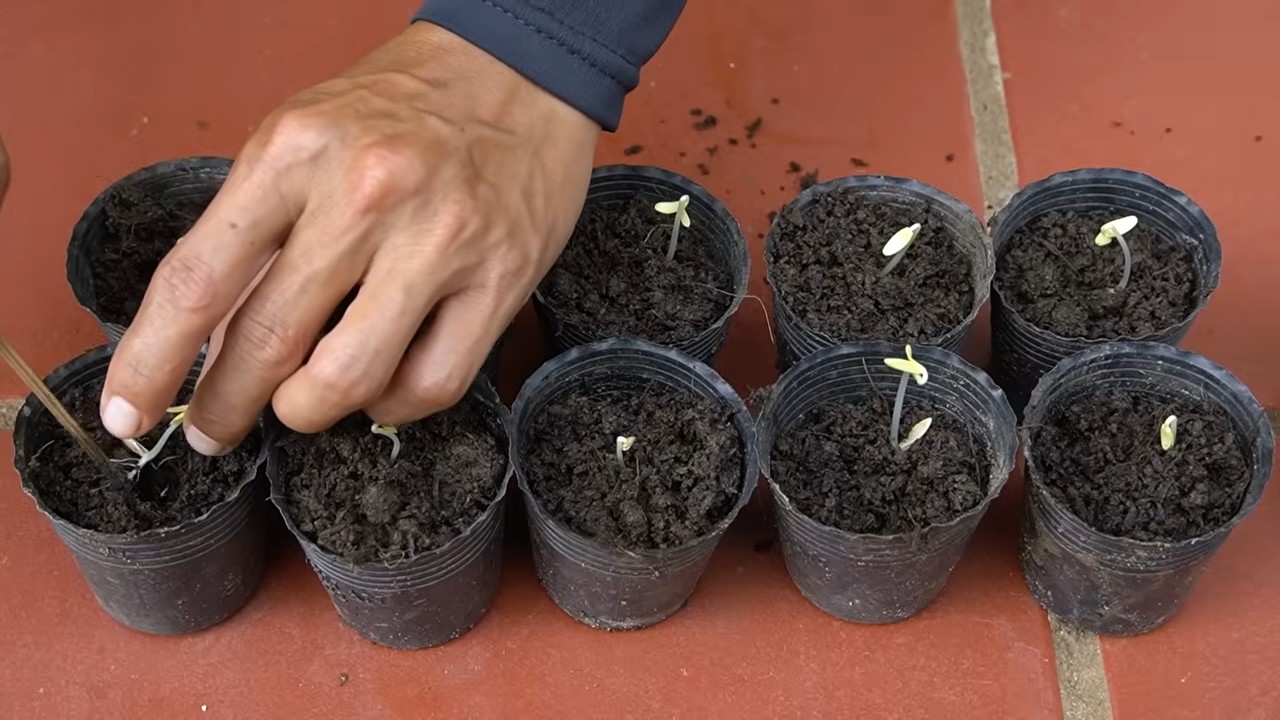
* **Plant at the Right Time:** Cucumbers are warm-weather crops and should be planted after the last frost.
* **Fertilize Regularly:** In addition to this DIY garden boost, you can also fertilize your cucumber plants with a balanced fertilizer. Follow the instructions on the fertilizer package.
* **Control Pests and Diseases:** Keep an eye out for pests and diseases, and take action to control them as soon as possible.
* **Harvest
Conclusion
So, there you have it! This simple, yet incredibly effective, DIY cucumber garden boost is more than just a gardening hack; it’s a game-changer for anyone looking to maximize their cucumber harvest. We’ve walked you through the process, highlighting the benefits of each ingredient and demonstrating how easy it is to create this potent elixir for your plants.
Why is this a must-try? Because it addresses the core needs of cucumber plants – providing essential nutrients, promoting strong root development, and enhancing overall plant health. Store-bought fertilizers can be expensive and often contain harsh chemicals. This DIY solution is not only cost-effective but also environmentally friendly, utilizing ingredients you likely already have in your kitchen or garden. It’s a win-win!
But the beauty of this DIY cucumber garden boost lies in its adaptability. Feel free to experiment with variations to suit your specific needs and resources. For instance, if you don’t have access to Epsom salts, you can substitute with a diluted solution of seaweed extract, which is rich in trace minerals. If you’re looking for an extra boost of nitrogen, consider adding a small amount of compost tea to the mixture. Remember to always start with small adjustments and observe your plants carefully to gauge their response.
Don’t be afraid to get creative! You can also tailor the frequency of application based on your soil conditions and the stage of growth of your cucumber plants. Younger plants may benefit from more frequent, diluted applications, while mature plants can handle less frequent, more concentrated doses.
We are confident that this DIY cucumber garden boost will significantly improve the health and productivity of your cucumber plants. Imagine harvesting an abundance of crisp, delicious cucumbers, knowing that you achieved it with a simple, natural solution. The satisfaction is unparalleled!
Now, it’s your turn to put this knowledge into action. Gather your ingredients, follow the steps outlined, and witness the transformation of your cucumber garden. We encourage you to try this DIY trick and share your experiences with us. Let us know what variations you tried, what results you achieved, and any tips or tricks you discovered along the way. Your feedback will not only help us refine this recipe but also inspire other gardeners to embrace the power of DIY solutions.
Share your success stories! Post pictures of your thriving cucumber plants and bountiful harvests on social media, using the hashtag #DIYCucumberBoost. Let’s create a community of gardeners who are passionate about growing healthy, delicious cucumbers using natural and sustainable methods.
So, what are you waiting for? Get started today and unlock the full potential of your cucumber garden!
Frequently Asked Questions (FAQ)
What exactly does this DIY cucumber garden boost do for my plants?
This DIY boost provides a balanced blend of essential nutrients that cucumbers need to thrive. The Epsom salts supply magnesium, which is crucial for chlorophyll production and nutrient uptake. The baking soda helps to regulate soil pH, making it more conducive to cucumber growth. The ammonia (from urine) provides a readily available source of nitrogen, which is essential for leafy growth and fruit development. Together, these ingredients create a synergistic effect that promotes strong root development, healthy foliage, and abundant fruit production. It’s a holistic approach to plant nutrition that addresses the specific needs of cucumber plants.
How often should I apply this DIY cucumber garden boost?
The frequency of application depends on several factors, including the age of your plants, the quality of your soil, and the weather conditions. As a general guideline, you can apply this boost every 2-3 weeks during the growing season. For younger plants, you may want to dilute the mixture further and apply it more frequently (e.g., once a week) to avoid over-fertilization. If your soil is particularly poor or if your plants are showing signs of nutrient deficiency, you can increase the frequency of application. Conversely, if your soil is rich in nutrients or if your plants are growing vigorously, you can reduce the frequency of application. Always observe your plants carefully and adjust the frequency accordingly.
Can I use this DIY boost on other plants besides cucumbers?
While this boost is specifically formulated for cucumbers, it can also be beneficial for other plants that have similar nutrient requirements, such as zucchini, squash, and melons. However, it’s important to note that different plants have different needs, so you may need to adjust the recipe accordingly. For example, tomatoes may benefit from a slightly higher concentration of phosphorus, while peppers may prefer a slightly lower concentration of nitrogen. Before applying this boost to other plants, it’s always a good idea to do some research to determine their specific nutrient requirements.
Is it safe to use urine in my garden?
Yes, urine is a safe and effective fertilizer when used properly. It’s a natural source of nitrogen, phosphorus, and potassium, which are all essential nutrients for plant growth. However, it’s important to dilute urine before applying it to your plants, as undiluted urine can be too strong and can burn the roots. A dilution ratio of 1:10 (one part urine to ten parts water) is generally recommended. Also, it’s important to avoid using urine from individuals who are taking certain medications, as these medications can be excreted in the urine and may harm your plants. If you’re concerned about the safety of using urine, you can substitute it with another source of nitrogen, such as compost tea or diluted fish emulsion.
What if I don’t have Epsom salts or baking soda? Can I still make this boost?
While Epsom salts and baking soda contribute to the overall effectiveness of this boost, you can still make it without them. Epsom salts provide magnesium, which is important for chlorophyll production. If you don’t have Epsom salts, you can substitute with a diluted solution of seaweed extract, which is rich in trace minerals. Baking soda helps to regulate soil pH. If you don’t have baking soda, you can skip it altogether, but be sure to monitor your soil pH regularly and adjust it as needed. The most important ingredient in this boost is the urine, as it provides the essential nitrogen that cucumbers need to thrive.
My cucumber plants are already producing fruit. Is it too late to use this boost?
No, it’s never too late to use this boost! In fact, applying it during the fruiting stage can help to ensure that your plants have the nutrients they need to produce a bountiful harvest. Just be sure to dilute the mixture further and apply it more frequently to avoid over-fertilization. Also, avoid getting the mixture on the fruits themselves, as this can cause them to rot.
Can I use this boost on container-grown cucumbers?
Yes, this boost is perfectly safe to use on container-grown cucumbers. In fact, container-grown plants often benefit from regular fertilization, as the nutrients in the potting mix can be depleted quickly. Just be sure to adjust the frequency of application based on the size of the container and the growth rate of your plants.
I’m seeing yellow leaves on my cucumber plants. Will this boost help?
Yellow leaves can be a sign of nutrient deficiency, so this boost may help to address the problem. However, yellow leaves can also be caused by other factors, such as overwatering, underwatering, or disease. Before applying this boost, it’s important to rule out other potential causes. If you suspect that your plants are suffering from a nutrient deficiency, this boost can provide the essential nutrients they need to recover.
How do I store the leftover DIY cucumber garden boost?
It’s best to use the DIY cucumber garden boost immediately after mixing it. However, if you have leftovers, you can store them in a sealed container in a cool, dark place for up to a week. Be sure to label the container clearly and keep it out of reach of children and pets. Before using the stored boost, give it a good shake to ensure that the ingredients are evenly distributed.
What are some other tips for growing healthy cucumbers?
In addition to using this DIY boost, there are several other things you can do to promote healthy cucumber growth. These include:
* Providing your plants with plenty of sunlight (at least 6-8 hours per day).
* Watering your plants regularly, especially during hot, dry weather.
* Mulching around your plants to help retain moisture and suppress weeds.
* Providing your plants with a trellis or other support to climb on.
* Protecting your plants from pests and diseases.
* Harvesting your cucumbers regularly to encourage continued production.

Leave a Comment