
Cowpea Growing Cycle DIY: Unlock the Secrets to Bountiful Harvests!
Have you ever dreamt of strolling through your own backyard, plucking fresh, delicious cowpeas straight from the vine? I know I have! There’s something incredibly satisfying about growing your own food, and cowpeas, with their rich history and nutritional value, are a fantastic choice for any home gardener. From West Africa, where they’ve been cultivated for millennia, to kitchen gardens around the world, cowpeas have nourished communities and cultures for generations.
But let’s be honest, understanding the cowpea growing cycle can feel a little daunting at first. When do you plant? How much water do they need? What about pests? That’s where this DIY guide comes in! I’m going to walk you through every stage, from seed to harvest, with easy-to-follow instructions and helpful tips.
Why is mastering the cowpea growing cycle so important? Because with a little know-how, you can maximize your yield, avoid common pitfalls, and enjoy a continuous supply of these versatile legumes. Imagine adding fresh cowpeas to your favorite soups, stews, and salads, knowing you grew them yourself! Plus, growing your own food is a sustainable and rewarding way to connect with nature and reduce your carbon footprint. So, grab your gardening gloves, and let’s get started on this exciting journey together!

DIY: Der komplette Leitfaden für den Anbau von Augenbohnen im eigenen Garten
Hallo Gartenfreunde! Ich freue mich riesig, euch heute durch den gesamten Lebenszyklus des Anbaus von Augenbohnen (auch Kuhbohnen genannt) zu führen. Diese vielseitige und nahrhafte Hülsenfrucht ist nicht nur lecker, sondern auch relativ einfach anzubauen, selbst wenn ihr noch nicht so viel Erfahrung im Gärtnern habt. Lasst uns gemeinsam in dieses spannende Projekt eintauchen!
Was ihr für den Anbau von Augenbohnen benötigt
Bevor wir loslegen, hier eine Liste der Dinge, die ihr für den erfolgreichen Anbau von Augenbohnen benötigt:
* Augenbohnen-Samen (wählt eine Sorte, die für euer Klima geeignet ist)
* Einen sonnigen Standort mit mindestens 6 Stunden direkter Sonneneinstrahlung pro Tag
* Gut durchlässigen Boden
* Kompost oder anderen organischen Dünger
* Gartengeräte: Spaten, Harke, Gießkanne oder Gartenschlauch
* Rankhilfe (optional, aber empfehlenswert für rankende Sorten)
* Mulch (z.B. Stroh oder Holzhackschnitzel)
Die Vorbereitung: Der Grundstein für eine reiche Ernte
Die richtige Vorbereitung ist das A und O für eine erfolgreiche Ernte. Nehmt euch also Zeit für diese Schritte:
1. Den Boden vorbereiten: Augenbohnen bevorzugen einen gut durchlässigen Boden. Beginnt damit, den Boden an eurem gewählten Standort mit einem Spaten oder einer Grabegabel aufzulockern. Entfernt Steine, Wurzeln und Unkraut.
2. Boden verbessern: Mischt reichlich Kompost oder anderen organischen Dünger in den Boden ein. Das verbessert die Bodenstruktur, die Drainage und den Nährstoffgehalt. Augenbohnen sind zwar nicht besonders anspruchsvoll, aber ein guter Start hilft ihnen enorm.
3. Boden testen (optional): Wenn ihr unsicher seid, wie es um euren Boden bestellt ist, könnt ihr einen Bodentest durchführen. Das gibt euch Aufschluss über den pH-Wert und den Nährstoffgehalt und hilft euch, den Boden optimal vorzubereiten. Der ideale pH-Wert für Augenbohnen liegt zwischen 6,0 und 7,0.
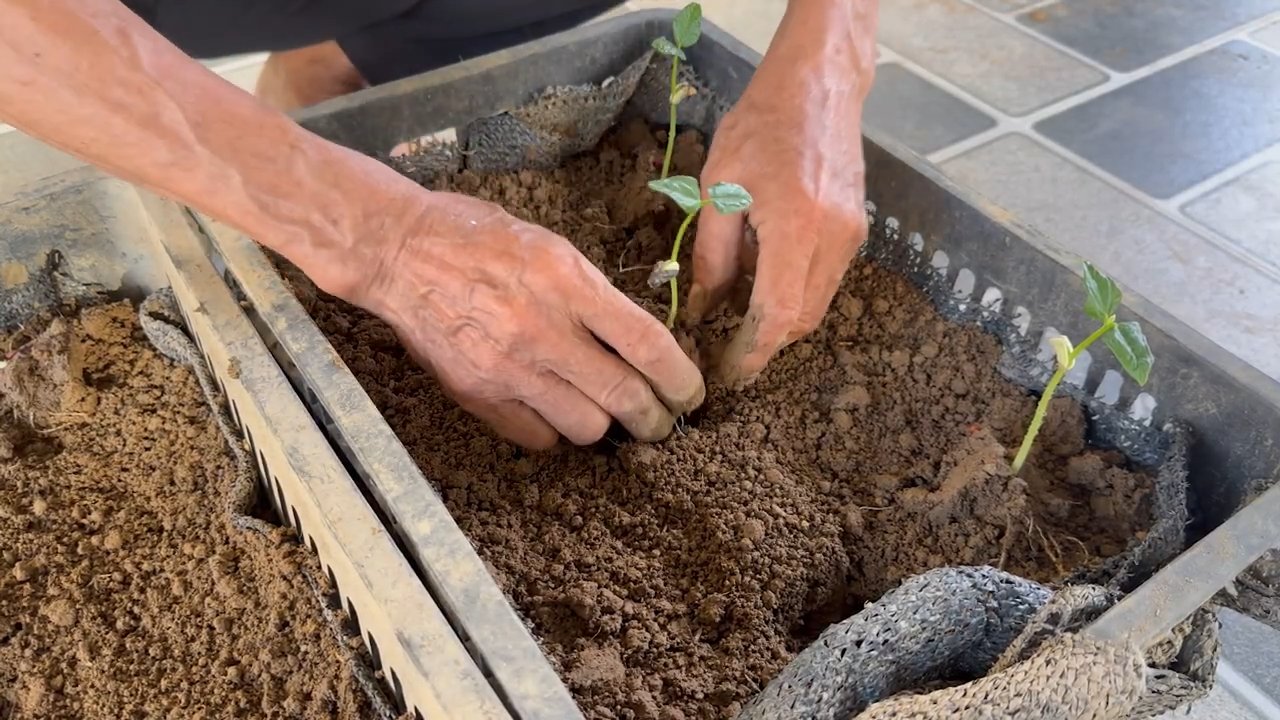
Die Aussaat: Der Beginn des Lebenszyklus
Jetzt kommt der spannende Teil: die Aussaat der Samen!
1. Den richtigen Zeitpunkt wählen: Augenbohnen sind wärmeliebend und sollten erst nach dem letzten Frost ausgesät werden, wenn sich der Boden ausreichend erwärmt hat. Die Bodentemperatur sollte idealerweise mindestens 18°C betragen.
2. Aussaatmethode: Es gibt zwei Möglichkeiten, Augenbohnen auszusäen: Direktsaat ins Freiland oder Vorkultur im Haus. Ich empfehle die Direktsaat, da sie einfacher ist und die Pflanzen weniger Stress aussetzt.
3. Aussaattiefe und Abstand: Säet die Samen etwa 2,5 bis 5 cm tief und mit einem Abstand von 5 bis 10 cm in der Reihe aus. Der Reihenabstand sollte etwa 60 bis 90 cm betragen.
4. Gießen: Gießt die Samen nach der Aussaat gründlich an. Haltet den Boden feucht, aber nicht nass, bis die Keimung erfolgt ist.
Die Keimung und das frühe Wachstum: Geduld ist gefragt
Nach der Aussaat heißt es erst einmal abwarten. Die Keimung dauert in der Regel 5 bis 10 Tage, abhängig von der Bodentemperatur und der Feuchtigkeit.
1. Beobachtung: Beobachtet eure Pflanzen regelmäßig. Sobald die ersten Keimlinge erscheinen, ist es wichtig, sie vor Schädlingen und Krankheiten zu schützen.
2. Ausdünnen: Wenn die Pflanzen zu dicht stehen, solltet ihr sie ausdünnen, um ihnen genügend Platz zum Wachsen zu geben. Lasst die stärksten Pflanzen stehen und entfernt die schwächeren.
3. Gießen: Gießt die Pflanzen regelmäßig, besonders während trockener Perioden. Achtet darauf, dass der Boden nicht austrocknet, aber vermeidet Staunässe.
4. Unkrautbekämpfung: Haltet den Bereich um die Pflanzen unkrautfrei. Unkraut konkurriert mit den Augenbohnen um Nährstoffe und Wasser.
Die Rankhilfe: Unterstützung für ein gesundes Wachstum
Einige Augenbohnensorten sind rankend und benötigen eine Rankhilfe, um optimal zu wachsen.
1. Auswahl der Rankhilfe: Es gibt verschiedene Arten von Rankhilfen, z.B. Rankgitter, Zäune oder Stangen. Wählt eine Rankhilfe, die stabil ist und den Pflanzen genügend Halt bietet.
2. Installation: Installiert die Rankhilfe, bevor die Pflanzen zu groß werden. Leitet die Triebe der Pflanzen vorsichtig an der Rankhilfe entlang.
3. Pflege: Überprüft die Rankhilfe regelmäßig und bindet die Triebe der Pflanzen gegebenenfalls fest.
Die Blüte und Fruchtbildung: Der Lohn der Arbeit
Nach einigen Wochen beginnen die Augenbohnen zu blühen. Die Blüten sind in der Regel weiß oder lila und sehr attraktiv für Bienen und andere Bestäuber.
1. Bestäubung: Augenbohnen sind in der Regel selbstbestäubend, aber die Bestäubung durch Insekten kann den Ertrag erhöhen.
2. Fruchtbildung: Nach der Bestäubung entwickeln sich die Blüten zu Schoten. Die Schoten sind zunächst grün und werden später gelb oder braun, wenn sie reif sind.
3. Gießen: Während der Blüte und Fruchtbildung ist es besonders wichtig, die Pflanzen ausreichend zu gießen.
4. Düngung (optional): Wenn ihr das Gefühl habt, dass die Pflanzen zusätzliche Nährstoffe benötigen, könnt ihr sie mit einem organischen Dünger düngen.
Die Ernte: Der krönende Abschluss
Die Erntezeit ist der Höhepunkt des Anbauprozesses.
1. Den richtigen Zeitpunkt wählen: Augenbohnen können in verschiedenen Reifestadien geerntet werden. Für frische Bohnen erntet ihr die Schoten, wenn sie noch grün und prall sind. Für Trockenbohnen lasst ihr die Schoten an der Pflanze trocknen, bis sie braun und trocken sind.
2. Erntemethode: Pflückt die Schoten vorsichtig von der Pflanze ab. Achtet darauf, die Pflanze nicht zu beschädigen.
3. Lagerung: Frische Bohnen können im Kühlschrank einige Tage aufbewahrt werden. Trockenbohnen können in einem luftdichten Behälter an einem kühlen, trockenen Ort mehrere Monate gelagert werden.
Schädlinge und Krankheiten: Vorbeugen ist besser als Heilen
Wie alle Pflanzen können auch Augenbohnen von Schädlingen und Krankheiten befallen werden.
1. Vorbeugung: Die beste Vorbeugung ist ein gesunder Boden, ausreichend Sonnenlicht und eine gute Belüftung.
2. Schädlinge: Zu den häufigsten Schädlingen gehören Blattläuse, Bohnenkäfer und Schnecken. Bekämpft Schädlinge mit natürlichen Methoden, z.B. mit Nützlingen oder Neemöl.
3. Krankheiten: Zu den häufigsten Krankheiten gehören Pilzkrankheiten wie Mehltau und Rost. Sorgt für eine gute Belüftung und vermeidet Staunässe, um Krankheiten vorzubeugen.
Augenbohnen als Gründüngung: Ein Bonus für den Boden
Augenbohnen sind nicht nur lecker, sondern auch eine hervorragende Gründüngung. Sie reichern den Boden mit Stickstoff an und verbessern die Bodenstruktur.
1. Aussaat: Säet die Augenbohnen nach der Ernte anderer Kulturen aus.
2. Einarbeitung: Wenn die Pflanzen blühen, schneidet ihr sie ab und arbeitet sie in den Boden ein.
Zusammenfassung des Lebenszyklus
Hier noch einmal eine kurze Zusammenfassung des Lebenszyklus von Augenbohnen:
* Aussaat: Nach dem letzten Frost
* Keimung: 5-10 Tage
* Vegetatives Wachstum: Einige Wochen
* Blüte: Nach einigen Wochen
* Fruchtbildung: Nach der Bestäubung
* Ernte: Je nach Reifestadium
Sortenempfehlungen
Es gibt viele verschiedene Augenbohnensorten. Hier sind einige Empfehlungen:
* ‘California Blackeye No. 5
Conclusion
So, there you have it! Mastering the cowpea growing cycle DIY is not just about saving money; it’s about connecting with your food source, understanding the rhythms of nature, and enjoying the unparalleled satisfaction of harvesting your own delicious and nutritious cowpeas. From carefully selecting your seeds to patiently nurturing your plants through each stage of development, this hands-on approach offers a unique and rewarding experience that store-bought cowpeas simply can’t replicate.
But why is this DIY method a must-try? Firstly, you gain complete control over the growing process. You choose the soil, the fertilizers (or lack thereof, if you prefer organic methods), and the pest control strategies. This means you can ensure your cowpeas are grown without harmful chemicals, resulting in a healthier and tastier harvest. Secondly, it’s incredibly educational. Witnessing the cowpea growing cycle firsthand provides invaluable insights into plant biology, soil science, and the delicate balance of ecosystems. It’s a fantastic learning opportunity for both adults and children. Thirdly, it’s empowering. There’s a profound sense of accomplishment that comes from nurturing a plant from seed to harvest, knowing that you played an active role in providing food for yourself and your family.
Beyond the Basics: Exploring Cowpea Variations and Growing Techniques
Don’t be afraid to experiment! The world of cowpeas is vast and diverse, with numerous varieties offering different flavors, textures, and growing characteristics. Consider trying different types of cowpeas, such as black-eyed peas, cream peas, or crowder peas, to discover your favorites. You can also explore different growing techniques, such as companion planting (planting beneficial herbs or flowers alongside your cowpeas) or vertical gardening (growing your cowpeas on trellises or fences to save space).
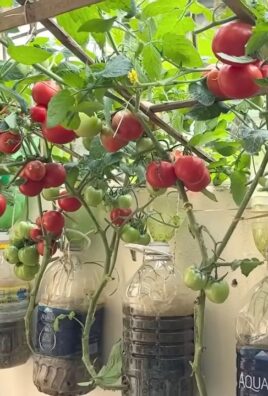
For those with limited space, container gardening is an excellent option. Choose a large pot (at least 12 inches in diameter) and fill it with well-draining potting mix. Ensure the pot receives plenty of sunlight and water regularly. You can even grow dwarf varieties of cowpeas in hanging baskets for a unique and visually appealing display.
Another variation to consider is succession planting. By planting cowpeas every few weeks, you can extend your harvest season and enjoy a continuous supply of fresh cowpeas throughout the summer. This is particularly useful in regions with shorter growing seasons.
Your Cowpea Growing Journey Awaits!
We wholeheartedly encourage you to embark on your own cowpea growing cycle DIY adventure. It’s a journey filled with learning, discovery, and the ultimate reward of fresh, homegrown cowpeas. Don’t be intimidated by the process; even if you’re a beginner gardener, you can successfully grow cowpeas with a little patience and attention.
Once you’ve harvested your first crop, we’d love to hear about your experience! Share your tips, tricks, and challenges in the comments section below. Let’s create a community of cowpea enthusiasts and learn from each other’s successes and failures. Together, we can unlock the secrets of the cowpea growing cycle and enjoy the bounty of our gardens. So, grab your seeds, prepare your soil, and get ready to experience the joy of growing your own cowpeas!
Frequently Asked Questions (FAQ)
What is the ideal soil type for growing cowpeas?
Cowpeas thrive in well-drained, sandy loam soil with a pH between 6.0 and 7.0. While they are relatively tolerant of poor soil conditions, amending the soil with compost or other organic matter will improve drainage, fertility, and water retention, leading to a healthier and more productive crop. Avoid heavy clay soils, as they can become waterlogged and inhibit root growth. If you have clay soil, consider adding sand and organic matter to improve its structure.
How much sunlight do cowpeas need?
Cowpeas require at least 6-8 hours of direct sunlight per day to thrive. Choose a planting location that receives ample sunlight throughout the growing season. Insufficient sunlight can result in stunted growth, reduced flowering, and lower yields. If you’re growing cowpeas indoors, use grow lights to supplement natural sunlight.
How often should I water my cowpeas?
Water cowpeas regularly, especially during hot, dry weather. Aim to keep the soil consistently moist but not waterlogged. Water deeply and less frequently, rather than shallowly and more often, to encourage deep root growth. Avoid overhead watering, as it can promote fungal diseases. Use a soaker hose or drip irrigation system to deliver water directly to the roots. During periods of heavy rainfall, you may need to reduce watering frequency.
What are some common pests and diseases that affect cowpeas, and how can I control them?
Common pests that affect cowpeas include aphids, bean beetles, and spider mites. Diseases include fungal diseases like powdery mildew and root rot. To control pests, you can use insecticidal soap, neem oil, or introduce beneficial insects like ladybugs. For diseases, ensure good air circulation, avoid overhead watering, and use fungicides if necessary. Crop rotation and planting disease-resistant varieties can also help prevent disease outbreaks. Regularly inspect your plants for signs of pests or diseases and take action promptly to prevent them from spreading.
When is the best time to harvest cowpeas?
The best time to harvest cowpeas depends on the variety and your intended use. For fresh eating, harvest the pods when they are plump and tender, but before the beans inside become fully mature and hard. For dried beans, allow the pods to dry completely on the plant before harvesting. The pods should be brittle and the beans should rattle inside. Harvest on a dry day to prevent mold growth.
Can I grow cowpeas in containers?
Yes, cowpeas can be successfully grown in containers, making them a great option for gardeners with limited space. Choose a large container (at least 12 inches in diameter) with drainage holes. Fill the container with a well-draining potting mix. Provide a trellis or support for the vines to climb. Water regularly and fertilize as needed. Dwarf varieties of cowpeas are particularly well-suited for container gardening.
How do I store cowpeas after harvesting?
Fresh cowpeas can be stored in the refrigerator for up to a week. Dried cowpeas should be stored in an airtight container in a cool, dry place. They can be stored for several months or even years if properly stored. Before storing dried cowpeas, make sure they are completely dry to prevent mold growth.
Are cowpeas nitrogen fixers?
Yes, cowpeas are legumes, which means they have the ability to fix nitrogen from the atmosphere into the soil. This makes them a valuable cover crop and can improve soil fertility. When planting cowpeas, you can inoculate the seeds with a nitrogen-fixing bacteria to enhance this process.
What are some good companion plants for cowpeas?
Good companion plants for cowpeas include corn, sunflowers, and herbs like rosemary and thyme. Corn and sunflowers provide support for the cowpea vines to climb. Rosemary and thyme repel pests and attract beneficial insects. Avoid planting cowpeas near onions or garlic, as they can inhibit growth.
How can I improve the germination rate of cowpea seeds?
To improve the germination rate of cowpea seeds, soak them in water for 12-24 hours before planting. This will help soften the seed coat and speed up germination. Plant the seeds in warm soil (at least 60°F) and keep the soil consistently moist. Avoid planting the seeds too deep, as this can prevent them from emerging.

Leave a Comment