
Cowpea garden from scratch? Absolutely! Imagine harvesting your own delicious, protein-packed cowpeas right from your backyard. It’s easier than you think, and this DIY guide will walk you through every step. Forget those bland, store-bought beans – we’re talking about fresh, flavorful cowpeas bursting with homegrown goodness!
Cowpeas, also known as black-eyed peas, have a rich history, particularly in the Southern United States, where they’ve been a staple crop for generations. Brought over from Africa, they’ve become deeply ingrained in Southern cuisine and culture, symbolizing prosperity and good luck, especially when eaten on New Year’s Day. But you don’t have to be Southern to appreciate the incredible taste and nutritional benefits of these legumes.
Why should you embark on this cowpea garden from scratch adventure? Well, for starters, growing your own food is incredibly rewarding. Plus, you’ll know exactly what’s going into your food – no harmful pesticides or mystery ingredients. More importantly, with rising grocery prices, cultivating your own cowpeas can be a budget-friendly way to add a healthy and delicious source of protein to your diet. I’m excited to share these simple, effective DIY tricks and hacks that will have you enjoying a bountiful cowpea harvest in no time, even if you’re a complete beginner!
Your Own Black-Eyed Pea Garden: A Step-by-Step Guide
Hey garden friends! I’m thrilled to show you today how to create your own black-eyed pea garden. Black-eyed peas, also known as cowpeas, are not only super delicious but also incredibly nutritious and relatively easy to grow. So, let’s roll up our sleeves and get started!
What You Need for Your Black-Eyed Pea Garden
Before we begin, here is a list of everything you’ll need:
- Black-eyed pea seeds: Choose a variety that grows well in your region. It’s best to ask at your local garden center.
- Gardening tools: Spade, rake, possibly a hoe.
- Compost or organic fertilizer: For nutrient-rich soil.
- Watering can or garden hose: For watering.
- Stakes or trellis (optional): For vining varieties.
- Mulch (optional): Straw, wood chips, or similar materials to retain moisture in the soil and suppress weeds.
- Patience and love: The most important ingredients!
Preparation: The Key to Success
A good start is half the battle, and that’s true for the garden as well. Preparing the soil is crucial for a bountiful harvest.
1. Choosing the Right Location
Black-eyed peas love the sun! Choose a location that gets at least 6-8 hours of direct sunlight per day. Also, make sure the soil is well-draining. Black-eyed peas do not like waterlogged soil at all.
2. Preparing the Soil
- Cleaning: First, remove all stones, roots, and weeds from the area where you want to grow your black-eyed peas. A clean area is important so that the young plants don’t have to compete with weeds from the start.
- Loosening: Dig up the soil with a spade or a digging fork. Loosen it well so that the roots of the black-eyed peas can easily penetrate later. A depth of about 20-30 cm is ideal.
- Improving: Mix plenty of compost or organic fertilizer into the soil. This improves the soil structure, increases the nutrient supply, and promotes plant growth. I like to use well-rotted compost from my own compost pile.
- Leveling: Afterward, rake the soil smooth to create a level surface. This makes planting the seeds easier.
3. Testing the Soil pH (optional)
Black-eyed peas prefer slightly acidic to neutral soil with a pH between 6.0 and 7.0. You can check the pH of your soil with a soil test kit from the garden center. If the pH is too high, you can lower it with sulfur. If it is too low, you can raise it with lime.
Sowing: The Start of Life
Now comes the exciting part: sowing the seeds!
1. Choosing the Right Time
Black-eyed peas are heat-loving and should only be sown after the last frost when the soil has warmed up sufficiently. In most regions, this is from about mid-May to early June. You can also start the seeds indoors to extend the growing season.
2. The Sowing Method
- Sowing in rows: Use a rake or a stick to draw rows in the prepared soil. The rows should be about 60-90 cm apart.
- Placing seeds: Place the seeds in the rows at a distance of about 10-15 cm. The seeds should be placed about 2-3 cm deep in the soil.
- Covering: Cover the seeds with soil and press down lightly.
- Watering: Water the rows carefully to moisten the soil. Be careful not to wash the seeds away.
3. Starting Indoors (optional)
If you want to extend the growing season, you can also start the seeds indoors.
- Prepare seed pots: Fill small pots or seed trays with seed starting mix.
- Sow seeds: Place 1-2 seeds in each pot and cover them with a thin layer of soil.
- Water: Water the soil gently.
- Keep warm: Place the pots in a warm and bright place.
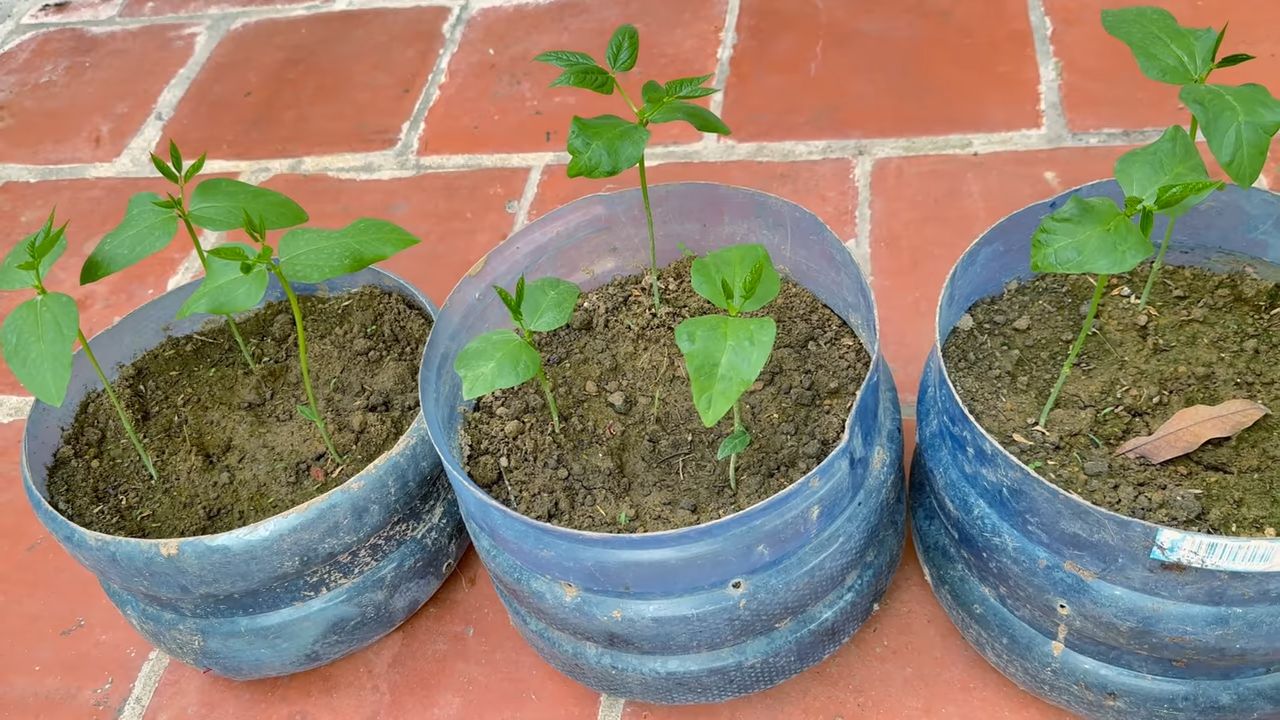
- Prick out: Once the seedlings are large enough (about 5-7 cm high), you can prick them out into larger pots.
- Planting out: After the last frost, you can plant the seedlings outdoors.
Care: So Your Black-Eyed Peas Thrive
After sowing, it’s important to care for the black-eyed peas well so they thrive.
1. Watering
Black-eyed peas need regular watering, especially during the flowering and fruiting period. It’s best to water the plants early in the morning so the leaves can dry off by evening. Avoid waterlogging, as this can lead to root rot.
2. Weed Control
Keep the area around the black-eyed peas free of weeds. Weeds compete with the plants for nutrients and water. You can weed by hand or use a hoe.
3. Fertilizing
Black-eyed peas are relatively undemanding when it comes to fertilization. If you have improved the soil with compost or organic fertilizer before sowing, no additional fertilization is usually necessary. However, if the plants look pale green, you can fertilize them with a low-nitrogen fertilizer.
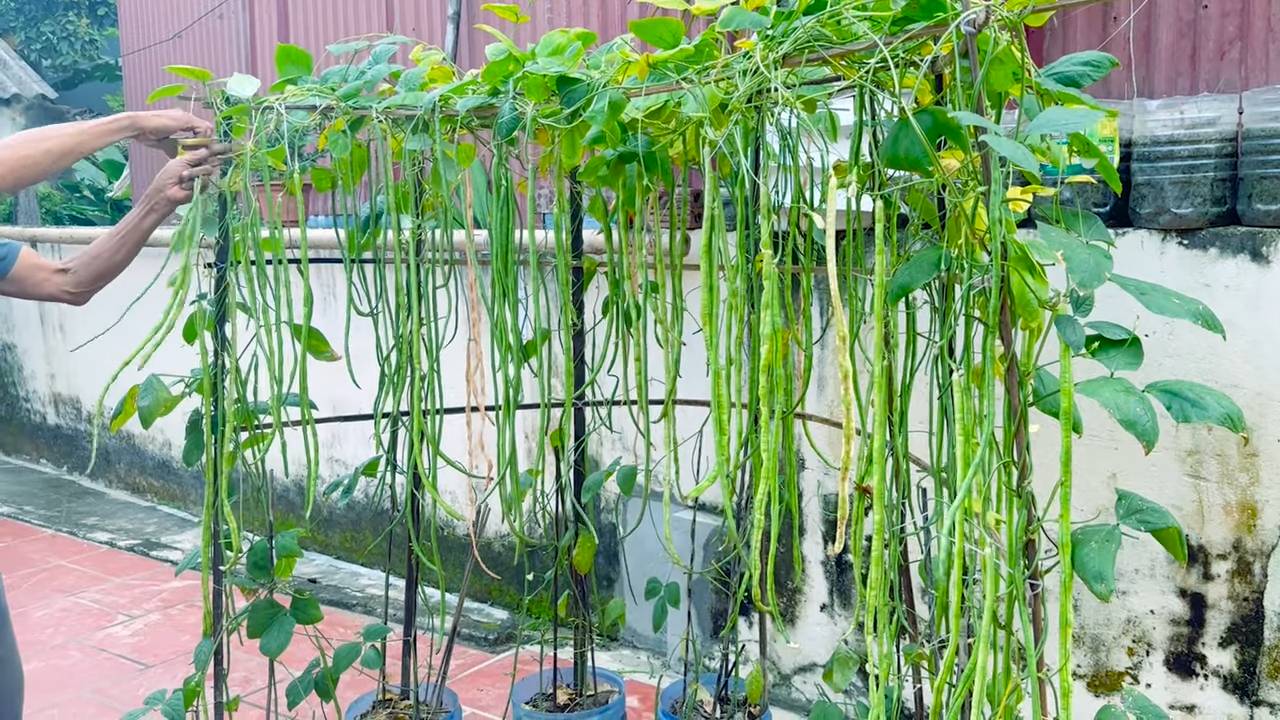
4. Support (optional)
Some varieties of black-eyed peas are vining and require support, such as stakes or a trellis. The support helps the plants grow upright and keeps the fruit off the ground.
5. Pest Control
Black-eyed peas can be infested by various pests, such as aphids, bean beetles, and slugs. Check the plants regularly for pests and combat them with appropriate means if necessary. I prefer natural pesticides, such as neem oil or insecticidal soap.
The Harvest: The Reward for Your Effort
After all the work, the best part finally arrives: the harvest!
1. Choosing the Right Time
Black-eyed peas can be harvested as soon as the pods are plump and easily detach from the stem. The harvest time depends on the variety and weather conditions. It usually takes about 60-90 days from sowing to harvest.
2. The Harvesting Method
Carefully pick the pods from the plants. Be careful not to damage the plants. You can eat the black-eyed peas fresh, freeze them, or dry them.
3. Storage
Fresh black-eyed peas can be stored in the refrigerator for a few days. Dried black-eyed peas can be stored in an airtight container in a cool, dry place for several months.
Additional Tips for a Bountiful Harvest
Water regularly: Make sure the plants get enough water, especially during the flowering and fruiting period.
Practice crop rotation: Do not grow black-eyed peas in the same spot every year. Rotate your crops to prevent diseases and pests.
Mulch: Cover the soil around the plants with mulch to retain moisture in the soil and suppress weeds.
Conclusion
So, there you have it! Embarking on your own cowpea garden from scratch is not just a rewarding experience; it’s a journey into self-sufficiency and a deeper connection with the food you consume. We’ve walked through the essential steps, from selecting the perfect location and preparing the soil to nurturing your young plants and harvesting your bountiful crop. But why is this DIY approach a must-try?
Firstly, growing your own cowpeas allows you complete control over the process. You know exactly what goes into your food – no harmful pesticides, no questionable fertilizers, just pure, natural goodness. This is especially important if you’re conscious about your health and the environment. Store-bought cowpeas, while convenient, often lack the freshness and vibrant flavor that homegrown varieties possess. The difference is truly remarkable.
Secondly, a cowpea garden from scratch is incredibly cost-effective in the long run. While there’s an initial investment in seeds, soil amendments, and perhaps some basic gardening tools, the yield from even a small plot can be substantial. You’ll be amazed at how much money you can save by growing your own beans, especially if you consume them regularly.
Thirdly, and perhaps most importantly, gardening is therapeutic. It’s a chance to disconnect from the digital world, get your hands dirty, and reconnect with nature. The simple act of nurturing a plant from seed to harvest is incredibly satisfying and can be a great stress reliever. Plus, you’ll be getting some much-needed vitamin D and fresh air in the process!
But don’t stop there! The beauty of gardening lies in its adaptability. Feel free to experiment with different varieties of cowpeas. Some popular choices include the Black-Eyed Pea, the Cream Pea, and the Pinkeye Purple Hull Pea. Each variety has its own unique flavor and texture, so try a few and see which ones you prefer.
Consider companion planting to further enhance your garden’s health and productivity. Marigolds, for example, are known to repel nematodes, while basil can deter aphids. Planting these alongside your cowpeas can help protect them from pests and diseases.
For those with limited space, container gardening is an excellent option. Cowpeas can thrive in large pots or raised beds, making them ideal for balconies, patios, or small yards. Just be sure to provide adequate drainage and support for the vines.
And if you’re feeling adventurous, why not try saving your own seeds from your most successful plants? This is a great way to ensure a consistent supply of your favorite varieties and adapt them to your local climate.
We wholeheartedly encourage you to give this DIY cowpea garden from scratch a try. It’s a rewarding experience that will not only provide you with delicious, healthy food but also connect you with nature in a meaningful way. Once you’ve harvested your first crop, we’d love to hear about your experience! Share your photos, tips, and challenges in the comments below. Let’s build a community of passionate gardeners and inspire others to grow their own food. Happy gardening!
Frequently Asked Questions (FAQ)
What is the best time of year to plant cowpeas?
The ideal time to plant cowpeas is after the last frost in spring, when the soil has warmed to at least 65°F (18°C). Cowpeas are warm-season crops and thrive in hot weather. In most regions, this typically falls between late spring and early summer. Planting too early can result in poor germination and stunted growth due to cold soil temperatures. If you live in a region with a short growing season, you can start your cowpea seeds indoors a few weeks before the last frost to give them a head start.
How much space do cowpeas need?
Cowpeas require adequate space to grow and thrive. Generally, you should space your cowpea plants about 4-6 inches apart in rows that are 2-3 feet apart. This spacing allows for proper air circulation, which helps prevent fungal diseases. If you’re growing bush varieties, you can space them closer together, but vining varieties will need more room to spread. Consider providing a trellis or other support structure for vining varieties to climb on, which will save space and improve air circulation.
What type of soil is best for growing cowpeas?
Cowpeas are relatively adaptable to different soil types, but they prefer well-drained, sandy loam soil with a pH between 6.0 and 7.0. Good drainage is crucial to prevent root rot. Before planting, amend the soil with compost or other organic matter to improve its fertility and drainage. Cowpeas are nitrogen-fixing plants, meaning they can convert atmospheric nitrogen into a form that plants can use. Therefore, they don’t require as much nitrogen fertilizer as other crops. However, adding a small amount of phosphorus and potassium can help promote healthy growth and pod development.
How often should I water my cowpea plants?
Cowpeas are relatively drought-tolerant, but they still need regular watering, especially during dry periods. Water deeply and infrequently, allowing the soil to dry out slightly between waterings. Avoid overwatering, as this can lead to root rot. The frequency of watering will depend on the weather conditions and the type of soil. Sandy soils will dry out more quickly than clay soils. Mulching around your cowpea plants can help retain moisture and suppress weeds.
What are some common pests and diseases that affect cowpeas?
Cowpeas can be susceptible to various pests and diseases, including aphids, bean beetles, nematodes, and fungal diseases like powdery mildew and root rot. Regularly inspect your plants for signs of pests or diseases. If you find any, take action promptly to prevent them from spreading. Organic pest control methods, such as insecticidal soap or neem oil, can be effective against aphids and bean beetles. Crop rotation and good sanitation practices can help prevent fungal diseases. Choose disease-resistant varieties of cowpeas whenever possible.
How do I know when my cowpeas are ready to harvest?
The timing of harvest depends on whether you’re harvesting the cowpeas for fresh use or for dried beans. For fresh use, harvest the pods when they are plump and tender, but before the beans inside have fully matured. The pods should snap easily from the plant. For dried beans, allow the pods to dry completely on the plant. The pods will turn brown and brittle, and the beans inside will be hard and dry. Harvest the pods on a dry day and spread them out in a well-ventilated area to dry further. Once the pods are completely dry, you can shell the beans and store them in an airtight container.
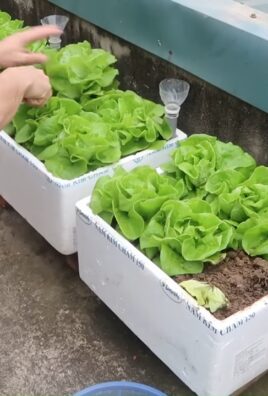
Can I grow cowpeas in containers?
Yes, cowpeas can be successfully grown in containers, making them a great option for gardeners with limited space. Choose a large container with good drainage holes. A 5-gallon container or larger is recommended. Fill the container with a well-draining potting mix. Plant your cowpea seeds according to the instructions on the seed packet. Provide a trellis or other support structure for vining varieties to climb on. Water regularly and fertilize with a balanced fertilizer every few weeks. Place the container in a sunny location that receives at least 6-8 hours of sunlight per day.
How can I improve the yield of my cowpea crop?
Several factors can influence the yield of your cowpea crop. Choose a sunny location with well-drained soil. Amend the soil with compost or other organic matter to improve its fertility. Water regularly and fertilize with a balanced fertilizer. Control pests and diseases promptly. Provide a trellis or other support structure for vining varieties. Harvest the pods regularly to encourage continued production. Consider using a nitrogen-fixing inoculant when planting to help the cowpeas fix more nitrogen from the atmosphere. Crop rotation can also help improve soil health and reduce the risk of pests and diseases.
Leave a Comment