
Chili cutting propagation: Unlock the secrets to multiplying your chili plants and enjoying a bountiful harvest year after year! Have you ever admired a friend’s thriving chili plant and wished you could have one just like it? Or perhaps you’re looking for a cost-effective and sustainable way to expand your garden? Well, you’re in the right place! This DIY guide will walk you through the simple yet effective process of chili cutting propagation, allowing you to create new chili plants from existing ones.
The practice of propagating plants through cuttings has ancient roots, dating back to early civilizations who discovered the power of vegetative reproduction. While we might not know exactly when chili cutting propagation specifically began, the general technique has been used for centuries to cultivate various plants. Today, it’s a fantastic way to preserve your favorite chili varieties and share them with fellow gardening enthusiasts.
Why should you learn this DIY trick? Because it’s incredibly rewarding! Not only does it save you money on buying new seedlings, but it also allows you to clone plants with desirable traits, like exceptional fruit production or disease resistance. Plus, it’s a fun and engaging project that connects you with the natural world. I’m excited to share my knowledge and help you master the art of chili cutting propagation. Let’s get started and transform your garden into a chili paradise!
Chili Propagation from Cuttings: Guaranteed Success!
Hey folks, do you also have a favorite chili plant that you absolutely want more of? Or maybe your plant is getting a bit old and you want to ensure its genes live on? Then propagation by cuttings is just the thing for you! I’ll show you how you can easily grow a new, healthy plant from a shoot of your chili. Don’t worry, it’s really not difficult!
What You Need for Chili Cutting Propagation:
- A healthy chili mother plant (preferably one that is not currently flowering or bearing fruit)
- A sharp, clean knife or a razor blade (disinfected!)
- Small pots (approx. 8-10 cm in diameter)
- Seed starting mix or coconut coir pellets
- Rooting hormone (optional, but recommended)
- A spray bottle with water
- A clear plastic bag or a mini-greenhouse
Why Cuttings? The Advantages at a Glance:
- Genetic Copy: You get an exact copy of your mother plant, with all its characteristics (heat level, yield, etc.).
- Faster Harvest: Cuttings often grow faster than plants grown from seed and bear fruit earlier.
- Simple Method: Propagation by cuttings is relatively easy and also suitable for beginners.
- Space-Saving: You can grow several cuttings in a small space.
The Preparation: The Key to Successful Cuttings
Before we get started, it’s important to prepare everything. A clean work environment and the right materials are crucial for success.
- Disinfect tools: This is super important! Take your knife or razor blade and disinfect it thoroughly with alcohol. This prevents diseases or fungi from getting into the cut.
- Prepare pots: Fill your small pots with seed starting mix or coconut coir pellets. The soil should be loose and well-draining. Water the soil lightly so that it is moist but not wet.
- Select the mother plant: Choose a healthy chili mother plant. It’s best if it’s not currently flowering or bearing fruit, as the plant then puts its energy into the flowers and fruits and less into rooting the cuttings.
- Prepare your workspace: Have everything you need ready: the prepared pots, the disinfected knife, the rooting hormone (if you are using it), the spray bottle, and the plastic bag or mini-greenhouse.
Cutting Cuttings: The Right Cut Makes All the Difference!
Now for the exciting part: cutting the cuttings. Precision is required here, but don’t worry, with a little practice it works out great!
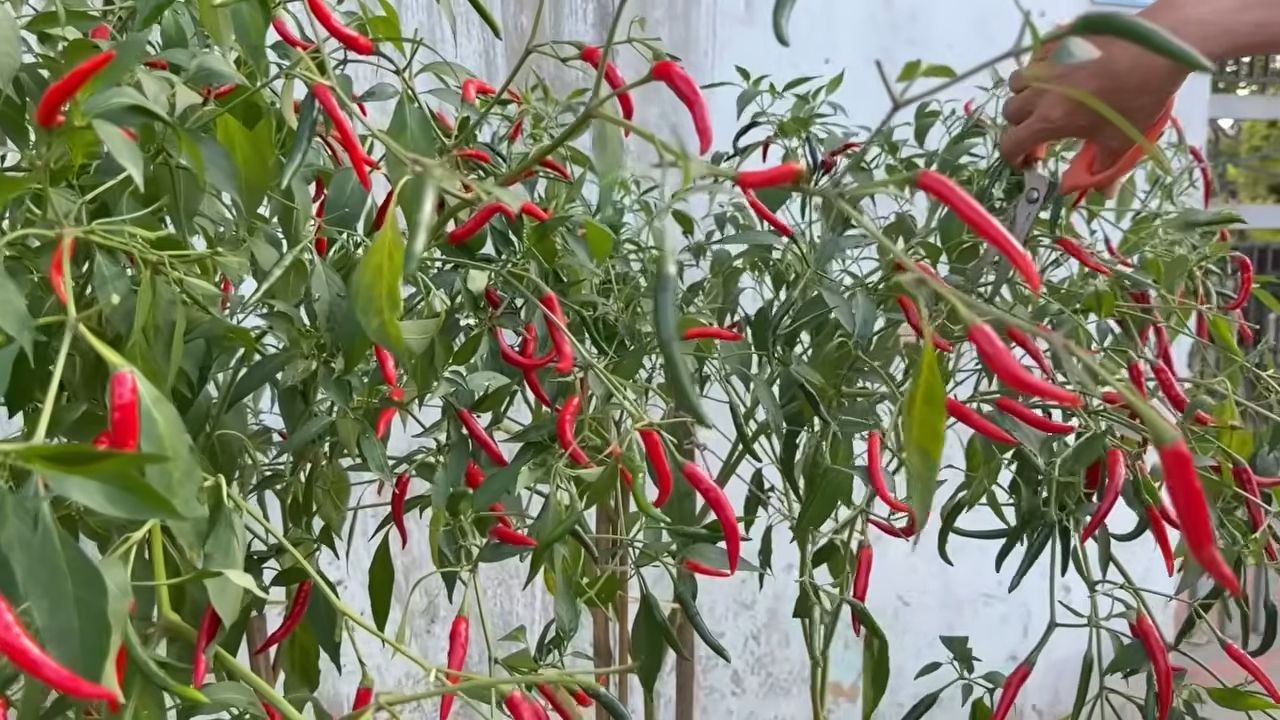
- Select the right shoot: Look for a healthy, strong shoot on your mother plant. The shoot should be about 8-12 cm long and have at least 2-3 leaf nodes. A leaf node is the point where a leaf grows out of the stem.
- Make the cut: Cut the shoot with the disinfected knife or razor blade just below a leaf node. The cut should be clean and smooth so the plant can heal well.
- Remove leaves: Remove the lower leaves of the cutting so that only the top 2-3 leaves remain. This prevents the plant from putting too much energy into the leaves and promotes rooting. If the remaining leaves are very large, you can cut them in half to reduce evaporation.
- Optional: Use rooting hormone: Dip the lower end of the cutting in rooting hormone. The hormone promotes root formation and increases the success rate. Be careful not to use too much hormone, as this can inhibit root formation.
Planting Cuttings: Into the Soil!
After you have cut and prepared the cuttings, they can go into the soil.
- Make a hole: With a pencil or a small stick, make a hole in the soil of the prepared pot. The hole should be deep enough to accommodate the cutting without the lower leaves touching the soil.
- Insert the cutting: Carefully place the cutting in the hole and press the soil down lightly. Make sure the cutting is stable.
- Water in: Water the cutting gently so that the soil is moist but not wet.
- Increase humidity: Place the pot with the cutting in a clear plastic bag or a mini-greenhouse. This increases the humidity and promotes rooting. Make sure the leaves of the cutting do not touch the plastic bag.
The Care: Patience is Required!
Now it’s time to be patient and take good care of the cuttings.
- Location: Place the cuttings in a bright, warm place, but not in direct sun. Direct sunlight can burn the leaves.
- Moisture: Keep the soil moist, but not wet. Spray the cuttings regularly with water to keep the humidity high.
- Ventilation: Ventilate the plastic bag or mini-greenhouse regularly to prevent mold. Once a day is usually sufficient.
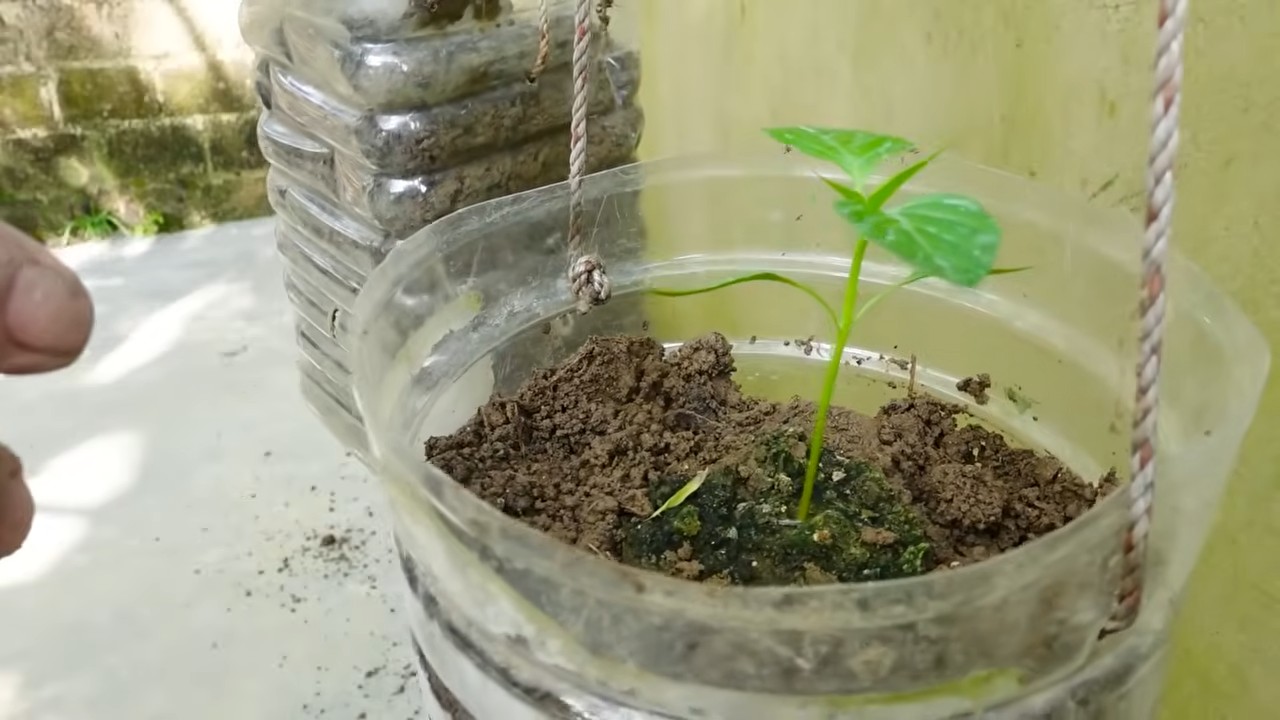
- Root formation: After about 2-4 weeks, the first roots should have formed. You can check this by gently pulling on the cutting. If it resists, it has formed roots.
- Repotting: Once the roots are well developed, you can repot the cuttings into larger pots. Use a good chili soil for this.
Common Problems and Solutions:
- Cutting is rotting: This indicates too high humidity or too much water. Ventilate the plastic bag more often and water less.
- Cutting is wilting: This indicates too low humidity or too little water. Spray the cuttings with water more often and water regularly.
- No root formation: This can have various causes: too little light, too low temperature, poor quality of the cuttings, or the wrong soil. Optimize the conditions and try again with new cuttings.
Additional Tips for Success:
- Use fresh seed starting mix: Old soil can contain diseases or pests that impair the rooting of the cuttings.
- Pay attention to the temperature: The ideal temperature for rooting chili cuttings is between 22 and 25 degrees Celsius.
- Use a heating mat: A heating mat under the pots can speed up rooting.
- Be patient: Rooting cuttings can take several weeks. Don’t give up if it doesn’t work right away!
I hope this guide helps you to grow your own chili cuttings. Good luck and have fun gardening! And remember: practice makes perfect! Let me know if you have any questions or want to share your experiences. I look forward to hearing from you
Conclusion
So, there you have it! Mastering chili cutting propagation is not just a fun gardening experiment; it’s a game-changer for any chili lover. Imagine having a continuous supply of your favorite chili varieties, all propagated from a single, healthy mother plant. No more relying solely on seeds, which can sometimes be unreliable or produce variations you didn’t expect. This method offers a direct clone, ensuring you get the exact same fiery flavor and heat level every time.
But why is this DIY trick a must-try? Firstly, it’s incredibly cost-effective. Once you’ve invested in a healthy chili plant, you can essentially create an endless supply of new plants without spending a dime on seeds. Secondly, it’s a fantastic way to preserve your favorite chili varieties. If you have a particular chili that you absolutely adore, propagation ensures its survival and continued availability in your garden. Thirdly, it’s a rewarding and educational experience. Watching your cuttings take root and grow into thriving plants is incredibly satisfying and deepens your understanding of plant biology.
Beyond the basic method outlined, there are plenty of ways to experiment and personalize your chili cutting propagation. For example, you could try using different rooting hormones to see which one yields the best results for your specific chili variety. Some gardeners swear by honey as a natural rooting agent, while others prefer commercial hormone powders or gels. You could also experiment with different growing mediums. While we recommended a well-draining potting mix, you could also try perlite, vermiculite, or even a hydroponic setup.
Consider the type of chili you are propagating. Some varieties, like cayenne or jalapeno, tend to root more easily than others, such as habaneros or scotch bonnets. Adjust your approach accordingly. For more challenging varieties, you might want to increase humidity by using a propagation dome or covering your cuttings with a plastic bag.
Don’t be afraid to get creative! You can even try grafting different chili varieties onto a single rootstock to create a unique and fascinating plant with multiple types of chilies. This is a more advanced technique, but it’s a fun challenge for experienced gardeners.
We wholeheartedly encourage you to give chili cutting propagation a try. It’s a simple, affordable, and rewarding way to expand your chili garden and ensure a continuous supply of your favorite peppers. Once you’ve successfully propagated your chili cuttings, we’d love to hear about your experience! Share your tips, tricks, and photos in the comments section below. Let’s build a community of chili enthusiasts who are passionate about growing their own peppers from cuttings. Your insights could help other gardeners succeed and discover the joys of this fantastic DIY trick. Happy growing!
FAQ
What are the best chili varieties to propagate from cuttings?
While many chili varieties can be propagated from cuttings, some are generally easier to root than others. Jalapenos and cayenne peppers are known for their relatively high success rates. Other varieties like serranos and Thai chilies also tend to root well. Habaneros and Scotch Bonnets can be more challenging, requiring more attention to humidity and temperature. Experiment with different varieties to see what works best for you, but starting with easier-to-root varieties is recommended for beginners. Remember that the health of the mother plant plays a significant role in the success of propagation, regardless of the variety.
How long does it take for chili cuttings to root?
The time it takes for chili cuttings to root can vary depending on several factors, including the chili variety, the rooting medium, temperature, humidity, and the use of rooting hormones. Generally, you can expect to see roots forming within 2-4 weeks. However, some cuttings may take longer, especially if the conditions are not optimal. Be patient and avoid disturbing the cuttings too much during this period. Check for root development by gently tugging on the cutting. If you feel resistance, it’s likely that roots have formed.
What is the best rooting hormone to use for chili cuttings?
There are several options for rooting hormones, both commercial and natural. Commercial rooting hormones, available in powder or gel form, contain synthetic auxins that promote root development. These are generally effective and can speed up the rooting process. Popular brands include Clonex and Rootone. Alternatively, you can try natural rooting agents like honey or willow water. Honey contains enzymes that can stimulate root growth, while willow water contains salicylic acid, a natural rooting hormone. To use honey, simply dip the cut end of the chili cutting in honey before planting it in the rooting medium. To make willow water, soak willow branches in water for several days, then use the water to moisten the rooting medium. Experiment with different rooting hormones to see which one works best for your chili variety and growing conditions.
What are the signs of a successful chili cutting propagation?
The most obvious sign of successful chili cutting propagation is the development of roots. You can check for root development by gently tugging on the cutting. If you feel resistance, it’s likely that roots have formed. Other signs include new leaf growth, which indicates that the cutting is actively growing and absorbing nutrients. The cutting should also appear healthy and vibrant, with no signs of wilting or yellowing. If the cutting remains green and firm and shows signs of new growth, it’s a good indication that it has successfully rooted.
What are common problems and how to troubleshoot them?
One common problem is cuttings rotting before they root. This is usually caused by excessive moisture or poor drainage. To prevent this, use a well-draining rooting medium and avoid overwatering. Ensure that the cuttings have adequate ventilation to prevent fungal growth. Another common problem is cuttings wilting. This can be caused by low humidity or insufficient water. To address this, increase humidity by using a propagation dome or covering the cuttings with a plastic bag. Make sure the rooting medium is consistently moist, but not waterlogged. If the cuttings are not rooting after several weeks, try using a stronger rooting hormone or adjusting the temperature and humidity. Ensure that the cuttings are receiving adequate light, but avoid direct sunlight, which can scorch the leaves.
Can I propagate chili cuttings in water?
While it’s possible to propagate chili cuttings in water, it’s generally not the most effective method. Cuttings rooted in water tend to develop water roots, which are different from the roots that grow in soil. When you transplant water-rooted cuttings into soil, they may struggle to adapt and can experience transplant shock. However, if you choose to propagate in water, use a clean glass or jar filled with water. Change the water every few days to prevent bacterial growth. Once the roots are about an inch long, carefully transplant the cutting into a well-draining potting mix.
What kind of light do chili cuttings need?
Chili cuttings need bright, indirect light to thrive. Avoid direct sunlight, which can scorch the leaves and damage the cuttings. A location near a window with filtered sunlight is ideal. If you don’t have access to natural light, you can use grow lights. LED grow lights are a good option because they provide the necessary light spectrum without generating excessive heat. Position the grow lights about 12-18 inches above the cuttings.
How often should I water chili cuttings?
The frequency of watering depends on the rooting medium, temperature, and humidity. The goal is to keep the rooting medium consistently moist, but not waterlogged. Check the moisture level of the rooting medium daily. If the top inch feels dry, water the cuttings gently. Avoid overwatering, as this can lead to root rot. Using a spray bottle to mist the cuttings can help maintain humidity without overwatering.
When can I transplant my rooted chili cuttings?
Once the chili cuttings have developed a healthy root system, typically after 4-6 weeks, they can be transplanted into individual pots. Choose pots that are appropriately sized for the cuttings, usually 3-4 inch pots. Use a well-draining potting mix that is rich in nutrients. Gently remove the cuttings from the rooting medium, being careful not to damage the roots. Plant the cuttings in the pots and water them thoroughly. Place the pots in a location with bright, indirect light. Gradually acclimate the transplanted cuttings to outdoor conditions before planting them in the garden.

Leave a Comment