
Bell Pepper Container Gardening: Imagine plucking a vibrant, juicy bell pepper straight from your patio, ready to add a burst of flavor to your next meal. Sounds dreamy, right? Well, it doesn’t have to be just a dream! For centuries, people have cultivated gardens in limited spaces, from the hanging gardens of Babylon to the window boxes of Parisian apartments. This DIY guide will unlock the secrets to successfully growing your own bell peppers, even if you only have a small balcony or a sunny windowsill.
Why should you embrace bell pepper container gardening? Because fresh, homegrown produce is simply unbeatable! Store-bought peppers often lack the vibrant taste and crisp texture of those grown with love and care. Plus, knowing exactly where your food comes from and how it was grown provides peace of mind. This DIY project is perfect for apartment dwellers, urban gardeners, or anyone looking to add a touch of green to their lives. I’m going to show you how to bypass common gardening pitfalls and enjoy a bountiful harvest of delicious bell peppers, all from the comfort of your own home.
DIY Bell Pepper Container Gardening: From Seed to Salsa on Your Patio!
Hey there, fellow gardening enthusiasts! I’m so excited to share my tried-and-true method for growing bell peppers in containers. It’s easier than you might think, and nothing beats the taste of a homegrown bell pepper, especially when you’ve nurtured it from a tiny seed. This guide will walk you through every step, from choosing the right seeds to harvesting your colorful bounty. Let’s get our hands dirty!
Choosing Your Bell Pepper Varieties
Before we dive into the nitty-gritty, let’s talk peppers! The beauty of container gardening is that you can grow almost any variety, but some are better suited than others.
* Consider size: Smaller, more compact varieties like ‘Patio Bell’ or ‘Mini Bell’ are ideal for smaller containers. They won’t get too top-heavy and are generally more productive in limited space.
* Think about color: Red, yellow, orange, green – the choice is yours! Each color offers a slightly different flavor profile. I personally love growing a mix for a vibrant and flavorful harvest.
* Check the days to maturity: This is crucial! If you live in a cooler climate with a shorter growing season, opt for varieties that mature quickly (around 60-70 days).
* Read reviews: See what other gardeners are saying about specific varieties in containers. Their experiences can be invaluable.
I usually go for a combination of ‘California Wonder’ (a classic green bell pepper), ‘Golden Bell’ (sweet and mild), and maybe a ‘Chocolate Beauty’ for something a little different.
Gathering Your Supplies
Okay, time to gather our gardening arsenal! Here’s what you’ll need:
* Bell pepper seeds: Choose your favorite varieties!
* Seed starting trays or small pots: These are essential for starting your seeds indoors.
* Seed starting mix: This is a light, sterile mix that’s perfect for delicate seedlings.
* Larger containers (at least 5 gallons): These will be the peppers’ permanent homes. Make sure they have drainage holes!
* High-quality potting mix: Avoid using garden soil, as it can compact in containers.
* Slow-release fertilizer: This will provide your peppers with a steady supply of nutrients.
* Watering can or hose: For keeping your plants hydrated.
* Plant labels and a permanent marker: To keep track of your varieties.
* Optional:
* Grow lights: If you don’t have a sunny windowsill.
* Heat mat: To speed up germination.
* Tomato cages or stakes: To support the plants as they grow.
* Gardening gloves: To keep your hands clean.
Starting Your Seeds Indoors (6-8 Weeks Before Last Frost)
This is where the magic begins! Starting your seeds indoors gives them a head start, especially in colder climates.
1. Prepare your seed starting trays: Fill each cell or pot with seed starting mix. Gently tap the trays to settle the mix.
2. Sow the seeds: Plant 2-3 seeds per cell, about ¼ inch deep.
3. Water gently: Use a spray bottle or watering can with a gentle rose to avoid disturbing the seeds.
4. Cover the trays: Place a clear plastic dome or plastic wrap over the trays to create a humid environment.
5. Provide warmth: Place the trays on a heat mat or in a warm location (around 70-75°F).
6. Wait for germination: Seeds typically germinate in 7-14 days.
7. Remove the cover: Once the seedlings emerge, remove the plastic cover to prevent fungal diseases.
8. Provide light: Place the trays under grow lights or on a sunny windowsill. If using a windowsill, rotate the trays regularly to prevent the seedlings from leaning towards the light.
9. Thin the seedlings: Once the seedlings have their first true leaves (the second set of leaves), thin them to one seedling per cell. Snip off the weaker seedlings at the soil line with scissors. Don’t pull them out, as this can disturb the roots of the remaining seedling.
10. Water regularly: Keep the soil consistently moist, but not soggy.
11. Fertilize lightly: Once the seedlings have their second set of true leaves, start fertilizing them with a diluted liquid fertilizer (half strength) every 1-2 weeks.
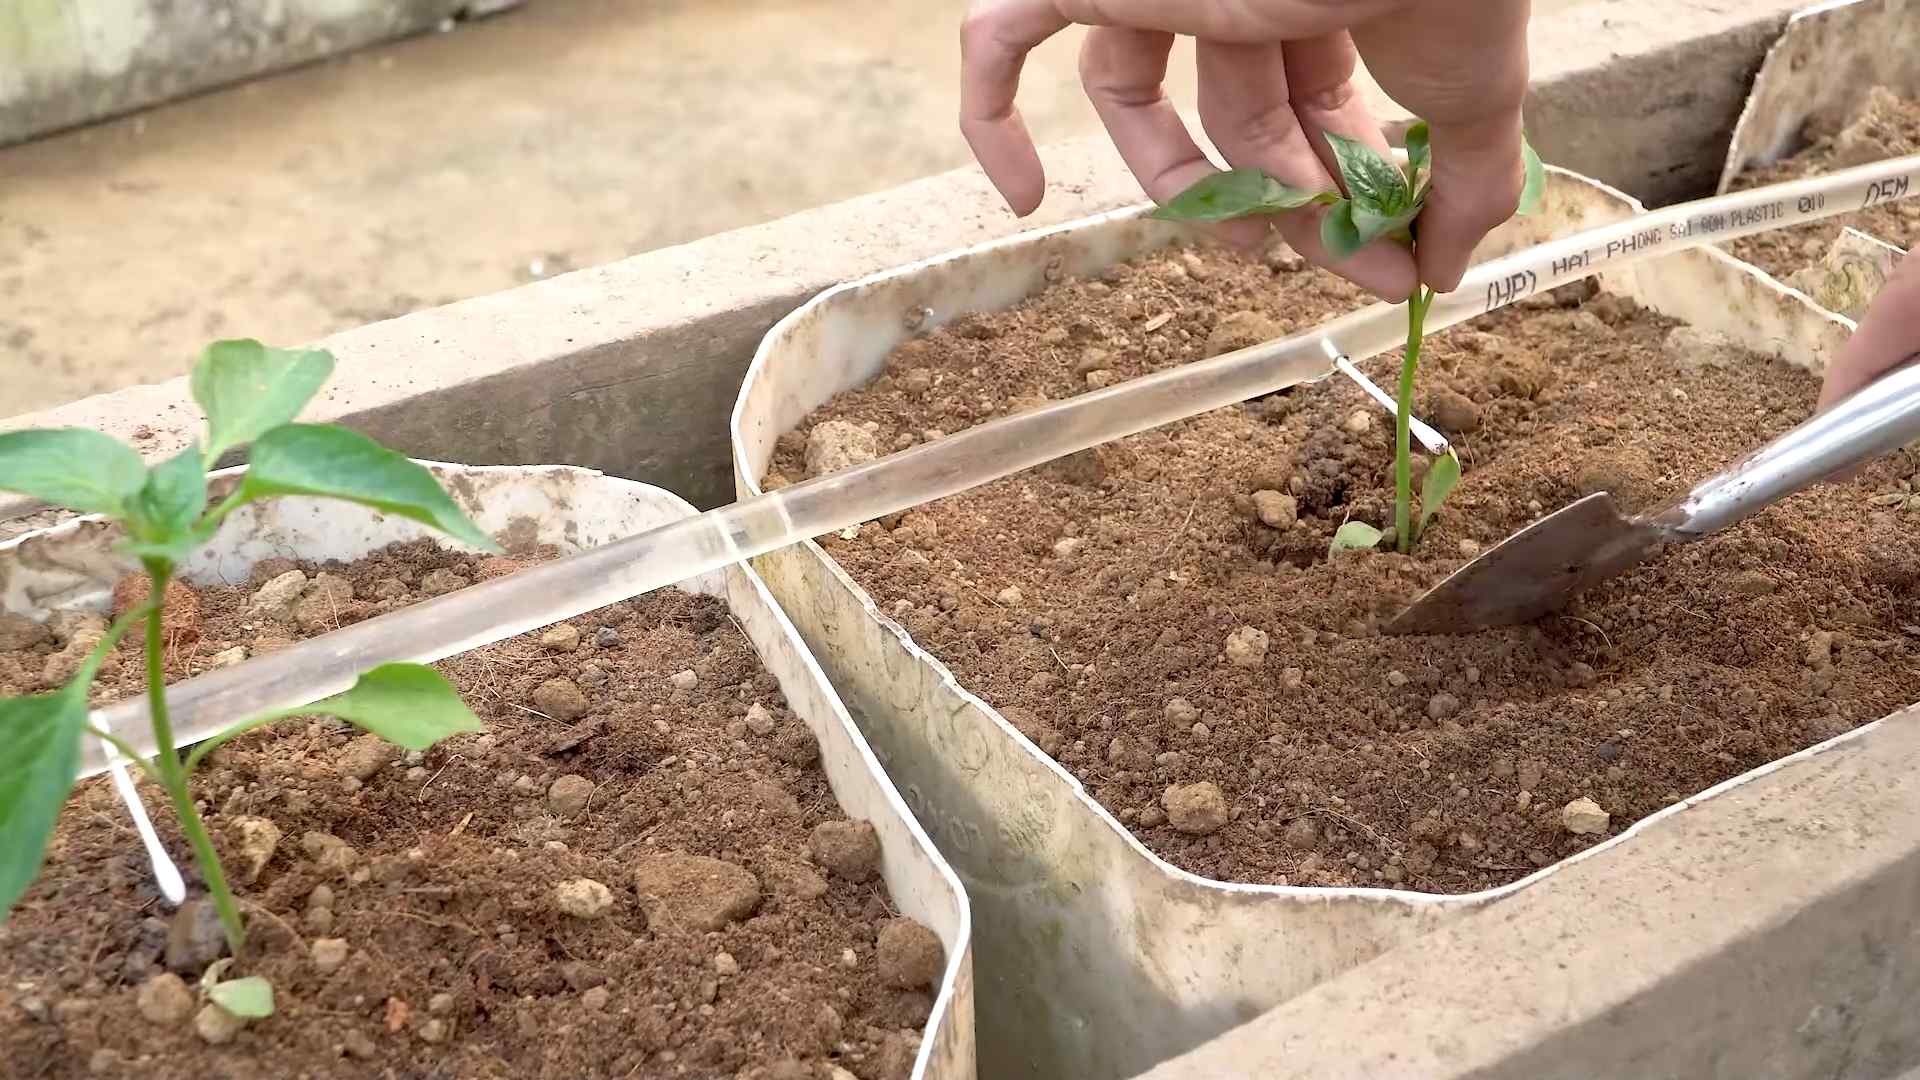
Transplanting Your Seedlings to Larger Containers
Once the danger of frost has passed and your seedlings are a few inches tall, it’s time to transplant them to their permanent containers.
1. Harden off the seedlings: This is crucial to acclimate them to outdoor conditions. Gradually expose them to the outdoors for increasing periods of time over a week or two. Start with an hour or two in a sheltered location and gradually increase the time and exposure to sunlight.
2. Prepare your containers: Fill the containers with high-quality potting mix, leaving a few inches of space at the top.
3. Add slow-release fertilizer: Mix a slow-release fertilizer into the potting mix according to the package directions.
4. Dig a hole: Dig a hole in the center of each container that’s large enough to accommodate the root ball of the seedling.
5. Gently remove the seedling: Carefully remove the seedling from its cell or pot, being careful not to damage the roots. Gently loosen the roots if they are circling the bottom of the container.
6. Place the seedling in the hole: Position the seedling in the hole so that the top of the root ball is level with the surrounding soil.
7. Fill in the hole: Fill in the hole with potting mix and gently firm the soil around the seedling.
8. Water thoroughly: Water the newly transplanted seedlings thoroughly.
9. Add support (optional): If you’re growing a larger variety, insert a tomato cage or stake into the container to provide support as the plant grows.
Caring for Your Bell Pepper Plants
Now that your peppers are in their containers, it’s time to provide them with the care they need to thrive.
* Sunlight: Bell peppers need at least 6-8 hours of sunlight per day. Place your containers in a sunny location.
* Watering: Water regularly, especially during hot, dry weather. Check the soil moisture regularly and water when the top inch of soil feels dry. Avoid overwatering, as this can lead to root rot.
* Fertilizing: Continue to fertilize your plants every 2-3 weeks with a balanced liquid fertilizer.
* Pruning: Pruning isn’t essential, but it can help to improve air circulation and encourage fruit production. Remove any suckers (small shoots that grow from the base of the plant) and any yellowing or diseased leaves.
* Pest control: Keep an eye out for pests like aphids, whiteflies, and spider mites. Treat infestations promptly with insecticidal soap or neem oil.
* Pollination: Bell peppers are self-pollinating, but you can help them along by gently shaking the plants or using a small paintbrush to transfer pollen from one flower to another. This is especially helpful if you’re growing your peppers indoors.
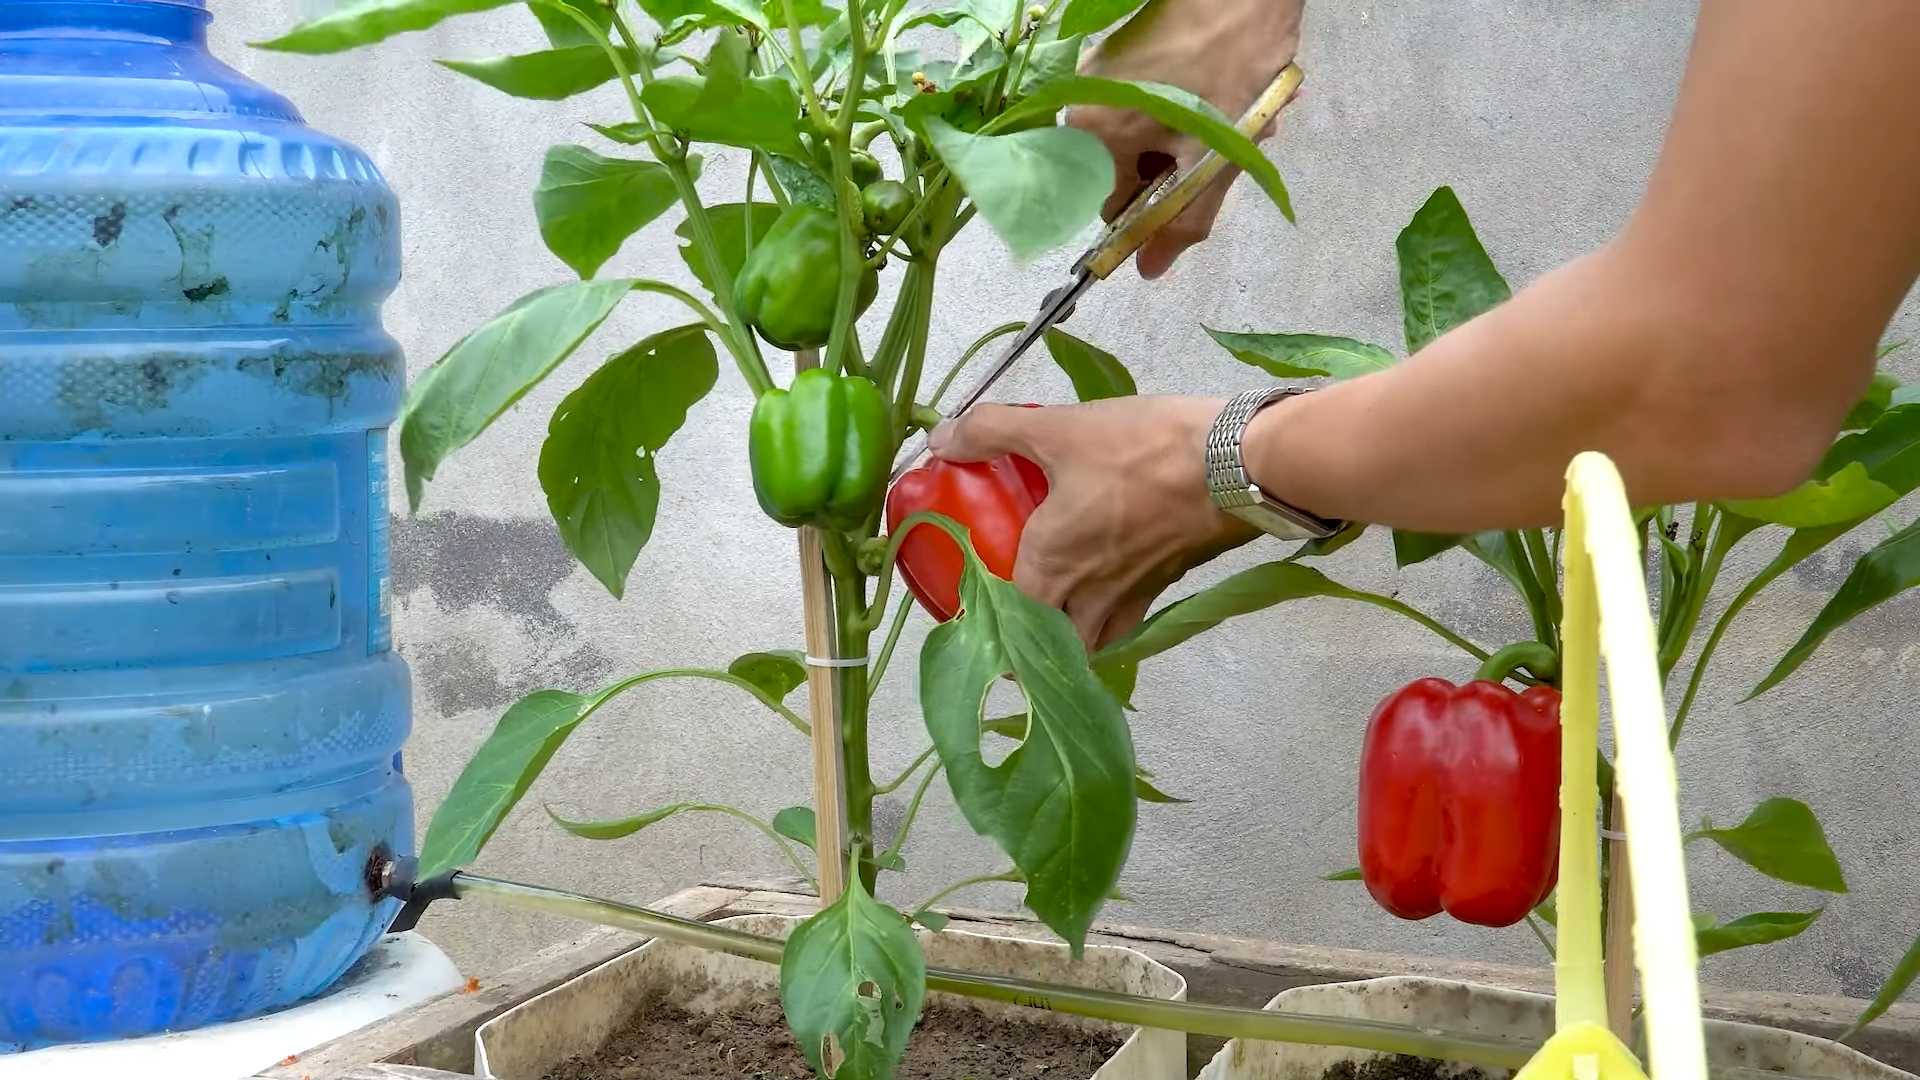
Harvesting Your Bell Peppers
The moment we’ve all been waiting for! Harvesting your bell peppers is the most rewarding part of the process.
* When to harvest: You can harvest bell peppers at any stage of maturity, but they are sweetest and most flavorful when they are fully colored. Green bell peppers are simply unripe red, yellow, or orange peppers.
* How to harvest: Use a sharp knife or pruning shears to cut the pepper from the plant, leaving a short stem attached.
* Enjoy your harvest: Use your homegrown bell peppers in salads, stir-fries, salsas, or any other dish you can imagine!
Troubleshooting Common Problems
Even with the best care, you might encounter some problems along the way. Here are a few common issues and how to address them:
* Blossom end rot: This is caused by a calcium deficiency. Ensure consistent watering and consider adding calcium to the soil.
* Sunscald: This occurs when peppers are exposed to too much direct sunlight, causing them to develop white or tan patches. Provide shade during the hottest part of the day.
* Pest infestations: As mentioned earlier, treat infestations promptly with insecticidal soap or neem oil.
* Lack of fruit: This can be caused by a variety of factors, including lack of sunlight, poor pollination, or nutrient deficiencies. Ensure your plants are getting enough sunlight, water, and fertilizer.
Extending Your Growing Season
If you live in a cooler climate, you can extend your growing season by using row covers or a cold frame to protect your plants from
Conclusion
So, there you have it! Growing your own bell peppers in containers is not only achievable, but it’s also incredibly rewarding. We’ve walked you through the entire process, from selecting the right container and soil to nurturing your plants and harvesting those vibrant, flavorful peppers. But why should you take the plunge and try this DIY trick?
Firstly, consider the convenience. Imagine stepping outside your door and picking fresh, organic bell peppers whenever you need them. No more trips to the grocery store, no more wondering about the origin of your produce. You’ll have complete control over what goes into your bell peppers, ensuring they’re free from harmful pesticides and chemicals.
Secondly, think about the cost savings. While there’s an initial investment in containers, soil, and seedlings, you’ll quickly recoup that cost by avoiding the inflated prices of store-bought bell peppers, especially during off-seasons. Plus, you can save seeds from your harvest to grow even more peppers next year, creating a sustainable cycle of deliciousness.
Thirdly, and perhaps most importantly, growing bell peppers in containers is a fantastic way to connect with nature and experience the satisfaction of nurturing something from seed to harvest. It’s a therapeutic activity that can reduce stress, improve your mood, and give you a sense of accomplishment.
But the beauty of container gardening lies in its adaptability. Feel free to experiment with different bell pepper varieties. Try growing a mix of red, yellow, orange, and green peppers for a colorful and diverse harvest. Or, if you’re feeling adventurous, explore some of the more exotic varieties like purple or chocolate bell peppers.
You can also customize your soil mix to suit your specific needs. Adding compost or other organic matter will enrich the soil and provide your plants with essential nutrients. Consider using a self-watering container to simplify watering and prevent over or under-watering.
For those with limited space, consider growing bell peppers in hanging baskets. This is a great way to maximize your vertical space and add a touch of greenery to your balcony or patio. Just be sure to choose a sturdy basket and provide adequate support for the plants as they grow.
Another variation is to companion plant your bell peppers with other herbs and vegetables. Basil, for example, is known to repel pests and improve the flavor of bell peppers. Marigolds are also effective at deterring nematodes and other soil-borne pests.
Don’t be afraid to experiment and find what works best for you and your growing conditions. The key is to provide your bell peppers with plenty of sunlight, water, and nutrients, and to protect them from extreme temperatures and pests.
Growing bell peppers in containers is a rewarding and accessible way to enjoy fresh, homegrown produce, even if you don’t have a traditional garden. It’s a must-try for anyone who loves fresh, flavorful food and wants to connect with nature.
We’re confident that you’ll be amazed at how easy and enjoyable it is to grow your own bell peppers. So, grab a container, some soil, and a few seedlings, and get started today!
We’d love to hear about your experience growing bell peppers in containers. Share your tips, tricks, and photos with us in the comments below. Let’s create a community of container gardening enthusiasts and inspire others to grow their own food. Happy gardening!
Frequently Asked Questions (FAQ)
1. What is the best size container for growing bell peppers?
The ideal container size for bell peppers is at least 5 gallons, but 7-10 gallons is even better. This provides ample space for the roots to grow and develop, which is essential for healthy plant growth and abundant pepper production. Smaller containers can restrict root growth, leading to stunted plants and fewer peppers. Consider the mature size of the bell pepper variety you’re growing when choosing a container. Larger varieties will benefit from larger containers. Also, ensure the container has adequate drainage holes to prevent waterlogging, which can lead to root rot.
2. What type of soil is best for container-grown bell peppers?
Bell peppers thrive in well-draining, nutrient-rich soil. A good potting mix specifically formulated for vegetables is an excellent choice. Avoid using garden soil, as it can be too heavy and compact in containers, hindering drainage and root development. You can also create your own potting mix by combining equal parts of peat moss (or coconut coir), perlite, and compost. Adding compost provides essential nutrients and improves soil structure. Consider amending the soil with slow-release fertilizer to provide a steady supply of nutrients throughout the growing season.
3. How much sunlight do bell peppers need?
Bell peppers require at least 6-8 hours of direct sunlight per day to produce a bountiful harvest. Choose a location that receives full sun exposure. If you live in a particularly hot climate, some afternoon shade may be beneficial to prevent the plants from overheating. If you don’t have a sunny spot, you can supplement with grow lights. Rotate the containers regularly to ensure all sides of the plant receive adequate sunlight. Insufficient sunlight can lead to leggy plants and reduced pepper production.
4. How often should I water my container-grown bell peppers?
Water bell peppers regularly, especially during hot, dry weather. The soil should be kept consistently moist, but not waterlogged. Check the soil moisture level by sticking your finger about an inch into the soil. If it feels dry, it’s time to water. Water deeply, allowing the water to drain out of the drainage holes. Avoid overhead watering, as this can promote fungal diseases. Consider using a soaker hose or drip irrigation system to deliver water directly to the roots. Mulching around the base of the plant can help retain moisture and suppress weeds.
5. How often should I fertilize my bell pepper plants?
Bell peppers are heavy feeders and require regular fertilization to produce a good crop. Start fertilizing about two weeks after transplanting the seedlings into the containers. Use a balanced fertilizer with an NPK ratio of 10-10-10 or 14-14-14. Follow the instructions on the fertilizer label for application rates. Fertilize every 2-3 weeks throughout the growing season. You can also supplement with liquid seaweed or fish emulsion for an extra boost of nutrients. Avoid over-fertilizing, as this can lead to excessive foliage growth and reduced pepper production.
6. What are some common pests and diseases that affect bell peppers?
Common pests that affect bell peppers include aphids, spider mites, whiteflies, and pepper hornworms. Regularly inspect your plants for signs of infestation. You can control these pests with insecticidal soap, neem oil, or by hand-picking them off the plants. Common diseases include blossom-end rot, fungal leaf spot, and powdery mildew. Blossom-end rot is caused by calcium deficiency and can be prevented by ensuring adequate calcium levels in the soil. Fungal diseases can be prevented by providing good air circulation and avoiding overhead watering. Use a fungicide if necessary.
7. How do I prevent blossom-end rot in my bell peppers?
Blossom-end rot is a common problem in bell peppers, characterized by a dark, sunken spot on the bottom of the pepper. It’s caused by a calcium deficiency, which can be due to insufficient calcium in the soil or inconsistent watering. To prevent blossom-end rot, ensure your soil is rich in calcium. You can add lime or bone meal to the soil before planting. Water your plants consistently to maintain even soil moisture. Avoid letting the soil dry out completely, as this can prevent the plants from absorbing calcium. You can also use a calcium spray to supplement the plants with calcium.
8. When should I harvest my bell peppers?
Bell peppers are typically ready to harvest 60-90 days after transplanting, depending on the variety. The peppers should be firm, glossy, and fully colored. You can harvest them at any stage of ripeness, but they will be sweetest and most flavorful when fully ripe. Use a sharp knife or pruning shears to cut the peppers from the plant, leaving a short stem attached. Regular harvesting encourages the plant to produce more peppers.
9. Can I grow bell peppers indoors?
Yes, you can grow bell peppers indoors, but it requires providing them with adequate light and warmth. You’ll need to use grow lights to supplement natural sunlight, as bell peppers need at least 6-8 hours of light per day. Choose a warm location with temperatures between 70-80°F during the day and 60-70°F at night. Use a well-draining potting mix and water regularly. You may also need to hand-pollinate the flowers to ensure fruit set.
10. Can I save seeds from my bell peppers to grow next year?
Yes, you can save seeds from your bell peppers to grow next year, but keep in mind that hybrid varieties may not produce true-to-type offspring. To save seeds, allow the peppers to fully ripen on the plant. Cut open the pepper and remove the seeds. Rinse the seeds in water to remove any pulp. Spread the seeds out on a paper towel to dry completely. Store the dried seeds in an airtight container in a cool, dark place.

Leave a Comment