
Balcony strawberry growing soil free might sound like something out of a sci-fi movie, but trust me, it’s totally achievable and incredibly rewarding! Imagine stepping onto your balcony and plucking juicy, red strawberries, all without the mess and hassle of traditional soil. Sounds dreamy, right?
For centuries, humans have cultivated strawberries, with evidence suggesting their consumption dates back to ancient Rome. But the idea of growing them in urban spaces, especially without soil, is a relatively modern innovation, driven by a desire for fresh, local produce, even in the smallest of apartments. This DIY guide is your ticket to joining that movement!
Let’s face it, not everyone has a sprawling garden. Many of us are confined to balconies, patios, or even just a sunny windowsill. And even if you *do* have a garden, dealing with soil can be messy, time-consuming, and prone to pests and diseases. That’s where soil-free growing comes in! This method, often called hydroponics or soilless culture, allows you to control the nutrients your strawberries receive, leading to healthier plants and bigger yields. Plus, it’s a fantastic way to recycle materials and reduce your environmental impact. I’m excited to share my favorite tricks and hacks for successful balcony strawberry growing soil free, so you can enjoy a bountiful harvest right outside your door. Get ready to ditch the dirt and embrace a cleaner, easier, and more productive way to grow your own delicious strawberries!
DIY Balcony Strawberry Garden: Soil-Free Success!
Hey there, fellow balcony gardeners! Dreaming of juicy, homegrown strawberries but short on space and tired of dealing with messy soil? Well, you’ve come to the right place! I’m going to walk you through creating a thriving strawberry garden on your balcony, completely soil-free. This method is cleaner, lighter, and often yields surprisingly delicious results. Get ready to enjoy fresh strawberries right outside your door!
What You’ll Need: The Essentials
Before we dive in, let’s gather our supplies. This is a crucial step, so make sure you have everything on hand to avoid any mid-project hiccups.
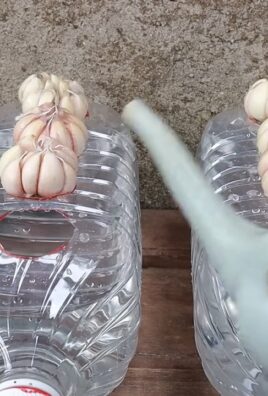
* A Suitable Container: This is where the magic happens! I recommend using a vertical planter, a hanging basket, or even repurposed plastic bottles. The key is good drainage and enough space for the roots to spread. For this guide, I’ll focus on using a multi-tiered vertical planter, as it maximizes space.
* Coco Coir: This is our soil substitute! Coco coir is made from coconut husks and is an excellent growing medium. It’s lightweight, retains moisture well, and provides good aeration for the roots. You can buy it in compressed bricks or loose form.
* Perlite: This volcanic glass helps improve drainage and aeration. Mix it with the coco coir for optimal results.
* Vermiculite: Similar to perlite, vermiculite helps retain moisture and nutrients. A good addition for a balanced growing medium.
* Nutrient Solution: Since we’re not using soil, we need to provide our strawberries with all the essential nutrients they need. Look for a balanced liquid fertilizer specifically formulated for strawberries or fruits and vegetables.
* Strawberry Plants: Of course! You can start with bare-root plants, runners, or established plants from a nursery. I prefer established plants for faster results. Choose everbearing varieties for a continuous harvest throughout the season.
* Watering Can or Hose: For regular watering.
* pH Meter (Optional but Recommended): To ensure the nutrient solution is at the correct pH level for optimal nutrient absorption. Strawberries prefer a slightly acidic pH (around 5.5-6.5).
* Gloves: To keep your hands clean.
* Small Trowel or Scoop: For mixing and transferring the coco coir mixture.
* Measuring Cups/Spoons: For accurate mixing of the nutrient solution.
Preparing the Coco Coir Mixture
This is the foundation of our soil-free garden. Getting the mixture right is essential for healthy strawberry plants.
1. Hydrate the Coco Coir: If you’re using compressed coco coir bricks, you’ll need to hydrate them first. Place the brick in a large container and add water according to the package instructions. It will expand significantly, so make sure you have enough space. Let it soak for the recommended time, usually around 30-60 minutes.
2. Fluff the Coco Coir: Once the coco coir is fully hydrated, fluff it up with your hands or a trowel to break up any clumps. This will improve aeration and drainage.
3. Mix in Perlite and Vermiculite: In a large container or on a clean surface, combine the hydrated coco coir with perlite and vermiculite. A good ratio is approximately 70% coco coir, 15% perlite, and 15% vermiculite. Adjust the ratio slightly based on your local climate. If you live in a very humid area, you might want to increase the perlite percentage for better drainage.
4. Mix Thoroughly: Use your hands or a trowel to mix the ingredients thoroughly until they are evenly distributed. The mixture should be light, airy, and slightly moist.
Planting Your Strawberries
Now for the fun part! Let’s get those strawberry plants into their new home.
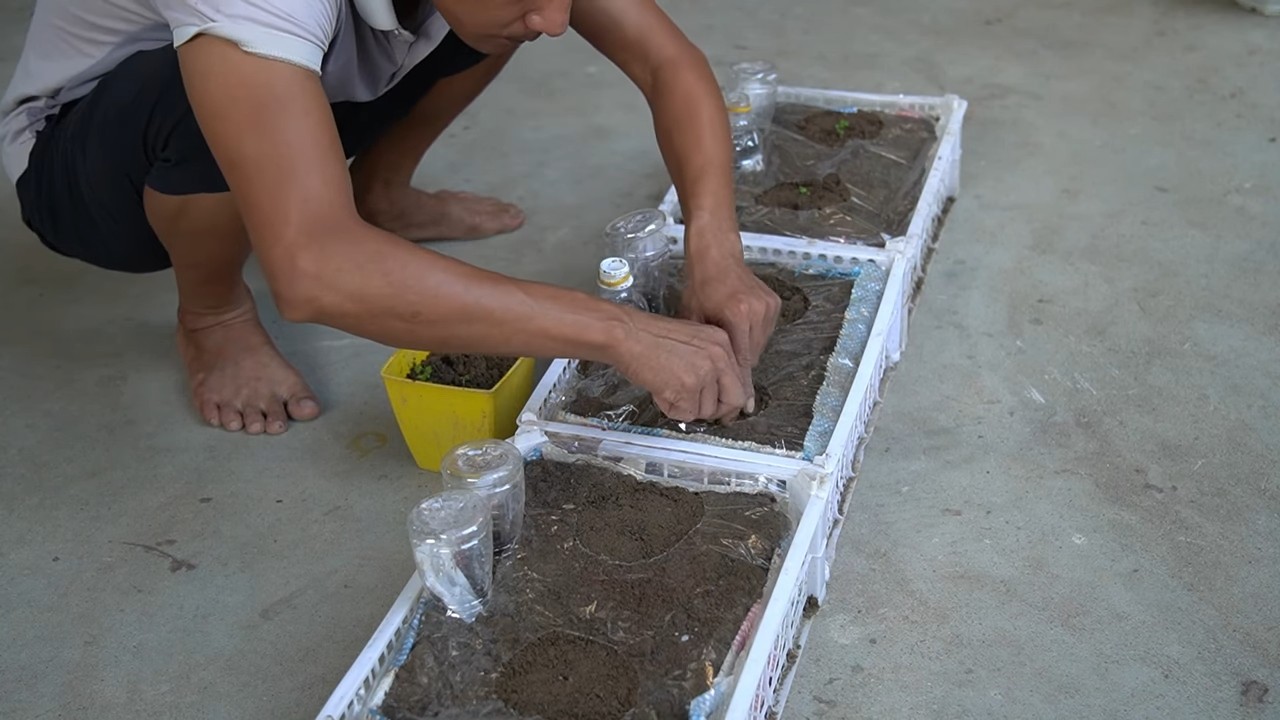
1. Prepare the Vertical Planter: Make sure your vertical planter is clean and has adequate drainage holes. If necessary, add a layer of gravel or pebbles at the bottom of each tier to further improve drainage.
2. Fill the Tiers with Coco Coir Mixture: Carefully fill each tier of the vertical planter with the prepared coco coir mixture. Leave about an inch or two of space at the top of each tier to prevent overflow when watering.
3. Create Planting Holes: Use your fingers or a small trowel to create planting holes in the coco coir mixture. The size of the holes will depend on the size of the root balls of your strawberry plants.
4. Gently Remove Plants from Containers: Carefully remove the strawberry plants from their nursery containers. Gently loosen the roots with your fingers to encourage them to spread out into the coco coir mixture.
5. Plant the Strawberries: Place each strawberry plant into a planting hole, making sure the crown of the plant (where the stems meet the roots) is level with the surface of the coco coir mixture.
6. Backfill with Coco Coir Mixture: Gently backfill the planting holes with the coco coir mixture, firming it around the roots of the plants.
7. Water Thoroughly: Water the newly planted strawberries thoroughly with plain water to settle the coco coir mixture and hydrate the roots.
Nutrient Solution and Watering
Since we’re growing soil-free, providing the right nutrients is absolutely critical.
1. Prepare the Nutrient Solution: Follow the instructions on the liquid fertilizer package to prepare the nutrient solution. It’s crucial to use the correct concentration to avoid burning the plants. Start with a slightly weaker solution than recommended and gradually increase the concentration as the plants grow.
2. Check the pH (Optional but Recommended): Use a pH meter to check the pH of the nutrient solution. Strawberries prefer a slightly acidic pH (around 5.5-6.5). If the pH is too high, you can lower it by adding a small amount of pH down solution (available at garden centers). If the pH is too low, you can raise it by adding a small amount of pH up solution.
3. Watering Schedule: Water your strawberry plants regularly with the nutrient solution, especially during hot and dry weather. The frequency of watering will depend on the weather conditions and the drainage of your container. Check the moisture level of the coco coir mixture regularly. It should be moist but not soggy. I usually water every 1-2 days, but you might need to adjust the schedule based on your specific conditions.
4. Watering Technique: Water slowly and evenly, allowing the nutrient solution to soak into the coco coir mixture. Avoid overwatering, as this can lead to root rot.
Ongoing Care and Maintenance
A little bit of attention goes a long way in keeping your strawberry plants happy and productive.
1. Sunlight: Strawberries need at least 6-8 hours of sunlight per day to thrive. Place your vertical planter in a sunny location on your balcony. If you don’t have enough sunlight, you can supplement with grow lights.
2. Pruning: Regularly remove any dead or yellowing leaves to prevent disease and encourage new growth. Also, pinch off any runners (long stems that grow out from the plant) unless you want to propagate new plants.
3. Pest and Disease Control: Keep an eye out for pests and diseases. Common strawberry pests include aphids, spider mites, and slugs. Common diseases include powdery mildew and gray mold. Treat any infestations or infections promptly with appropriate organic pesticides or fungicides.
4. Pollination: Strawberries are self-pollinating, but you can improve fruit set by gently shaking the plants or using a small paintbrush to transfer pollen from one flower to another. This is especially important if you’re growing your strawberries indoors or in a sheltered location where there are few pollinators.
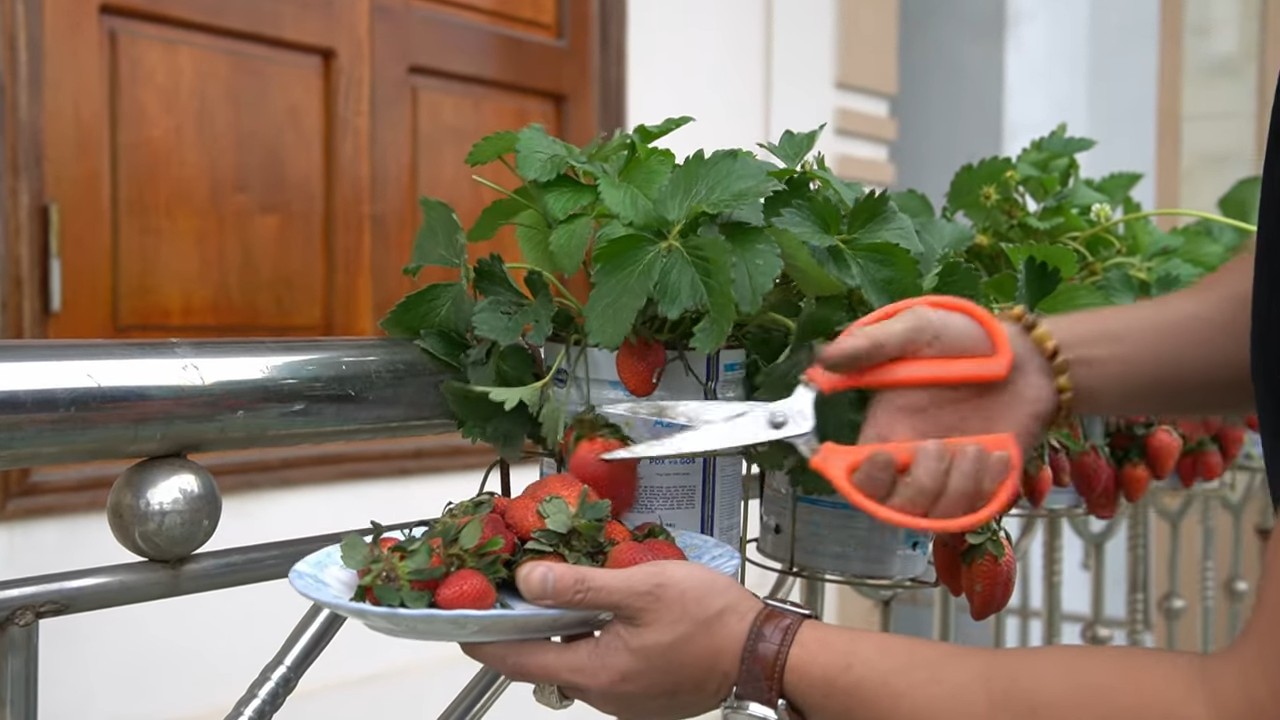
5. Harvesting: Harvest your strawberries when they are fully ripe and red. Gently twist the berries off the plant, leaving the green cap attached.
6. Nutrient Monitoring: Periodically monitor the health of your plants. Yellowing leaves can indicate a nutrient deficiency. Adjust the concentration of the nutrient solution as needed. You can also use a soil testing kit to check the nutrient levels in the coco coir mixture.
7. Repotting (Optional): After a year or two, the coco coir mixture may start to break down and lose its ability to retain moisture and nutrients. You may need to repot your strawberry plants into fresh coco coir mixture.
Troubleshooting Tips
Even with the best care, you might encounter some challenges along the way. Here are a few common problems and how to fix them:
* Yellowing Leaves: This can be caused by a nutrient deficiency, overwatering, or underwatering. Check the moisture level of the coco coir mixture and adjust your watering schedule accordingly. Also, make sure you’re using a balanced nutrient solution and that the pH is within the optimal range.
* Small or Misshapen Berries: This can be caused by poor pollination, nutrient deficiency, or lack of sunlight. Make sure your plants
Conclusion
So, there you have it! Growing luscious, juicy strawberries on your balcony without the mess and weight of traditional soil is not only possible, it’s surprisingly easy and incredibly rewarding. This DIY soil-free method opens up a world of possibilities for urban gardeners, allowing you to cultivate your own little strawberry patch even in the smallest of spaces.
Why is this a must-try? Because it’s a game-changer for balcony gardening. Forget lugging heavy bags of soil up flights of stairs. Say goodbye to the constant watering and potential for soil-borne diseases. Embrace a cleaner, lighter, and more efficient way to grow your favorite berries. This method is particularly beneficial if you’re dealing with weight restrictions on your balcony or simply want to minimize the mess. Plus, the enhanced drainage of a soil-free system can lead to healthier, more productive strawberry plants.
But the beauty of this DIY trick lies in its adaptability. Feel free to experiment with different hydroponic solutions to find what works best for your strawberries. You could try adding small amounts of organic nutrients to the water to boost growth and flavor. Consider using different types of inert growing media, such as perlite or vermiculite, to adjust the moisture retention and aeration. You can also explore vertical growing systems to maximize your space and create a stunning strawberry wall.
Another variation to consider is the type of container you use. While we’ve focused on using readily available materials like plastic bottles or buckets, you could invest in specialized hydroponic containers designed for strawberries. These containers often have built-in drainage and aeration systems, further enhancing the growing environment.
Don’t be afraid to get creative and personalize your soil-free strawberry garden. The key is to provide your plants with the essential nutrients, water, and light they need to thrive. With a little experimentation and observation, you’ll be enjoying fresh, homegrown strawberries in no time.
We are confident that this **balcony strawberry growing soil free** method will revolutionize your urban gardening experience. It’s a simple, effective, and sustainable way to enjoy the taste of summer, right on your doorstep.
So, what are you waiting for? Gather your supplies, follow the steps outlined in this guide, and embark on your soil-free strawberry adventure today! We’re eager to hear about your successes, challenges, and any variations you try. Share your experiences, photos, and tips in the comments below. Let’s build a community of balcony strawberry growers and inspire others to embrace the joys of urban gardening. Happy growing!
Frequently Asked Questions (FAQ)
What exactly does “soil-free” mean in this context?
Soil-free, in this case, refers to growing strawberries without using traditional garden soil or potting mix. Instead, the plants are grown in an inert medium, such as coco coir, perlite, or rockwool, which provides support for the roots but doesn’t contain any nutrients. The nutrients are supplied through a hydroponic solution, which is a water-based solution containing all the essential minerals and elements that strawberries need to grow. This method allows for better control over nutrient delivery and eliminates the risk of soil-borne diseases.
What are the benefits of growing strawberries without soil on a balcony?
There are several advantages to using a soil-free method for growing strawberries on a balcony:
* **Reduced weight:** Soil can be heavy, especially when wet. Soil-free systems are significantly lighter, which is crucial for balconies with weight restrictions.
* **Less mess:** Soil can be messy, especially when watering or transplanting. Soil-free systems are cleaner and easier to manage.
* **Improved drainage:** Soil-free media typically have excellent drainage, preventing waterlogging and root rot.
* **Better nutrient control:** You can precisely control the nutrients your plants receive, leading to healthier growth and higher yields.
* **Reduced risk of soil-borne diseases:** Soil can harbor pests and diseases that can harm your strawberry plants. Soil-free systems eliminate this risk.
* **Space saving:** Soil-free systems can be adapted to vertical growing, maximizing space on your balcony.
What type of hydroponic solution should I use for my strawberries?
You can purchase commercially available hydroponic solutions specifically formulated for strawberries or fruiting plants. These solutions typically contain a balanced blend of macronutrients (nitrogen, phosphorus, potassium) and micronutrients (iron, manganese, zinc, copper, boron, molybdenum). Follow the instructions on the product label for dilution and application rates. Alternatively, you can create your own hydroponic solution using individual nutrient salts, but this requires more knowledge and precision.
How often should I water my soil-free strawberry plants?
The frequency of watering depends on several factors, including the type of growing medium, the size of the container, the temperature, and the humidity. Generally, you should water your plants when the growing medium feels slightly dry to the touch. Avoid overwatering, as this can lead to root rot. In hot, sunny weather, you may need to water daily or even twice a day. In cooler, cloudy weather, you may only need to water every few days.
What kind of light do my soil-free strawberry plants need?
Strawberries need at least 6-8 hours of direct sunlight per day to produce abundant fruit. If your balcony doesn’t receive enough natural sunlight, you may need to supplement with artificial grow lights. LED grow lights are a good option, as they are energy-efficient and produce a full spectrum of light that is beneficial for plant growth.
How do I pollinate my strawberry plants if I’m growing them on a balcony?
Strawberries are self-pollinating, but they benefit from cross-pollination, which can increase fruit size and yield. On a balcony, you may need to hand-pollinate your plants, especially if there are no bees or other pollinators around. To hand-pollinate, use a small paintbrush or cotton swab to gently transfer pollen from one flower to another. You can also use a small fan to create air movement, which can help to distribute the pollen.
What are some common problems I might encounter when growing strawberries without soil, and how can I fix them?
Some common problems include:
* **Nutrient deficiencies:** Yellowing leaves, stunted growth, or poor fruit production can indicate a nutrient deficiency. Adjust the hydroponic solution according to the plant’s needs.
* **Root rot:** Overwatering or poor drainage can lead to root rot. Ensure proper drainage and avoid overwatering.
* **Pests and diseases:** Although soil-free systems are less prone to pests and diseases, they can still occur. Inspect your plants regularly and treat any infestations or infections promptly.
* **Algae growth:** Algae can grow in the hydroponic solution, especially in sunny locations. Use opaque containers to block light and prevent algae growth.
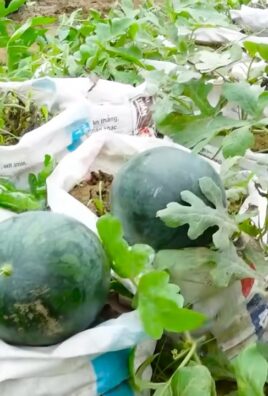
Can I use this method for other types of berries or vegetables?
Yes, this soil-free method can be adapted for growing other types of berries and vegetables on a balcony. However, you may need to adjust the hydroponic solution and growing conditions to suit the specific needs of each plant. For example, tomatoes and peppers require different nutrient ratios than strawberries.
How do I overwinter my strawberry plants in a soil-free system?
Strawberry plants are perennials, meaning they can live for several years. To overwinter your plants in a soil-free system, reduce watering and fertilization during the dormant season. Move the plants to a sheltered location, such as a garage or shed, to protect them from freezing temperatures. In the spring, gradually increase watering and fertilization as the weather warms up.
Is **balcony strawberry growing soil free** really worth the effort?
Absolutely! While it requires a bit of initial setup and ongoing maintenance, the rewards of growing your own fresh, delicious strawberries on your balcony are well worth the effort. The taste of homegrown strawberries is far superior to store-bought ones, and you’ll have the satisfaction of knowing that you grew them yourself. Plus, it’s a fun and rewarding hobby that can bring joy to your life.

Leave a Comment