
Cauliflower bigger heads trick – that’s what every home gardener dreams of, right? Imagine strolling through your garden, the sun warming your face, and being greeted by the sight of enormous, perfectly formed cauliflower heads, ready for harvest. Forget those puny, store-bought cauliflowers; we’re talking about garden-fresh giants bursting with flavor!
For centuries, cauliflower has been a staple in diets around the world, from the elaborate gardens of Roman emperors to the humble plots of peasant farmers. Its versatility and nutritional value have made it a prized vegetable. But let’s be honest, getting those impressive, market-worthy heads can be a challenge. That’s where this DIY guide comes in.
I’ve been there, trust me. I’ve poured my heart and soul into my cauliflower plants, only to be disappointed by small, lackluster heads. It’s frustrating! But after years of experimenting and researching, I’ve discovered some simple yet effective tricks to help you achieve cauliflower glory. This article is your roadmap to bigger, better, and more bountiful cauliflower harvests. You’ll learn easy-to-implement techniques that will transform your cauliflower growing game. So, ditch the disappointment and get ready to impress your friends and family with your homegrown cauliflower masterpieces! Let’s dive into the cauliflower bigger heads trick that will revolutionize your garden.
How to Grow Giant Cauliflower Heads: My Secret DIY Trick!
Hey fellow gardeners! Are you tired of those puny, underwhelming cauliflower heads? I was too! After years of experimenting, I’ve finally cracked the code to growing cauliflower heads that are so big, they’ll make your neighbors jealous. This isn’t just about luck; it’s about understanding your cauliflower and giving it exactly what it needs. Get ready to roll up your sleeves, because I’m about to share my secret DIY trick for achieving cauliflower greatness!
Understanding Cauliflower’s Needs
Before we dive into the nitty-gritty, let’s talk about what makes cauliflower tick. These guys are heavy feeders, meaning they need a lot of nutrients to produce those massive heads. They also crave consistent moisture and cool temperatures. Ignoring these needs is a recipe for small, bitter, or even nonexistent cauliflower.
Here’s a quick rundown:
* Nutrient-Rich Soil: Cauliflower needs a soil that’s packed with organic matter and essential nutrients like nitrogen, phosphorus, and potassium.
* Consistent Watering: Uneven watering can lead to stunted growth and poor head formation.
* Cool Temperatures: Cauliflower thrives in temperatures between 60°F and 70°F (15°C and 21°C). Hot weather can cause bolting (premature flowering) and bitter taste.
* Sunlight: At least 6 hours of direct sunlight per day is crucial for healthy growth.
* Proper Spacing: Give your cauliflower plants enough room to grow, usually about 18-24 inches apart.
My Secret Weapon: The DIY Nutrient Boost
Okay, now for the fun part! My secret to growing giant cauliflower heads involves a DIY nutrient boost that I apply throughout the growing season. This isn’t some complicated chemical concoction; it’s a simple, organic mixture that you can easily make at home.
Here’s what you’ll need:
* Epsom Salts: Provides magnesium, which is essential for chlorophyll production and overall plant health.
* Bone Meal: A great source of phosphorus, which promotes strong root development and head formation.
* Composted Manure (or Worm Castings): Adds organic matter and a slow-release source of nitrogen and other essential nutrients.
* Water: To dilute the mixture and make it easy to apply.
Step-by-Step Instructions: From Seed to Giant Head
Now, let’s get down to the step-by-step process. I’ll walk you through everything from starting your seeds to harvesting your prize-winning cauliflower.
Phase 1: Starting Your Seeds (or Transplants)
1. Choose the Right Variety: Not all cauliflower varieties are created equal. Some are naturally larger than others. Look for varieties that are known for producing large heads, such as ‘Giant of Naples,’ ‘Snowball Y Improved,’ or ‘Amazing.’ I personally love ‘Snowball Y Improved’ because it’s reliable and produces consistently large, white heads.
2. Start Seeds Indoors (Optional): If you live in an area with a short growing season, starting your seeds indoors 6-8 weeks before the last expected frost is a great way to get a head start. Use a seed-starting mix and sow the seeds about ¼ inch deep. Keep the soil moist and warm (around 70°F or 21°C). Once the seedlings have a few true leaves, you can transplant them into larger pots.
3. Direct Sow Seeds (If Climate Allows): If you have a longer growing season, you can direct sow the seeds into your garden bed. Make sure the soil is well-prepared and the weather is consistently cool. Sow the seeds about ½ inch deep and thin them to the strongest seedlings once they emerge.
4. Harden Off Transplants: Before transplanting your seedlings into the garden, you need to “harden them off.” This means gradually exposing them to outdoor conditions over a period of 7-10 days. Start by placing them in a sheltered spot for a few hours each day, gradually increasing the amount of time they spend outdoors. This will help them adjust to the sun, wind, and temperature changes.
Phase 2: Preparing the Garden Bed
1. Choose a Sunny Location: Cauliflower needs at least 6 hours of direct sunlight per day. Choose a spot in your garden that gets plenty of sun.
2. Amend the Soil: This is where the magic happens! Cauliflower needs nutrient-rich soil to thrive. Dig in plenty of composted manure or worm castings to improve the soil’s fertility and drainage. I usually add about 2-3 inches of composted manure per square foot.
3. Add Bone Meal: Sprinkle bone meal over the soil at a rate of about 1 cup per 10 square feet. Bone meal provides phosphorus, which is essential for root development and head formation.
4. Test the Soil pH: Cauliflower prefers a soil pH between 6.0 and 7.0. Use a soil testing kit to check the pH and amend the soil as needed. If the soil is too acidic, add lime. If it’s too alkaline, add sulfur.
5. Create Raised Beds (Optional): Raised beds can improve drainage and warm up the soil more quickly in the spring. This can be especially helpful if you live in an area with heavy clay soil.
Phase 3: Planting and Initial Care
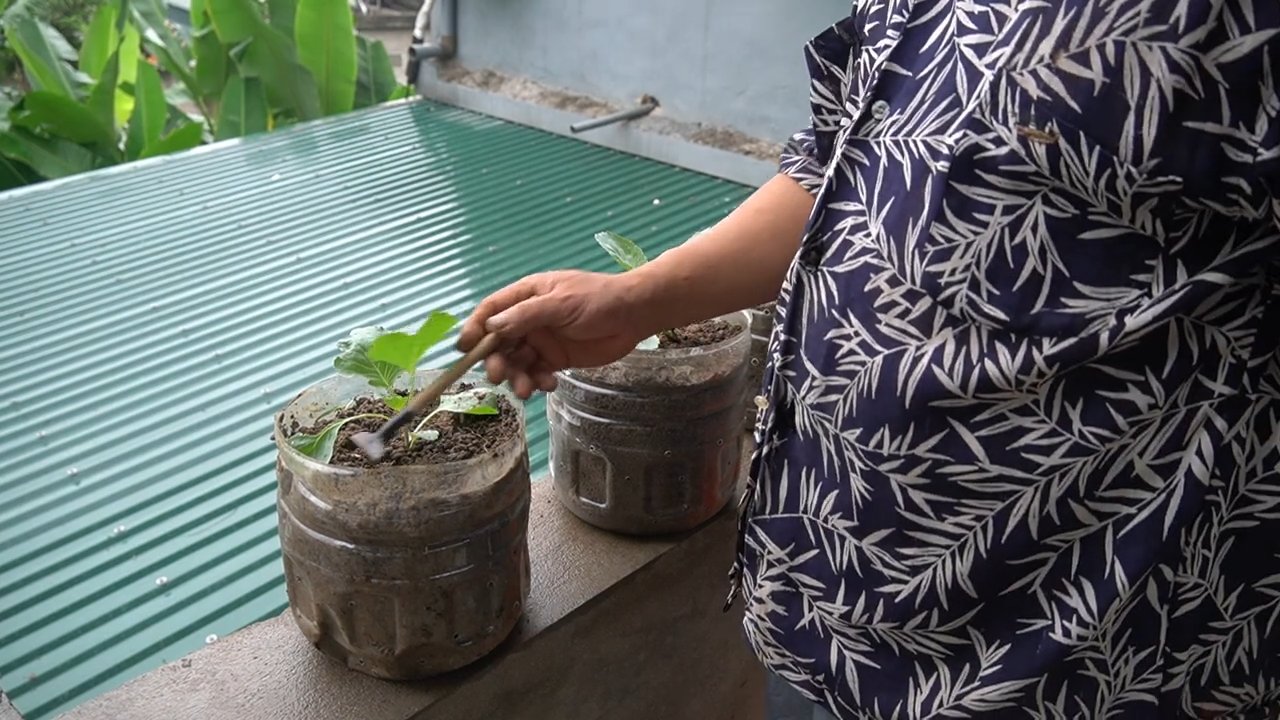
1. Transplant Seedlings (or Thin Direct-Sown Seedlings): Once your seedlings are hardened off (or your direct-sown seedlings have emerged and have a few true leaves), it’s time to plant them in the garden. Space the plants about 18-24 inches apart.
2. Water Thoroughly: After planting, water the seedlings thoroughly to help them settle in.
3. Mulch Around the Plants: Mulching helps to retain moisture, suppress weeds, and regulate soil temperature. Use organic mulch such as straw, wood chips, or shredded leaves.
4. Protect from Pests: Cauliflower is susceptible to several pests, including cabbage worms, aphids, and flea beetles. Use row covers to protect the plants from pests early in the season. You can also use organic pest control methods such as insecticidal soap or neem oil.
Phase 4: The DIY Nutrient Boost Application
This is where my secret weapon comes into play! We’ll be applying the DIY nutrient boost every 2-3 weeks throughout the growing season.
1. Prepare the Nutrient Solution: In a large bucket or watering can, mix the following ingredients:
* 1 tablespoon of Epsom salts per gallon of water.
* 1 tablespoon of bone meal per gallon of water.
* 1 cup of composted manure (or worm castings) per gallon of water.
2. Stir Well: Make sure all the ingredients are thoroughly mixed.
3. Apply to the Soil: Pour the nutrient solution around the base of each cauliflower plant, being careful not to get it on the leaves. I usually use about 1-2 cups of solution per plant, depending on its size.
4. Water After Application: After applying the nutrient solution, water the plants thoroughly to help the nutrients soak into the soil.
Phase 5: Ongoing Care and Maintenance
1. Water Regularly: Cauliflower needs consistent moisture to thrive. Water deeply whenever the top inch of soil feels dry. Avoid overwatering, as this can lead to root rot.
2. Fertilize Regularly: Continue to apply the DIY nutrient boost every 2-3 weeks throughout the growing season. You can also supplement with a balanced organic fertilizer if needed.
3. Weed Regularly: Keep the garden bed free of weeds, as they can compete with the cauliflower plants for nutrients and water.
4. Blanching (Optional): Some cauliflower varieties need to be blanched to prevent the heads from turning yellow or brown. To blanch, simply tie the outer leaves together over the developing head when it reaches about 2-3 inches in diameter. This will protect the head from the sun and keep it white.
5. Monitor for Pests and Diseases: Keep an eye out for pests and diseases and take action promptly if you notice any problems.
Phase 6: Harvesting Your Giant Cauliflower
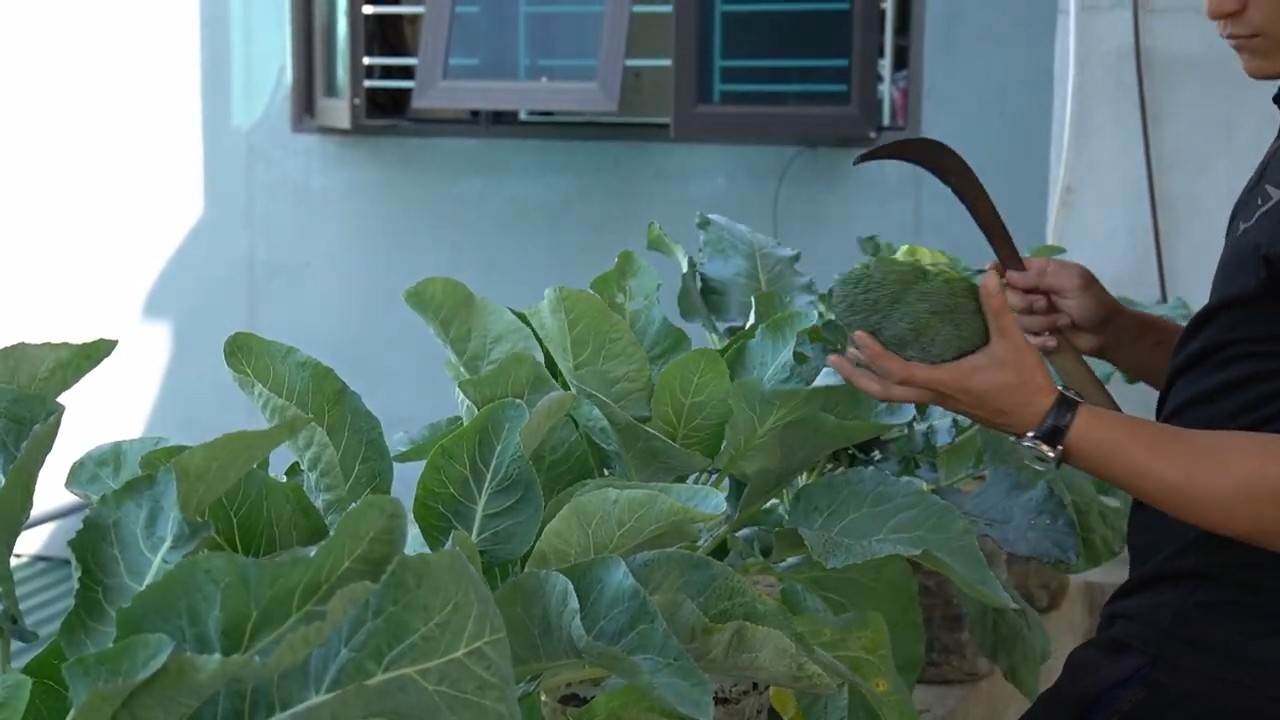
1. Harvest When Ready: Cauliflower is ready to harvest when the head is firm, compact, and about 6-8 inches in diameter (or larger, depending on the variety).
2. Cut the Head: Use a sharp knife to cut the head from the plant, leaving a few leaves attached to protect it.
3. Enjoy Your Harvest! Now you can enjoy your delicious, homegrown cauliflower! Use it in your favorite recipes, or simply steam it and serve it with a little butter and salt.
Troubleshooting Tips
Even with the best care, you might encounter some challenges along the way. Here are a few common problems and how to fix them:
* Small Heads: This is
Conclusion
So, there you have it! The secret to unlocking truly impressive, restaurant-worthy cauliflower heads, right in your own garden. This simple yet effective DIY trick for achieving bigger cauliflower heads is more than just a gardening hack; it’s a pathway to maximizing your yield, minimizing waste, and enjoying the unparalleled satisfaction of harvesting produce you’ve nurtured to its full potential.
Think about it: no more underwhelming, golf-ball-sized cauliflowers that barely make a side dish. Instead, imagine proudly presenting a magnificent, snow-white head of cauliflower at your next family dinner, knowing you coaxed it into existence with your own two hands. The difference is truly remarkable, and the best part is, it requires minimal effort and resources.
But the beauty of this technique lies not only in its simplicity but also in its adaptability. Feel free to experiment with different organic fertilizers to find the perfect blend for your soil and climate. Some gardeners swear by bone meal for added phosphorus, while others prefer a seaweed extract for its micronutrient boost. You can also adjust the frequency of your feeding based on the specific needs of your cauliflower variety.
Consider these variations to further personalize your cauliflower-growing experience:
* Colored Cauliflower Boost: If you’re growing purple, orange, or green cauliflower, this trick works just as well! The enhanced nutrient uptake will intensify the vibrant colors and improve the overall health of your plants.
* Companion Planting Power-Up: Maximize the benefits by planting companion plants like marigolds or nasturtiums around your cauliflower. These natural pest repellents will protect your precious heads and further contribute to their healthy growth.
* Hydroponic Adaptation: While this trick is primarily designed for soil-based gardening, you can adapt the principles of nutrient-rich feeding to hydroponic cauliflower cultivation. Adjust the nutrient solution to provide a similar boost during the head-forming stage.
Don’t just take our word for it, though. The real magic happens when you put this DIY trick into practice and witness the results firsthand. We wholeheartedly encourage you to give it a try in your own garden. Whether you’re a seasoned gardener or a complete beginner, you’ll be amazed at how easy it is to achieve significantly larger and healthier cauliflower heads.
And once you’ve experienced the joy of harvesting your own bountiful cauliflower crop, we want to hear all about it! Share your photos, tips, and experiences in the comments section below. Let’s create a community of cauliflower enthusiasts who are passionate about growing the best possible produce. Your insights could inspire others to embark on their own cauliflower-growing adventures.
So, grab your gardening gloves, prepare your soil, and get ready to witness the transformative power of this simple yet effective DIY trick. Your journey to bigger, better cauliflower heads starts now! Happy gardening!
Frequently Asked Questions (FAQ)
What exactly does this “bigger cauliflower heads” trick involve?
The trick primarily involves providing your cauliflower plants with an extra boost of nutrients, particularly nitrogen and phosphorus, during the head-forming stage. This is typically achieved by applying a diluted, balanced fertilizer solution directly to the soil around the plants every 1-2 weeks. The increased nutrient availability fuels rapid growth and results in significantly larger and denser cauliflower heads. It’s about timing and targeted feeding to maximize the plant’s potential during a crucial growth phase.
When is the best time to start applying this trick?
The ideal time to begin applying this nutrient boost is when you first notice the small cauliflower head beginning to form in the center of the plant. This is a critical stage in the plant’s development, and providing extra nutrients at this point will have the greatest impact on the size and quality of the final head. Start observing your plants closely around the time they are expected to mature, and be ready to act as soon as you see that initial head formation.
What type of fertilizer should I use?
A balanced, water-soluble fertilizer with an NPK ratio (Nitrogen, Phosphorus, Potassium) of around 10-10-10 or 20-20-20 is generally recommended. However, you can also use organic options like compost tea, diluted fish emulsion, or bone meal. The key is to ensure that the fertilizer provides a good balance of essential nutrients, particularly nitrogen and phosphorus, which are crucial for head development. Always dilute the fertilizer according to the manufacturer’s instructions to avoid burning the plants.
How often should I apply the fertilizer?
Generally, applying the fertilizer every 1-2 weeks during the head-forming stage is sufficient. However, you may need to adjust the frequency based on your soil type, climate, and the specific needs of your cauliflower variety. Observe your plants closely for any signs of nutrient deficiency or over-fertilization, and adjust your feeding schedule accordingly. If the leaves start to yellow or brown, you may be over-fertilizing.
Can I use this trick on other vegetables?
While this trick is specifically tailored for cauliflower, the principle of providing extra nutrients during a crucial growth stage can be applied to other vegetables as well. For example, you can use a similar approach with broccoli, cabbage, or even leafy greens like spinach and lettuce. However, it’s important to research the specific nutrient requirements of each vegetable and adjust the fertilizer and feeding schedule accordingly.
What if I don’t see any results?
Several factors can affect the success of this trick. First, ensure that your cauliflower plants are receiving adequate sunlight (at least 6 hours per day) and water. Second, check the pH of your soil to ensure that it’s within the optimal range for cauliflower (around 6.0-7.0). Third, make sure that your plants are not suffering from any pests or diseases. If you’ve addressed all of these factors and still don’t see results, it may be due to poor soil quality or an inadequate fertilizer. Consider amending your soil with compost or other organic matter and trying a different fertilizer.
Is this trick safe for organic gardening?
Yes, this trick can be easily adapted for organic gardening. Simply use organic fertilizers like compost tea, diluted fish emulsion, bone meal, or seaweed extract. These natural fertilizers provide a slow-release source of nutrients that are safe for your plants and the environment. Avoid using synthetic fertilizers, which can harm beneficial soil microorganisms and contaminate the water supply.
What are some common mistakes to avoid?
One common mistake is over-fertilizing, which can burn the plants and damage the roots. Always dilute the fertilizer according to the manufacturer’s instructions and avoid applying it directly to the leaves. Another mistake is neglecting other essential growing conditions, such as sunlight, water, and pest control. Make sure that your cauliflower plants are receiving adequate sunlight and water, and protect them from pests and diseases. Finally, don’t expect overnight miracles. It takes time and patience to grow large, healthy cauliflower heads.
How do I know when my cauliflower is ready to harvest?
Cauliflower is ready to harvest when the head is firm, compact, and has reached its desired size. The curds (the small, tightly packed florets that make up the head) should be tightly closed and not starting to separate or turn yellow. Use a sharp knife to cut the head from the plant, leaving a few leaves attached to protect the head.
Can I store cauliflower after harvesting?
Yes, you can store cauliflower in the refrigerator for up to a week. Wrap the head in plastic wrap or store it in a perforated plastic bag to prevent it from drying out. You can also freeze cauliflower for longer storage. Blanch the florets in boiling water for 3 minutes, then cool them in ice water before freezing.

Leave a Comment