
Bottle garden for cabbage: Ever dreamt of harvesting plump, juicy cabbages right from your windowsill, even without a sprawling garden? I know I have! Forget the image of endless acres and back-breaking labor. We’re diving into a super cool, space-saving, and budget-friendly DIY project that will have you growing your own delicious cabbages in recycled bottles.
The concept of container gardening, in general, has been around for centuries, with evidence suggesting its use in ancient civilizations like Rome and Egypt. But the modern twist of upcycling bottles adds a sustainable and creative dimension to this age-old practice. It’s a fantastic way to reduce waste while enjoying fresh, homegrown produce.
Why is this bottle garden for cabbage trick so essential? Well, let’s face it, not everyone has access to a traditional garden. Apartment dwellers, urban residents, and those with limited mobility can all benefit from this accessible gardening method. Plus, growing your own food is incredibly rewarding! You know exactly what’s going into your cabbage, avoiding harmful pesticides and supporting a healthier lifestyle. So, grab your empty bottles, some soil, and let’s get ready to cultivate some cabbage magic!

Creating a Thriving Bottle Garden for Your Cabbage
Hey there, fellow gardening enthusiasts! I’m super excited to share a fantastic DIY project with you: building a bottle garden specifically designed for growing cabbage. This is a great way to recycle plastic bottles, save space, and create a controlled environment for your leafy greens. Trust me, it’s easier than you think, and the results are incredibly rewarding. Let’s dive in!
Materials You’ll Need
Before we get started, let’s gather all the necessary materials. This will make the process smoother and more enjoyable.
* Large Plastic Bottles: Think 2-liter soda bottles, water bottles, or even larger juice containers. The number of bottles you need depends on how many cabbage plants you want to grow. I usually aim for one bottle per plant.
* Potting Soil: Use a high-quality potting mix that’s well-draining and rich in nutrients. Cabbage loves fertile soil!
* Cabbage Seedlings: You can either start your cabbage from seed or purchase seedlings from a local nursery. Seedlings are generally easier for beginners.
* Scissors or Utility Knife: For cutting the plastic bottles. Be careful!
* Drill or Nail and Hammer: To create drainage holes in the bottles.
* Watering Can or Spray Bottle: For watering your cabbage plants.
* Optional:
* Gravel or Small Stones: For drainage at the bottom of the bottles.
* Fertilizer: To supplement the soil with extra nutrients.
* Labels: To identify your cabbage varieties.
* Gloves: To protect your hands.
Preparing the Bottles
This is where we transform those discarded plastic bottles into mini-gardens.
1. Clean the Bottles: Thoroughly wash the plastic bottles with soap and water to remove any residue. Rinse them well and let them dry completely. This is crucial to prevent any contamination that could harm your cabbage plants.
2. Cut the Bottles: There are a couple of ways you can cut the bottles, depending on the size and shape you want for your garden.
* Option 1: Horizontal Cut: Cut the bottle horizontally about two-thirds of the way up from the bottom. This creates a larger planting area. You can discard the top portion or use it as a makeshift greenhouse cover later on.
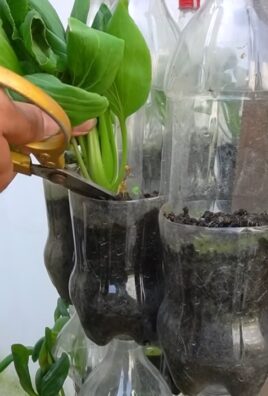
* Option 2: Vertical Cut (for hanging gardens): Cut the bottle vertically down one side, stopping a few inches from the bottom. Then, carefully bend the plastic outwards to create a wider opening. This is ideal if you want to hang your bottle gardens.
3. Create Drainage Holes: Drainage is essential to prevent waterlogging, which can lead to root rot. Use a drill or a nail and hammer to create several drainage holes in the bottom of each bottle. I usually make about 4-5 holes, evenly spaced.
4. Optional: Add Gravel: Place a layer of gravel or small stones at the bottom of each bottle to further improve drainage. This helps prevent the soil from becoming waterlogged.
Planting Your Cabbage Seedlings
Now comes the fun part – planting your cabbage!
1. Fill with Potting Soil: Fill each prepared bottle with potting soil, leaving about an inch of space at the top. Gently pat down the soil to remove any air pockets.
2. Create a Planting Hole: Use your finger or a small trowel to create a hole in the center of the soil, large enough to accommodate the root ball of your cabbage seedling.
3. Plant the Seedling: Carefully remove the cabbage seedling from its container and gently loosen the roots. Place the seedling in the planting hole and cover the roots with soil. Gently pat down the soil around the base of the plant.
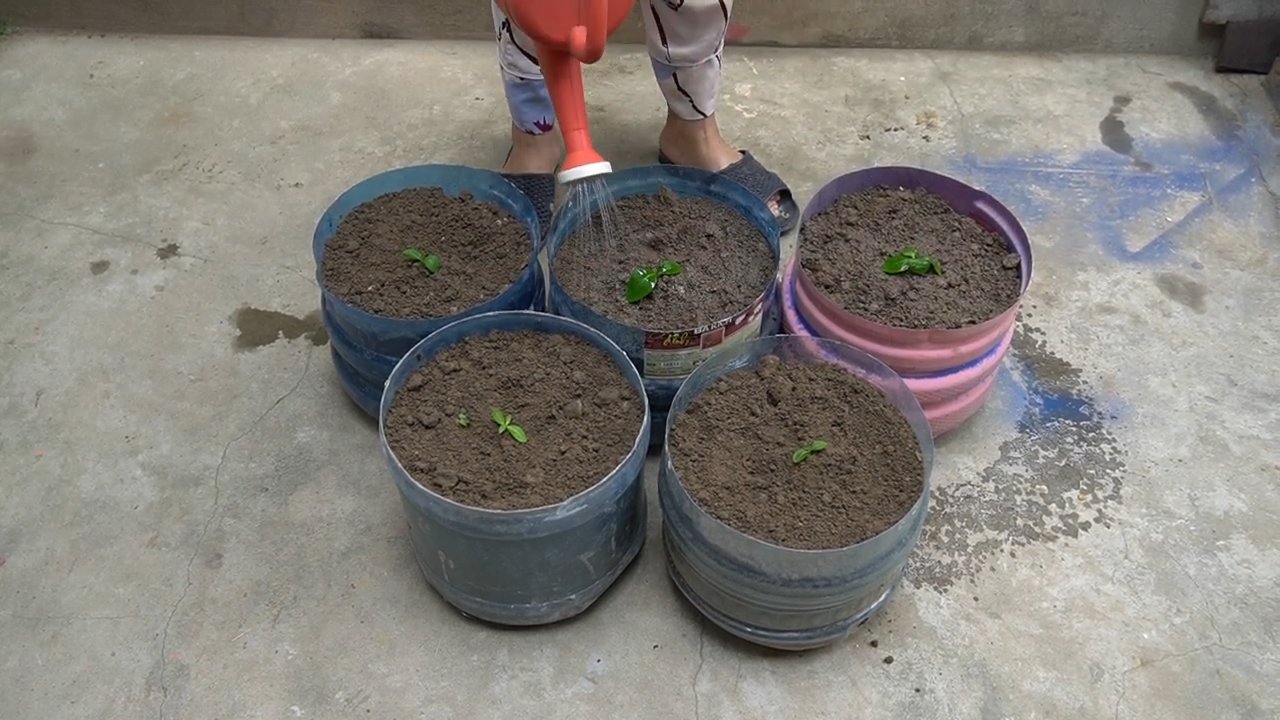
4. Water Thoroughly: Water the newly planted cabbage seedlings thoroughly, until the water drains out of the drainage holes. This helps settle the soil and encourages root growth.
5. Label Your Plants: If you’re growing different varieties of cabbage, label each bottle with the name of the variety. This will help you keep track of your plants and their growth habits.
Caring for Your Bottle Garden Cabbage
Proper care is essential for ensuring your cabbage plants thrive in their bottle gardens.
1. Sunlight: Cabbage needs at least 6 hours of sunlight per day. Place your bottle gardens in a sunny location, such as a windowsill, balcony, or patio. If you don’t have enough natural sunlight, you can supplement with grow lights.
2. Watering: Water your cabbage plants regularly, especially during hot and dry weather. Check the soil moisture by sticking your finger into the soil. If the top inch of soil feels dry, it’s time to water. Avoid overwatering, as this can lead to root rot.
3. Fertilizing: Cabbage is a heavy feeder, so it benefits from regular fertilization. Use a balanced fertilizer, following the instructions on the package. You can also use organic fertilizers, such as compost tea or fish emulsion. I personally like to use a slow-release fertilizer when I plant, and then supplement with liquid fertilizer every few weeks.
4. Pest Control: Keep an eye out for pests, such as aphids, cabbage worms, and slugs. Inspect your plants regularly and take action if you notice any signs of infestation. You can use organic pest control methods, such as insecticidal soap, neem oil, or handpicking the pests off the plants.
5. Support: As your cabbage plants grow, they may need support to prevent them from falling over. You can use stakes or trellises to support the plants.
Harvesting Your Cabbage
The moment you’ve been waiting for!
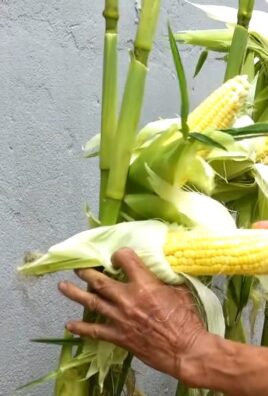
1. Harvest Time: Cabbage is typically ready to harvest in 60-80 days, depending on the variety. The head should be firm and compact.
2. Harvesting Method: Use a sharp knife to cut the cabbage head from the stem. Leave a few outer leaves on the plant, as these can continue to produce smaller heads.
3. Enjoy Your Harvest: Enjoy your homegrown cabbage in salads, soups, stir-fries, or any other dish you like. Freshly harvested cabbage tastes amazing!
Troubleshooting Tips
Even with the best care, you might encounter some challenges. Here are a few common issues and how to address them:
* Yellowing Leaves: This could be a sign of overwatering, underwatering, or nutrient deficiency. Check the soil moisture and adjust your watering accordingly. Fertilize your plants to provide them with the nutrients they need.
* Slow Growth: This could be due to insufficient sunlight, poor soil, or pest infestation. Make sure your plants are getting enough sunlight and fertilize them regularly. Inspect your plants for pests and take action if necessary.
* Root Rot: This is caused by overwatering and poor drainage. Make sure your bottles have adequate drainage holes and avoid overwatering. If you suspect root rot, you can try transplanting the plant into fresh soil.
* Pest Infestation: As mentioned earlier, keep an eye out for pests and take action if you notice any signs of infestation. Organic pest control methods are generally the safest and most effective.
Hanging Bottle Gardens (Optional)
If you opted for the vertical cut method, you can create a stunning hanging cabbage garden.
1. Reinforce the Cut Edges: Use duct tape or strong packing tape to reinforce the cut edges of the bottle. This will prevent the plastic from tearing and make the bottle more durable.
2. Create Hanging Holes: Use a drill or a nail and hammer to create two or three holes near the top of the bottle, evenly spaced.
3. Thread with Rope or Wire: Thread a strong rope or wire through the hanging holes. Make sure the rope or wire is long enough to hang the bottle at the desired height.
4. Hang Your Garden: Hang your bottle garden from a sturdy hook, branch, or railing. Make sure the hanging location receives plenty of sunlight.
Additional Tips and Tricks
* Choose the Right Cabbage Variety: Some cabbage varieties are better suited for container gardening than others. Look for compact varieties that don’t require a lot of space.
* Rotate Your Crops: To prevent soilborne diseases, rotate your crops each year. Don’t plant cabbage in the same bottle garden for more than two years in a row.
* Companion Planting: Plant companion plants alongside your cabbage to deter pests and improve growth. Good companion plants for cabbage include dill, rosemary, and thyme.
* Recycle and Reuse: Don’t throw away your old bottle gardens. You can reuse them for other plants or recycle the plastic.
I hope you found this guide helpful! Growing cabbage in bottle gardens is a fun, rewarding, and eco-friendly way to enjoy fresh, homegrown produce. Happy gardening!
Conclusion
So, there you have it! Transforming a simple plastic bottle into a thriving mini-garden for your cabbage seedlings is not just a fun project; it’s a game-changer for any gardener, regardless of space or experience. This DIY bottle garden method offers a multitude of benefits, from efficient space utilization and improved drainage to protection against pests and the elements. It’s a sustainable, cost-effective, and incredibly rewarding way to nurture your cabbage plants from seed to transplant-ready seedlings.
But why is this DIY trick a must-try? Because it addresses several common challenges faced by gardeners. Limited space? Bottle gardens stack vertically, maximizing your growing area. Pest problems? The enclosed environment offers a degree of protection against slugs, snails, and other unwanted visitors. Unpredictable weather? You can easily move your bottle gardens indoors during harsh conditions. Plus, the clear plastic allows you to monitor the soil moisture and root development with ease, giving you valuable insights into your plants’ health.
Beyond the basic method, there’s plenty of room for experimentation and personalization. Consider using different types of plastic bottles – larger bottles for more mature plants, or colored bottles to filter sunlight. You can also add drainage layers of gravel or pebbles to the bottom of your bottle garden to further improve drainage. For added nutrients, incorporate slow-release fertilizer granules into the potting mix. And if you’re feeling creative, decorate your bottle gardens with paint, labels, or other embellishments to add a touch of personality to your growing space.
Don’t limit yourself to just cabbage! This bottle garden technique can be adapted for a wide variety of other vegetables, herbs, and flowers. Try growing lettuce, spinach, kale, or even small tomato varieties in your bottle gardens. The possibilities are endless!
We wholeheartedly encourage you to give this DIY bottle garden for cabbage a try. It’s a simple, effective, and incredibly satisfying way to grow your own food. Embrace the challenge, get your hands dirty, and witness the magic of transforming waste into a thriving garden.
And most importantly, we want to hear about your experiences! Share your photos, tips, and stories with us in the comments section below. Let us know what worked for you, what challenges you faced, and any variations you tried. Together, we can learn and grow a vibrant community of bottle garden enthusiasts. So, grab a bottle, some soil, and some cabbage seeds, and let’s get growing! Your journey to a greener, more sustainable garden starts now. This is a fantastic way to practice sustainable gardening and enjoy fresh, homegrown cabbage.
Frequently Asked Questions (FAQ)
What type of plastic bottle is best for a bottle garden?
Ideally, you should use clear plastic bottles that are food-grade. This ensures that no harmful chemicals leach into the soil and affect your plants. Bottles that have held water, juice, or soda are excellent choices. Avoid using bottles that have contained harsh chemicals or cleaning products, as these may contaminate the soil. The size of the bottle will depend on the type of plant you’re growing. For cabbage seedlings, a 2-liter bottle is usually sufficient.
How do I ensure proper drainage in my bottle garden?
Proper drainage is crucial to prevent waterlogging and root rot. Before adding soil, create a drainage layer at the bottom of the bottle. You can use gravel, pebbles, or even broken pieces of terracotta pots. This layer will allow excess water to drain away from the roots. Additionally, make sure to create drainage holes in the bottom of the bottle. You can use a drill, a hot nail, or a sharp knife to create these holes. Start with a few holes and add more if needed.
What type of soil should I use for my bottle garden?
A well-draining potting mix is essential for healthy plant growth in a bottle garden. Avoid using garden soil, as it can be too heavy and compact, leading to poor drainage. Instead, opt for a commercial potting mix that is specifically formulated for container gardening. You can also create your own potting mix by combining equal parts of peat moss, perlite, and vermiculite. This mixture provides good drainage, aeration, and water retention.
How often should I water my bottle garden?
The frequency of watering will depend on several factors, including the type of plant, the weather conditions, and the type of soil you’re using. As a general rule, water your bottle garden when the top inch of soil feels dry to the touch. Avoid overwatering, as this can lead to root rot. When watering, water thoroughly until water drains out of the drainage holes. This ensures that the entire root system is moistened.
How much sunlight does my bottle garden need?
Cabbage seedlings require at least 6 hours of sunlight per day. Place your bottle garden in a sunny location, such as a windowsill or a balcony. If you don’t have access to enough natural light, you can supplement with artificial grow lights. LED grow lights are a good option, as they are energy-efficient and produce very little heat.
How do I protect my bottle garden from pests?
While bottle gardens offer some protection against pests, they are not entirely immune. To further protect your plants, you can use organic pest control methods. For example, you can spray your plants with a solution of neem oil or insecticidal soap. You can also introduce beneficial insects, such as ladybugs or lacewings, to your bottle garden. These insects will prey on common garden pests, such as aphids and spider mites.
Can I use fertilizer in my bottle garden?
Yes, fertilizing your bottle garden is important to provide your plants with the nutrients they need to grow and thrive. Use a balanced fertilizer that is specifically formulated for vegetables. You can use either a liquid fertilizer or a slow-release granular fertilizer. Follow the instructions on the fertilizer package carefully. Avoid over-fertilizing, as this can damage your plants.
How do I transplant my cabbage seedlings from the bottle garden to the garden bed?
Once your cabbage seedlings have developed several sets of true leaves and are large enough to handle, they are ready to be transplanted to the garden bed. Before transplanting, harden off your seedlings by gradually exposing them to outdoor conditions for a week or two. To transplant, gently remove the seedlings from the bottle garden, being careful not to damage the roots. Plant the seedlings in the garden bed at the appropriate spacing, and water them thoroughly.
What other plants can I grow in a bottle garden?
The possibilities are endless! Bottle gardens are suitable for a wide variety of plants, including herbs, vegetables, and flowers. Some popular choices include lettuce, spinach, kale, basil, mint, oregano, strawberries, and petunias. When choosing plants for your bottle garden, consider their size, growth habits, and light requirements.
How do I clean and reuse my plastic bottles for future bottle gardens?
Cleaning and reusing your plastic bottles is a great way to reduce waste and save money. After harvesting your plants, thoroughly wash the bottles with soap and water. Rinse them well to remove any soap residue. You can also disinfect the bottles with a solution of bleach and water. Allow the bottles to dry completely before reusing them.

Leave a Comment