
Growing Malabar Spinach at Home can seem daunting, but trust me, it’s easier than you think! Have you ever dreamed of stepping into your backyard and harvesting fresh, vibrant greens for a delicious and healthy meal? Imagine the satisfaction of knowing exactly where your food comes from and that it’s free from harmful chemicals. This isn’t just a dream; it’s a reality you can achieve with a little know-how.
Malabar Spinach, also known as Basella alba, has a rich history, particularly in Asian and African cuisines, where it’s been enjoyed for centuries. It’s not a true spinach, but its mild, slightly peppery flavor and succulent leaves make it a fantastic substitute, especially in warmer climates where traditional spinach struggles. Plus, it’s incredibly nutritious, packed with vitamins and minerals!
So, why should you learn this DIY trick? Well, for starters, growing Malabar Spinach at Home allows you to enjoy fresh, organic greens without the hefty price tag of store-bought produce. More importantly, it’s a rewarding experience that connects you with nature and provides a sense of accomplishment. In this article, I’ll share my tried-and-true tips and tricks for successfully cultivating this amazing plant, even if you’re a complete beginner. Get ready to transform your garden and your plate with this easy-to-follow guide!
Growing Malabar Spinach at Home: A Beginner’s Guide
Hey there, fellow gardening enthusiasts! I’m so excited to share my experience with growing Malabar spinach. It’s a fantastic leafy green that’s not only delicious but also incredibly easy to cultivate at home. If you’re looking for a heat-tolerant alternative to traditional spinach, or just want to add something new and interesting to your garden, Malabar spinach is definitely worth a try. Let’s dive in!
What is Malabar Spinach?
Before we get started, let’s clarify what Malabar spinach actually is. Despite its name, it’s not true spinach. It’s a vine that thrives in warm weather, making it perfect for those of us who struggle to grow regular spinach in the summer heat. It has thick, succulent leaves and a slightly citrusy flavor. You can use it just like regular spinach – in salads, stir-fries, soups, and more!
Why Grow Malabar Spinach?
* Heat Tolerance: This is the biggest advantage! It loves the sun and thrives in hot weather.
* Easy to Grow: It’s relatively low-maintenance and doesn’t require a lot of fuss.
* Nutritious: It’s packed with vitamins and minerals, making it a healthy addition to your diet.
* Beautiful Vine: It’s an attractive vine that can add visual interest to your garden. You can even train it to grow on a trellis or fence.
* Continuous Harvest: You can harvest leaves throughout the growing season, providing a steady supply of fresh greens.
Getting Started: Seeds vs. Cuttings
You can start Malabar spinach from either seeds or cuttings. I’ve tried both methods, and here’s what I’ve learned:
* Seeds: Starting from seeds takes a little longer, but it’s a great way to get a lot of plants going. The seeds have a hard outer shell, so they need a little help to germinate.
* Cuttings: Starting from cuttings is faster and easier, especially if you already have a Malabar spinach plant. You can simply snip off a stem and root it in water or soil.
I’ll cover both methods in detail below.
Growing Malabar Spinach from Seeds
This is my preferred method, as I love the satisfaction of watching a tiny seed grow into a thriving plant.
Preparing the Seeds
Malabar spinach seeds have a tough outer coating, which can make germination slow and uneven. Here’s how I prepare them for planting:
1. Scarification: Gently rub the seeds with sandpaper or nick them with a knife. This helps water penetrate the seed coat. Be careful not to damage the inside of the seed!
2. Soaking: Soak the scarified seeds in warm water for 24-48 hours. This further softens the seed coat and encourages germination. I usually change the water every 12 hours.
Sowing the Seeds
You can start the seeds indoors or directly in the garden, depending on your climate. I prefer starting them indoors to get a head start.
1. Choose Your Containers: Use small pots or seed trays filled with a well-draining potting mix.
2. Sow the Seeds: Plant the seeds about 1/2 inch deep in the soil.
3. Water Gently: Water the soil gently to avoid disturbing the seeds.
4. Provide Warmth: Keep the soil warm and moist. A heat mat can help speed up germination.
5. Wait Patiently: Germination can take anywhere from 1 to 3 weeks, so be patient!
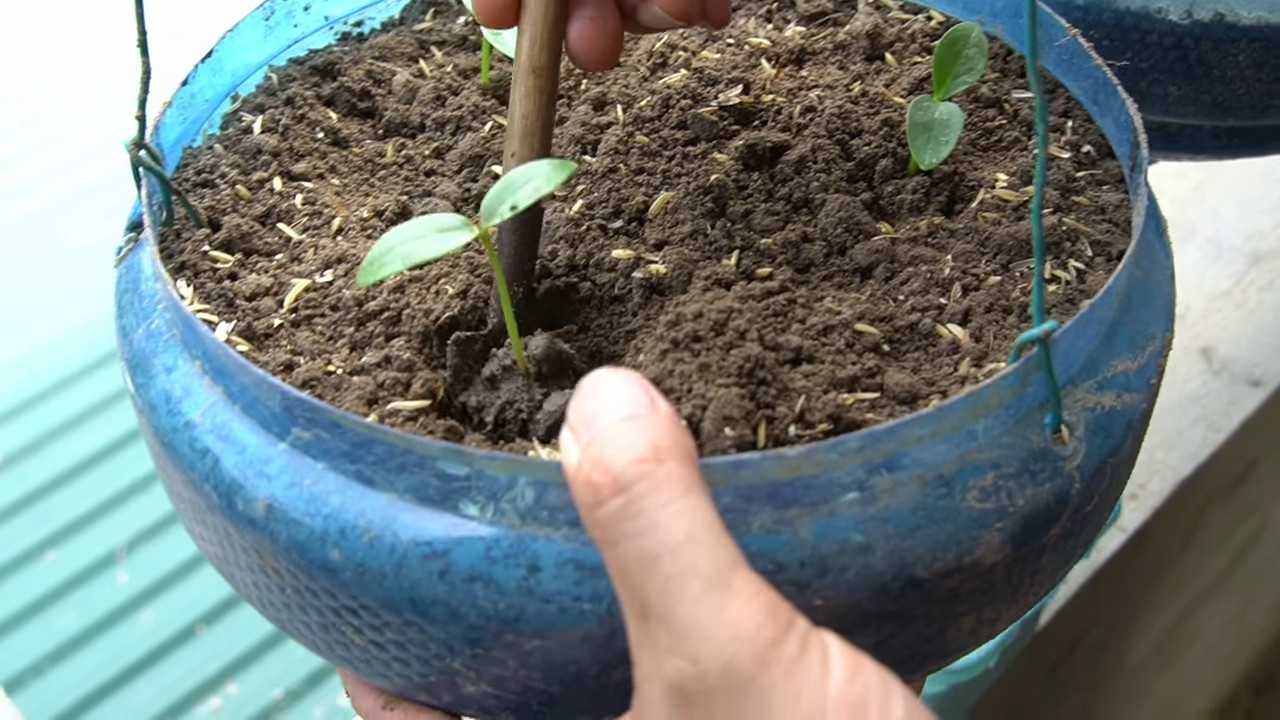
Transplanting Seedlings
Once the seedlings have developed a few sets of true leaves, they’re ready to be transplanted into the garden.
1. Harden Off: Before transplanting, gradually acclimate the seedlings to outdoor conditions by exposing them to increasing amounts of sunlight and wind over a period of a week or two. This process is called “hardening off.”
2. Choose a Sunny Location: Select a location in your garden that receives at least 6 hours of sunlight per day.
3. Prepare the Soil: Amend the soil with compost or other organic matter to improve drainage and fertility.
4. Transplant Carefully: Gently remove the seedlings from their containers and plant them in the garden, spacing them about 12-18 inches apart.
5. Water Thoroughly: Water the newly transplanted seedlings thoroughly.
Growing Malabar Spinach from Cuttings
This is a super easy way to propagate Malabar spinach, especially if you already have a plant.
1. Take Cuttings: Select healthy stems that are about 4-6 inches long. Remove the lower leaves, leaving only a few leaves at the top.
2. Root in Water or Soil: You can root the cuttings in water or directly in soil.
* Water Method: Place the cuttings in a glass of water, making sure the lower nodes (where the leaves were removed) are submerged. Change the water every few days. Roots should start to appear within a week or two.
* Soil Method: Dip the cut end of the stem in rooting hormone (optional) and plant it in a pot filled with well-draining potting mix. Keep the soil moist but not soggy.
3. Transplant: Once the cuttings have developed a good root system, they’re ready to be transplanted into the garden. Follow the same transplanting instructions as for seedlings.
Caring for Your Malabar Spinach
Once your Malabar spinach plants are established, they’re relatively easy to care for.
* Watering: Water regularly, especially during hot, dry weather. Malabar spinach prefers consistently moist soil.
* Fertilizing: Fertilize every few weeks with a balanced fertilizer or compost tea.
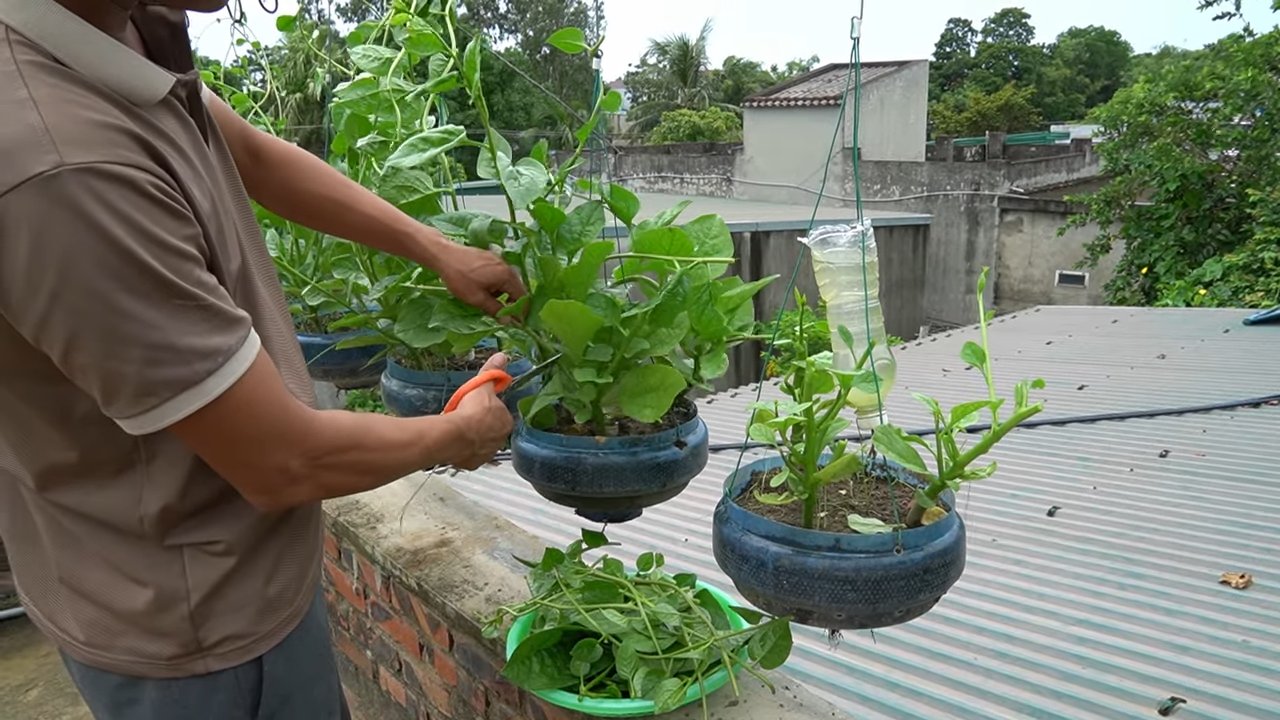
* Support: Provide a trellis, fence, or other support for the vines to climb on. This will help keep the leaves clean and make harvesting easier.
* Pruning: Prune the vines regularly to encourage branching and bushier growth. You can also pinch off the growing tips to promote leaf production.
* Pest and Disease Control: Malabar spinach is generally pest and disease resistant. However, keep an eye out for aphids, spider mites, and fungal diseases. Treat any problems promptly with organic pest control methods.
Harvesting Malabar Spinach
You can start harvesting Malabar spinach leaves as soon as the plants are large enough.
1. Harvest Regularly: Harvest leaves regularly to encourage continued growth.
2. Pinch or Cut: Pinch or cut off the leaves at the base of the stem.
3. Enjoy Fresh: Use the leaves fresh in salads, stir-fries, soups, and other dishes.
Troubleshooting
Even with the easiest plants, sometimes things don’t go as planned. Here are a few common issues you might encounter and how to address them:
* Slow Germination: If your seeds are taking a long time to germinate, make sure they’re warm enough and that the soil is consistently moist. You can also try scarifying and soaking the seeds before planting.
* Yellowing Leaves: Yellowing leaves can be a sign of overwatering, underwatering, or nutrient deficiency. Adjust your watering schedule and fertilize regularly.
* Pest Infestations: If you notice pests on your plants, try spraying them with insecticidal soap or neem oil. You can also attract beneficial insects to your garden to help control pests.
* Slow Growth: If your plants are growing slowly, make sure they’re getting enough sunlight and nutrients. Amend the soil with compost or other organic matter to improve fertility.
Enjoying Your Harvest
The best part of growing Malabar spinach is, of course, enjoying the delicious leaves! Here are a few of my favorite ways to use them:
* Salads: Add fresh Malabar spinach leaves to your salads for a slightly citrusy flavor and a boost of nutrients.
* Stir-Fries: Stir-fry the leaves with garlic, ginger, and your favorite vegetables.
* Soups: Add the leaves to soups and stews for a healthy and flavorful addition.
* Smoothies: Blend the leaves into smoothies for a nutritious green boost.
Final Thoughts
Growing Malabar spinach is a rewarding experience that anyone can enjoy. With a little bit of care and attention, you can have a continuous supply of fresh, delicious greens throughout the growing season. So, what are you waiting for? Get out there and start growing! Happy gardening!
Conclusion
So, there you have it! Growing Malabar spinach at home is not only achievable but also incredibly rewarding. From the vibrant, glossy leaves to the satisfying feeling of harvesting your own food, this leafy green offers a unique and enriching gardening experience. We’ve walked you through the entire process, from selecting the right seeds or cuttings to providing the optimal growing conditions and troubleshooting common issues.
But why is this DIY trick a must-try? Beyond the obvious benefits of fresh, organic produce, growing your own Malabar spinach allows you to control exactly what goes into your food. No more worrying about pesticides or long transportation distances. You’ll have a constant supply of this nutritious and delicious vegetable right at your fingertips. Plus, it’s a beautiful addition to any garden, adding a touch of exotic flair with its climbing vines and deep green foliage.
Consider these variations to personalize your Malabar spinach growing experience:
* Vertical Gardening: Malabar spinach thrives in vertical gardens, making it perfect for small spaces. Use trellises, fences, or even hanging baskets to maximize your yield.
* Companion Planting: Plant Malabar spinach alongside other vegetables like tomatoes, peppers, and eggplant to create a mutually beneficial ecosystem.
* Different Varieties: Explore different varieties of Malabar spinach, such as the red-stemmed variety, for a unique visual appeal and slightly different flavor profile.
* Container Gardening: If you don’t have a garden, you can still grow Malabar spinach in containers on your balcony or patio. Just make sure to choose a large enough pot and provide adequate support for the vines.
Ultimately, the best way to discover the joys of growing Malabar spinach is to simply dive in and try it yourself. Don’t be afraid to experiment, learn from your mistakes, and adapt the techniques to suit your specific environment and preferences. The satisfaction of harvesting your own homegrown Malabar spinach is well worth the effort.
We are confident that with the knowledge and tips shared in this article, you’ll be well on your way to enjoying a bountiful harvest of this versatile and delicious leafy green. So, grab your seeds or cuttings, prepare your garden, and get ready to embark on a rewarding gardening adventure.
Now, we want to hear from you! Have you tried growing Malabar spinach at home? What challenges did you face, and what successes did you achieve? Share your experiences, tips, and photos in the comments below. Let’s create a community of Malabar spinach enthusiasts and learn from each other. Your insights could be invaluable to other aspiring gardeners. Happy growing!
Frequently Asked Questions (FAQ)
What exactly is Malabar spinach, and how is it different from regular spinach?
Malabar spinach (Basella alba or Basella rubra) is not actually related to true spinach (Spinacia oleracea). It’s a tropical vine that thrives in warm weather, unlike true spinach which prefers cooler temperatures. Malabar spinach has thicker, succulent leaves and a slightly citrusy, peppery flavor. It’s also more heat-tolerant and less prone to bolting in hot weather, making it a great alternative to spinach in warmer climates. It’s also known as Ceylon Spinach, Vine Spinach, and Indian Spinach.
How long does it take for Malabar spinach to grow from seed to harvest?
Generally, you can expect to start harvesting Malabar spinach about 60-70 days after planting seeds. However, this can vary depending on the growing conditions, such as temperature, sunlight, and soil fertility. Starting with cuttings can shorten this timeframe considerably.
What are the best growing conditions for Malabar spinach?
Malabar spinach thrives in warm, humid conditions with plenty of sunlight (at least 6-8 hours per day). It prefers well-drained soil that is rich in organic matter. The ideal soil pH is between 6.5 and 7.5. Regular watering is essential, especially during hot and dry periods.
How often should I water my Malabar spinach plants?
Water your Malabar spinach plants regularly, especially during hot and dry weather. The soil should be consistently moist but not waterlogged. A good rule of thumb is to water deeply whenever the top inch of soil feels dry to the touch. Mulching around the plants can help retain moisture and suppress weeds.
Does Malabar spinach need a trellis or other support?
Yes, Malabar spinach is a climbing vine and needs a trellis, fence, or other support structure to grow properly. Without support, the vines will sprawl on the ground, making them more susceptible to pests and diseases. A trellis also allows for better air circulation and sunlight penetration, which promotes healthy growth.
What are some common pests and diseases that affect Malabar spinach?
Malabar spinach is generally resistant to pests and diseases, but it can be susceptible to aphids, spider mites, and fungal diseases like leaf spot. Regularly inspect your plants for signs of infestation or disease and take appropriate action if necessary. Insecticidal soap or neem oil can be used to control aphids and spider mites. Fungicides can be used to treat fungal diseases. Good air circulation and proper watering practices can also help prevent these problems.
How do I harvest Malabar spinach?
Harvest Malabar spinach by snipping off the leaves and tender stems as needed. You can harvest individual leaves or entire stems. Regular harvesting encourages the plant to produce more leaves. Avoid harvesting more than one-third of the plant at a time to allow it to continue growing.
How do I store harvested Malabar spinach?
Store harvested Malabar spinach in the refrigerator in a plastic bag or container. It will keep for several days. Wash the leaves thoroughly before using.
Can I eat Malabar spinach raw?
Yes, you can eat Malabar spinach raw, but it’s generally preferred cooked. Raw Malabar spinach has a slightly slimy texture, which some people may find unappealing. Cooking the leaves reduces the sliminess and enhances the flavor.
What are some ways to cook Malabar spinach?
Malabar spinach can be cooked in a variety of ways, such as stir-frying, steaming, boiling, or adding it to soups and stews. It can be used as a substitute for spinach in many recipes. It pairs well with garlic, ginger, onions, and other vegetables.
Is Malabar spinach nutritious?
Yes, Malabar spinach is a highly nutritious vegetable. It’s a good source of vitamins A and C, iron, calcium, and antioxidants. It’s also low in calories and fat.
Can I grow Malabar spinach indoors?
While it’s possible to grow Malabar spinach indoors, it can be challenging due to the plant’s need for ample sunlight and space. If you choose to grow it indoors, provide it with a sunny location (such as a south-facing window) and use grow lights to supplement the natural light. You’ll also need a large container and a trellis or other support structure.
How do I save seeds from Malabar spinach?
To save seeds from Malabar spinach, allow some of the flowers to develop into berries. Once the berries turn dark purple or black, they are ripe. Harvest the berries and remove the seeds. Dry the seeds thoroughly before storing them in an airtight container in a cool, dark place.
Is Malabar spinach a perennial or an annual?
Malabar spinach is a perennial in tropical and subtropical climates (USDA zones 9-11). In colder climates, it is typically grown as an annual.
Can I grow Malabar spinach in containers?
Yes, Malabar spinach grows very well in containers. Choose a large container (at least 12 inches in diameter) with good drainage. Use a well-draining potting mix that is rich in organic matter. Provide the plants with a trellis or other support structure.

Leave a Comment