
Hydroponic Celery Growing Guide: Unlock the secrets to cultivating crisp, delicious celery right in your own home, even without a traditional garden! Have you ever dreamed of snipping fresh celery stalks for your salads or soups, knowing exactly where they came from and what went into growing them? Well, dream no more! This DIY guide will walk you through the surprisingly simple process of hydroponic celery growing.
While celery might seem like a modern grocery store staple, its history stretches back to ancient times. The Romans and Greeks used it for medicinal purposes, and it wasn’t until the 16th century that it became a popular culinary ingredient. Now, we’re taking celery cultivation a step further, embracing innovative methods like hydroponics to make it accessible to everyone, regardless of space or climate.
Why should you try this DIY trick? Because fresh, store-bought celery can often be disappointing – limp, bitter, and sometimes even carrying pesticide residue. With our hydroponic celery growing guide, you’ll gain complete control over the growing process, ensuring you harvest only the most flavorful and healthy celery. Plus, it’s a fantastic way to reduce your environmental footprint and enjoy the satisfaction of growing your own food. Let’s dive in and discover how easy it is to have a thriving hydroponic celery garden!

DIY Hydroponic Celery: A Crispy, Crunchy Adventure!
Hey there, fellow plant enthusiasts! Ever dreamt of harvesting your own crisp, refreshing celery right from your kitchen? Well, dream no more! I’m going to walk you through building your own simple hydroponic system to grow celery indoors. It’s easier than you think, and the results are incredibly rewarding. Get ready for some serious celery satisfaction!
What You’ll Need: The Celery Starter Pack
Before we dive in, let’s gather our supplies. Don’t worry, you probably have a lot of this stuff lying around already!
* Celery Stalk: Obviously! Choose a healthy-looking stalk from the grocery store. Look for one with a firm base and vibrant green leaves.
* Clear Container: A plastic container, glass jar, or even a repurposed yogurt tub will work. Just make sure it’s clear so light can reach the roots.
* Toothpicks: These are crucial for suspending the celery base over the water.
* Water: Tap water is fine, but filtered water is even better.
* Hydroponic Nutrients (Optional but Recommended): While celery can initially grow in just water, adding hydroponic nutrients will give it a significant boost and ensure healthier, more robust growth. Look for a balanced nutrient solution specifically designed for leafy greens.
* Grow Lights (Optional but Recommended): If you don’t have a sunny windowsill, grow lights will be your best friend. Celery needs plenty of light to thrive.
* pH Meter or pH Test Strips (Optional): Maintaining the correct pH level is important for nutrient absorption.
* Rockwool Cubes or Coco Coir (Optional): If you want to start your celery from seed, you’ll need a growing medium.
* Net Pots (Optional): If you’re using rockwool or coco coir, net pots will help support the seedlings in your hydroponic system.
* Air Pump and Air Stone (Optional): For a deeper water culture system, an air pump and air stone will oxygenate the water, promoting faster growth.
Phase 1: Celery Regeneration – From Stalk to Sprout
This is where the magic begins! We’re going to coax a new celery plant from a humble grocery store stalk.
1. Prepare the Celery Base: Carefully cut off the bottom 2-3 inches of the celery stalk. This is the part we’ll be regenerating. Try to make a clean cut.
2. Insert Toothpicks: Insert 3-4 toothpicks evenly spaced around the sides of the celery base. These will act as “legs” to suspend the base over the water.
3. Position Over Water: Place the celery base over your clear container, ensuring that the bottom of the base is just barely touching the water. The toothpicks should hold it in place.
4. Find a Sunny Spot: Place the container in a bright, sunny windowsill. If you don’t have a good windowsill, use a grow light. Aim for at least 6-8 hours of light per day.
5. Change the Water Regularly: Every 1-2 days, change the water in the container. This prevents algae growth and keeps the water fresh. If you’re using hydroponic nutrients, add them to the water according to the package instructions.
6. Observe and Wait: Within a week or two, you should start to see new growth emerging from the center of the celery base. These will be the new leaves and roots of your hydroponic celery plant!
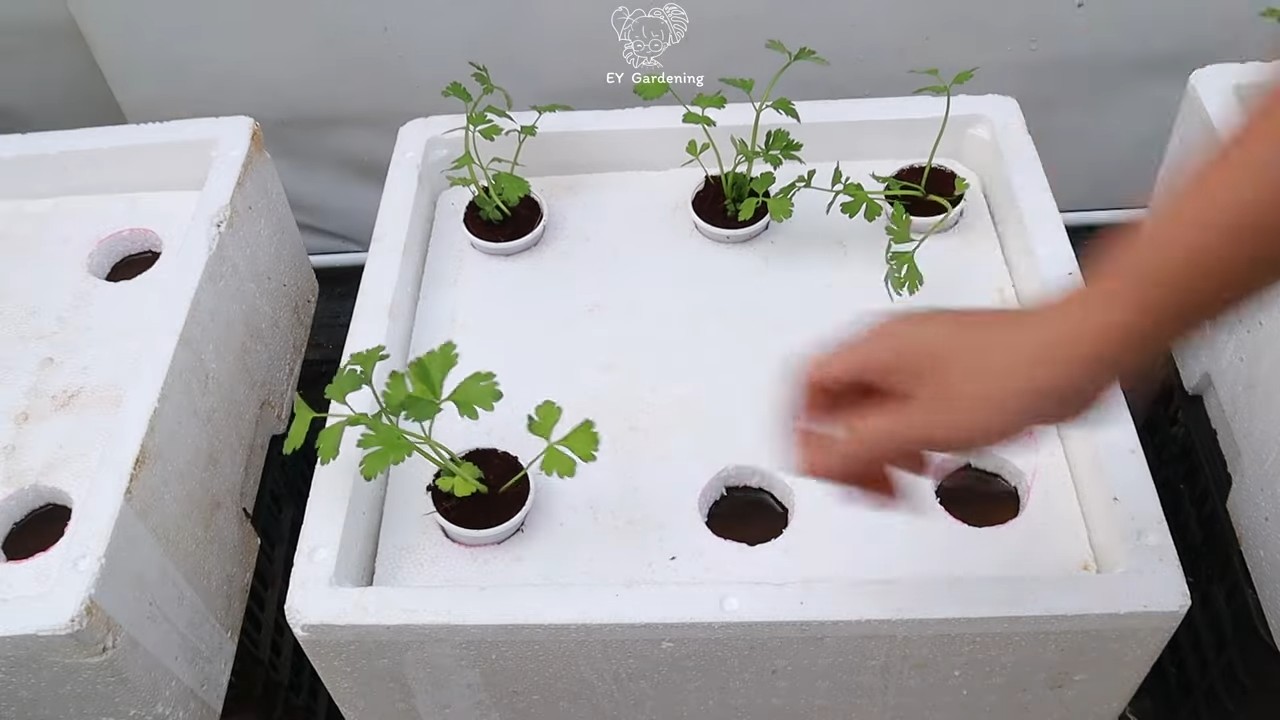
Phase 2: Building Your Hydroponic System (Two Options!)
Now that we have a sprouting celery base, it’s time to move it into a more permanent hydroponic setup. I’m going to give you two options: a simple water culture system and a slightly more advanced deep water culture (DWC) system.
Option 1: Simple Water Culture
This is the easiest and most beginner-friendly option.
1. Choose Your Container: Select a larger container than the one you used for regeneration. A plastic storage bin or a large bucket works well. Make sure it’s opaque to prevent algae growth.
2. Create a Lid (Optional): If you want to prevent evaporation and keep out pests, create a lid for your container. You can use a piece of cardboard or plastic. Cut a hole in the lid large enough to accommodate your celery plant.
3. Transfer the Celery: Gently remove the celery base from its original container and place it in the larger container. If you created a lid, place the celery through the hole.
4. Add Water and Nutrients: Fill the container with water, leaving a few inches of space at the top. Add hydroponic nutrients according to the package instructions.
5. Monitor and Maintain: Regularly check the water level and add more as needed. Change the water and nutrients every 1-2 weeks.
Option 2: Deep Water Culture (DWC)
This option provides more oxygen to the roots, resulting in faster growth.
1. Choose Your Container: Same as above, select a large, opaque container.
2. Create a Lid: Again, a lid is optional but recommended. Cut a hole in the lid large enough to accommodate a net pot.
3. Prepare the Net Pot: If you started your celery from seed using rockwool or coco coir, place the seedling in a net pot. If you’re using the regenerated celery base, you can try to gently secure it in the net pot using some growing medium or simply let the roots dangle into the water.
4. Add Water and Nutrients: Fill the container with water, leaving a few inches of space at the top. Add hydroponic nutrients according to the package instructions.
5. Add Air Stone and Air Pump: Place the air stone at the bottom of the container and connect it to the air pump. The air pump will bubble air through the water, providing oxygen to the roots.
6. Monitor and Maintain: Regularly check the water level and add more as needed. Change the water and nutrients every 1-2 weeks. Make sure the air pump is always running.
Phase 3: Nurturing Your Hydroponic Celery
Now that your celery is in its hydroponic system, it’s time to provide the care it needs to thrive.
1. Light: Celery needs plenty of light, so make sure it’s getting at least 6-8 hours of sunlight per day or the equivalent from grow lights. If you’re using grow lights, position them about 6-12 inches above the plant.
2. Nutrients: Continue to provide hydroponic nutrients according to the package instructions. A balanced nutrient solution is essential for healthy growth.
3. pH: Ideally, the pH of your hydroponic solution should be between 6.0 and 6.5. Use a pH meter or pH test strips to monitor the pH and adjust it as needed. You can use pH up or pH down solutions to raise or lower the pH.
4. Temperature: Celery prefers cooler temperatures, between 60-70°F (15-21°C). Avoid placing your hydroponic system in direct sunlight or near a heat source.
5. Air Circulation: Good air circulation helps prevent fungal diseases. If you’re growing your celery indoors, consider using a small fan to circulate the air.
6. Pest Control: Keep an eye out for pests like aphids or spider mites. If you spot any pests, you can try spraying them with insecticidal soap or neem oil.
7. Water Changes: Regular water changes are crucial for preventing nutrient buildup and algae growth. Change the water and nutrients every 1-2 weeks.
Phase 4: Harvesting and Enjoying Your Homegrown Celery
After a few weeks of nurturing, your hydroponic celery should be ready to harvest!
1. Harvesting: You can harvest individual stalks as needed or harvest the entire plant at once. To harvest individual stalks, simply cut them off at the base of the plant. To harvest the entire plant, cut it off at the base.
2. Enjoying: Now comes the best part! Enjoy your homegrown celery in salads, soups, smoothies, or as a crunchy snack. The possibilities are endless!
Troubleshooting Tips
Even with the best care, you might encounter some challenges along the way. Here are a few common problems and how to fix them:
* Yellowing Leaves: This could be a sign of nutrient deficiency. Make sure you’re providing a balanced nutrient solution and that the pH is within the correct range.
* Slow Growth: This could be due to insufficient light, low temperatures, or nutrient deficiencies. Make sure your celery is getting enough light, the temperature is within the optimal range, and you’re providing a balanced nutrient solution.
* Root Rot: This is caused by overwatering or poor drainage. Make sure the roots are not constantly submerged in
Conclusion
So, there you have it! A comprehensive guide to growing your own celery hydroponically. We’ve walked you through everything from seed starting to nutrient solutions, troubleshooting common problems, and harvesting your crisp, delicious celery stalks. But why should you bother with this method? Why not just stick to buying celery from the grocery store?
The answer is simple: control, freshness, and flavor. When you grow your own celery hydroponically, you have complete control over the growing environment. You know exactly what nutrients your plants are receiving, ensuring they are healthy and free from harmful pesticides. This translates to a cleaner, healthier, and ultimately more flavorful celery. Store-bought celery, while convenient, often lacks the vibrant taste and satisfying crunch of freshly harvested, home-grown celery. Plus, the satisfaction of nurturing a plant from seed to table is an experience that simply can’t be replicated.
Beyond the superior quality, hydroponic celery growing offers a sustainable and space-saving solution for urban gardeners or anyone with limited outdoor space. You don’t need a sprawling garden to enjoy fresh celery; a simple hydroponic setup can thrive on a balcony, patio, or even indoors with the help of grow lights. This makes it an accessible option for anyone looking to incorporate more fresh, healthy produce into their diet.
This DIY hydroponic celery growing method is a must-try for anyone seeking a sustainable, flavorful, and rewarding gardening experience.
But don’t stop there! Experiment with different nutrient solutions to find the perfect balance for your plants. Try growing different varieties of celery, such as Pascal or Utah, to discover your favorite flavor profile. You can even add companion plants like basil or parsley to your hydroponic system to enhance the flavor of your celery and create a more diverse and productive garden.
Consider these variations to elevate your hydroponic celery experience:
* Vertical Hydroponics: If space is truly limited, explore vertical hydroponic systems. These systems allow you to grow celery in stacked layers, maximizing your yield in a small footprint.
* Deep Water Culture (DWC): For a simpler setup, try DWC. This method involves suspending the celery roots in a nutrient-rich solution with an air stone to provide oxygen.
* Kratky Method: This passive hydroponic method requires no pumps or electricity, making it a low-maintenance option. The roots are partially submerged in the nutrient solution, and the plant absorbs what it needs as the water level drops.
* Adding Beneficial Microbes: Introduce beneficial bacteria and fungi to your nutrient solution to enhance nutrient uptake and improve plant health.
We are confident that you will find this DIY hydroponic celery growing guide to be a valuable resource. We encourage you to take the plunge and embark on your own hydroponic celery adventure. The rewards are well worth the effort.
Now, it’s your turn! We want to hear about your experiences. Did you try our method? What challenges did you face? What successes did you achieve? Share your tips, tricks, and photos in the comments below. Let’s build a community of hydroponic celery enthusiasts and learn from each other. Your feedback will help us improve this guide and inspire others to give it a try. Happy growing!
Frequently Asked Questions (FAQ)
What are the benefits of growing celery hydroponically compared to traditional soil gardening?
Hydroponic celery growing offers several advantages over traditional soil gardening. Firstly, it allows for faster growth rates. Because the plants receive nutrients directly to their roots, they don’t have to expend energy searching for them in the soil. This leads to quicker maturation and harvesting. Secondly, hydroponics uses less water than soil gardening. The water is recirculated within the system, minimizing water waste. Thirdly, it eliminates soilborne diseases and pests. Without soil, there’s no risk of common soil pathogens affecting your celery plants. Finally, hydroponics is space-efficient. You can grow celery in a small area, making it ideal for urban gardeners or those with limited outdoor space.
What type of hydroponic system is best for growing celery?
The best type of hydroponic system for celery depends on your budget, space, and experience level. Deep Water Culture (DWC) is a simple and affordable option for beginners. Nutrient Film Technique (NFT) is more advanced but offers excellent nutrient delivery. The Kratky method is a passive system that requires minimal maintenance. Ebb and Flow (Flood and Drain) systems are also suitable but require more setup. Consider your resources and preferences when choosing a system.
What are the ideal nutrient solution requirements for hydroponic celery?
Celery requires a balanced nutrient solution with adequate levels of nitrogen (N), phosphorus (P), and potassium (K). A general-purpose hydroponic nutrient solution formulated for leafy greens will work well. Look for a solution with an NPK ratio of around 10-5-14. The pH of the nutrient solution should be maintained between 6.0 and 6.5. Regularly monitor and adjust the pH as needed. Also, ensure the Electrical Conductivity (EC) of the solution is within the recommended range for celery, typically between 1.8 and 2.4 mS/cm.
How often should I change the nutrient solution in my hydroponic system?
The frequency of nutrient solution changes depends on the size of your system and the growth rate of your celery plants. As a general rule, change the nutrient solution every 1-2 weeks. This helps prevent nutrient imbalances and the buildup of harmful salts. Monitor the EC and pH of the solution regularly. If the EC drops significantly or the pH drifts outside the ideal range, it’s time for a change.
What are some common problems I might encounter when growing celery hydroponically, and how can I fix them?
Common problems include nutrient deficiencies, algae growth, and pest infestations. Nutrient deficiencies can be identified by yellowing leaves or stunted growth. Adjust the nutrient solution accordingly. Algae growth can be prevented by keeping the system clean and blocking out light. If algae does appear, clean the system thoroughly and consider using an algaecide. Pest infestations can be treated with organic insecticides or by introducing beneficial insects. Regularly inspect your plants for signs of pests or diseases.
How long does it take to grow celery hydroponically from seed to harvest?
Celery typically takes 120-140 days to mature from seed to harvest. However, hydroponic celery growing can shorten this timeframe by several weeks. You can expect to harvest your celery in about 90-120 days, depending on the variety and growing conditions.
Can I grow celery hydroponically indoors?
Yes, you can grow celery hydroponically indoors with the help of grow lights. Celery requires at least 6-8 hours of light per day. If you don’t have access to natural sunlight, use LED grow lights to provide the necessary illumination. Choose full-spectrum grow lights that emit a balanced spectrum of light for optimal plant growth.
What is the best temperature for growing celery hydroponically?
The ideal temperature for growing celery hydroponically is between 60°F and 70°F (15°C and 21°C). Celery can tolerate slightly cooler temperatures, but growth will be slower. Avoid exposing your plants to temperatures above 80°F (27°C), as this can cause stress and reduce yields.
How do I harvest celery from my hydroponic system?
To harvest celery, simply cut the stalks at the base of the plant with a sharp knife. You can harvest individual stalks as needed or harvest the entire plant at once. After harvesting, wash the celery stalks thoroughly and store them in the refrigerator.
Can I reuse the nutrient solution after harvesting my celery?
It’s generally not recommended to reuse the nutrient solution after harvesting celery. The solution may contain accumulated salts, pathogens, and nutrient imbalances. It’s best to discard the old solution and start with a fresh batch for your next crop.


Leave a Comment