
Grow Black Tomatoes, and transform your garden into a vibrant tapestry of color and flavor! Have you ever seen those deep, mysterious, almost gothic-looking tomatoes and wondered, “How do they do that?” Well, wonder no more! This DIY guide is your key to unlocking the secrets of cultivating these unique and delicious fruits right in your own backyard.
The allure of black tomatoes isn’t just their striking appearance. These beauties boast a rich, complex flavor profile, often described as smoky, sweet, and slightly earthy – a far cry from your average supermarket tomato. While the exact origins are debated, the development of black tomato varieties like ‘Black Krim’ and ‘Cherokee Purple’ represents a fascinating chapter in horticultural innovation, with dedicated breeders carefully selecting and cross-breeding to enhance their unique characteristics.
But why should *you* bother to grow black tomatoes? Beyond the bragging rights of having the coolest-looking tomatoes on the block, these varieties often offer superior taste and nutritional benefits. Plus, learning to cultivate them yourself is incredibly rewarding. In this article, I’ll share my tried-and-true DIY tricks and hacks, from selecting the right seeds to nurturing your plants for optimal growth and a bountiful harvest. Get ready to impress your friends and family with the most flavorful and visually stunning tomatoes they’ve ever tasted!
Unlocking the Secrets to Growing Luscious Black Tomatoes: A DIY Guide
Hey fellow gardening enthusiasts! Ever dreamt of biting into a juicy, almost-black tomato, bursting with unique flavor? Well, dream no more! Growing black tomatoes isn’t as mysterious as it sounds. With a little know-how and some TLC, you can cultivate these beauties right in your own backyard. I’m going to walk you through everything you need to know, from seed to harvest.
Choosing the Right Black Tomato Variety
First things first, let’s talk varieties. Not all “black” tomatoes are created equal. They range in color from deep mahogany to almost jet black, and their flavors vary just as much. Here are a few popular choices:
* Black Krim: This is a classic for a reason. It’s known for its rich, slightly salty flavor and flattened shape. It’s also relatively easy to grow.
* Cherokee Purple: While technically more of a dusky rose-purple, Cherokee Purple is a beloved heirloom with a complex, sweet, and smoky taste.
* Black Prince: A smaller, more compact variety, Black Prince is a good choice for smaller gardens or containers. It has a slightly tart flavor.
* Paul Robeson: This Russian heirloom is prized for its intense, almost smoky flavor and smooth texture.
* Japanese Black Trifele: Pear-shaped and beautiful, this variety offers a unique look and a sweet, slightly tangy flavor.
My recommendation? Start with Black Krim or Cherokee Purple. They’re relatively forgiving and offer fantastic flavor.
Getting Started: From Seed to Seedling
Okay, let’s get our hands dirty! You have two options here: starting from seed or buying seedlings from a nursery. I personally prefer starting from seed because it gives me more control over the process and allows me to choose from a wider variety of black tomato types.
Starting Seeds Indoors (Recommended)
This is the method I swear by for strong, healthy plants.
1. Gather Your Supplies: You’ll need:
* Tomato seeds (of your chosen black tomato variety, of course!)
* Seed starting trays or small pots
* Seed starting mix (this is crucial – don’t use regular potting soil!)
* A spray bottle filled with water
* A heat mat (optional, but highly recommended)
* A grow light (also optional, but helps prevent leggy seedlings)
2. Sow the Seeds: Moisten the seed starting mix and fill your trays or pots. Make a small indentation (about ¼ inch deep) in each cell or pot. Place 2-3 seeds in each indentation. Gently cover the seeds with more seed starting mix.
3. Water Gently: Use the spray bottle to mist the soil. You want it to be moist, but not soggy.
4. Provide Warmth and Light: Place the trays or pots on a heat mat (if using) and under a grow light (if using). If you don’t have a heat mat, find a warm spot in your house (around 70-75°F). If you don’t have a grow light, place the trays or pots near a sunny window, rotating them regularly to prevent the seedlings from leaning towards the light.
5. Keep the Soil Moist: Check the soil daily and mist with water as needed to keep it moist.
6. Wait Patiently: Germination usually takes 5-10 days.
7. Thin the Seedlings: Once the seedlings have their first true leaves (the second set of leaves that appear after the initial seed leaves), thin them to one seedling per cell or pot. Choose the strongest, healthiest-looking seedling and snip off the others at the soil line. Don’t pull them out, as this can disturb the roots of the remaining seedling.
Buying Seedlings
If you’re short on time or space, buying seedlings is a perfectly acceptable option.
1. Choose Healthy Seedlings: Look for seedlings that are about 6-8 inches tall, with thick stems and healthy green leaves. Avoid seedlings that are leggy (tall and spindly), yellowed, or have spots on their leaves.
2. Check the Roots: Gently remove a seedling from its pot and inspect the roots. They should be white or light brown and not circling tightly around the pot.
3. Harden Off the Seedlings: Before planting your seedlings outdoors, you need to “harden them off.” This means gradually exposing them to outdoor conditions over a period of 7-10 days. Start by placing them in a sheltered spot outdoors for an hour or two each day, gradually increasing the amount of time they spend outside. This will help them acclimate to the sun, wind, and temperature changes.
Preparing the Garden Bed
Black tomatoes, like all tomatoes, are heavy feeders. They need rich, well-drained soil to thrive.
1. Choose a Sunny Location: Tomatoes need at least 6-8 hours of sunlight per day.
2. Prepare the Soil: Dig a hole that is twice as wide and as deep as the root ball of your seedling. Amend the soil with plenty of compost or well-rotted manure. This will provide the nutrients your tomatoes need to grow strong and produce delicious fruit. I also like to add a handful of bone meal to the planting hole to promote strong root development.
3. Check the Soil pH: Tomatoes prefer a slightly acidic soil pH of 6.0-6.8. You can test your soil pH with a soil testing kit. If your soil is too alkaline, you can amend it with sulfur.
Planting Your Black Tomato Seedlings
Now for the fun part!
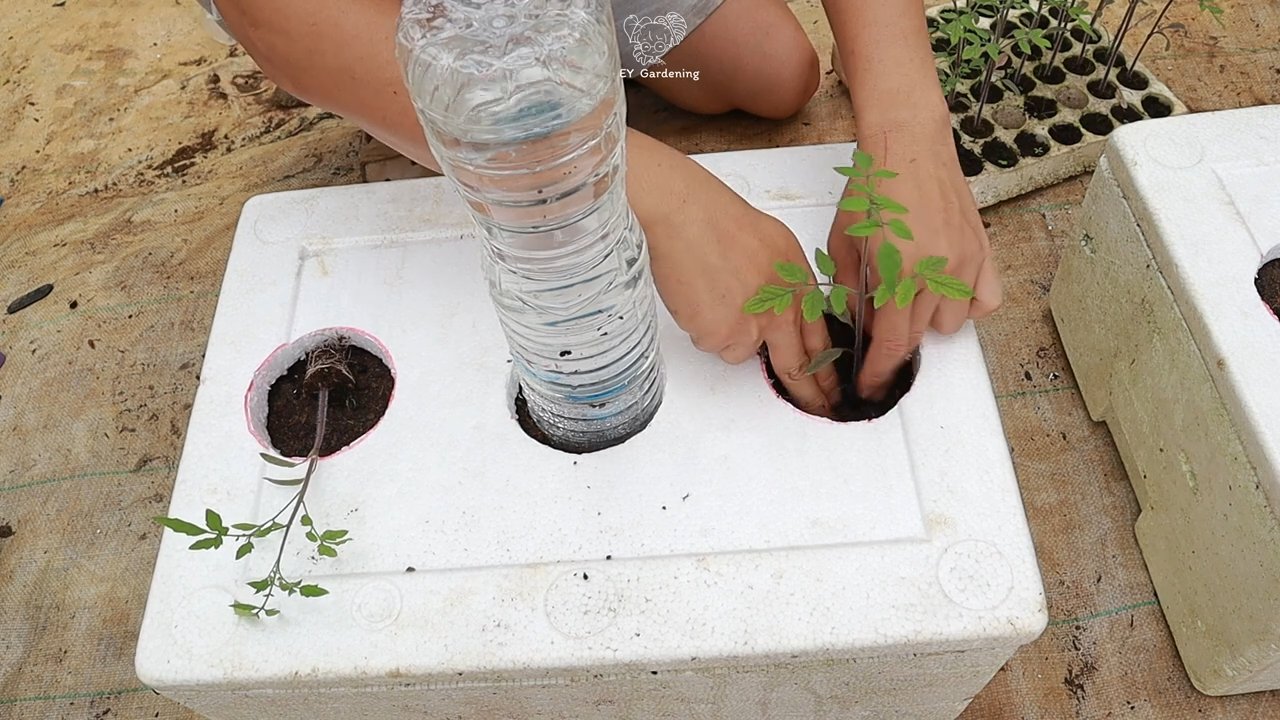
1. Planting Time: Wait until all danger of frost has passed before planting your tomato seedlings outdoors.
2. Planting Depth: Plant the seedlings slightly deeper than they were growing in their pots. This will encourage them to develop more roots along the buried stem.
3. Spacing: Space the seedlings about 2-3 feet apart. This will give them enough room to grow and prevent overcrowding.
4. Water Thoroughly: After planting, water the seedlings thoroughly.
5. Mulch: Apply a layer of mulch around the base of the plants. This will help to retain moisture, suppress weeds, and regulate soil temperature. I like to use straw or shredded leaves as mulch.
Caring for Your Black Tomato Plants
Consistent care is key to a bountiful harvest of black tomatoes.
1. Watering: Water deeply and regularly, especially during hot, dry weather. Aim to water at the base of the plants to avoid wetting the foliage, which can lead to disease.
2. Fertilizing: Fertilize your tomato plants every 2-3 weeks with a balanced tomato fertilizer. Follow the instructions on the fertilizer package.
3. Pruning: Prune your tomato plants regularly to remove suckers (the small shoots that grow between the main stem and the branches). This will help to improve air circulation and prevent disease. I usually prune my indeterminate tomato varieties (those that continue to grow throughout the season) more heavily than my determinate varieties (those that grow to a certain size and then stop).
4. Staking or Caging: Black tomato plants can get quite large and heavy, so it’s important to provide them with support. You can use stakes, cages, or trellises to support the plants. I prefer using cages because they provide all-around support.
5. Pest and Disease Control: Keep an eye out for pests and diseases. Common tomato pests include aphids, tomato hornworms, and whiteflies. Common tomato diseases include early blight, late blight, and blossom end rot. Treat any problems promptly with appropriate organic pest control methods or fungicides. For blossom end rot, ensure consistent watering and consider adding calcium to the soil.
Harvesting Your Black Tomatoes
The moment you’ve been waiting for!
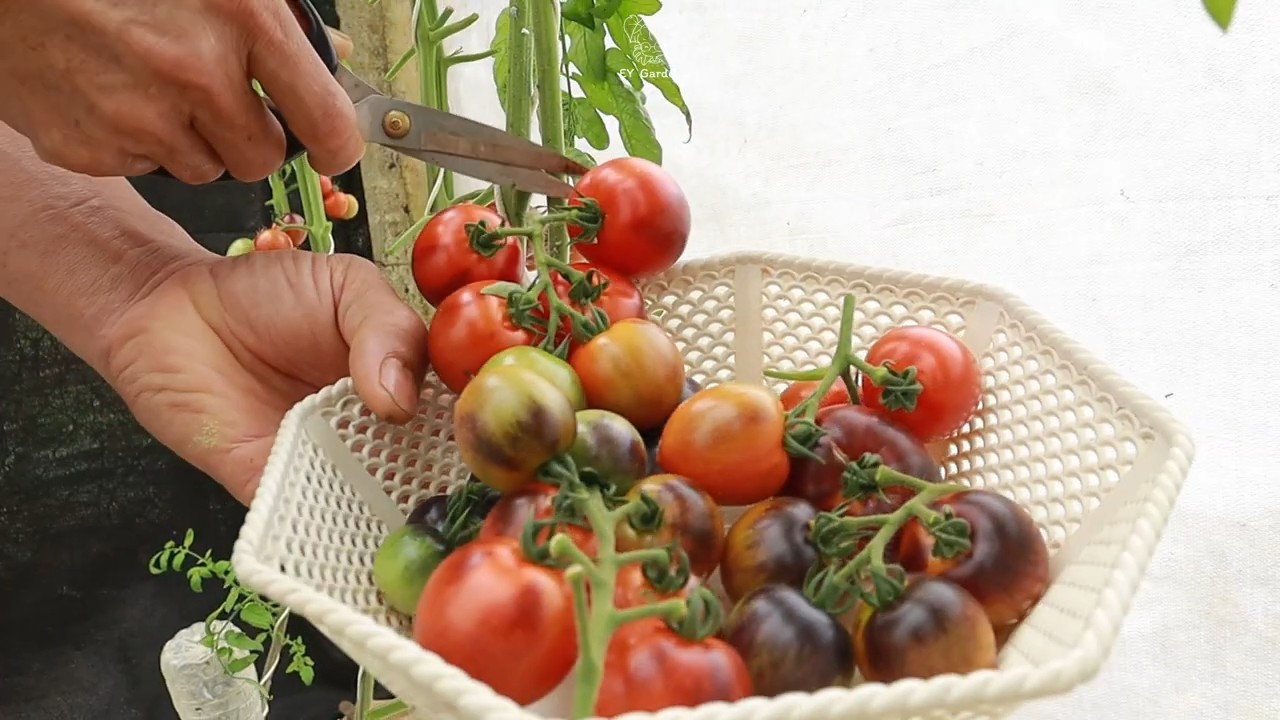
1. Ripeness: Black tomatoes are ripe when they are firm to the touch and have a deep, rich color. The color will vary depending on the variety, but generally, they should be a deep mahogany or almost black.
2. Harvesting Technique: Gently twist the tomato off the vine.
3. Storage: Store your harvested tomatoes at room temperature. Refrigerating them can affect their flavor and texture.
Troubleshooting Common Problems
Even with the best care, you might encounter some challenges. Here are a few common problems and how to address them:
* Blossom End Rot: This is caused by a calcium deficiency. Ensure consistent watering and consider adding calcium to the soil.
* Early Blight: This fungal disease causes dark spots on the leaves. Remove affected leaves and apply a fungicide.
* Tomato Hornworms: These large green caterpillars can quickly defoliate your tomato plants. Handpick them off the plants or use Bacillus thuringiensis (Bt), a natural insecticide.
* Cracking: This can happen when tomatoes experience inconsistent watering. Maintain consistent soil moisture
Conclusion
So, there you have it! Mastering the art of growing black tomatoes isn’t just about adding a unique and visually stunning element to your garden; it’s about unlocking a deeper connection with the food you consume and experiencing the unparalleled satisfaction of nurturing something extraordinary from seed to table. The deep, complex flavors of these dark beauties are a reward in themselves, far surpassing anything you can find on a supermarket shelf.
This DIY approach, focusing on soil amendments, strategic pruning, and consistent watering, empowers you to take control of your tomato-growing journey. It’s a hands-on experience that fosters a greater understanding of plant needs and the delicate balance of the ecosystem within your garden. Forget relying solely on commercial fertilizers and generic gardening advice; this method allows you to tailor your approach to your specific environment and the unique needs of your black tomato plants.
But the benefits extend beyond just taste and control. Growing your own black tomatoes is also a sustainable choice. You’re reducing your carbon footprint by minimizing transportation and packaging, and you’re ensuring that your tomatoes are free from harmful pesticides and chemicals. It’s a win-win for your health and the environment.
Consider these variations to further personalize your black tomato growing experience:
* Experiment with different black tomato varieties: ‘Black Krim’, ‘Cherokee Purple’, ‘Black Prince’, and ‘Paul Robeson’ each offer slightly different flavor profiles and growth habits. Explore which one best suits your palate and garden conditions.
* Incorporate companion planting: Basil, marigolds, and carrots are excellent companions for tomatoes, helping to deter pests and improve soil health.
* Try different soil amendments: While we’ve highlighted the importance of compost and bone meal, you can also experiment with other organic amendments like worm castings, kelp meal, or even coffee grounds to see how they impact your tomato growth.
* Explore hydroponics: For those with limited space or challenging soil conditions, hydroponic systems can provide a controlled environment for growing black tomatoes.
Don’t be intimidated by the prospect of growing something different. The process is surprisingly straightforward, and the rewards are immeasurable. The rich, smoky flavor of a homegrown black tomato, sliced fresh from the vine and enjoyed in a salad or sandwich, is an experience that will transform your appreciation for this versatile fruit.
We wholeheartedly encourage you to give this DIY trick a try. Start small, be patient, and don’t be afraid to experiment. The journey of growing your own black tomatoes is a learning experience, and every season will bring new insights and opportunities for improvement.
Most importantly, we want to hear about your experiences! Share your successes, your challenges, and your tips for growing black tomatoes in the comments below. Let’s create a community of passionate gardeners who are dedicated to cultivating these extraordinary fruits. Your insights could inspire others to embark on their own black tomato growing adventures. Let’s grow together!
Frequently Asked Questions (FAQ)
What exactly makes a tomato “black”?
The term “black tomato” refers to a group of tomato varieties that exhibit a dark, reddish-purple to almost black coloration on their skin when ripe. This coloration is due to high concentrations of anthocyanins, the same antioxidants that give blueberries and other dark fruits their vibrant hues. These anthocyanins not only contribute to the unique color but also enhance the flavor profile, giving black tomatoes a richer, more complex taste compared to their red counterparts. They are also thought to contribute to the health benefits of these tomatoes.
Is it really more difficult to grow black tomatoes compared to regular red tomatoes?
While the fundamental principles of tomato cultivation remain the same, black tomatoes can sometimes be slightly more challenging to grow. They often require more consistent watering and feeding, and they may be more susceptible to certain diseases. However, with the right care and attention, as outlined in this guide, you can successfully grow black tomatoes in your garden. The key is to provide them with optimal growing conditions, including well-draining soil, adequate sunlight, and proper support.
What kind of soil is best for growing black tomatoes?
Black tomatoes thrive in well-draining, fertile soil that is rich in organic matter. A slightly acidic to neutral pH (around 6.0 to 7.0) is ideal. Before planting, amend your soil with plenty of compost, aged manure, or other organic materials to improve drainage, aeration, and nutrient content. Adding bone meal to the soil can also provide essential phosphorus, which promotes strong root development and fruit production. Avoid heavy clay soils, as they can retain too much moisture and lead to root rot.
How much sunlight do black tomatoes need?
Like all tomato varieties, black tomatoes require at least 6-8 hours of direct sunlight per day to thrive. Choose a planting location that receives ample sunlight throughout the day. If you live in a particularly hot climate, providing some afternoon shade can help prevent sunscald on the fruits. Insufficient sunlight can result in leggy plants, reduced fruit production, and less intense coloration in the tomatoes.
How often should I water my black tomato plants?
Consistent watering is crucial for growing healthy black tomato plants. Water deeply and regularly, especially during hot, dry weather. Aim to keep the soil consistently moist but not waterlogged. Avoid overhead watering, as this can increase the risk of fungal diseases. Instead, water at the base of the plants, using a soaker hose or drip irrigation system. Mulching around the plants can help retain moisture in the soil and suppress weed growth.
What are some common pests and diseases that affect black tomatoes, and how can I prevent them?
Black tomatoes are susceptible to the same pests and diseases that affect other tomato varieties, including aphids, whiteflies, tomato hornworms, early blight, and blossom end rot. To prevent these problems, practice good garden hygiene, such as removing weeds and debris from around the plants. Use organic pest control methods, such as insecticidal soap or neem oil, to control pests. Ensure proper air circulation around the plants to prevent fungal diseases. Blossom end rot is often caused by calcium deficiency, so amend your soil with bone meal or add calcium supplements as needed.
When is the best time to harvest black tomatoes?
Black tomatoes are typically ready to harvest when they have reached their full size and have developed a deep, reddish-purple to almost black coloration. The fruits should feel slightly soft to the touch but not mushy. The stem should also detach easily from the vine. The exact timing of harvest will depend on the variety of black tomato and the growing conditions. Taste test a tomato to ensure it has reached its peak flavor before harvesting the rest of the crop.
Can I save seeds from my black tomatoes to plant next year?
Yes, you can save seeds from your black tomatoes to plant next year, but keep in mind that tomatoes are self-pollinating, but cross-pollination can occur, especially if you are growing multiple varieties of tomatoes close together. To ensure that you are saving true-to-type seeds, choose fruits from healthy plants that exhibit the desired characteristics. Ferment the seeds in water for a few days to remove the gelatinous coating, then rinse and dry them thoroughly before storing them in a cool, dry place.
Are black tomatoes really more nutritious than regular red tomatoes?
While all tomatoes are a good source of vitamins and minerals, black tomatoes are particularly rich in antioxidants, especially anthocyanins. These compounds have been linked to a variety of health benefits, including reducing the risk of heart disease, cancer, and other chronic diseases. Black tomatoes also tend to have higher levels of lycopene, another powerful antioxidant. So, while both red and black tomatoes are nutritious, black tomatoes offer an extra boost of health-promoting compounds.


Leave a Comment