
Best Chili for High Yield: Craving a garden bursting with vibrant, fiery peppers? I know I am! There’s nothing quite like the satisfaction of harvesting your own chili peppers, ready to spice up your favorite dishes. But let’s be honest, sometimes our chili plants can be a little… shy. They might produce a few peppers, but not the bountiful harvest we dream of. That’s where this DIY guide comes in!
For centuries, chili peppers have been a staple in cuisines around the world, adding warmth and depth to everything from stews to sauces. From their origins in South America, they’ve traveled the globe, becoming integral to culinary traditions in Asia, Africa, and beyond. But growing them successfully, especially for a truly impressive yield, can feel like a secret art.
That’s why I’m sharing my top secrets for cultivating the best chili for high yield. Whether you’re a seasoned gardener or just starting out, these simple yet effective tricks will help you maximize your pepper production. Imagine baskets overflowing with ripe, ready-to-pick chilies – enough to share with friends, preserve for the winter, and add a kick to every meal. Stop settling for meager harvests and unlock the full potential of your chili plants with these easy DIY hacks!

The Ultimate Chili Growing Guide for a Maximum Harvest
Hello dear chili enthusiasts! I am thrilled to introduce you today to the world of chili cultivation, with a focus on how you can achieve a truly abundant harvest. Over the years, I’ve learned quite a few tricks and tips that I’m eager to share with you. Let’s work together to ensure your chili plants are bursting with fruit!
The Basics: What Chili Plants Really Love
Before we dive into the details, it’s important to understand the fundamental needs of our spicy friends. Chili plants are sun-worshippers and need warmth to thrive optimally. The right soil and a balanced supply of nutrients are also crucial for a rich harvest.
- Sun: At least 6-8 hours of direct sunlight per day is ideal.
- Warmth: Chili plants like it warm! Temperatures between 20°C and 30°C (68°F and 86°F) are optimal.
- Soil: Well-draining, nutrient-rich soil is a must.
- Water: Regular watering is important, but waterlogging should be avoided.
- Nutrients: Chili plants are hungry! A balanced fertilization is crucial for a good harvest.
Choosing the Right Chili Variety: The Key to Success
Not every chili variety is the same when it comes to yield. Some varieties are naturally more productive than others. Here are a few of my personal favorites for a high chili yield:
- Jalapeño: These classics are not only versatile but also very high-yielding.
- Serrano: Similar to jalapeños, but a bit hotter and also very productive.
- Thai Chili: Small but fiery chilis that grow in large quantities.
- Habanero: If you like it really hot, habaneros are a good choice, although they are a bit more demanding.
- Bell Pepper: Even though they are not spicy, bell peppers belong to the chili family and are known for their high harvest.
Step-by-Step Guide for Chili Cultivation
Now let’s get down to it! Here is a detailed guide on how to properly care for your chili plants from the very beginning to achieve a maximum harvest.
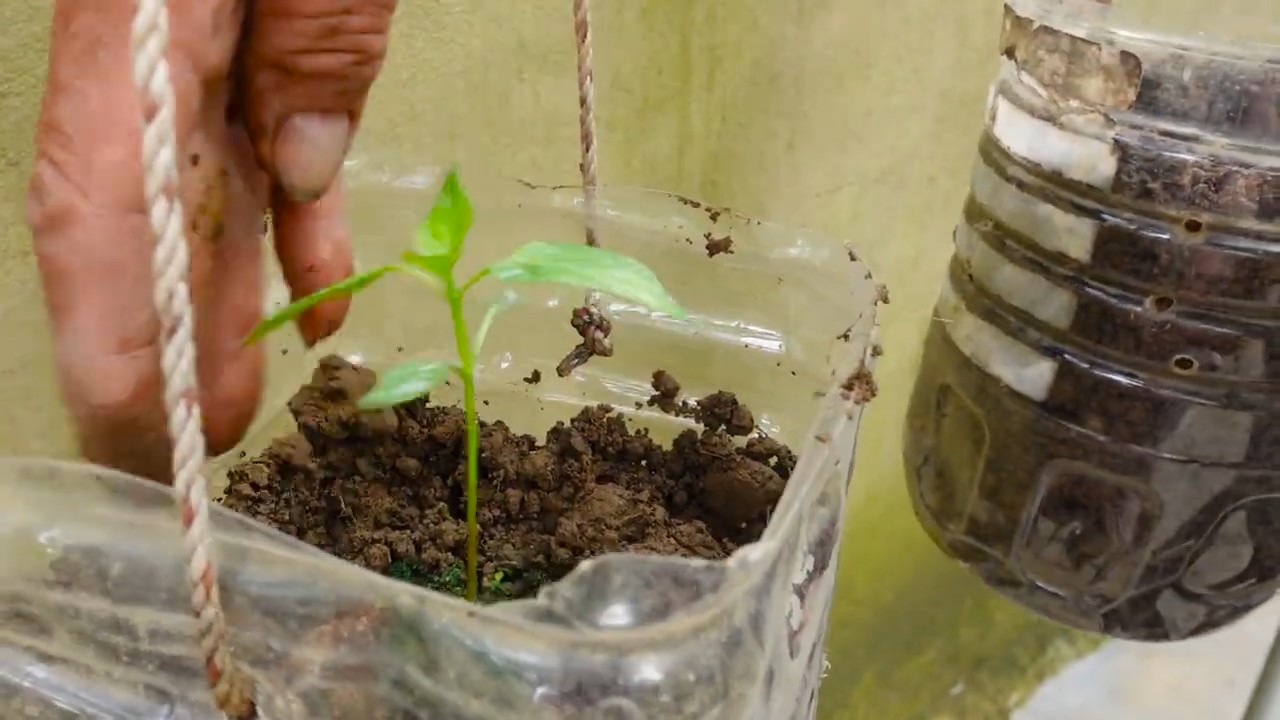
1. Preparation: Germinating Seeds
I usually start growing my chili plants indoors in February or March. This gives them a head start before they go outside.
- Select seeds: Choose your favorite chili variety and get high-quality seeds.
- Prepare seed trays: Fill small pots or seed trays with seed starting mix.
- Sow seeds: Place the seeds about 0.5 cm (0.2 inches) deep into the soil and press lightly.
- Maintain moisture: Keep the soil moist, but not wet. It’s best to moisten it with a spray bottle.
- Warmth and light: Place the seed trays in a warm, bright place. A heating mat can help to speed up germination.
- Be patient: Germination can take 1-3 weeks depending on the variety and temperature.
2. Transplanting: Giving the Plants More Space
Once the seedlings have a few true leaves (besides the initial cotyledons), it’s time to transplant them into larger pots.
- Prepare larger pots: Choose pots with a diameter of about 10-15 cm (4-6 inches) and fill them with high-quality potting soil.
- Carefully lift seedlings: Be careful not to damage the roots.
- Transplant: Place the seedlings in the new pots and fill with soil.
- Water in: Water the plants well and place them in a bright spot.
3. Planting Outdoors: When the Weather Cooperates
Chili plants are sensitive to frost, so you should only plant them outdoors after the last frost (mid-May).
- Choose a location: Select a sunny location with well-draining soil.
- Prepare the soil: Loosen the soil and mix in compost or organic fertilizer.
- Dig planting holes: The holes should be slightly larger than the root balls of the plants.
- Planting: Carefully remove the plants from the pots and place them in the holes.
- Fill with soil: Fill the holes with soil and press down lightly.
- Water in: Water the plants well.
- Mulch: A layer of mulch (e.g., straw or wood chips) around the plants helps to retain moisture in the soil and suppress weeds.
4. The Right Care: Watering, Fertilizing, Pruning
Proper care is crucial for a bountiful harvest. Here are a few tips I’ve learned over the years:
- Watering: Water the plants regularly, especially in dry weather. Make sure the soil doesn’t dry out, but avoid waterlogging.
- Fertilizing: Chili plants are hungry! Fertilize them regularly with a balanced fertilizer. I like to use organic fertilizer, such as compost tea or horn shavings.
- Pruning: Pruning side shoots is not strictly necessary for chili plants, but it can help to improve air circulation and promote fruit formation. I usually only remove the lower leaves that touch the ground.
- Supporting: Some chili varieties, especially those with large fruits, need support to keep from breaking.
- Pests and diseases: Watch out for pests and diseases and treat them early. I like to use natural remedies, such as neem oil or nettle manure.
Special Techniques for a Maximum Harvest
In addition to basic care, there are a few special techniques you can use to maximize your chili harvest.
1. Topping: Encouraging the Plant to Branch Out
Topping means cutting off the tip of the plant. This encourages the plant to form side shoots, resulting in a bushier plant and more fruit.
- When to top: Top the plant when it is about 20-30 cm (8-12 inches) tall.
- How to top: Cut the tip of the plant above a leaf node.
2. Stressing: Forcing the Plant to Produce Fruit
A little bit of stress can encourage the chili plant to produce more fruit.
- Water stress: Let the soil dry out slightly between waterings.
- Temperature stress: Briefly expose the plants to lower temperatures (but not below 10°C / 50°F).
Caution: Don’t overdo the stressing, as this can also damage the plant.
3. Pollination: Ensuring the Flowers are Fertilized
Chili plants are generally self-pollinating, but sometimes it can help to assist with pollination.
Attracting insects: Plant flowers near your chili plants
Shaking: Gently shake the plants to distribute the pollen.
Brush: Use a small brush to transfer pollen from flower to flower.
Conclusion
So, there you have it! Mastering this high-yield chili recipe is more than just cooking; it’s an investment in delicious, satisfying meals that will keep you warm and well-fed for days. We’ve walked you through the steps to create a chili that not only tastes incredible but also produces a generous quantity, perfect for meal prepping, feeding a crowd, or simply enjoying leftovers throughout the week.
Why is this DIY chili trick a must-try? Because it empowers you to control the ingredients, customize the flavors to your exact preferences, and save money compared to buying pre-made chili or dining out. You know exactly what’s going into your food, ensuring a healthier and more wholesome meal. Plus, the sheer volume you’ll create means less cooking in the long run – a huge win for busy weeknights!
But the beauty of this recipe lies in its adaptability. Feel free to experiment with different types of beans. Kidney beans, pinto beans, black beans – each will contribute a unique texture and flavor profile. For a spicier kick, add a pinch of cayenne pepper or a finely chopped jalapeño. If you prefer a sweeter chili, a tablespoon of brown sugar or a drizzle of molasses can work wonders. Consider adding vegetables like diced bell peppers, zucchini, or corn for added nutrients and texture. For a vegetarian option, simply omit the meat and add more vegetables or a plant-based protein substitute.
Don’t be afraid to get creative with your toppings, too! A dollop of sour cream or Greek yogurt adds a creamy tang, while shredded cheddar cheese provides a classic cheesy goodness. Chopped green onions, cilantro, or avocado offer a fresh and vibrant finish. A sprinkle of crushed tortilla chips adds a satisfying crunch.
We’re confident that this high-yield chili recipe will become a staple in your kitchen. It’s a versatile, flavorful, and economical way to enjoy a hearty and comforting meal.
Now, it’s your turn! We encourage you to try this recipe and experience the joy of creating your own delicious, high-yield chili. Don’t be shy about experimenting with different ingredients and flavors to find your perfect combination. And most importantly, share your experience with us! We’d love to hear about your variations, your favorite toppings, and any tips or tricks you discover along the way. Post your photos and comments on our social media pages using #HighYieldChili or tag us in your posts. Let’s build a community of chili enthusiasts and share the love of homemade goodness! We can’t wait to see what culinary masterpieces you create.
Frequently Asked Questions (FAQ)
Q: How long does this chili last in the refrigerator?
A: Properly stored in an airtight container, this chili will last for 3-4 days in the refrigerator. Ensure the chili has cooled down completely before refrigerating it to prevent bacterial growth. For optimal food safety, it’s best to consume it within this timeframe.
Q: Can I freeze this chili?
A: Absolutely! This chili freezes exceptionally well, making it perfect for meal prepping. Allow the chili to cool completely before transferring it to freezer-safe containers or freezer bags. Be sure to leave some headspace in the containers as the chili will expand slightly when frozen. It can be stored in the freezer for up to 2-3 months. When ready to eat, thaw it overnight in the refrigerator or use the defrost setting on your microwave.
Q: What kind of meat is best for this chili?
A: Ground beef is a classic choice for chili, but you can also use ground turkey, ground pork, or even shredded beef or chicken. For a richer flavor, consider using a combination of ground beef and ground sausage. If you’re using a leaner meat like ground turkey, you may want to add a tablespoon or two of olive oil to the pot to prevent it from drying out.
Q: Can I make this chili in a slow cooker?
A: Yes, you can easily adapt this recipe for a slow cooker. Brown the meat and onions in a skillet before transferring them to the slow cooker. Add the remaining ingredients and cook on low for 6-8 hours or on high for 3-4 hours. This is a great option for busy days when you want to come home to a warm and comforting meal.
Q: How can I thicken the chili if it’s too watery?
A: If your chili is too watery, there are several ways to thicken it. You can simmer it uncovered for a longer period of time to allow some of the liquid to evaporate. Alternatively, you can mix a tablespoon of cornstarch or flour with a small amount of cold water to create a slurry, then stir it into the chili and simmer for a few minutes until it thickens. Another option is to mash some of the beans with a fork and stir them back into the chili.
Q: How can I make this chili spicier?
A: If you like your chili with a kick, there are several ways to increase the heat. You can add a pinch of cayenne pepper, a finely chopped jalapeño or serrano pepper, or a few dashes of hot sauce. You can also use chili powder with a higher heat level. Remember to add the spices gradually and taste as you go to avoid making it too spicy.
Q: What if I don’t have all the spices listed in the recipe?
A: Don’t worry if you’re missing a spice or two. Chili powder is the most essential spice for chili, so make sure you have that. You can adjust the amounts of the other spices to your liking or substitute them with similar spices. For example, if you don’t have cumin, you can use a little bit of coriander.
Q: Can I use canned beans instead of dried beans?
A: Yes, you can use canned beans instead of dried beans. Just be sure to drain and rinse them before adding them to the chili. You’ll need about 6-7 cups of canned beans to replace the 2 cups of dried beans. Keep in mind that canned beans may be softer than dried beans, so you may need to adjust the cooking time accordingly.
Q: What are some good side dishes to serve with chili?
A: Chili is a versatile dish that pairs well with a variety of side dishes. Cornbread is a classic choice, but you can also serve it with crackers, tortilla chips, or a side salad. A baked potato or sweet potato is another great option. For a heartier meal, you can serve it with rice or quinoa.
Q: Can I make this chili vegetarian or vegan?
A: Absolutely! To make this chili vegetarian, simply omit the meat and add more vegetables or a plant-based protein substitute like tofu, tempeh, or lentils. To make it vegan, also ensure that you are not using any animal products in your toppings. For example, use a plant-based sour cream alternative instead of dairy sour cream. You can also add a tablespoon of cocoa powder for a richer flavor.


Leave a Comment