
DIY Strawberry Tower Bottles: Imagine plucking juicy, sun-ripened strawberries right from your own backyard, even if you only have a tiny balcony or patio! For centuries, gardeners have sought innovative ways to maximize space and yield, and vertical gardening is a testament to that ingenuity. From the hanging gardens of Babylon to modern-day urban farms, the desire to cultivate our own food in limited spaces has always been strong.
That’s where this amazing DIY project comes in. Are you tired of battling slugs for your precious strawberries or simply lacking the garden space to grow a decent crop? I know I was! That’s why I’m so excited to share this incredibly simple and effective method for creating your own DIY Strawberry Tower Bottles. This project not only saves space but also elevates your strawberries, literally, making them less susceptible to pests and diseases. Plus, it’s a fantastic way to recycle plastic bottles and add a touch of green to any corner of your home.
In this article, I’ll guide you step-by-step through the process of building your own strawberry tower using recycled bottles. You’ll learn everything from choosing the right bottles and soil to planting and caring for your strawberry plants. Get ready to transform your small space into a thriving strawberry paradise!

DIY Strawberry Tower from Plastic Bottles: Your Own Vertical Garden
Hello garden friends! Do you have little space but a desire for fresh strawberries from your own garden? Then I have just the thing for you: a strawberry tower made from recycled plastic bottles! This is not only super sustainable but also a real eye-catcher on the balcony or in the garden. Let’s get started!
What you need:
- A large number of empty plastic bottles (preferably the same sizes, e.g., 1.5-liter bottles)
- A sharp knife or scissors
- A drill or a nail and hammer
- Potting soil
- Strawberry plants (preferably different varieties for a longer harvest season)
- Watering can
- Optional: Spray paint (to decorate the bottles)
- Optional: Fleece or jute (to prevent the soil from falling out)
- Optional: Gloves (to keep your hands clean)
Preparation of the Bottles:
Before we start building the tower, we need to prepare the bottles. This is the most important step, so take your time and work carefully.
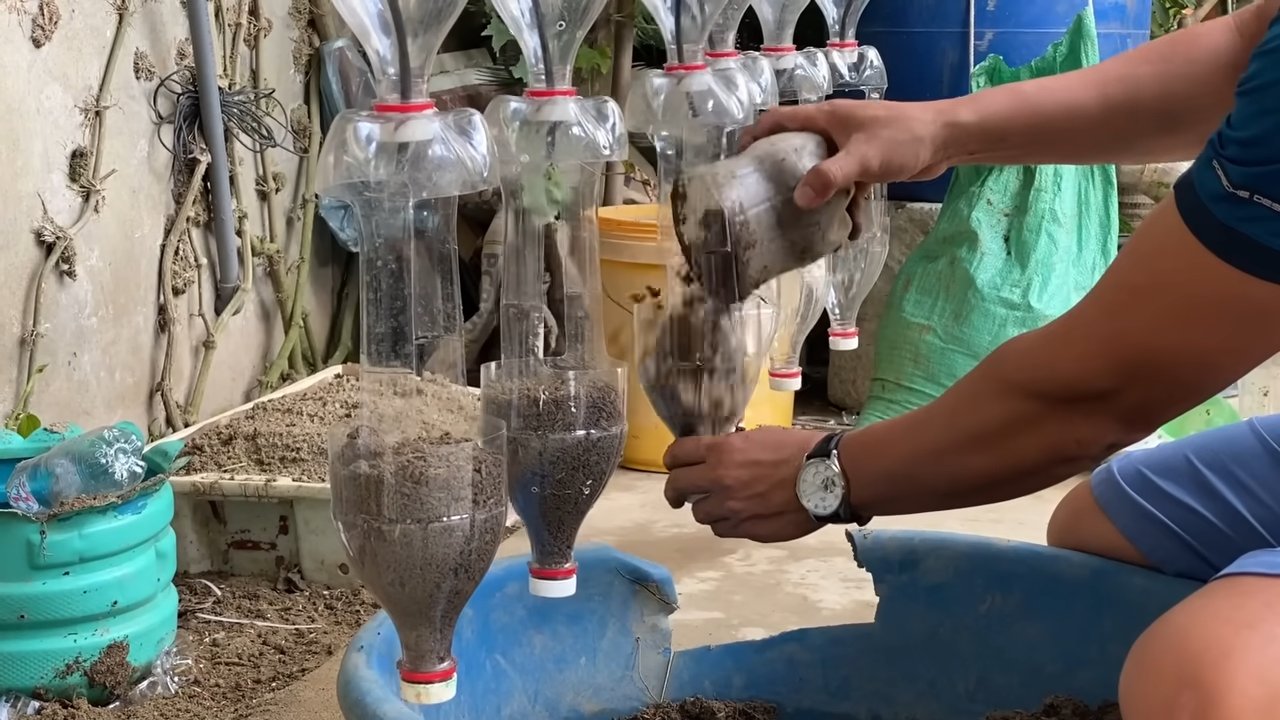
- Cleaning the bottles: Rinse all bottles thoroughly with warm water and dish soap. Remove all labels and adhesive residues. Dry the bottles well. Clean bottles are important to prevent mold.
- Cutting the planting holes: Now comes the tricky part. We need to cut holes in the bottles through which the strawberry plants can later grow.
- Position of the holes: Mark the spots where you want to cut the holes with a pen. It’s best to distribute the holes evenly around the bottle. Make sure the holes are not too large, so the soil doesn’t fall out later. I recommend a diameter of about 5-7 cm.
- Cutting the holes: Now, carefully cut out the marked holes with a sharp knife or scissors. Be very careful not to injure yourself. You can also use a utility knife to cut the holes cleanly.
- Number of holes: The number of holes per bottle depends on the size of the bottle and the size of the strawberry plants. I recommend 3-4 holes per bottle.
- Drilling the drainage holes: To ensure that water can drain well and the strawberries are not sitting in water, we need to drill drainage holes in the bottom of the bottles.
- Position of the holes: Drill or punch 3-4 small holes in the bottom of each bottle with a nail and hammer.
- Size of the holes: The holes should not be too large, so the soil doesn’t fall out. A diameter of 0.5 cm is sufficient.
- Optional: Decorating the bottles: If you wish, you can now paint the bottles with spray paint in your favorite colors. This makes the strawberry tower a real eye-catcher. Let the paint dry well before you proceed to the next step.
Building the Strawberry Tower:
Now that the bottles are prepared, we can start building the strawberry tower.
- The first bottle: Place the first bottle on a level surface. This can be a balcony, a terrace, or a garden. Make sure the surface is stable so the tower doesn’t tip over.
- Filling the first bottle: Fill the first bottle with potting soil. Press the soil down lightly so it is not too loose. Leave about 2-3 cm of space at the top so the water doesn’t overflow when watering.
- Planting the strawberries in the first bottle: Insert the first strawberry plants into the holes of the first bottle. Make sure the roots are well covered with soil. Water the plants carefully.
- The second bottle: Cut off the bottom of the second bottle. The bottom should be cut off in such a way that the second bottle can be placed over the first bottle like a funnel.
- Placing the second bottle: Place the second bottle over the first bottle. Make sure the second bottle sits stably on the first bottle.
- Filling the second bottle: Fill the second bottle with potting soil. Press the soil down lightly.
- Planting the strawberries in the second bottle: Insert the next strawberry plants into the holes of the second bottle. Water the plants carefully.
- Repeating the steps: Repeat steps 4-7 until you have reached the desired height of the strawberry tower. The taller the tower, the more strawberries you can grow.
- The top bottle: The top bottle is filled and planted like the other bottles. You can also plant a larger strawberry plant here.
Caring for the Strawberry Tower:
Proper care is important for your strawberries to grow well and bear lots of fruit.
- Watering: Water the strawberry tower regularly, especially on hot days. Make sure the soil is always moist, but not too wet. Waterlogging can lead to root rot. It’s best to water the tower from the top so the water reaches all the bottles.
- Fertilizing: Fertilize the strawberries regularly with a special strawberry fertilizer. Follow the instructions on the packaging. Fertilizing is important so that the plants receive sufficient nutrients.
- Sunlight: Place the strawberry tower in a sunny location. Strawberries need a lot of sun to grow well and develop sweet fruits.
- Pest protection: Regularly check the strawberries for pests like snails or aphids. If necessary, you can use natural pesticides.
- Harvesting: Harvest the strawberries as soon as they are ripe. Ripe strawberries are red and can be easily detached from the stem. The more often you harvest, the more strawberries will grow back.
Additional Tips:
- Different strawberry varieties: Use different strawberry varieties to achieve a longer harvest season. There are early, mid-season, and late varieties.
- Fleece or jute: Place fleece or jute in the holes before you fill in the soil. This prevents the soil from falling out.
- Drainage: Place a layer of gravel or expanded clay at the bottom of the bottles to improve drainage.
- Wind protection: Place the strawberry tower in a location protected from the wind to prevent it from tipping over.
- Creativity: Be creative when designing the strawberry tower. You can paint the bottles with different colors or decorate them with patterns.
I hope this guide helps you build your own strawberry tower from plastic bottles. Have fun gardening and a bountiful strawberry harvest! Let me know if you have any questions or want to share your experiences.
Conclusion
So, there you have it! Transforming ordinary plastic bottles into a thriving, space-saving strawberry tower is not just a fun project; it’s a game-changer for anyone looking to maximize their gardening potential, especially in limited spaces. This DIY strawberry tower bottles method offers a sustainable and incredibly rewarding way to grow your own delicious, fresh strawberries right at home.
Why is this a must-try? Because it’s more than just a gardening hack; it’s a statement. It’s a statement about reducing waste, embracing creativity, and connecting with nature in a tangible way. Imagine stepping outside your door and plucking ripe, juicy strawberries grown with your own two hands, all thanks to a few repurposed plastic bottles. The satisfaction is unparalleled. Plus, the vertical design is perfect for balconies, patios, or even small backyards, allowing you to enjoy the fruits (literally!) of your labor regardless of your space constraints.
But the beauty of this project lies in its adaptability. Feel free to experiment with different bottle sizes and configurations. Consider using bottles of varying colors to add a visual appeal to your tower. You could even paint the bottles with vibrant designs to create a truly unique and eye-catching garden feature.
For those looking to take it a step further, try incorporating companion plants like basil or marigolds into your strawberry tower. These plants not only add beauty but also help deter pests and improve the overall health of your strawberry plants. Think about adding a simple irrigation system using a drip line running down the center of the tower to ensure consistent watering.
Don’t be afraid to get creative with your soil mix, too. While a standard potting mix works well, you can enhance it with compost, perlite, or vermiculite to improve drainage and nutrient retention. Remember, healthy soil equals happy strawberry plants!
The possibilities are endless, and the rewards are plentiful. This DIY strawberry tower bottles project is not only cost-effective and environmentally friendly but also a fantastic way to engage children in gardening and teach them about sustainability.
We wholeheartedly encourage you to give this project a try. It’s a simple, fun, and incredibly rewarding way to grow your own strawberries and add a touch of green to your life. And most importantly, we want to hear about your experience! Share your photos, tips, and variations with us in the comments below. Let’s create a community of DIY strawberry tower enthusiasts and inspire others to embrace sustainable gardening practices. Let us know what worked for you, what challenges you faced, and any creative solutions you came up with. Together, we can learn and grow (pun intended!) a greener, more sustainable future. So, grab those plastic bottles, get your hands dirty, and start building your own amazing strawberry tower today! You won’t regret it.
Frequently Asked Questions (FAQ)
What type of plastic bottles are best for a strawberry tower?
Ideally, you should use food-grade plastic bottles, such as those used for water, juice, or soda. Ensure they are thoroughly cleaned before use to remove any residue that could harm your plants. Avoid using bottles that have contained harsh chemicals or pesticides. The size of the bottle is also a factor; larger bottles will hold more soil and allow for better root development, but smaller bottles are easier to handle and stack. A mix of sizes can also create an interesting visual effect.
How do I properly prepare the plastic bottles for planting?
First, thoroughly clean the bottles with soap and water to remove any residue. Then, carefully cut holes in the sides of the bottles for the strawberry plants. The size of the holes should be large enough to accommodate the plant’s crown but not so large that the soil falls out. You’ll also need to create drainage holes in the bottom of each bottle to prevent waterlogging. A drill or a sharp knife can be used for this purpose. Remember to be cautious when using sharp tools.
What type of soil should I use for my strawberry tower?
A well-draining potting mix is essential for growing healthy strawberries in a tower. You can use a commercially available potting mix or create your own by combining equal parts of garden soil, compost, and perlite or vermiculite. The compost will provide nutrients, while the perlite or vermiculite will improve drainage and aeration. Avoid using heavy clay soil, as it can become waterlogged and suffocate the roots.
How often should I water my strawberry tower?
The watering frequency will depend on the weather conditions and the type of soil you use. Generally, you should water your strawberry tower when the top inch of soil feels dry to the touch. Water thoroughly until the water drains out of the bottom of the bottles. Avoid overwatering, as this can lead to root rot. During hot, dry weather, you may need to water more frequently. Consider using a drip irrigation system for consistent and efficient watering.
What kind of fertilizer should I use for my strawberry plants?
Strawberries are heavy feeders and benefit from regular fertilization. Use a balanced fertilizer specifically formulated for strawberries or other fruiting plants. Follow the instructions on the fertilizer package for application rates and frequency. You can also supplement with organic fertilizers like compost tea or fish emulsion. Avoid over-fertilizing, as this can burn the roots and damage the plants.
How much sunlight do strawberry plants need?
Strawberry plants need at least 6-8 hours of direct sunlight per day to produce abundant fruit. Choose a location for your strawberry tower that receives plenty of sunlight. If you live in a hot climate, provide some afternoon shade to prevent the plants from overheating. If you don’t have enough sunlight, you can supplement with grow lights.
How do I protect my strawberry plants from pests and diseases?
Regularly inspect your strawberry plants for signs of pests or diseases. Common pests include aphids, spider mites, and slugs. You can control these pests with insecticidal soap, neem oil, or by handpicking them off the plants. Common diseases include powdery mildew and gray mold. Prevent these diseases by providing good air circulation and avoiding overwatering. You can also use fungicides if necessary. Companion planting with herbs like basil or marigolds can also help deter pests.
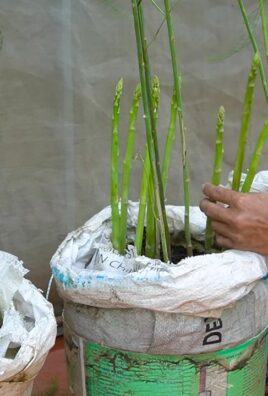
Can I grow other plants in my strawberry tower?
While the tower is designed for strawberries, you can certainly experiment with growing other compatible plants. Herbs like basil, thyme, and oregano are good choices, as they have shallow roots and can help deter pests. Avoid planting aggressive or large plants that will compete with the strawberries for resources. Consider the sunlight and watering requirements of any plants you add to the tower.
How do I overwinter my strawberry plants in a strawberry tower?
In colder climates, you’ll need to protect your strawberry plants from freezing temperatures. You can move the entire tower indoors to a sunny location or a greenhouse. Alternatively, you can wrap the tower with burlap or blankets to insulate the plants. Mulching around the base of the plants can also help protect the roots. In milder climates, you may not need to take any special precautions.
How long will my strawberry tower last?
The lifespan of your strawberry tower will depend on the quality of the plastic bottles and the care you provide. With proper maintenance, a well-constructed tower can last for several years. Regularly inspect the bottles for cracks or damage and replace them as needed. You may also need to refresh the soil periodically as it becomes depleted of nutrients.

Leave a Comment