
Grow pineapples at home? Absolutely! Imagine plucking a juicy, sun-ripened pineapple straight from your own backyard. Sounds like a tropical dream, right? Well, it’s more achievable than you think, and this DIY guide is your passport to pineapple paradise!
For centuries, pineapples have symbolized hospitality and luxury. Originating in South America, they were once so prized that owning one was a status symbol. Today, while more accessible, the joy of nurturing your own pineapple plant and harvesting its sweet fruit remains a deeply satisfying experience.
Why should you embark on this DIY adventure? Because store-bought pineapples, while delicious, often lack the intense flavor of a homegrown variety. Plus, you’ll know exactly what went into growing your fruit – no mystery chemicals or long-distance shipping. And let’s be honest, there’s something incredibly rewarding about turning kitchen scraps into a thriving plant. This DIY trick is not just about saving money; it’s about connecting with nature, learning a new skill, and enjoying the unparalleled taste of a pineapple you nurtured from start to finish. So, let’s dive in and discover how easy it is to grow pineapples at home!
Growing Your Own Pineapple: Your Tropical DIY Project for Home
Hey everyone! Have you ever wondered what it would be like to grow your own pineapple? I’ve tried it and it’s easier than you might think! With a little patience and the right steps, you can soon be enjoying your own homegrown pineapple. Let’s dive into this tropical DIY adventure together!
What You Need: The Ingredients for Your Pineapple Success
Before we get started, here is a list of the things you’ll need:
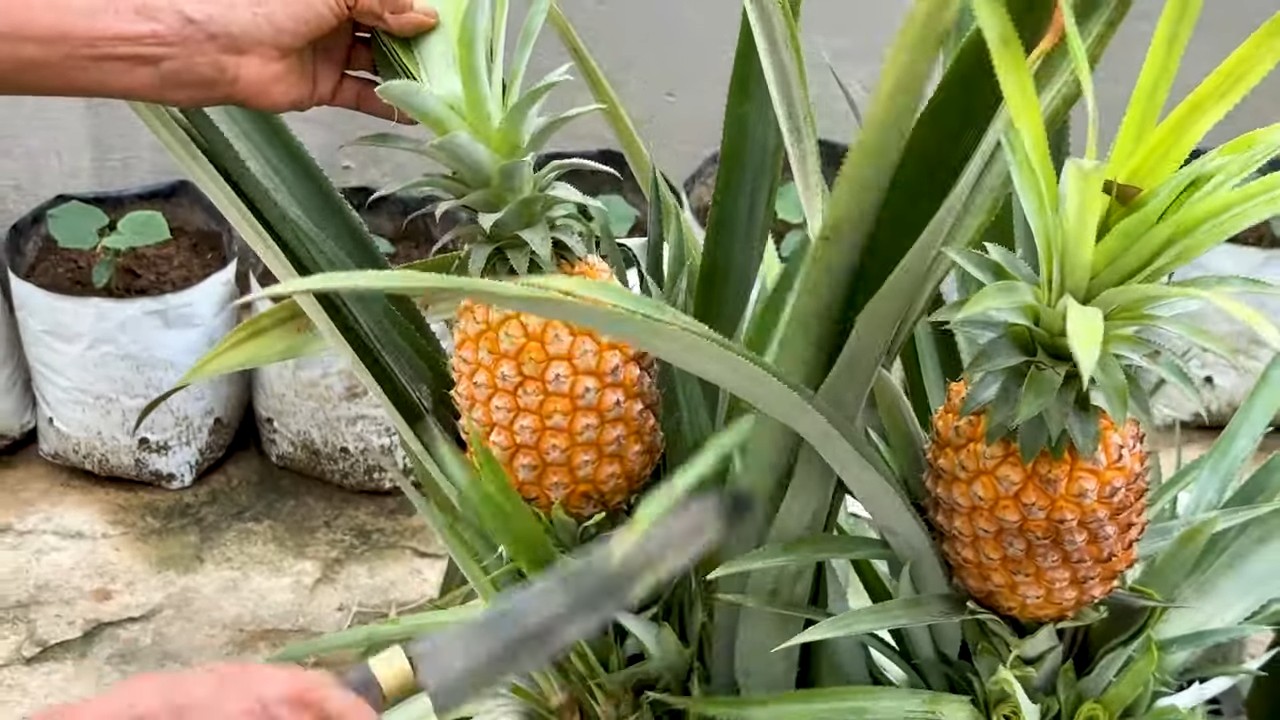
- A ripe pineapple: Choose a pineapple with healthy, green leaves. Make sure the fruit itself is ripe, but not overripe.
- A sharp knife: A kitchen knife or a sharp pocketknife will do.
- A glass or vase: Large enough to hold the pineapple top.
- Toothpicks: To stabilize the top in the water (optional).
- Potting soil: Preferably a well-draining soil.
- A flowerpot: With enough space for the roots.
- Water: For watering.
- Patience: Pineapples take time to grow!
Step-by-Step Guide: How to Grow Your Own Pineapple
Here is a detailed guide on how you can grow your own pineapple at home:
1. Preparing the Pineapple Top
- Remove leaves: Hold the pineapple top firmly and remove the lower leaves until about 2-3 cm of the stem is exposed. This is important so that the roots can grow better later. Be careful not to damage the root nubs.
- Remove fruit flesh: Carefully cut the fruit flesh off the top. Make sure no fruit flesh remains on the stem, as this can lead to rot.
- Let it dry: Let the top dry for a few days in a dry, well-ventilated place. This helps prevent rot.
2. Rooting in Water
- Insert toothpicks (optional): If you like, you can insert toothpicks into the stem to stabilize the top in the water. Insert the toothpicks evenly distributed into the stem so that they rest on the rim of the glass.
- Place in water: Fill the glass with water and place the pineapple top in it. Make sure only the stem is in the water and the leaves remain dry.
- Change water regularly: Change the water every few days to prevent rot.
- Wait for roots: Place the glass in a bright place, but not in direct sunlight. After a few weeks (about 2-8 weeks), roots should form. Be patient!
3. Planting in Soil
- Prepare the pot: Fill the flowerpot with potting soil.
- Plant the pineapple top: Once the roots are about 2-3 cm long, you can plant the pineapple top in the pot. Dig a small hole in the soil and carefully place the top in it. Make sure the roots are well covered.
- Water in: Water the soil well, but avoid waterlogging.
4. Caring for Your Pineapple Plant
- Location: Place the pot in a bright, warm place. Pineapples love sun, but direct midday sun can burn the leaves.
- Watering: Water the plant regularly, but let the soil dry out slightly between waterings. Avoid waterlogging, as this can lead to rot.
- Fertilizing: Fertilize the plant every few weeks during the growing season (spring and summer) with a liquid fertilizer for houseplants.
- Overwintering: In winter, you should water the plant a little less and place it in a cooler location.
- Be patient: It can take up to 2-3 years for your pineapple plant to bear fruit. Be patient and take good care of it!
Common Problems and Solutions: How to Master the Challenges
Here are some common problems that can occur when growing pineapples, and how you can solve them:
- Rot: If the top rots, it is usually due to too much moisture. Make sure no fruit flesh remains on the stem and let the top dry well before planting. Change the water regularly and avoid waterlogging.
- Yellow leaves: Yellow leaves can be a sign of too little light, too much water, or a nutrient deficiency. Move the plant to a brighter location, reduce watering, or fertilize it.
- No fruit: It can take a long time for a pineapple plant to bear fruit. Make sure the plant receives sufficient light, warmth, and nutrients. Sometimes you can stimulate fruiting by adding ethylene (e.g., by placing an apple in a plastic bag with the plant).
Additional Tips and Tricks: How to Optimize Your Pineapple Cultivation
- Choose the right pineapple: When buying the pineapple, make sure the leaves are healthy and green and the fruit is ripe, but not overripe.
- Use rainwater: Rainwater is softer than tap water and contains less lime. It is ideal for watering your pineapple plant.
- Ensure good ventilation: Pineapples like good ventilation. Place the plant in a location where the air can circulate well.
- Observe your plant: Pay attention to changes in the plant’s appearance and adjust its care accordingly.
Why You Should Grow Your Own Pineapple: The Benefits at a Glance
- It’s a great DIY project: It’s fun and a great way to learn something new.
- You have your own, fresh pineapple: Homegrown pineapples just taste better!
- It’s environmentally friendly: You reduce your ecological footprint by growing your own pineapple.
- It’s a great gift: A homegrown pineapple plant is an original and personal gift.
I hope this guide helps you to grow your own pineapple. It’s an exciting project that requires some patience, but the reward is worth it! Good luck and have fun gardening!

Conclusion
So, there you have it! Growing pineapples at home isn’t just a fun project; it’s a rewarding experience that brings a touch of the tropics right to your windowsill or garden. Forget those expensive, sometimes bland, store-bought pineapples. Imagine the satisfaction of slicing into a juicy, sweet pineapple that you nurtured from start to finish. The flavor difference alone is enough to convince anyone to give this a try.
But the benefits extend beyond just taste. This DIY project is incredibly educational, especially for children. It teaches patience, responsibility, and a deeper appreciation for where our food comes from. Plus, it’s a fantastic conversation starter! Imagine showing off your homegrown pineapple to friends and family – they’ll be amazed.
And don’t think you’re limited to just one type of pineapple. Once you’ve mastered the basics, experiment with different varieties! Look for pineapple tops from different stores or even online. You might discover a preference for a particularly sweet or tangy type. You can also play around with different potting mixes and fertilizers to see what works best in your specific climate and growing conditions. Some gardeners even add coffee grounds to their soil for an extra boost of nutrients.
Consider this: you can even use the pineapple leaves to create a natural fiber. While it’s a more advanced project, extracting the fibers from the leaves and using them for crafts or even weaving is a fascinating way to utilize the entire plant.
The key to success with growing pineapples at home is patience and consistency. It takes time for the plant to root and mature, but the end result is well worth the wait. Don’t be discouraged if your first attempt isn’t perfect. Every gardener faces challenges, and learning from your mistakes is part of the process.
We wholeheartedly encourage you to embark on this exciting journey. It’s a simple, sustainable, and incredibly satisfying way to bring a little bit of paradise into your life. And most importantly, it’s a fantastic way to enjoy the unparalleled taste of a homegrown pineapple.
Don’t forget to document your progress and share your experiences with us! We’d love to see your pineapple plants thriving and hear about any tips or tricks you discover along the way. Share your photos and stories on social media using [Your Hashtag Here] or leave a comment below. Let’s create a community of home pineapple growers!
Now, go forth and grow your own delicious, homegrown pineapple! You won’t regret it.
Frequently Asked Questions (FAQ)
How long does it take to grow a pineapple from a top?
This is one of the most common questions, and the answer is: patience is key! Generally, it takes anywhere from 2 to 3 years for a pineapple plant to mature and produce fruit. The exact timeframe depends on several factors, including the variety of pineapple, the climate, and the growing conditions. Warmer climates with plenty of sunlight will generally see faster growth. Don’t be discouraged if it seems like nothing is happening for the first few months. The plant is focusing on developing its root system.
What kind of soil is best for growing pineapples?
Pineapples thrive in well-draining, slightly acidic soil. A mixture of potting soil, perlite, and peat moss is a good starting point. The perlite helps with drainage, while the peat moss adds acidity. You can also add some compost to provide extra nutrients. Avoid heavy clay soils, as they can retain too much water and lead to root rot. A pH level between 6.0 and 6.5 is ideal. You can test your soil’s pH using a readily available soil testing kit from most garden centers.
How much sunlight do pineapples need?
Pineapples are sun-loving plants and need at least 6 hours of direct sunlight per day. If you’re growing your pineapple indoors, place it near a south-facing window where it can receive plenty of light. If you don’t have enough natural light, you can supplement with a grow light. Rotate the plant regularly to ensure even growth on all sides.
How often should I water my pineapple plant?
Water your pineapple plant thoroughly when the top inch of soil feels dry to the touch. Avoid overwatering, as this can lead to root rot. During the warmer months, you may need to water more frequently than during the cooler months. Ensure the pot has drainage holes to allow excess water to escape. You can also mist the leaves occasionally to increase humidity, especially if you live in a dry climate.
What kind of fertilizer should I use for my pineapple plant?
Pineapples are heavy feeders and benefit from regular fertilization. Use a balanced fertilizer with an N-P-K ratio of 10-10-10 or 14-14-14. Apply the fertilizer according to the package directions, usually every 2-3 months during the growing season (spring and summer). You can also use a liquid fertilizer diluted to half strength and apply it more frequently. Avoid over-fertilizing, as this can burn the roots.
How do I know when my pineapple is ripe?
Knowing when your pineapple is ripe is crucial for enjoying its full flavor. Several indicators can help you determine ripeness. First, the pineapple should have a strong, sweet aroma. Second, the color should change from green to yellow or golden. Third, the “eyes” of the pineapple should be relatively flat. Finally, you can gently tug on one of the leaves near the top. If it comes out easily, the pineapple is likely ripe. Don’t wait too long to harvest, as the pineapple can become overripe and ferment.
Can I grow a pineapple indoors?
Yes, you can absolutely grow a pineapple indoors! In fact, it’s a great way to enjoy this tropical fruit even if you don’t live in a warm climate. Just make sure to provide your pineapple plant with plenty of sunlight, well-draining soil, and regular watering. You may also need to supplement with a grow light if you don’t have enough natural light. Indoor-grown pineapples may take a bit longer to fruit than those grown outdoors, but the satisfaction of harvesting your own pineapple is well worth the wait.
What are some common problems when growing pineapples, and how can I fix them?
Some common problems include root rot (caused by overwatering), mealybugs (small, white, cottony insects), and scale (small, brown, shell-like insects). To prevent root rot, ensure your soil is well-draining and avoid overwatering. If you notice mealybugs or scale, you can treat them with insecticidal soap or neem oil. Regularly inspect your plant for pests and diseases to catch them early. Yellowing leaves can indicate a nutrient deficiency, so make sure you’re fertilizing regularly.
Can I grow a pineapple in a container? What size container should I use?
Yes, growing pineapples in containers is a very common and effective method, especially for those in cooler climates who need to move the plant indoors during winter. Start with a pot that is at least 6 inches in diameter for the initial rooting phase. As the plant grows, you’ll need to transplant it into a larger container. A 10-12 inch pot is generally sufficient for a mature pineapple plant. Make sure the container has drainage holes to prevent waterlogging.
My pineapple plant has flowered, but the fruit isn’t developing. What should I do?
Sometimes, pineapple plants may flower but fail to produce fruit due to a lack of pollination or other environmental factors. You can try hand-pollinating the flowers by using a small brush to transfer pollen from one flower to another. You can also try enclosing the plant in a plastic bag with a ripe apple for a few days. The ethylene gas released by the apple can help stimulate fruit development. Ensure the plant is receiving adequate sunlight and nutrients.
Leave a Comment