
Growing Hibiscus at Home can transform your garden into a vibrant, tropical paradise, even if you don’t live in a tropical climate! Imagine stepping outside to be greeted by the bold, beautiful blooms of hibiscus, adding a splash of color and a touch of exotic flair to your everyday life. But let’s be honest, sometimes the thought of nurturing these beauties can feel a little daunting, right?
Hibiscus flowers have been cherished for centuries, holding cultural significance in many societies. In some cultures, they symbolize beauty, femininity, and hospitality, often used in traditional ceremonies and even as a natural remedy. From ancient China to the Polynesian Islands, the hibiscus has woven its way into the tapestry of human history.
That’s where this DIY guide comes in! I’m here to share some simple, effective tricks and hacks that will make growing hibiscus at home a breeze. Whether you’re a seasoned gardener or just starting out, these tips will help you cultivate healthy, thriving hibiscus plants that burst with stunning blooms. We’ll cover everything from choosing the right variety and providing the perfect soil conditions to mastering watering techniques and tackling common pests. So, ditch the overwhelm and get ready to unlock the secrets to a flourishing hibiscus garden – you’ll be amazed at how easy and rewarding it can be!
Growing Hibiscus at Home: A Comprehensive DIY Guide
Hello plant friends! I am so excited to introduce you to the wonderful world of growing hibiscus at home today. These tropical beauties with their vibrant flowers can add a touch of the exotic to any garden or even a sunny windowsill. Don’t worry, it’s easier than you think! I’ll show you step-by-step how to successfully grow and care for your own hibiscus.
What you need to get started
Before we get started, here is a list of the things you will need:
- Hibiscus seeds or a hibiscus plant: You can buy seeds online or at a garden center. Alternatively, you can also purchase a plant that has already grown to see results faster.
- A suitable pot: Choose a pot with good drainage. The size depends on whether you are starting with seeds or repotting a plant.
- High-quality potting soil: Hibiscus prefers well-draining, slightly acidic soil. A mixture of potting soil, peat moss, and perlite is ideal.
- Watering can or spray bottle: For watering.
- Fertilizer: A balanced fertilizer for flowering plants.
- Pruning shears: For pruning.
- Sunlight: A sunny location is crucial for growth and flowering.
- Patience: Hibiscus takes time to grow and bloom.
Growing Hibiscus from Seed
Growing hibiscus from seed is an exciting project that requires a bit more time and patience, but the joy of growing a plant from scratch is priceless.
1. Preparing the Seeds
- Soak seeds: Place the hibiscus seeds in warm water for 24 hours. This helps to soften the hard seed coat and speed up germination.
- Prepare the seed starting container: Fill a small seed starting container or a pot with seed starting mix. Lightly moisten the soil.
- Sow seeds: Press the seeds about 1 cm deep into the soil. Cover them lightly with soil.
- Retain moisture: Cover the seed starting container with plastic wrap or a plastic bag to increase humidity. Place it in a warm place (approx. 20-25°C).
- Ventilate regularly: Ventilate the seed starting container daily to prevent mold.
- Be patient: Germination can take several weeks. Keep the soil moist, but not wet.
2. Caring for Seedlings
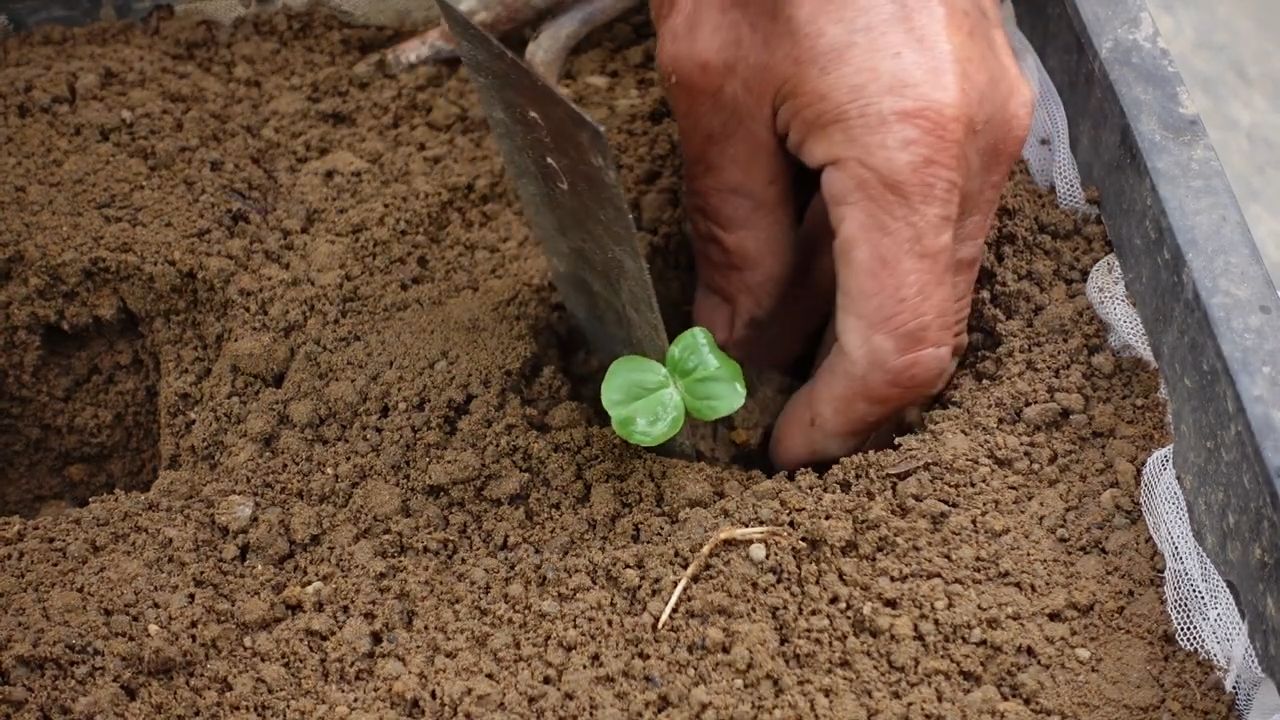
- Pricking out: Once the seedlings have developed a few leaves, you can transplant them into separate pots. Be careful not to damage the roots.
- Location: Place the seedlings in a bright, but not directly sunny, location.
- Watering: Water regularly, but avoid waterlogging. The soil should be slightly moist.
- Fertilizing: Start fertilizing after a few weeks with a diluted liquid fertilizer.
Planting or Repotting Hibiscus
When you have bought a hibiscus plant or your seedlings are large enough, it is time to plant them in a larger pot or in the garden.
1. Choosing the Right Pot
- Size: Choose a pot that is slightly larger than the previous pot or the plant’s root ball.
- Drainage: Make sure the pot has drainage holes so that excess water can drain away.
- Material: Terracotta pots are a good choice because they are breathable and help keep the soil dry.
2. Planting or Repotting
- Prepare the pot: Fill the pot with a layer of potting soil.
- Carefully remove the plant: Carefully remove the plant from the old pot. Be careful not to damage the roots.
- Insert the plant: Place the plant in the new pot and fill the remaining space with potting soil.
- Press down: Press the soil down lightly.
- Water: Water the plant thoroughly.
Caring for Hibiscus: The Most Important Tips
Proper care is crucial for your hibiscus to grow and bloom magnificently.
1. Location
- Sunlight: Hibiscus loves the sun! Place it in a location where it gets at least 6 hours of direct sunlight per day.
- Protection from wind: Protect the plant from strong winds that can damage the flowers.
2. Watering
- Water regularly: Water regularly, especially during the growing season. The soil should always be slightly moist.
- Avoid waterlogging: Avoid waterlogging, as this can lead to root rot.
- Water less in winter: Reduce watering in winter when the plant is less active.
3. Fertilizing
- Fertilize regularly: Fertilize your hibiscus every two weeks during the growing season (spring and summer) with a balanced fertilizer for flowering plants.
- Dilute the fertilizer: Dilute the fertilizer according to the instructions on the packaging.
- Fertilize less in winter: Reduce fertilizing in winter.
4. Pruning
- Prune regularly: Prune your hibiscus regularly to stimulate growth and promote flowering.
- Remove faded flowers: Remove faded flowers to encourage the plant to produce new flowers.
- Prune heavily in spring: Prune the plant heavily in spring to rejuvenate it.
5. Overwintering
- Sensitive to frost: Hibiscus is sensitive to frost and must be brought indoors in winter if you live in a region with cold winters.
- Cool location: Place the plant in a cool, bright place.
- Water less: Water less in winter.
- Do not fertilize: Do not fertilize the plant in winter.
Common Problems and Solutions
Even with the best care, problems can occur. Here are some common problems and how you can solve them:
- Yellow leaves: Can be caused by overwatering, underwatering, nutrient deficiency, or pests. Check the watering, fertilize the plant, and examine it for pests.
- No flowers: Can be caused by too little sunlight, incorrect fertilization, or too little water. Move the plant to a sunnier location, fertilize it with a fertilizer for flowering plants, and water it regularly.
- Pests: Hibiscus can be infested by aphids, spider mites, or mealybugs. Treat the plant with an insecticide or a soap solution.
Additional Tips and Tricks
Use rainwater: Use rainwater for watering, as it is softer than tap water.
Increase humidity: Hibiscus loves high humidity. You can increase the humidity by spraying the plant regularly or by placing it on a tray filled with water and pebbles.
Conclusion
So, there you have it! Growing hibiscus at home, especially with our simple DIY trick for creating the perfect soil mix, is not only achievable but also incredibly rewarding. We’ve demystified the process, breaking it down into manageable steps that even the most novice gardener can follow. Forget expensive, pre-packaged potting mixes that may or may not meet your hibiscus’s specific needs. With a few readily available ingredients and our easy-to-follow recipe, you can create a thriving environment for your hibiscus to flourish.
Why is this DIY trick a must-try? Because it gives you complete control over the nutrients and drainage your hibiscus receives. Commercial mixes can sometimes be too heavy, leading to root rot, or too light, resulting in rapid drying. Our blend strikes the perfect balance, ensuring optimal aeration, moisture retention, and nutrient availability. This translates to healthier, more vibrant plants with an abundance of stunning blooms.
But the beauty of this DIY approach doesn’t stop there. Feel free to experiment and tailor the mix to your specific climate and hibiscus variety. For example, if you live in a particularly humid area, you might want to increase the proportion of perlite or coarse sand to improve drainage even further. If your hibiscus is a heavy feeder, consider adding a slow-release fertilizer specifically formulated for flowering plants to the mix. You could also incorporate composted manure for an extra boost of organic matter.
Consider these variations to elevate your hibiscus growing experience:
* Hibiscus Tea Infusion: After pruning your hibiscus, don’t discard the trimmings! Dry the petals and leaves and use them to make a refreshing and antioxidant-rich hibiscus tea. It’s a delightful way to enjoy the fruits (or rather, flowers) of your labor.
* Hibiscus Syrup: Create a vibrant and flavorful syrup from your hibiscus flowers. This syrup can be used to sweeten drinks, drizzle over desserts, or even add a unique twist to savory dishes.
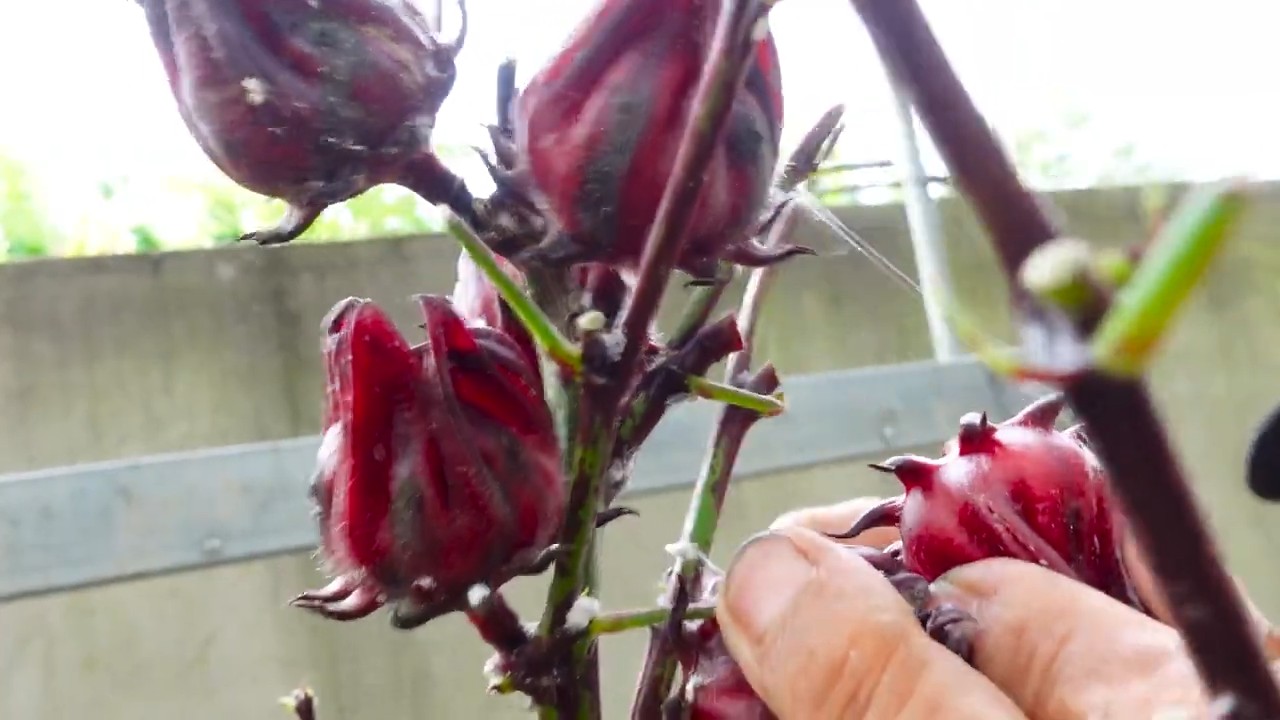
* Hibiscus Propagation: Use cuttings from your hibiscus to propagate new plants. This is a fantastic way to expand your hibiscus collection or share the beauty of these tropical blooms with friends and family.
We are confident that this DIY soil mix will revolutionize your hibiscus growing experience. Imagine the satisfaction of watching your hibiscus thrive, knowing that you created the perfect environment for it to flourish. The vibrant colors, the delicate petals, and the sweet fragrance will be a testament to your dedication and skill.
Don’t just take our word for it, though. We encourage you to try this DIY trick for growing hibiscus at home and see the difference for yourself. Share your experiences with us! We’d love to hear about your successes, your challenges, and any variations you’ve discovered. Post photos of your thriving hibiscus on social media using #DIYHibiscusSoil and tag us so we can celebrate your gardening achievements. Let’s create a community of hibiscus enthusiasts, sharing tips and tricks to help each other grow the most beautiful hibiscus possible. Happy gardening!
Frequently Asked Questions (FAQ)
What type of hibiscus is best suited for growing at home?
Many hibiscus varieties thrive in home gardens, but some are particularly well-suited for container growing. Consider tropical hibiscus (Hibiscus rosa-sinensis), which comes in a wide range of colors and flower shapes. Rose of Sharon (Hibiscus syriacus) is another popular choice, known for its hardiness and late-season blooms. For smaller spaces, dwarf varieties are an excellent option. Research the specific needs of the variety you choose to ensure it receives the proper care.
How often should I water my hibiscus grown in this DIY soil mix?
Watering frequency depends on several factors, including the size of the pot, the climate, and the specific hibiscus variety. Generally, you should water your hibiscus when the top inch of soil feels dry to the touch. Avoid overwatering, as this can lead to root rot. Ensure the pot has adequate drainage to prevent water from pooling at the bottom. During hot, dry periods, you may need to water more frequently.
What kind of fertilizer should I use for my hibiscus?
Hibiscus are heavy feeders and benefit from regular fertilization. Use a fertilizer specifically formulated for hibiscus or flowering plants. Look for a balanced fertilizer with a slightly higher phosphorus content (the middle number in the NPK ratio) to promote blooming. Follow the instructions on the fertilizer package carefully, as over-fertilizing can damage your plants. Slow-release fertilizers are a convenient option, providing a steady supply of nutrients over several months.
How much sunlight does my hibiscus need?
Hibiscus thrive in full sun, requiring at least 6-8 hours of direct sunlight per day. Insufficient sunlight can result in fewer blooms and leggy growth. If you’re growing your hibiscus indoors, place it near a sunny window or supplement with grow lights. During the hottest part of the day, some afternoon shade may be beneficial, especially in extremely hot climates.
What are some common pests and diseases that affect hibiscus, and how can I prevent them?
Common pests that affect hibiscus include aphids, spider mites, and whiteflies. Regularly inspect your plants for signs of infestation, such as sticky residue, webbing, or distorted leaves. Treat infestations promptly with insecticidal soap, neem oil, or other appropriate treatments. Root rot is a common disease, often caused by overwatering. Ensure proper drainage and avoid letting the soil remain soggy. Good air circulation can also help prevent fungal diseases.
Can I use this DIY soil mix for other plants besides hibiscus?
While this DIY soil mix is specifically formulated for hibiscus, it can also be used for other plants that prefer well-draining, slightly acidic soil. Some examples include azaleas, camellias, and gardenias. However, you may need to adjust the mix slightly to meet the specific needs of each plant. For example, you might add more peat moss for plants that prefer a more acidic soil or more perlite for plants that require exceptionally good drainage.
How do I know if my hibiscus is getting too much or not enough water?
Signs of overwatering include yellowing leaves, wilting, and root rot. The soil will also feel consistently wet. Signs of underwatering include dry, brittle leaves, drooping, and stunted growth. The soil will feel dry to the touch. Adjust your watering schedule accordingly to maintain the proper moisture level.
How often should I repot my hibiscus?
Repot your hibiscus every 1-2 years, or when it becomes root-bound. Choose a pot that is slightly larger than the previous one. Use fresh DIY soil mix when repotting. The best time to repot is in the spring, before the growing season begins.
What is the best way to prune my hibiscus?
Pruning encourages bushier growth and more blooms. Prune your hibiscus in late winter or early spring, before new growth begins. Remove any dead, damaged, or crossing branches. You can also prune to shape the plant and control its size. Pinching back the tips of new growth will encourage branching.
How do I overwinter my hibiscus in colder climates?
If you live in a colder climate, you’ll need to bring your hibiscus indoors before the first frost. Prune the plant back slightly and reduce watering. Place it in a bright, cool location, such as a sunroom or greenhouse. You may need to supplement with grow lights if natural light is limited. Water sparingly throughout the winter, allowing the soil to dry out slightly between waterings. In the spring, gradually acclimate the plant to outdoor conditions before placing it back in its permanent location.

Leave a Comment