
Hanging gardens for small homes – sounds like a dream, right? But what if I told you that dream could be your reality, even if you’re short on space? Forget sprawling acres; we’re talking vertical vibrancy! For centuries, humans have been captivated by the idea of gardens suspended in air. Think of the legendary Hanging Gardens of Babylon, one of the Seven Wonders of the Ancient World, a testament to our enduring desire to bring nature closer, even in the most unlikely places.
Today, that desire is more relevant than ever. With urban living on the rise and outdoor space often a luxury, many of us are craving a connection to the natural world. That’s where hanging gardens for small homes come in! They’re not just a pretty face; they’re a practical solution for bringing greenery into your life, boosting your mood, purifying the air, and even growing your own herbs and vegetables.
This DIY guide is your passport to creating your own stunning hanging garden, no matter how tiny your apartment or balcony. We’ll explore clever hacks, budget-friendly ideas, and easy-to-follow instructions that will transform your space into a lush, living oasis. Get ready to unleash your inner gardener and discover the joy of growing up, not out!
DIY Hängegarten für kleine Wohnungen: Mehr Grün auf wenig Raum
Hallo ihr Lieben! Ihr träumt von einem üppigen Garten, habt aber nur wenig Platz? Keine Sorge, ich zeige euch, wie ihr einen wunderschönen Hängegarten zaubern könnt, der selbst die kleinste Wohnung in eine grüne Oase verwandelt. Lasst uns gemeinsam loslegen!
Was du für deinen Hängegarten brauchst
Bevor wir starten, hier eine Liste mit allen Materialien und Werkzeugen, die du benötigst. Keine Angst, vieles davon hast du vielleicht schon zu Hause!
* Pflanzgefäße: Hier sind deiner Kreativität keine Grenzen gesetzt! Du kannst Terrakotta-Töpfe, alte Dosen, Eimer oder sogar recycelte Plastikflaschen verwenden. Achte nur darauf, dass sie Löcher im Boden haben, damit das Wasser ablaufen kann.
* Pflanzen: Wähle Pflanzen, die wenig Platz benötigen und gut in Töpfen wachsen. Hängeerdbeeren, Kräuter, Sukkulenten, Efeu oder kleine Blumen sind ideal. Informiere dich vorher über die Lichtbedürfnisse der Pflanzen, damit sie sich auch wohlfühlen.
* Erde: Verwende hochwertige Blumenerde, die auf die Bedürfnisse deiner Pflanzen abgestimmt ist.
* Aufhängung: Hier gibt es verschiedene Möglichkeiten: Makramee-Garn, Seile, Ketten oder sogar alte Gürtel. Wähle das Material, das dir am besten gefällt und zu deinem Stil passt.
* Werkzeug: Schere, Bohrmaschine (falls du Löcher in die Töpfe bohren musst), Maßband, Bleistift, eventuell eine Zange.
* Optional: Farbe, Pinsel, Dekorationselemente (z.B. Muscheln, Steine, kleine Figuren).
Die Vorbereitung: Alles für den perfekten Start
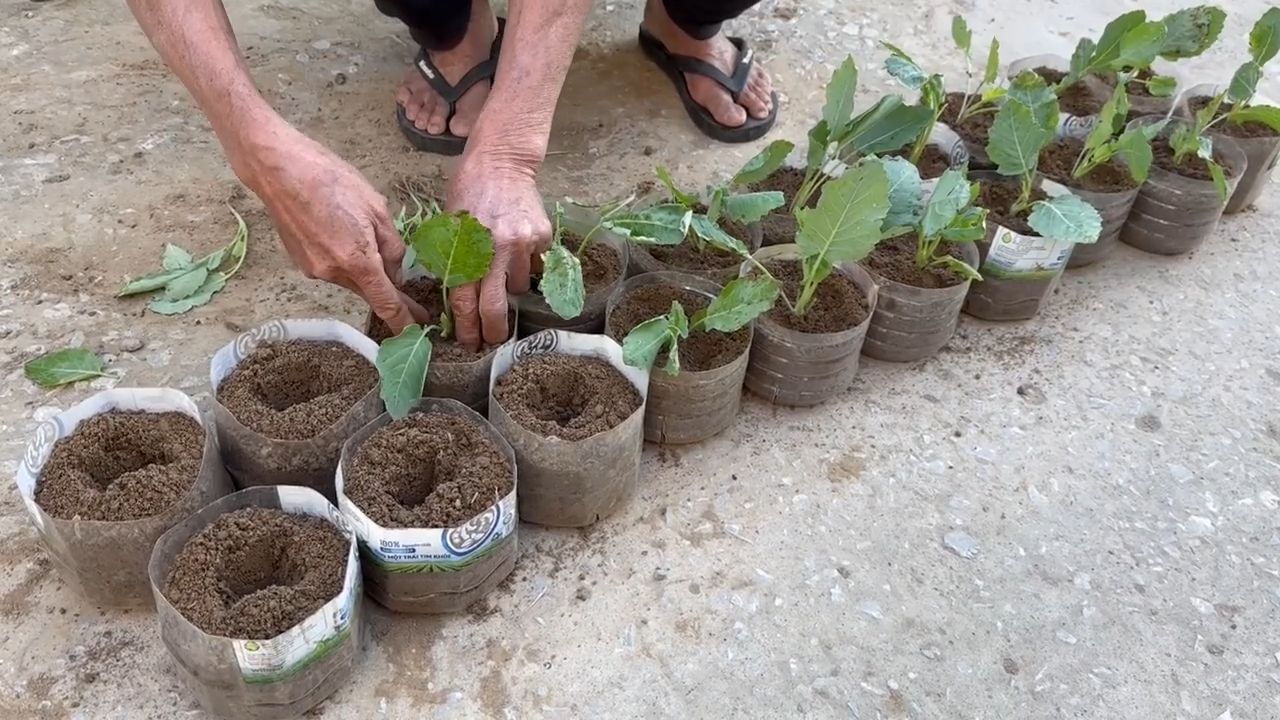
Bevor wir mit dem Aufhängen beginnen, müssen wir die Pflanzgefäße vorbereiten und die Pflanzen einsetzen.
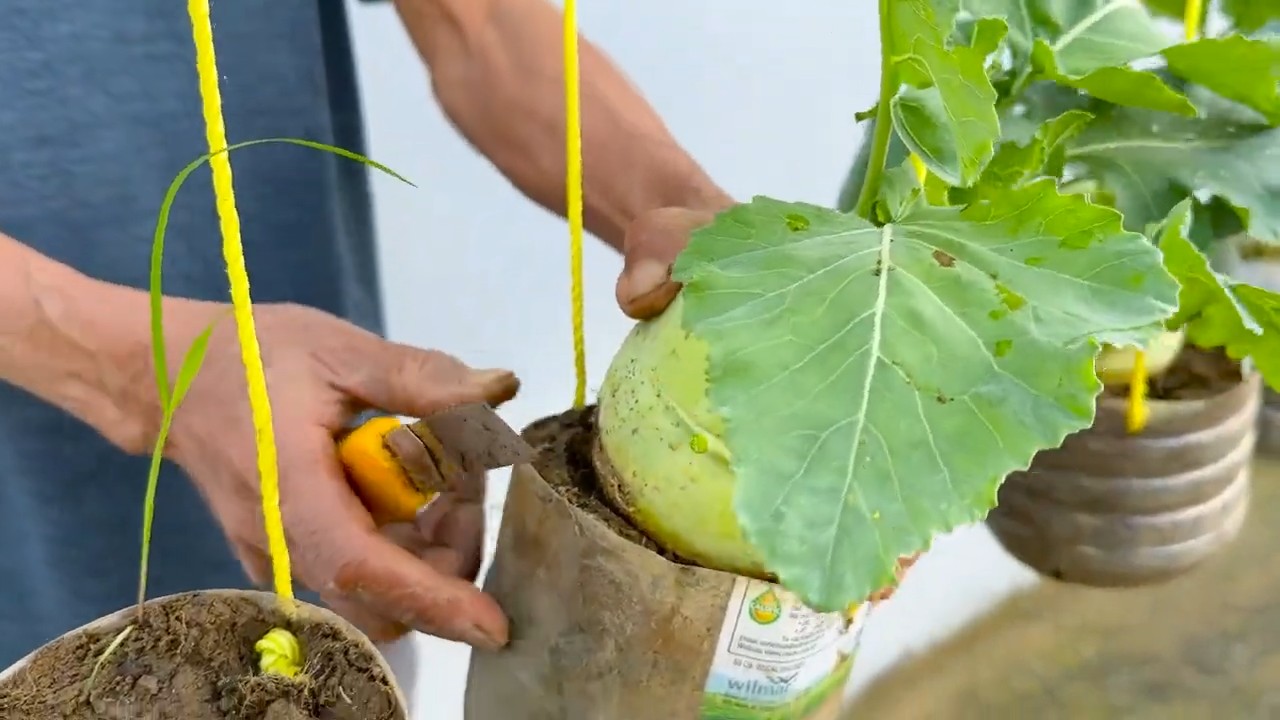
1. Töpfe vorbereiten: Wenn deine Töpfe keine Löcher im Boden haben, bohre vorsichtig einige Löcher hinein. Das ist wichtig, damit überschüssiges Wasser ablaufen kann und die Wurzeln nicht faulen.
2. Töpfe bemalen (optional): Wenn du möchtest, kannst du deine Töpfe jetzt bemalen und verzieren. Lass deiner Kreativität freien Lauf! Acrylfarben eignen sich gut dafür.
3. Pflanzen einsetzen: Fülle die Töpfe mit Erde und setze die Pflanzen vorsichtig ein. Achte darauf, dass die Wurzeln genügend Platz haben. Gieße die Pflanzen anschließend gut an.
Hängevarianten: So bringst du deinen Garten in die Luft
Jetzt kommt der spannende Teil: das Aufhängen! Hier stelle ich dir verschiedene Möglichkeiten vor, wie du deinen Hängegarten gestalten kannst.
Variante 1: Der klassische Makramee-Hängegarten
Makramee ist eine tolle Technik, um individuelle und dekorative Aufhängungen zu gestalten. Es sieht nicht nur schön aus, sondern ist auch relativ einfach zu lernen.
1. Makramee-Garn zuschneiden: Schneide mehrere lange Stücke Makramee-Garn zu. Die Länge hängt davon ab, wie tief deine Töpfe hängen sollen. Lieber etwas länger schneiden, du kannst es später immer noch kürzen.
2. Knoten binden: Binde die Garnstücke an einem Ring oder einem Holzstab zusammen. Dieser dient als Aufhängung.
3. Netz knüpfen: Knüpfe nun ein Netz um den Topf. Es gibt verschiedene Makramee-Knoten, die du verwenden kannst. Im Internet findest du viele Anleitungen und Videos.
4. Topf einsetzen: Setze den Topf vorsichtig in das Netz ein.
5. Aufhängen: Hänge den Makramee-Hängegarten an einem Haken an der Decke oder an einer Gardinenstange auf.
Variante 2: Der einfache Seil-Hängegarten
Diese Variante ist besonders schnell und einfach umzusetzen.
1. Seil zuschneiden: Schneide drei oder vier gleich lange Stücke Seil zu.
2. Knoten binden: Binde die Seilstücke an einem Ende zusammen.
3. Seile verteilen: Verteile die Seile gleichmäßig um den Topf.
4. Knoten unter dem Topf binden: Binde die Seile unter dem Topf zusammen, sodass ein Netz entsteht, das den Topf hält.
5. Aufhängen: Hänge den Seil-Hängegarten an einem Haken auf.
Variante 3: Der Hängegarten mit mehreren Töpfen
Wenn du mehrere Pflanzen auf einmal aufhängen möchtest, ist diese Variante ideal.
1. Holzbrett vorbereiten: Besorge dir ein Holzbrett in der gewünschten Größe.
2. Löcher bohren: Bohre Löcher in das Holzbrett, in denen du die Seile befestigen kannst. Die Anzahl der Löcher hängt davon ab, wie viele Töpfe du aufhängen möchtest.
3. Seile befestigen: Fädle die Seile durch die Löcher und verknote sie fest.
4. Töpfe aufhängen: Hänge die Töpfe an den Seilen auf. Du kannst die Töpfe entweder direkt an den Seilen befestigen oder kleine Haken verwenden.
5. Aufhängen: Hänge das Holzbrett an zwei Haken an der Decke auf. Achte darauf, dass das Brett waagerecht hängt.
Variante 4: Der recycelte Hängegarten aus Plastikflaschen
Diese Variante ist nicht nur umweltfreundlich, sondern auch super günstig!
1. Plastikflaschen vorbereiten: Schneide die Plastikflaschen in der Mitte durch.
2. Löcher bohren: Bohre Löcher in den Boden der Flaschen, damit das Wasser ablaufen kann.
3. Flaschen bemalen (optional): Wenn du möchtest, kannst du die Flaschen bemalen und verzieren.
4. Aufhängung befestigen: Fädle Seile oder Schnüre durch die Flaschen, um sie aufzuhängen.
5. Pflanzen einsetzen: Fülle die Flaschen mit Erde und setze die Pflanzen ein.
6. Aufhängen: Hänge die Flaschen an einem Haken oder einer Gardinenstange auf.
Die Pflege: Damit dein Hängegarten lange Freude macht
Damit dein Hängegarten lange schön bleibt, ist die richtige Pflege wichtig.
* Gießen: Gieße deine Pflanzen regelmäßig, aber vermeide Staunässe. Die Erde sollte immer leicht feucht sein.
* Düngen: Dünge deine Pflanzen regelmäßig mit einem Flüssigdünger.
* Standort: Achte darauf, dass deine Pflanzen genügend Licht bekommen.
* Schädlinge: Kontrolliere deine Pflanzen regelmäßig auf Schädlinge und bekämpfe sie gegebenenfalls.
* Umtopfen: Wenn die Pflanzen zu groß für ihre Töpfe werden, solltest du sie umtopfen.
Wo du deinen Hängegarten aufhängen kannst
Dein Hängegarten kann fast überall in deiner Wohnung aufgehängt werden. Hier ein paar Ideen:
* Am Fenster: Hier bekommen deine Pflanzen genügend Licht.
* An der Decke: Ein Hängegarten an der Decke ist ein echter Hingucker.
* An der Gardinenstange: Eine einfache und praktische Lösung.
* Am Balkon: Auch auf dem Balkon kannst du einen Hängegarten gestalten.
Zusätzliche Tipps und Tricks
* Kombiniere verschiedene Pflanzen: Mische verschiedene Pflanzen mit unterschiedlichen Farben und Formen, um einen interessanten Look zu erzielen.
* Verwende verschiedene Töpfe: Auch die Wahl der Töpfe kann einen großen Unterschied machen. Kombiniere verschiedene Materialien, Größen und Farben.
* Dekoriere deinen Hängegarten: Füge kleine Dekorationselemente wie Muscheln, Steine oder kleine Figuren hinzu, um deinen Hängegarten noch individueller zu gestalten.
* Achte auf das Gewicht: Achte darauf, dass die Aufhängung das Gewicht der Töpfe und der Erde tragen kann.
* Sicherheit geht vor: Stelle sicher, dass die Aufhängung sicher befestigt ist, damit die Töpfe nicht herunterfallen.
Ich hoffe, diese Anleitung hat dir geholfen, deinen eigenen Hängegarten
Conclusion
Transforming your small home with a vibrant hanging garden is not just a trendy aesthetic choice; it’s a practical and enriching way to bring nature indoors, even when space is at a premium. We’ve explored the simplicity and affordability of creating your own DIY hanging garden, and hopefully, you’re now convinced that this project is a must-try for anyone looking to enhance their living space.
The benefits extend far beyond mere visual appeal. A hanging garden purifies the air, reduces stress, and adds a touch of tranquility to your daily life. Imagine waking up to the sight of lush greenery cascading from above, creating a serene and inviting atmosphere in your own home. This DIY project allows you to customize your green space to perfectly match your personal style and the unique characteristics of your home.
Don’t be afraid to experiment with different plant varieties. Trailing plants like pothos, spider plants, and string of pearls are excellent choices for hanging baskets, creating a beautiful waterfall effect. For a more vibrant display, consider adding flowering plants like petunias, begonias, or impatiens. You can also incorporate herbs like mint, basil, or rosemary for a functional and fragrant addition to your hanging garden.
Consider the materials you use for your hanging planters. Recycled materials like plastic bottles, tin cans, or even old clothing can be repurposed into unique and eco-friendly planters. Get creative with the hanging mechanisms as well. Macrame hangers, repurposed belts, or even simple rope can add a touch of personality to your hanging garden.
Remember to consider the lighting conditions in your home when choosing plants. Some plants thrive in bright, direct sunlight, while others prefer shade. Research the specific needs of each plant to ensure they receive the optimal amount of light. Proper watering is also crucial for the health of your hanging garden. Check the soil moisture regularly and water thoroughly when the top inch feels dry.
Creating a **hanging garden** in your small home is an incredibly rewarding experience. It’s a chance to unleash your creativity, connect with nature, and transform your living space into a vibrant and inviting oasis. So, gather your materials, choose your plants, and get ready to embark on this exciting DIY adventure.
We encourage you to try this DIY trick and share your experience with us! Post photos of your finished hanging garden on social media using #DIYHangingGarden and tag us so we can see your amazing creations. We can’t wait to see how you transform your small home with the beauty of nature. Let’s inspire others to embrace the joys of indoor gardening and create a greener, healthier, and more beautiful world, one hanging plant at a time. Your feedback and experiences will help others discover the joy and benefits of creating their own hanging gardens.
FAQ
What are the best plants for a hanging garden in a small home?
Choosing the right plants is crucial for a thriving hanging garden, especially in a small home where space and light might be limited. Trailing plants are generally excellent choices because they create a visually appealing cascading effect. Pothos, also known as devil’s ivy, is a popular option due to its low maintenance requirements and ability to tolerate a wide range of lighting conditions. Spider plants are another great choice, as they are easy to propagate and produce adorable “spiderettes” that dangle from the mother plant. String of pearls is a unique and eye-catching succulent that adds a touch of whimsy to any hanging garden. For those who prefer flowering plants, consider petunias, begonias, or impatiens, which offer a burst of color and can brighten up any space. Herbs like mint, basil, and rosemary are also excellent choices, providing both beauty and functionality. Remember to research the specific needs of each plant to ensure they receive the optimal amount of light, water, and nutrients.
How do I water a hanging garden effectively?
Watering a hanging garden can be a bit tricky, as it’s important to avoid overwatering, which can lead to root rot. The best way to water your hanging plants is to check the soil moisture regularly. Stick your finger into the soil about an inch deep. If it feels dry, it’s time to water. When watering, do so thoroughly, ensuring that the water drains out of the bottom of the pot. This helps to flush out any excess salts and minerals that may have accumulated in the soil. Avoid watering the foliage directly, as this can promote fungal growth. Consider using a watering can with a long spout to reach the plants easily. For plants that are difficult to reach, you can use a self-watering system or a watering globe. Remember to adjust your watering schedule based on the season and the specific needs of your plants. During the warmer months, you may need to water more frequently, while during the cooler months, you can reduce the frequency.
What type of lighting is best for a hanging garden in a small home?
Lighting is a critical factor in the success of your hanging garden. Most indoor plants require bright, indirect light to thrive. If your home doesn’t receive enough natural light, you may need to supplement with artificial lighting. Fluorescent grow lights or LED grow lights are excellent options for providing the necessary light for your plants. Place the lights about 12-18 inches away from the plants and keep them on for about 12-16 hours per day. Observe your plants closely for signs of insufficient light, such as leggy growth or pale leaves. If you notice these signs, move the plants closer to the light source or increase the intensity of the light. Remember that different plants have different lighting requirements, so research the specific needs of each plant before placing them in your hanging garden.
How do I prevent pests and diseases in my hanging garden?
Preventing pests and diseases is essential for maintaining a healthy and thriving hanging garden. Regularly inspect your plants for signs of pests, such as aphids, spider mites, or mealybugs. If you spot any pests, treat them immediately with insecticidal soap or neem oil. You can also try wiping the leaves with a damp cloth to remove the pests manually. To prevent fungal diseases, ensure that your plants have good air circulation and avoid overwatering. Remove any dead or decaying leaves promptly to prevent the spread of disease. Consider using a well-draining potting mix to prevent root rot. You can also add a layer of mulch to the top of the soil to help retain moisture and suppress weed growth. By taking these preventative measures, you can keep your hanging garden healthy and pest-free.
What are some creative ideas for hanging planters?
The possibilities are endless when it comes to creating unique and creative hanging planters. Repurposing old items is a great way to add a touch of personality to your hanging garden. Old tin cans, plastic bottles, or even teacups can be transformed into charming planters. You can also use macrame hangers, repurposed belts, or simple rope to create unique hanging mechanisms. Consider painting or decorating your planters to match your home decor. You can also add embellishments like beads, shells, or buttons to create a more personalized look. Get creative and experiment with different materials and designs to create a hanging garden that reflects your unique style. Remember to ensure that your planters have drainage holes to prevent water from accumulating and causing root rot.
How high should I hang my hanging garden?
The height at which you hang your hanging garden depends on several factors, including the size of your plants, the height of your ceiling, and your personal preference. Generally, you want to hang your plants at a height that allows them to receive adequate light and air circulation. Avoid hanging them too high, as this can make it difficult to water and care for them. You also want to ensure that the plants are not hanging too low, as this can create a tripping hazard. A good rule of thumb is to hang your plants at eye level or slightly above. This will allow you to admire them easily and ensure that they receive adequate light. Consider using adjustable hangers so you can easily adjust the height of your plants as they grow.

Leave a Comment