Growing garlic in plastic bags might sound unconventional, but trust me, it’s a game-changer for any home gardener looking to maximize their yield and minimize space! For centuries, garlic has been revered not just for its pungent flavor, but also for its medicinal properties and even its ability to ward off evil spirits in some cultures. From ancient Egypt, where it fueled the pyramid builders, to modern kitchens worldwide, garlic remains a staple.
But let’s face it, traditional gardening can be intimidating, especially if you’re short on space or time. That’s where this ingenious DIY trick comes in. Imagine harvesting plump, flavorful garlic bulbs without needing a sprawling garden bed. No more back-breaking digging or worrying about soil conditions!
This method of growing garlic in plastic bags is perfect for apartment dwellers, balcony gardeners, or anyone who wants a simple, effective way to cultivate this culinary essential. I’m going to show you how to transform ordinary plastic bags into mini garlic farms, giving you a bountiful harvest right at your fingertips. Get ready to unlock the secrets to easy, space-saving garlic cultivation – you’ll be amazed at how simple and rewarding it is!

Growing Garlic in Plastic Bags: A DIY Guide for the Hobby Gardener
Hello dear garden friends! Do you feel like growing your own garlic but have little space in the garden? Don’t worry, I’ll show you how you can do it easily in plastic bags! This method is super space-saving and ideal for balconies, terraces, or small gardens. Let’s get started!
What you need:
- Garlic cloves (preferably organic garlic from the supermarket or farmers’ market)
- Sturdy plastic bags (e.g., shopping bags or trash bags, depending on the desired quantity)
- High-quality potting soil or garden soil
- Compost (optional, but recommended)
- Sand or perlite (for better drainage)
- Water
- Scissors or a knife
- A planter or a crate (to place the bags in)
Preparation is everything: Mixing the right soil
Before we start planting, we need to prepare the perfect soil. Garlic loves loose, well-draining soil that is rich in nutrients.
- The base: Use your potting soil or garden soil as a base. I recommend using high-quality potting soil, as it is already enriched with important nutrients.
- Add compost: Mix in about one-third compost with the soil. Compost is a natural fertilizer and provides the garlic with important nutrients. If you don’t have compost, you can also use organic fertilizer from a garden center.
- Improve drainage: Add a handful of sand or perlite. This ensures better drainage and prevents waterlogging, which garlic does not like at all.
- Mix everything well: Mix all ingredients thoroughly, so that a loose, crumbly soil mixture is created.
Preparing the bags: Drainage and filling
Now it’s time to prepare the plastic bags. It’s important to ensure good drainage so that the water can drain well.
- Make holes: Take your scissors or knife and poke several small holes in the bottom of the plastic bags. This is important so that excess water can drain away and no waterlogging occurs. Make sure the holes are not too big, so that no soil falls out.
- Fill the bags: Fill the bags with your prepared soil mixture. Leave about 5-10 cm of space at the top so you can water later without the soil overflowing.
- Place the bags: Place the filled bags in your planters or crates. This gives the bags support and prevents them from falling over.
Planting garlic: How to do it right
Now comes the exciting part: planting the garlic cloves!
- Prepare garlic cloves: Take your garlic and carefully break apart the cloves. Be careful not to damage the cloves. Choose the largest and healthiest cloves, as these have the best chance of growing.
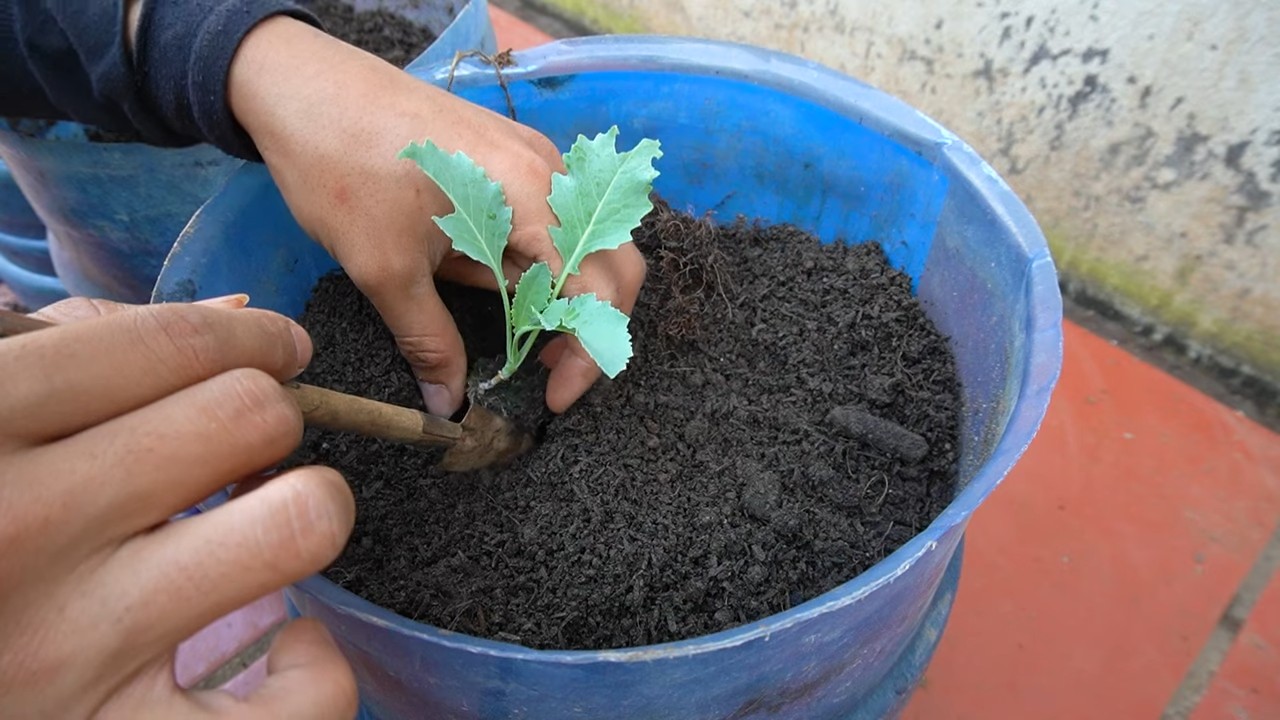
- Make planting holes: Make small holes in the soil with your finger or a small tool. The holes should be about 5-7 cm deep.
- Insert cloves: Place the garlic cloves with the tip facing upwards into the holes. Make sure the cloves are not too close together. A distance of about 10-15 cm is ideal.
- Close the holes: Carefully cover the garlic cloves with soil and press the soil down lightly.
- Water: Water the freshly planted garlic cloves thoroughly. The soil should be well moistened, but not wet.
Care: Watering, Fertilizing, and Protecting
So that your garlic grows well, it needs the right care.
- Watering: Water the garlic regularly, but not too much. The soil should always be slightly moist, but not wet. Avoid waterlogging, as this can lead to rot. On hot days, you may need to water more often.
- Fertilizing: Garlic is a heavy feeder and needs sufficient nutrients. Fertilize the garlic every few weeks with an organic fertilizer or compost tea. Be sure to follow the dosage instructions on the fertilizer.
- Pest protection: Regularly check your garlic plants for pests like aphids or onion flies. If necessary, you can use natural pesticides.
- Remove weeds: Regularly remove weeds from the bags so that the garlic is not overgrown by weeds.
- Location: Garlic loves the sun! Place your bags in a sunny location where the garlic gets at least 6 hours of sun per day.
Harvest time: When is the garlic ripe?
The harvest time for garlic is usually in the summer, about 8-9 months after planting.
- Signs of ripeness: The leaves of the garlic begin to turn yellow and bend over. This is a sign that the garlic is ripe.
- Harvest: Carefully pull the garlic out of the soil. If the soil is too firm, you can loosen it with a small shovel.
- Drying: Let the harvested garlic dry in a dry, airy place. You can tie the garlic bulbs together and hang them up or lay them out on a rack. Drying takes about 2-3 weeks.
- Storing: After drying, you can store the garlic in a cool, dry, and dark place. It will keep for several months this way.
Additional Tips and Tricks:
- Variety selection: There are different garlic varieties that differ in taste and size. Find out which varieties grow well in your region.
- Planting garlic in the fall: Garlic can also be planted in the fall. The cloves then overwinter in the ground and sprout in the spring.
- Remove the flower stalk: If the garlic forms a flower stalk (garlic scape), you should remove it. This promotes the growth of the garlic bulb.
- Mulching: Mulch the soil around the garlic with straw or leaves. This keeps the soil moist and suppresses weeds.
- Garlic as a pest repellent: Garlic has a deterrent effect on many pests. Plant garlic between your vegetable beds to keep pests away.
I hope this guide has helped you to grow your own garlic in plastic bags. Have fun gardening and a bountiful harvest

Conclusion
So, there you have it! Growing garlic in plastic bags is not just a quirky gardening experiment; it’s a game-changer for urban gardeners, space-conscious enthusiasts, and anyone looking for a more controlled and accessible way to cultivate this flavorful bulb. We’ve walked you through the simple steps, highlighted the benefits, and addressed potential concerns. Now, it’s time to ditch the traditional garden bed and embrace the bag!
Why is this DIY trick a must-try? Because it offers unparalleled convenience. Imagine having fresh, homegrown garlic right outside your door, even if you live in an apartment with only a balcony. The portability of plastic bags allows you to chase the sun, protect your precious bulbs from unexpected weather, and easily move them indoors during harsh winters. Furthermore, the controlled environment minimizes weed competition and soilborne diseases, leading to healthier, more robust garlic plants.
But the advantages don’t stop there. Growing garlic in plastic bags is incredibly cost-effective. You can repurpose old shopping bags, reducing waste and saving money on expensive pots and containers. Plus, the concentrated growing medium allows you to optimize nutrient levels, resulting in larger, more flavorful garlic cloves.
Ready to take your garlic game to the next level? Consider these variations:
* Experiment with different garlic varieties: From the mild and creamy ‘California Early’ to the pungent and spicy ‘Spanish Roja,’ each variety offers a unique flavor profile. Try growing a few different types in separate bags to discover your personal favorite.
* Add companion plants: Interplant your garlic with herbs like chamomile or dill to deter pests and attract beneficial insects. These companion plants can also enhance the flavor of your garlic.
* Get creative with your growing medium: While a standard potting mix works well, you can also incorporate compost, worm castings, or other organic amendments to boost nutrient levels and improve drainage.
* Vertical Gardening: Hang the bags on a wall or fence to create a vertical garlic garden. This is a great way to maximize space and add a touch of greenery to your balcony or patio.
Growing garlic in plastic bags is more than just a gardening technique; it’s a gateway to a more sustainable, self-sufficient lifestyle. It’s about connecting with nature, nurturing your own food, and enjoying the satisfaction of harvesting something you’ve grown with your own hands.
Don’t just take our word for it. We encourage you to try this DIY trick and experience the magic of growing your own garlic. Share your experiences, tips, and photos with us in the comments below. We can’t wait to see your thriving bag gardens! Let’s revolutionize the way we grow garlic, one plastic bag at a time. Embrace the simplicity, embrace the convenience, and embrace the deliciousness of homegrown garlic. Happy gardening!
Frequently Asked Questions (FAQ)
What kind of plastic bags are best for growing garlic?
The ideal plastic bags for growing garlic are sturdy, opaque bags that can hold a good amount of soil. Reusable shopping bags are a great option, as they are durable and often have handles for easy transport. Avoid using thin, flimsy bags that are likely to tear or puncture. Dark-colored bags are preferable as they help retain moisture and warmth, promoting faster growth. Make sure the bags are clean before using them to prevent the spread of diseases. You can also use grow bags made of fabric, which offer better drainage and aeration compared to plastic bags.
How many garlic cloves can I plant in one plastic bag?
The number of garlic cloves you can plant in one plastic bag depends on the size of the bag and the variety of garlic you are growing. As a general rule, space the cloves about 4-6 inches apart. For a standard-sized reusable shopping bag (approximately 12 inches in diameter), you can typically plant 3-5 cloves. Overcrowding can lead to smaller bulbs and increased risk of disease. Ensure each clove has enough space to develop properly. If you are planting in a larger bag, you can adjust the spacing accordingly.
What type of soil is best for growing garlic in plastic bags?
Garlic thrives in well-draining, fertile soil. A good potting mix is essential for growing garlic in plastic bags. You can use a commercially available potting mix or create your own by combining equal parts of garden soil, compost, and perlite or vermiculite. The compost provides essential nutrients, while the perlite or vermiculite improves drainage and aeration. Avoid using heavy clay soil, as it can become waterlogged and lead to root rot. Adding a slow-release fertilizer to the soil at planting time can also help ensure a steady supply of nutrients throughout the growing season.
How often should I water garlic grown in plastic bags?
Water garlic plants regularly, especially during dry periods. The frequency of watering will depend on the weather conditions and the type of soil you are using. Generally, water when the top inch of soil feels dry to the touch. Avoid overwatering, as this can lead to root rot. Ensure the plastic bags have drainage holes to allow excess water to escape. During hot weather, you may need to water more frequently. Mulching around the base of the plants can help retain moisture and reduce the need for frequent watering.
How much sunlight does garlic need when grown in plastic bags?
Garlic needs at least 6-8 hours of direct sunlight per day to thrive. Place your plastic bags in a sunny location where they will receive ample sunlight. If you are growing garlic indoors, use grow lights to supplement natural light. Rotate the bags regularly to ensure all sides of the plants receive equal exposure to sunlight. Insufficient sunlight can result in smaller bulbs and reduced yields.
How do I fertilize garlic grown in plastic bags?
Garlic is a heavy feeder and benefits from regular fertilization. At planting time, incorporate a slow-release fertilizer into the soil. During the growing season, you can supplement with liquid fertilizer every 2-3 weeks. Use a balanced fertilizer or one that is specifically formulated for vegetables. Avoid over-fertilizing, as this can lead to excessive foliage growth at the expense of bulb development. Organic fertilizers, such as compost tea or fish emulsion, are also excellent options.
How do I protect garlic grown in plastic bags from pests and diseases?
Growing garlic in plastic bags can help minimize pest and disease problems, but it’s still important to take precautions. Regularly inspect your plants for signs of pests or diseases. Common garlic pests include aphids, thrips, and onion maggots. Diseases include white rot, downy mildew, and rust. If you detect any problems, take action immediately. You can use organic pesticides or fungicides to control pests and diseases. Good air circulation and proper watering practices can also help prevent problems. Consider using companion plants like marigolds to deter pests.
When is the best time to harvest garlic grown in plastic bags?
Garlic is typically ready to harvest in late spring or early summer, about 8-9 months after planting. The exact timing will depend on the variety of garlic and the growing conditions. A good indicator of maturity is when the lower leaves start to turn yellow and brown. To harvest, gently loosen the soil around the bulbs and pull them up. Cure the garlic by hanging it in a cool, dry, well-ventilated place for 2-3 weeks. This allows the bulbs to dry and develop their full flavor.
Can I reuse the plastic bags for growing garlic again?
Yes, you can reuse the plastic bags for growing garlic again, but it’s important to clean them thoroughly before replanting. Remove any remaining soil and debris, and wash the bags with soap and water. Disinfect the bags with a solution of bleach and water (1 part bleach to 9 parts water) to kill any pathogens. Rinse the bags thoroughly and allow them to dry completely before using them again. This will help prevent the spread of diseases to your next crop of garlic.
What are the benefits of growing garlic in plastic bags compared to traditional methods?
Growing garlic in plastic bags offers several advantages over traditional methods. It’s a great option for urban gardeners with limited space, as it allows you to grow garlic on balconies, patios, or even indoors. The portability of the bags makes it easy to move the plants to optimal locations for sunlight and protection from the elements. The controlled environment minimizes weed competition and soilborne diseases. Additionally, growing garlic in plastic bags is a cost-effective way to produce your own fresh, flavorful garlic.


Leave a Comment