
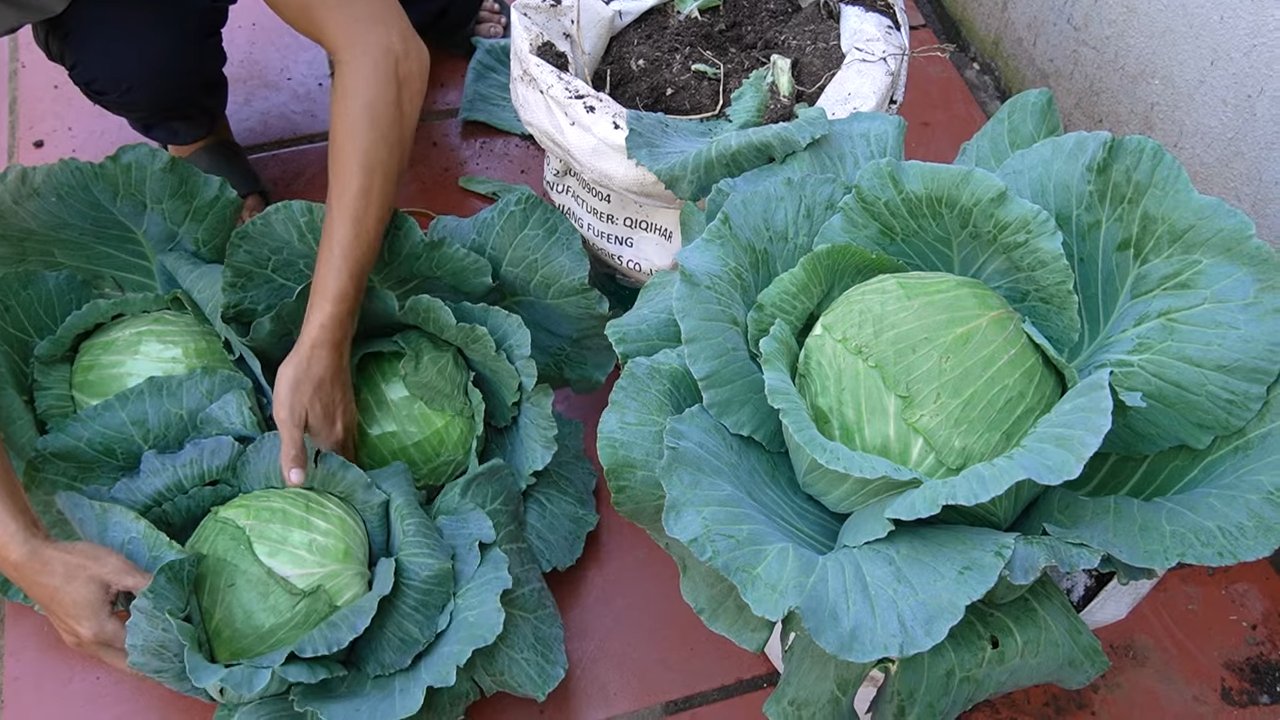
Growing cabbage for beginners might seem daunting, but trust me, it’s more rewarding than you think! Imagine harvesting your own crisp, flavorful cabbage heads, knowing you nurtured them from tiny seedlings. That’s the magic of home gardening, and it’s totally achievable, even if you’re just starting out.
Cabbage has a rich history, dating back thousands of years. Ancient Romans and Greeks prized it for its nutritional value and medicinal properties. Over time, different varieties emerged, each with its unique flavor and texture. Today, cabbage remains a staple in cuisines worldwide, from sauerkraut in Germany to kimchi in Korea.
But why bother growing your own cabbage? Well, for starters, homegrown cabbage tastes infinitely better than store-bought. Plus, you have complete control over what goes into your garden, ensuring your cabbage is free from harmful pesticides and chemicals. And let’s be honest, there’s something incredibly satisfying about harvesting food you’ve grown yourself. This DIY guide will provide you with all the essential tips and tricks for growing cabbage for beginners, ensuring a bountiful harvest. So, grab your gardening gloves, and let’s get started!
Kohl Anbauen für Anfänger: Dein DIY-Guide für eine reiche Ernte
Hey Gartenfreunde! Ihr wolltet schon immer mal euren eigenen Kohl anbauen, aber wart unsicher, wo ihr anfangen sollt? Keine Sorge, ich zeige euch, wie es geht! Kohl anzubauen ist gar nicht so schwer, wie man denkt, und mit ein bisschen Geduld und den richtigen Tipps könnt ihr bald eure eigene, frische Ernte genießen. In diesem Artikel führe ich euch Schritt für Schritt durch den gesamten Prozess, von der Aussaat bis zur Ernte. Los geht’s!
Die Grundlagen: Was du über Kohl wissen musst
Bevor wir loslegen, hier ein paar wichtige Infos über Kohl, die euch helfen werden, erfolgreich zu sein:
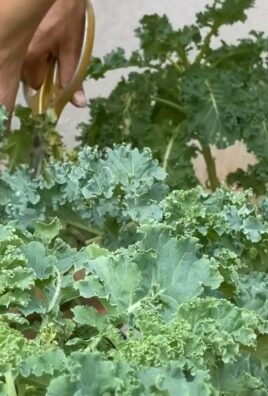
* Kohl ist vielfältig: Es gibt unzählige Kohlsorten, von Weißkohl und Rotkohl über Rosenkohl und Blumenkohl bis hin zu Grünkohl und Wirsing. Jede Sorte hat ihre eigenen Vorlieben und Wachstumsbedingungen.
* Kohl ist ein Starkzehrer: Das bedeutet, er braucht viele Nährstoffe, um gut zu wachsen. Ein nährstoffreicher Boden ist also das A und O.
* Kohl braucht Sonne: Mindestens 6 Stunden Sonne pro Tag sind ideal für ein gesundes Wachstum.
* Kohl mag es kühl: Die meisten Kohlsorten bevorzugen kühle Temperaturen, besonders während der Wachstumsphase.
* Kohl kann anfällig für Schädlinge sein: Kohlweißlinge, Erdflöhe und Kohlfliegen sind nur einige der ungebetenen Gäste, die sich gerne an eurem Kohl gütlich tun. Aber keine Panik, ich zeige euch, wie ihr sie in Schach haltet!
Die Vorbereitung: Was du brauchst
Bevor wir mit der Aussaat beginnen, müssen wir sicherstellen, dass wir alles haben, was wir brauchen. Hier ist eine Liste der wichtigsten Dinge:
* Kohlsaat: Wählt die Kohlsorte, die euch am besten gefällt und die für eure Region geeignet ist. Achtet auf hochwertiges Saatgut von einem vertrauenswürdigen Anbieter.
* Anzuchterde: Spezielle Anzuchterde ist nährstoffarm und locker, ideal für die Keimung der Samen.
* Anzuchttöpfe oder -schalen: Kleine Töpfe oder Schalen, in denen ihr die Samen vorziehen könnt.
* Gießkanne mit feinem Brausekopf: Zum sanften Bewässern der Keimlinge.
* Pikierstab: Zum Vereinzeln der Keimlinge.
* Gemüsegartenerde: Für das Beet, in das ihr die Jungpflanzen später umpflanzen werdet.
* Kompost oder organischer Dünger: Zum Anreichern des Bodens mit Nährstoffen.
* Gartengeräte: Spaten, Harke, Hacke.
* Schutznetz (optional): Zum Schutz vor Schädlingen.
Aussaat: Der Start in ein Kohlreiches Leben
Es gibt zwei Möglichkeiten, Kohl anzubauen: Entweder ihr sät die Samen direkt ins Beet oder ihr zieht die Jungpflanzen vor. Ich empfehle euch, die Jungpflanzen vorzuziehen, da dies die Erfolgschancen erhöht und euch einen Vorsprung verschafft.
Aussaat im Haus (Vorziehen):
1. Vorbereitung der Anzuchttöpfe: Füllt die Anzuchttöpfe oder -schalen mit Anzuchterde. Drückt die Erde leicht an.
2. Aussaat der Samen: Legt in jeden Topf 1-2 Samen. Bedeckt die Samen mit einer dünnen Schicht Erde (ca. 0,5 cm).
3. Bewässerung: Gießt die Erde vorsichtig mit einer Gießkanne mit feinem Brausekopf. Die Erde sollte feucht, aber nicht nass sein.
4. Standort: Stellt die Anzuchttöpfe an einen hellen und warmen Ort (ca. 18-20°C). Ein Fensterbrett oder ein Gewächshaus sind ideal.
5. Feuchtigkeit: Haltet die Erde feucht, indem ihr sie regelmäßig besprüht oder gießt.
6. Keimung: Die Samen keimen in der Regel innerhalb von 5-10 Tagen.
Pikieren: Den Keimlingen mehr Platz geben
Sobald die Keimlinge ihre ersten richtigen Blätter (nach den Keimblättern) entwickelt haben, ist es Zeit, sie zu pikieren. Das bedeutet, dass ihr sie in größere Töpfe umpflanzt, damit sie mehr Platz zum Wachsen haben.
1. Vorbereitung der Töpfe: Füllt größere Töpfe (ca. 8-10 cm Durchmesser) mit Gemüsegartenerde.
2. Vereinzeln der Keimlinge: Löst die Keimlinge vorsichtig mit einem Pikierstab aus den Anzuchttöpfen. Achtet darauf, die Wurzeln nicht zu beschädigen.
3. Umpflanzen: Setzt jeden Keimling in einen eigenen Topf. Die Wurzeln sollten gut mit Erde bedeckt sein.
4. Bewässerung: Gießt die Jungpflanzen vorsichtig an.
5. Standort: Stellt die Jungpflanzen an einen hellen und etwas kühleren Ort (ca. 15-18°C).
Auspflanzen: Ab ins Beet!
Nachdem die Jungpflanzen kräftig genug sind (ca. 10-15 cm hoch), können sie ins Beet umgepflanzt werden. Dies ist in der Regel nach 4-6 Wochen der Fall.
1. Vorbereitung des Beets: Lockert den Boden gründlich auf und entfernt Unkraut. Reichert den Boden mit Kompost oder organischem Dünger an.
2. Abhärten der Jungpflanzen: Stellt die Jungpflanzen einige Tage vor dem Auspflanzen tagsüber ins Freie, damit sie sich an die Sonne und die Temperaturen gewöhnen können.
3. Pflanzabstand: Der Pflanzabstand hängt von der Kohlsorte ab. Informiert euch, welcher Abstand für eure Sorte empfohlen wird. In der Regel beträgt er zwischen 40 und 60 cm.
4. Pflanzlöcher: Grabt Pflanzlöcher, die etwas größer sind als die Wurzelballen der Jungpflanzen.
5. Umpflanzen: Setzt die Jungpflanzen in die Pflanzlöcher. Die Wurzelballen sollten gut mit Erde bedeckt sein.
6. Bewässerung: Gießt die Jungpflanzen nach dem Umpflanzen gründlich an.
7. Schutz vor Schädlingen: Decken Sie die Jungpflanzen mit einem Schutznetz ab, um sie vor Kohlweißlingen und anderen Schädlingen zu schützen.
Pflege: Damit dein Kohl prächtig gedeiht
Nach dem Auspflanzen ist es wichtig, den Kohl regelmäßig zu pflegen, damit er gut wächst und eine reiche Ernte bringt.
* Bewässerung: Kohl braucht regelmäßig Wasser, besonders während trockener Perioden. Gießt am besten morgens, damit die Blätter bis zum Abend abtrocknen können.
* Düngung: Düngt den Kohl regelmäßig mit organischem Dünger oder Kompost. Achtet darauf, dass der Dünger ausreichend Stickstoff enthält, da Kohl ein Starkzehrer ist.
* Unkrautbekämpfung: Entfernt regelmäßig Unkraut, da es dem Kohl Nährstoffe und Wasser entzieht.
* Schädlingsbekämpfung: Kontrolliert den Kohl regelmäßig auf Schädlinge. Bei Befall könnt ihr natürliche Schädlingsbekämpfungsmittel einsetzen, z.B. Brennnesseljauche oder Neemöl.
* Häufeln: Häufelt den Kohl regelmäßig an, um die Standfestigkeit zu erhöhen und die Wurzelbildung zu fördern.
Ernte: Die Belohnung für deine Mühe
Die Erntezeit hängt von der Kohlsorte ab. In der Regel könnt ihr den Kohl ernten, wenn die Köpfe fest und prall sind.
* Erntezeitpunkt: Der richtige Erntezeitpunkt ist entscheidend für den Geschmack und die Lagerfähigkeit des Kohls.
* Erntemethode: Schneidet den Kohl mit einem scharfen Messer oder einer Axt knapp über dem Boden ab.
* Lagerung: Kohl kann im Kühlschrank oder im Keller gelagert werden. Wickelt ihn am besten in ein feuchtes Tuch ein, um

Conclusion
So, there you have it! Mastering the art of growing cabbage, even for beginners, is entirely within your reach. This isn’t just about saving money at the grocery store; it’s about connecting with your food, nurturing something from seed to table, and experiencing the immense satisfaction of harvesting your own fresh, crisp cabbage.
We’ve walked you through the essential steps, from selecting the right variety for your climate and preparing your soil to planting, nurturing, and protecting your precious cabbage heads. Remember, patience is key. Growing cabbage takes time and attention, but the rewards are well worth the effort. Imagine the delicious slaws, hearty soups, and flavorful stir-fries you’ll be able to create with your homegrown bounty!
This DIY approach to growing cabbage offers a level of control and customization you simply can’t achieve with store-bought produce. You can choose organic methods, ensuring your cabbage is free from harmful pesticides and chemicals. You can also experiment with different varieties, discovering unique flavors and textures that will elevate your culinary creations.
Consider these variations to further personalize your cabbage-growing experience:
* Succession Planting: Plant new cabbage seedlings every few weeks to ensure a continuous harvest throughout the growing season.
* Companion Planting: Plant cabbage alongside beneficial companions like dill, chamomile, or rosemary to deter pests and attract pollinators.
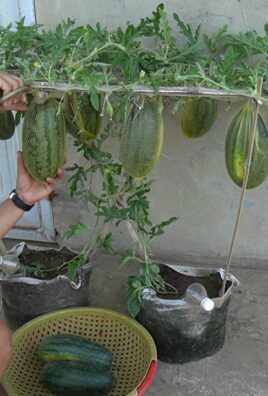
* Container Gardening: If you have limited space, grow cabbage in large containers on your patio or balcony. Choose smaller varieties that are well-suited for container gardening.
* Fermented Cabbage: Once you have a successful harvest, try your hand at making sauerkraut or kimchi using your homegrown cabbage. The possibilities are endless!
Growing your own cabbage is more than just a gardening project; it’s an investment in your health, your well-being, and your connection to the natural world. Don’t be intimidated by the process. Start small, learn as you go, and embrace the challenges and triumphs along the way.
We encourage you to take the plunge and embark on your own cabbage-growing adventure. We are confident that you’ll be amazed by what you can achieve. And most importantly, we want to hear about your experiences! Share your tips, tricks, and photos with us in the comments below. Let’s build a community of cabbage-growing enthusiasts and inspire others to discover the joy of homegrown goodness. Happy gardening!
Frequently Asked Questions (FAQ)
What is the best time of year to start growing cabbage?
The best time to start growing cabbage depends largely on your climate. Cabbage is a cool-season crop, meaning it thrives in temperatures between 60°F and 70°F (15°C and 21°C). In regions with mild winters, you can plant cabbage in the fall for a winter or early spring harvest. In colder climates, start seeds indoors 6-8 weeks before the last expected frost and transplant them outdoors in the spring. For a fall harvest in colder climates, start seeds indoors in late spring or early summer. Always check your local frost dates to determine the optimal planting time for your area.
How much sunlight does cabbage need?
Cabbage needs at least 6 hours of direct sunlight per day to thrive. Choose a planting location that receives full sun for the majority of the day. If you live in a particularly hot climate, some afternoon shade can be beneficial to prevent the cabbage heads from bolting (going to seed prematurely).
What kind of soil is best for growing cabbage?
Cabbage prefers well-drained, fertile soil that is rich in organic matter. The ideal soil pH is between 6.0 and 7.0. Before planting, amend your soil with compost, aged manure, or other organic materials to improve drainage, fertility, and water retention. A soil test can help you determine the specific nutrient needs of your soil.
How often should I water my cabbage plants?
Cabbage plants need consistent moisture to develop large, healthy heads. Water deeply and regularly, especially during dry periods. Aim to keep the soil consistently moist but not waterlogged. Mulching around the plants can help retain moisture and suppress weeds. A good rule of thumb is to water when the top inch of soil feels dry to the touch.
What are some common pests and diseases that affect cabbage?
Cabbage can be susceptible to a variety of pests and diseases, including cabbage worms, cabbage loopers, aphids, flea beetles, and clubroot. Regularly inspect your plants for signs of infestation or disease. Use organic pest control methods such as handpicking pests, using insecticidal soap, or applying Bacillus thuringiensis (Bt) to control cabbage worms and loopers. To prevent clubroot, ensure your soil is well-drained and has a pH above 6.5. Crop rotation can also help reduce the risk of disease.
How do I know when my cabbage is ready to harvest?
Cabbage is ready to harvest when the head is firm and solid to the touch. The size of the head will vary depending on the variety, but generally, a mature cabbage head will be about 6-12 inches in diameter. To harvest, use a sharp knife to cut the head from the stem, leaving a few outer leaves intact.
Can I grow cabbage in containers?
Yes, you can grow cabbage in containers, but you’ll need to choose a large container (at least 12 inches in diameter) and select a smaller cabbage variety that is well-suited for container gardening. Use a high-quality potting mix and ensure the container has good drainage. Water regularly and fertilize as needed.
What are some good companion plants for cabbage?
Good companion plants for cabbage include dill, chamomile, rosemary, thyme, onions, garlic, and marigolds. These plants can help deter pests, attract beneficial insects, and improve the overall health of your cabbage plants. Avoid planting cabbage near strawberries, tomatoes, or grapes, as these plants can compete for nutrients or attract pests that also affect cabbage.
My cabbage is bolting (going to seed). What can I do?
Bolting is when a cabbage plant prematurely produces a flower stalk and seeds. This can be caused by stress, such as extreme temperatures, drought, or poor soil. Once a cabbage plant bolts, the head will become loose and bitter. To prevent bolting, choose heat-tolerant varieties, provide consistent moisture, and protect your plants from extreme temperatures. If your cabbage plant bolts, you can still harvest the leaves for cooking, but the head will not be as palatable.
How can I store my harvested cabbage?
To store harvested cabbage, remove any damaged or yellowing outer leaves. Wrap the cabbage head in plastic wrap or place it in a plastic bag and store it in the refrigerator. Cabbage can typically be stored for several weeks in the refrigerator. You can also freeze cabbage, but it’s best to blanch it first to preserve its quality.

Leave a Comment