
Grow peanuts backyard? Absolutely! Imagine harvesting your own homegrown peanuts, fresh from the earth, ready to be roasted, boiled, or transformed into creamy peanut butter. It’s easier than you think, and this DIY guide will show you exactly how to make it happen, even if you have limited space.
For centuries, peanuts have been a staple food in many cultures, originating in South America and spreading across the globe. They’re not just delicious; they’re packed with protein and healthy fats. But beyond their nutritional value, there’s something incredibly satisfying about cultivating your own food, connecting with nature, and enjoying the fruits (or rather, the legumes!) of your labor.
Many people shy away from the idea of growing peanuts, thinking it’s too complicated or requires a large farm. But that’s simply not true! With a few simple tricks and the right approach, you can successfully grow peanuts backyard, even in containers on a patio or balcony. This DIY article is your comprehensive guide to demystifying the process. I’ll walk you through everything from selecting the right peanut variety to harvesting your bounty, ensuring you have a thriving peanut patch right outside your door. So, ditch the store-bought peanuts and get ready to experience the joy of growing your own!
Growing Peanuts in Your Own Garden: A Step-by-Step Guide
Hello garden friends! Have you ever wondered if you can grow peanuts in your own garden? The answer is a clear YES! It’s easier than you think and incredibly fun. I’ll show you how to grow your own peanuts, from sowing to harvest. Let’s get started!
What You Need for Peanut Cultivation
Before we begin, here is a list of the things you’ll need:
- Peanut seeds: Unroasted, untreated peanuts from a health food store or garden center are best. Make sure they are still in their shells.
- Garden soil: Loose, well-draining soil is ideal. Sandy loam soil is perfect.
- Compost or organic fertilizer: To enrich the soil.
- Garden tools: Spade, rake, watering can.
- Sunny location: Peanuts love the sun!
- Patience: Peanuts take time to grow.
Preparation: The Key to Success
Proper preparation is the be-all and end-all for a successful peanut harvest.
1. Preparing the Soil:
- First, you need to loosen the soil. Take a spade and dig over the area where you want to grow the peanuts, about 30 cm deep.
- Remove all stones, roots, and weeds. Peanuts don’t like to compete with other plants.
- Mix compost or organic fertilizer into the soil. This gives the peanuts a good start. I like to use well-rotted compost from my own compost heap.
- Rake the soil smooth so that it is level.
2. Preparing the Peanuts:
- Take your peanuts and carefully crack open the shells. Be careful not to damage the peanuts themselves.
- You can sow the peanuts directly, but I recommend starting them indoors first. This gives them a little head start.
Starting Peanuts Indoors: A Little Head Start
Starting them indoors is optional, but it increases the chances of success.
1. Soaking the Peanuts:
- Place the peanuts in lukewarm water for about 24 hours. This helps them to germinate faster.
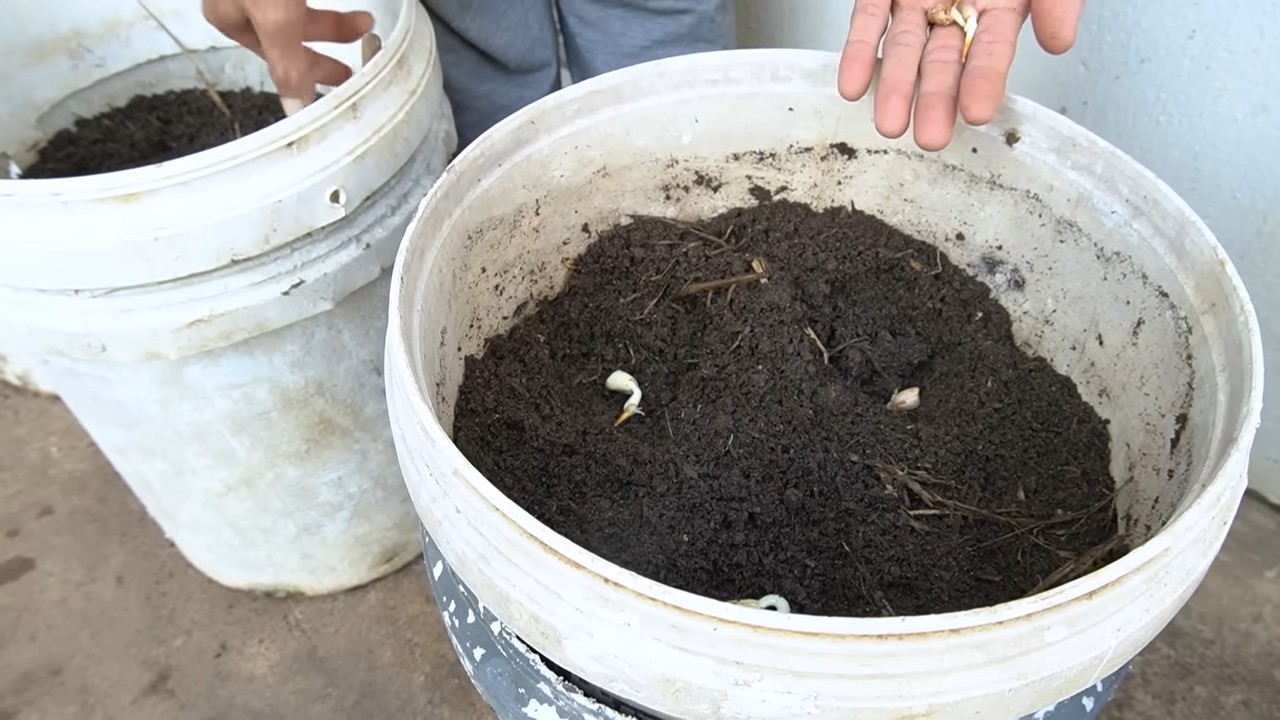
2. Sowing in Pots:
- Fill small pots with seed starting mix.
- Put one peanut in each pot, about 2-3 cm deep.
- Water the soil gently.
- Place the pots in a warm, bright place. A windowsill is ideal.
3. Be Patient:
- It takes about 7-10 days for the peanuts to germinate. Keep the soil moist, but not wet.
Sowing Outdoors: Finally into the Soil!
Once the peanut plants are about 10-15 cm high (or if you haven’t started them indoors and the soil temperature is consistently above 18°C), they can be planted outdoors.
1. Choosing the Right Time:
- Peanuts need warm weather. Wait until there is no more risk of frost. In Germany, this is usually from mid-May.
2. Planting Out the Peanut Plants:
- Dig holes about 20-30 cm apart.
- Carefully place the peanut plants in the holes. Be careful not to damage the roots.
- Fill the holes with soil and press it down lightly.
- Water the plants well.
3. Direct Sowing (if not started indoors):
- If you haven’t started the peanuts indoors, you can sow them directly into the ground.
- Make small holes 20-30 cm apart.
- Place 2-3 peanuts in each hole.
- Cover the holes with soil and water them well.
Care: Watering, Fertilizing, Hilling
Peanuts are relatively low-maintenance, but they still need a little attention.
1. Watering:
- Peanuts need regular water, especially during flowering and fruit formation. Make sure the soil is always slightly moist. However, avoid waterlogging.
2. Fertilizing:
- You can fertilize the peanuts once a month with an organic fertilizer. I like to use diluted nettle tea.
3. Hilling:
- Hilling is very important! When the peanut plants flower, they form what are called “pegs.” These are small stems that burrow into the ground and form the peanuts there.
- Hill the soil up around the plants so that the pegs can penetrate the soil more easily. It’s best to do this when the plants are about 30 cm high. Repeat the hilling every few weeks.
4. Removing Weeds:
- Keep the area around the peanut plants free of weeds. Weeds compete with the peanuts for nutrients and water.
The Harvest: The Reward for Your Efforts
Harvest time is the most exciting part!
1. Recognizing the Right Time:
- Peanuts are ripe when the leaves turn yellow and the plants begin to wilt. This is usually in September or October.
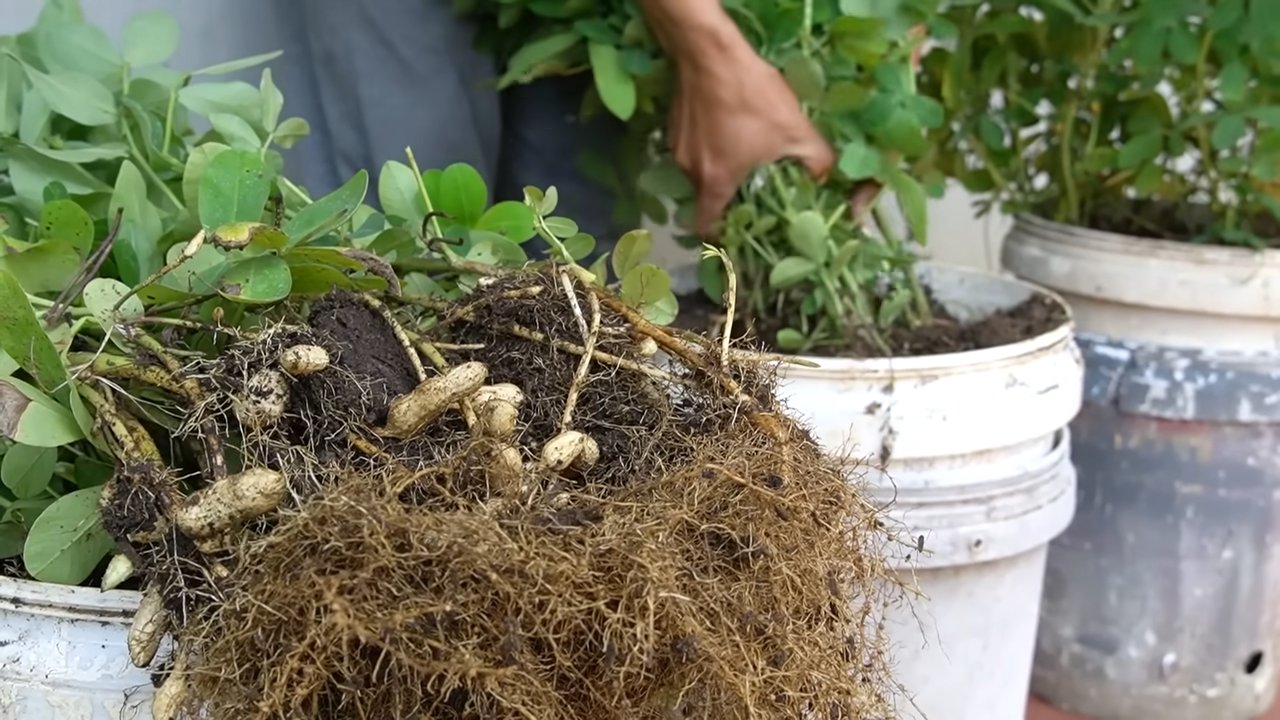
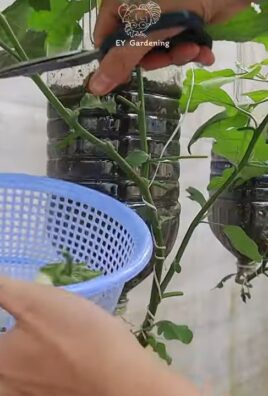
2. Harvesting the Peanuts:
- Take a spade and carefully dig up the peanut plants.
- Shake the soil off the roots.
- Let the peanuts dry on the plants for a few days in a dry, airy place.
3. Drying the Peanuts:
- After pre-drying, you can separate the peanuts from the plants.
- Place the peanuts on a wire rack or in a basket and let them dry for about 2-3 weeks in a dry, airy place.
- The peanuts are dry when they rattle easily and the shells are hard.
Storage: Making the Peanuts Last
1. Storing the Peanuts:
- Store the dried peanuts in an airtight container in a cool, dry place. They will keep for several months this way.
Common Problems and Solutions
Problems can also occur with peanut cultivation. Here are a few common problems and how you can solve them:
- Poor germination:
- Cause: Soil temperature is too cold, soil is too dry, poor seed quality.
- Solution: Wait until the soil temperature is warmer, keep the soil moist, use fresh seeds.
- Pests:
- Peanuts can be infested by slugs, aphids, or other pests.
- Solution: Hand-pick slugs, use natural pesticides like neem oil or soap solution.
- Diseases:
- Peanuts can be affected by fungal diseases, especially in damp weather.
- Solution: Ensure good ventilation, avoid waterlogging, use fungicides if necessary.
Conclusion: Homegrown Peanuts Are Something Special
I hope this guide has helped you to grow your own peanuts. It’s a rewarding project that rewards you with fresh, homegrown peanuts. Happy gardening!
Conclusion
So, there you have it! Growing peanuts in your backyard isn’t just a fun gardening project; it’s a rewarding experience that brings you closer to nature and provides you with a delicious, homegrown treat. Forget the store-bought peanuts laden with preservatives and unknown origins. Imagine the satisfaction of harvesting your own crop, knowing exactly where it came from and how it was grown. This DIY trick is a must-try for anyone who enjoys gardening, loves fresh food, or simply wants to add a unique and educational element to their outdoor space.
The beauty of growing peanuts is its adaptability. While we’ve outlined a straightforward method, there’s plenty of room for experimentation. Consider these variations to personalize your peanut-growing journey:
* **Container Gardening:** If you’re short on space or have poor soil, growing peanuts in large containers is a fantastic alternative. Choose a container at least 18 inches deep and wide to accommodate the root system and developing peanuts.
* **Different Peanut Varieties:** Explore different peanut varieties beyond the standard Virginia or Spanish types. Valencia peanuts are known for their sweet flavor and multiple peanuts per shell, while Runner peanuts are commonly used for peanut butter. Experiment to find your favorite!
* **Companion Planting:** Enhance your peanut patch by incorporating companion plants. Marigolds deter nematodes, while herbs like basil and rosemary can repel other pests. Legumes like beans and peas can also improve soil health.
* **Roasting Variations:** Once you’ve harvested your peanuts, get creative with roasting! Try different seasonings like smoked paprika, chili powder, or even a touch of maple syrup for a sweet and savory treat. You can also boil them for a southern delicacy.
Growing peanuts backyard is more than just planting seeds; it’s about connecting with the earth, learning about the life cycle of a plant, and enjoying the fruits (or rather, nuts) of your labor. It’s a project that’s suitable for gardeners of all skill levels, from beginners to seasoned pros. Plus, it’s a fantastic way to get kids involved in gardening and teach them about where their food comes from.
Don’t be intimidated by the process. With a little planning, preparation, and patience, you can successfully grow peanuts in your own backyard. The taste of freshly harvested, homegrown peanuts is unlike anything you’ve ever experienced. It’s a flavor that’s both earthy and sweet, and it’s a testament to the hard work and dedication you’ve put into your garden.
So, what are you waiting for? Grab some peanut seeds, find a sunny spot in your backyard, and get ready to embark on a peanut-growing adventure! We’re confident that you’ll be amazed by the results.
We’d love to hear about your experiences growing peanuts in your backyard. Share your tips, tricks, and photos with us in the comments below. Let’s create a community of peanut-growing enthusiasts and learn from each other! Happy gardening!
Frequently Asked Questions (FAQ)
1. What is the best time to plant peanuts?
The ideal time to plant peanuts is after the last frost, when the soil temperature has warmed to at least 65°F (18°C). This typically occurs in late spring or early summer, depending on your climate. Peanuts require a long growing season of at least 120-150 days to mature properly. Planting too early can result in poor germination and stunted growth. Check your local weather forecasts and planting calendars to determine the optimal planting time for your region.
2. What type of soil is best for growing peanuts?
Peanuts thrive in well-drained, sandy loam soil with a slightly acidic to neutral pH (6.0-7.0). Sandy loam soil allows for good drainage, which is crucial to prevent root rot and other fungal diseases. It also makes it easier for the “pegs” (the stems that develop into peanuts) to penetrate the soil. If your soil is heavy clay, amend it with organic matter such as compost, peat moss, or well-rotted manure to improve drainage and aeration. Avoid soils that are excessively rocky or compacted, as these can hinder peanut development.
3. How much sunlight do peanuts need?
Peanuts require at least 6-8 hours of direct sunlight per day to grow and produce a good yield. Choose a planting location that receives ample sunlight throughout the day. Insufficient sunlight can lead to weak, leggy plants and reduced peanut production. If you live in a particularly hot climate, some afternoon shade may be beneficial to prevent the plants from overheating.
4. How often should I water my peanut plants?
Peanuts need consistent moisture, especially during the flowering and pegging stages. Water deeply and regularly, aiming to keep the soil consistently moist but not waterlogged. Avoid overhead watering, as this can promote fungal diseases. Instead, use a soaker hose or drip irrigation system to deliver water directly to the roots. During periods of drought, you may need to water more frequently. As the peanuts mature and the leaves begin to yellow, you can gradually reduce watering.
5. What are common pests and diseases that affect peanuts, and how can I control them?
Some common pests that can affect peanuts include aphids, spider mites, and nematodes. Aphids and spider mites can be controlled with insecticidal soap or neem oil. Nematodes can be more challenging to manage, but crop rotation and soil solarization can help reduce their populations. Common diseases that can affect peanuts include leaf spot, rust, and white mold. These diseases can be prevented by ensuring good air circulation, avoiding overhead watering, and using disease-resistant varieties. Fungicides may be necessary in severe cases.
6. How do I know when my peanuts are ready to harvest?
The best way to determine when your peanuts are ready to harvest is to check the maturity of the pods. Dig up a few plants and examine the pods. The inside of the shells should be dark brown or reddish-brown, and the kernels should be plump and well-formed. The leaves of the plant will also begin to yellow and dry out. This typically occurs about 120-150 days after planting.
7. How do I harvest and cure peanuts?
To harvest peanuts, carefully dig up the entire plant, being careful not to damage the pods. Shake off any excess soil and allow the plants to dry in the sun for a few days. This process is called curing. Curing helps to reduce the moisture content of the peanuts and improve their flavor. After curing, you can remove the peanuts from the plants and store them in a cool, dry place.
8. Can I grow peanuts in containers?
Yes, you can successfully grow peanuts in containers, especially if you have limited space or poor soil. Choose a large container that is at least 18 inches deep and wide to accommodate the root system and developing peanuts. Use a well-draining potting mix and provide adequate sunlight and water. Container-grown peanuts may require more frequent watering and fertilization than those grown in the ground.
9. Are there any specific fertilizer requirements for peanuts?
Peanuts are legumes, which means they can fix nitrogen from the air. However, they still benefit from fertilization, especially with phosphorus and potassium. Apply a balanced fertilizer (e.g., 10-10-10) at planting time and again during the flowering stage. Avoid over-fertilizing with nitrogen, as this can promote excessive vegetative growth at the expense of peanut production. Soil testing can help you determine the specific nutrient needs of your soil.
10. Can I save seeds from my peanut harvest to plant next year?
Yes, you can save seeds from your peanut harvest to plant next year. Select healthy, well-formed peanuts and store them in a cool, dry place. Before planting, crack open the shells and remove the kernels. Plant the kernels directly in the ground, following the same planting instructions as before. Keep in mind that peanuts are often hybrids, so the offspring may not be exactly the same as the parent plant.
Leave a Comment