
Grow Chili Peppers at Home and ignite your culinary adventures! Have you ever dreamed of plucking fiery peppers straight from your garden, adding a burst of fresh, homegrown heat to your favorite dishes? Well, dream no more! This DIY guide is your passport to a vibrant, pepper-packed paradise, right in your own backyard (or balcony!).
For centuries, chili peppers have been more than just a spice; they’ve been woven into the fabric of cultures around the globe. From the ancient Aztecs using them in rituals to the vibrant street food of Southeast Asia, these fiery fruits have a rich and fascinating history. But you don’t need to be a historian to appreciate the joy of growing your own.
Let’s face it, store-bought chili peppers can sometimes be a gamble – bland, overpriced, or simply not the variety you’re craving. That’s where this DIY guide comes in. I’m going to show you simple, effective tricks and hacks to grow chili peppers at home, regardless of your gardening experience or space constraints. Imagine the satisfaction of harvesting your own Scotch Bonnets, Jalapeños, or even Ghost Peppers! Not only will you save money and enjoy fresher, more flavorful peppers, but you’ll also experience the therapeutic benefits of connecting with nature. So, grab your gardening gloves, and let’s get started on this exciting journey to pepper paradise!
Growing Your Own Chili: How to Make it Hot!
Hey everyone, are you also tired of the expensive and often tasteless chilies from the supermarket? I’ll show you how you can easily grow your own super-tasty and fiery chilies at home! It’s easier than you think and is a ton of fun. I promise!
What You Need: The Basic Chili Starter Kit
Before we get started, we’ll need the right equipment. Don’t worry, you probably have most of it at home already!
- Chili seeds: You can go wild here! From mild jalapeños to hellishly hot habaneros, anything is possible. Look for good quality and preferably buy from a trusted supplier.
- Seed starting mix: Regular potting soil is often too rich in nutrients for the delicate seedlings. Seed starting mix is finer and contains less fertilizer.
- Seedling pots or trays: Small pots or trays with drainage holes are ideal for starting seeds. You can also use egg cartons or yogurt cups if you poke holes in them.
- Spray bottle: For moistening the soil.
- Mini-greenhouse or plastic wrap: To keep the humidity high.
- Dibber or pencil: For separating the seedlings.
- Potting soil: For later repotting into larger pots.
- Pots: Larger pots (at least 15 cm in diameter) for the mature chili plants.
- Fertilizer: Liquid fertilizer for chili plants or tomato fertilizer.
- Watering can: For watering the plants.
- A sunny spot: Chilies love the sun!
Phase 1: Starting the Seeds – The Beginning of Chili Happiness
Starting the seeds is the most important step to get healthy and strong chili plants. Patience is required here, but it’s worth it!
- Prepare seeds (optional): To speed up germination, you can soak the seeds for 24 hours in lukewarm chamomile tea. This softens the seed coat and makes germination easier.
- Fill seedling pots: Fill the seedling pots or trays with seed starting mix. Press the soil down lightly.
- Sow seeds: Place 1-2 seeds per pot on the soil and cover them with a thin layer of seed starting mix (approx. 0.5 cm).
- Moisten: Gently moisten the soil with the spray bottle. It should be damp, but not wet.
- Mini-greenhouse or plastic wrap: Place the seedling pots in a mini-greenhouse or cover them with plastic wrap. This creates high humidity, which promotes germination.
- Warm location: Place the mini-greenhouse or covered pots in a warm place (22-28°C). A heating mat can be very helpful here.
- Be patient: Now it’s time to wait! Depending on the chili variety, germination can take 1-3 weeks. Make sure the soil always stays moist, but not too wet. Ventilate the mini-greenhouse or plastic wrap regularly to prevent mold.
Phase 2: Pricking Out – Giving the Little Ones More Space
As soon as the seedlings have developed their first true leaves (after the cotyledons), it’s time for pricking out. This means we move the small plants into larger pots so they have more room to grow.
- Preparation: Fill larger pots (approx. 8-10 cm in diameter) with potting soil.
- Gently lift seedlings: Carefully loosen the seedlings from the seed starting mix with a dibber or pencil. Be careful not to damage the roots.
- Planting: Place each seedling in its own pot with potting soil. The seedlings can be planted a little deeper than before, up to just below the first leaves.
- Press down and water: Lightly press the soil around the seedlings and water them gently.
- Bright location: Place the pricked-out seedlings in a bright, but not too sunny, location.
Phase 3: Caring for the Chili Plant – To Make It Really Hot!
Now that your chili plants are larger, they need regular care to grow optimally and produce a lot of fruit.
- Watering: Water the chili plants regularly, but avoid waterlogging. The soil should always be slightly moist. It’s best to water in the morning so the leaves can dry during the day.
- Fertilizing: Start fertilizing about 2-3 weeks after pricking out. Use a liquid fertilizer for chili plants or tomato fertilizer. Fertilize according to the instructions on the package.
- Sunlight: Chilies love the sun! Place the plants in the sunniest possible location. At least 6 hours of sun per day is ideal.
- Repotting: When the pots become too small, you need to repot the chili plants into larger pots. Choose pots with a diameter of at least 15 cm.
- Pruning (optional): For some chili varieties, it can be useful to prune the side shoots (suckers) to encourage fruit production. Find out if this is recommended for your chili variety.
- Pests: Watch out for pests like aphids or spider mites. If infested, you can treat the plants with a natural insecticide.
- Support (optional): If the chili plants bear a lot of fruit, they can collapse under the weight. In this case, you can support them with stakes or strings.
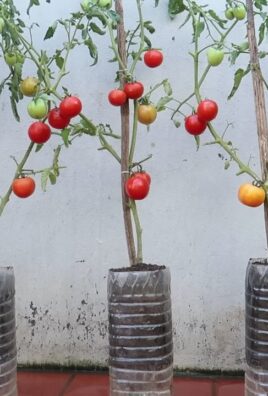
Phase 4: The Harvest – Finally, Hot Fruits!
After several months of hard work, the time has finally come: the chilies are ripe and can be harvested!
- Recognizing ripeness: The color of the chilies changes when they are ripe. Depending on the variety, they will turn red, yellow, orange, or brown. The exact color depends on the specific variety.
- Harvesting: Cut the chilies with scissors or a knife. Be careful not to damage the plant.
- Processing: The harvested chilies can be used fresh, dried, pickled, or made into sauces.
Additional Tips for Chili Pros:
Heat level: The heat level of chilies is measured in Scoville Heat Units (SHU). The higher the value, the hotter the chili. Find out about the heat level of the different varieties before you plant.
Overwintering: Chili plants are perennials and can be overwintered. Cut the plants back in the fall and place them in a bright, cool place (approx. 10-15°C). Water them only sparingly. In the spring, you can then move them outdoors again.
Cross-pollination: If you grow different chili varieties, they can cross-pollinate. This means that the seeds of the harvested chilies may have different characteristics next year than the parent plant. If you want to avoid this, you need to isolate the flowers.
Conclusion
So, there you have it! Growing chili peppers at home isn’t just a fun gardening project; it’s a gateway to unlocking a world of flavor, freshness, and fiery satisfaction. Forget those bland, store-bought peppers that lack the punch you crave. With a little effort and these simple DIY tricks, you can cultivate a thriving chili pepper garden right in your own backyard, balcony, or even windowsill.
Why is this a must-try? Because the difference between a commercially grown chili and one you’ve nurtured yourself is astounding. The flavor is more intense, the heat is more vibrant, and the satisfaction of harvesting your own ingredients is simply unmatched. Plus, you have complete control over the growing process, ensuring your peppers are free from harmful pesticides and chemicals. You know exactly what you’re putting into your food, and that peace of mind is priceless.
But the benefits don’t stop there. Growing your own chili peppers is also incredibly rewarding. Watching those tiny seedlings sprout and mature into vibrant, fruit-bearing plants is a truly magical experience. It’s a connection to nature that can be both therapeutic and educational. And let’s not forget the bragging rights! Imagine the look on your friends’ faces when you serve them a dish made with chili peppers you grew yourself.
Ready to take your chili pepper game to the next level? Here are a few suggestions and variations to get you started:
* Experiment with different varieties: From the mild jalapeño to the scorching habanero, there’s a chili pepper out there for every palate. Don’t be afraid to try growing a few different types to find your favorites.
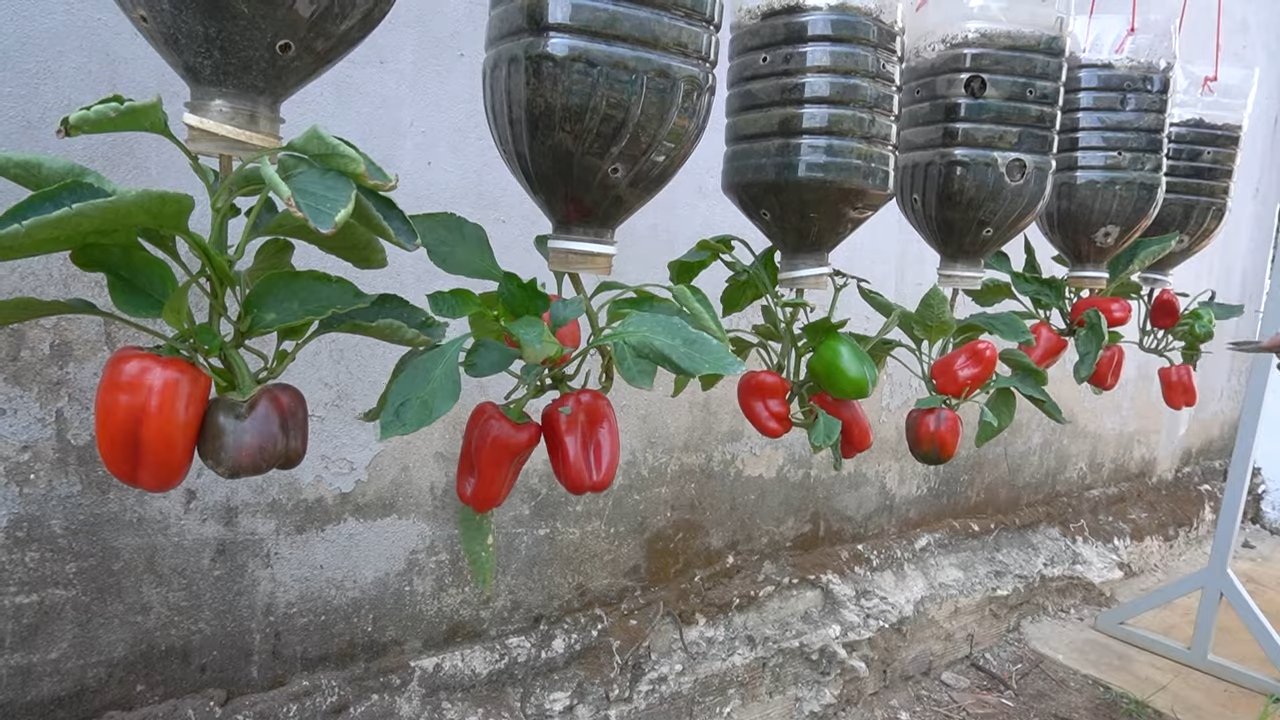
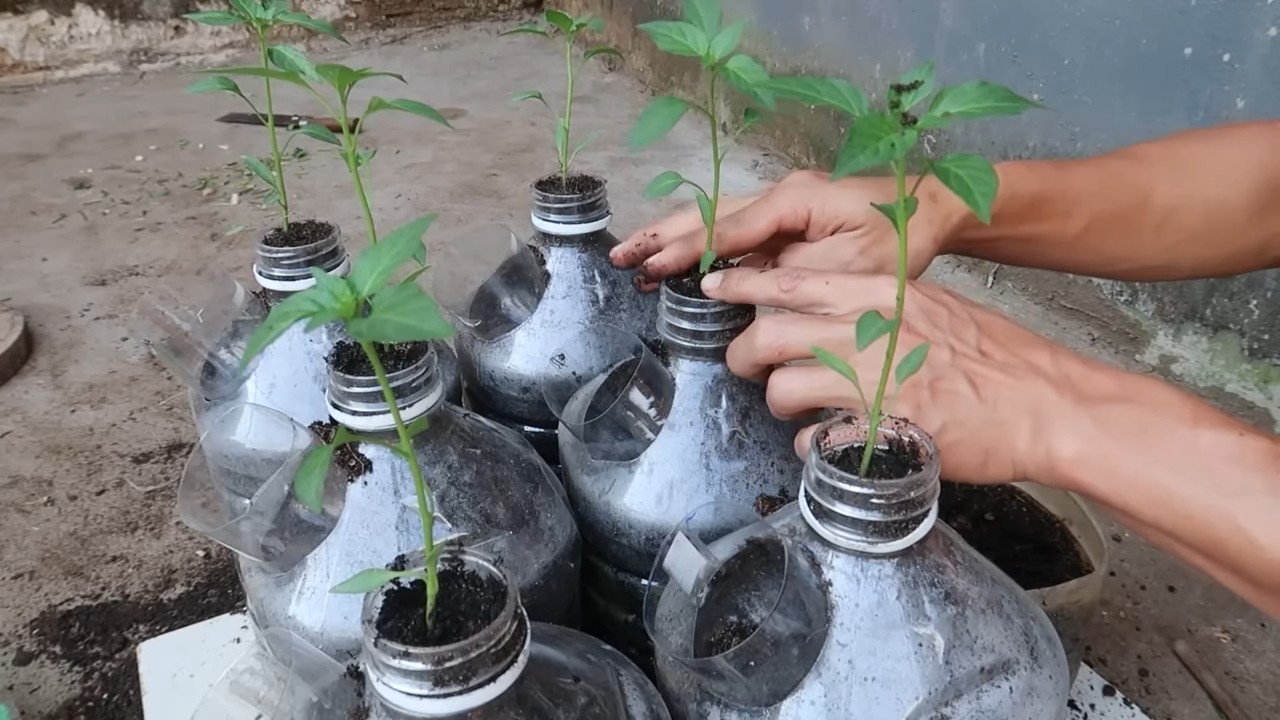
* Get creative with your containers: While traditional pots work perfectly fine, you can also use recycled materials like old tires, buckets, or even plastic bottles to create unique and eco-friendly planters.
* Try companion planting: Certain plants, like basil and tomatoes, can actually help chili peppers grow by deterring pests and improving soil quality.
* Make your own chili powder: Once you’ve harvested your peppers, you can dry them and grind them into homemade chili powder. This is a great way to preserve your harvest and create a custom spice blend that’s perfectly tailored to your taste.
* Infuse oils and vinegars: Add a fiery kick to your favorite condiments by infusing them with chili peppers. Simply add a few dried peppers to a bottle of olive oil or vinegar and let it steep for a few weeks.
Ultimately, the best way to learn is by doing. So, grab some seeds or seedlings, follow these tips, and get ready to embark on your own chili pepper growing adventure. We’re confident that you’ll be amazed by the results.
We encourage you to try these DIY tricks for growing chili peppers at home and share your experiences with us! What varieties did you grow? What challenges did you face? What tips and tricks did you discover along the way? Share your photos and stories in the comments below. We can’t wait to hear from you! Let’s build a community of chili pepper enthusiasts and help each other grow the best peppers possible. Happy growing!
Frequently Asked Questions (FAQ)
What is the best time of year to start growing chili peppers?
The best time to start growing chili peppers depends on your climate. In warmer climates with long growing seasons, you can start seeds indoors 6-8 weeks before the last expected frost. In colder climates, you may need to start them even earlier. The key is to ensure that the seedlings have enough time to mature before being transplanted outdoors. Generally, transplanting should occur after the danger of frost has passed and the soil has warmed up. A soil temperature of around 65-70°F (18-21°C) is ideal.
What kind of soil is best for chili peppers?
Chili peppers thrive in well-draining, fertile soil with a slightly acidic to neutral pH (around 6.0-7.0). A good soil mix should be rich in organic matter, such as compost or well-rotted manure. This will help to retain moisture and provide essential nutrients to the plants. Avoid heavy clay soils, as they can become waterlogged and lead to root rot. If you have clay soil, amend it with plenty of organic matter and consider growing your chili peppers in raised beds or containers.
How much sunlight do chili peppers need?
Chili peppers are sun-loving plants and require at least 6-8 hours of direct sunlight per day to thrive. Choose a location in your garden that receives plenty of sunlight throughout the day. If you’re growing chili peppers indoors, place them near a sunny window or use grow lights to supplement natural light. Insufficient sunlight can lead to leggy growth, reduced flowering, and smaller, less flavorful peppers.
How often should I water my chili peppers?
Water your chili peppers regularly, especially during hot, dry weather. The soil should be kept consistently moist, but not waterlogged. Overwatering can lead to root rot, while underwatering can stress the plants and reduce their yield. A good rule of thumb is to water deeply when the top inch of soil feels dry to the touch. Use a watering can or a hose with a gentle spray nozzle to avoid damaging the plants. Mulching around the base of the plants can help to retain moisture and suppress weeds.
What are some common pests and diseases that affect chili peppers?
Chili peppers are susceptible to a variety of pests and diseases, including aphids, spider mites, whiteflies, blossom-end rot, and fungal diseases. Regularly inspect your plants for signs of infestation or disease. If you spot any problems, take action immediately. Organic pest control methods, such as insecticidal soap or neem oil, can be effective against many common pests. To prevent fungal diseases, ensure good air circulation around the plants and avoid overwatering. Blossom-end rot is caused by a calcium deficiency and can be prevented by adding calcium to the soil or using a calcium-rich fertilizer.
How do I know when my chili peppers are ripe?
The color of the chili pepper is the most obvious indicator of ripeness. Most chili peppers will turn from green to red, yellow, orange, or brown when they are fully ripe. However, the exact color change will depend on the variety of pepper. The peppers should also feel firm and slightly glossy to the touch. You can also test the ripeness by tasting a small piece of the pepper. If it has a good flavor and heat, it’s likely ripe.
Can I grow chili peppers in containers?
Yes, chili peppers are well-suited to container gardening. Choose a pot that is at least 12 inches in diameter and has good drainage holes. Use a high-quality potting mix that is rich in organic matter. Place the container in a sunny location and water regularly. You may also need to fertilize your chili peppers more frequently when growing them in containers, as the nutrients in the potting mix can be depleted more quickly.
How do I overwinter my chili pepper plants?
In colder climates, you can overwinter your chili pepper plants indoors to keep them alive for the next growing season. Before the first frost, prune the plants back to about 6-8 inches tall and transplant them into smaller pots. Bring the plants indoors and place them in a sunny location. Water sparingly and avoid fertilizing during the winter months. In the spring, gradually acclimate the plants to outdoor conditions before transplanting them back into the garden.
How can I increase the heat of my chili peppers?
Several factors can influence the heat of chili peppers, including genetics, growing conditions, and stress levels. To increase the heat of your peppers, try the following:
* Choose a hot variety: Some chili pepper varieties are naturally hotter than others.
* Provide plenty of sunlight: Sunlight helps to increase the production of capsaicin, the compound that gives chili peppers their heat.
* Water sparingly: Stressing the plants slightly by withholding water can also increase capsaicin production.
* Fertilize with potassium: Potassium is essential for capsaicin production.
How do I dry chili peppers?
Drying chili peppers is a great way to preserve them for later use. There are several ways to dry chili peppers:
* Air drying: String the peppers together and hang them in a warm, dry, well-ventilated place.
* Oven drying: Spread the peppers on a baking sheet and dry them in a low oven (around 150°F or 65°C) for several hours.
* Dehydrator: Use a food dehydrator to dry the peppers according to the manufacturer’s instructions.
Once the peppers are completely dry, store them in an airtight container in a cool, dark place.
Leave a Comment