
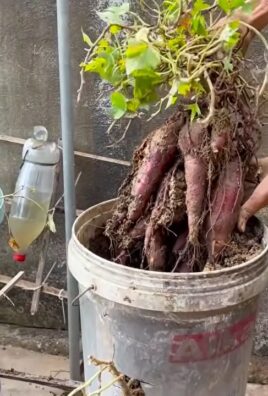
Mint growing styrofoam box: Ever dreamed of having a constant supply of fresh, fragrant mint right at your fingertips? Imagine stepping out your back door and snipping a handful of vibrant mint leaves for your mojito, your tea, or even a refreshing summer salad. Sounds idyllic, right? Well, it’s more achievable than you think, and you don’t need a sprawling garden to make it happen!
For centuries, mint has been cherished not only for its culinary uses but also for its medicinal properties and symbolic significance. From ancient Roman banquets where mint adorned tables to traditional herbal remedies passed down through generations, this versatile herb has a rich history. But let’s face it, mint can be a bit of a garden bully, spreading aggressively and taking over your precious flowerbeds. That’s where our clever DIY solution comes in!
This article is all about creating a simple, effective, and budget-friendly mint growing styrofoam box. Why a styrofoam box? Because it’s lightweight, readily available (often free!), and provides excellent insulation for your mint’s roots. This DIY project is perfect for apartment dwellers, balcony gardeners, or anyone who wants to keep their mint contained and thriving. I’m going to show you how to repurpose something that might otherwise end up in a landfill into a beautiful and productive mini-garden. Get ready to unleash your inner gardener and enjoy the endless possibilities of fresh, homegrown mint!
DIY Mint Garden in a Styrofoam Box: A Fragrant Project for Home
Hello dear garden friends! Do you also have a passion for fresh herbs like I do? And do you perhaps also have the problem of limited garden space, or no garden at all? Don’t worry, I have a great solution for you: a mint garden in a simple styrofoam box! This is not only super easy and inexpensive, but also a great way to grow your own fresh mint, no matter where you live. And the best part: mint is incredibly versatile! Whether in tea, cocktails, salads, or as a decoration – fresh mint is simply unbeatable.
In this article, I will show you step-by-step how to create your own mint garden in a styrofoam box. Let’s get started!
What you need for your mint garden:
- A styrofoam box (e.g., from a food transport)
- A utility knife or scissors
- Drainage material (e.g., expanded clay, gravel, or broken pottery)
- Garden fleece or weed barrier fabric
- Potting soil (preferably herb soil)
- Mint plants (preferably different varieties for more diversity!)
- Watering can
- Gloves (optional, but recommended)
- A tape measure or ruler
- A pen or marker
Step-by-Step Guide: How to Build Your Mint Garden
1. Preparing the Styrofoam Box:
- First, you need to clean the styrofoam box thoroughly. Remove all labels and residues. I washed my box with warm water and a little dish soap. Make sure no soap residue is left behind.
- Now comes the most important step: drainage! Mint likes it moist, but it can’t tolerate waterlogging at all. Therefore, we need to ensure good water drainage. Take your utility knife or scissors and cut several holes in the bottom of the styrofoam box. I recommend making at least 6-8 holes, depending on the size of the box. Make sure the holes are not too large, so the soil doesn’t fall out later.
- Important: Work carefully with the utility knife! It’s best to place the box on a stable surface and cut slowly and controlled.
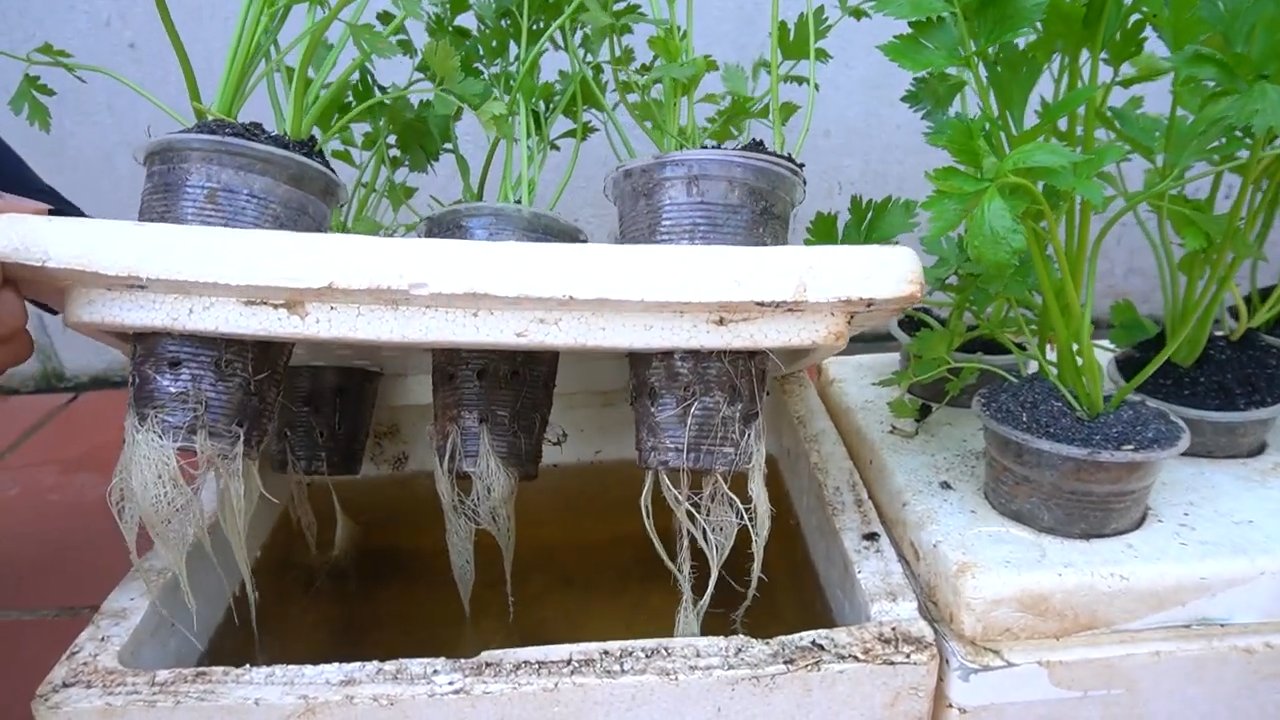
2. The Drainage Layer:
- Now it’s time for the drainage material. Distribute a layer of about 5-7 cm of expanded clay, gravel, or broken pottery on the bottom of the box. This layer ensures that excess water can drain away and the roots of the mint are not standing in water.
- I personally prefer expanded clay because it is lightweight and stores water well. But gravel or broken pottery are also good alternatives.
3. The Garden Fleece:
- To prevent the soil from getting into the drainage layer and clogging the holes, we place a layer of garden fleece or weed barrier fabric over the drainage material. Cut the fleece so that it covers the entire area of the box and extends slightly up the sides.
- The fleece ensures that the soil stays clean and the drainage works optimally.
4. The Soil:
- Now we fill the styrofoam box with potting soil. It is best to use special herb soil, as it is tailored to the needs of herbs. Fill the soil up to about 5-7 cm below the rim of the box.
- Press the soil down lightly, but not too firmly. It should remain loose and airy so that the roots of the mint can grow well.
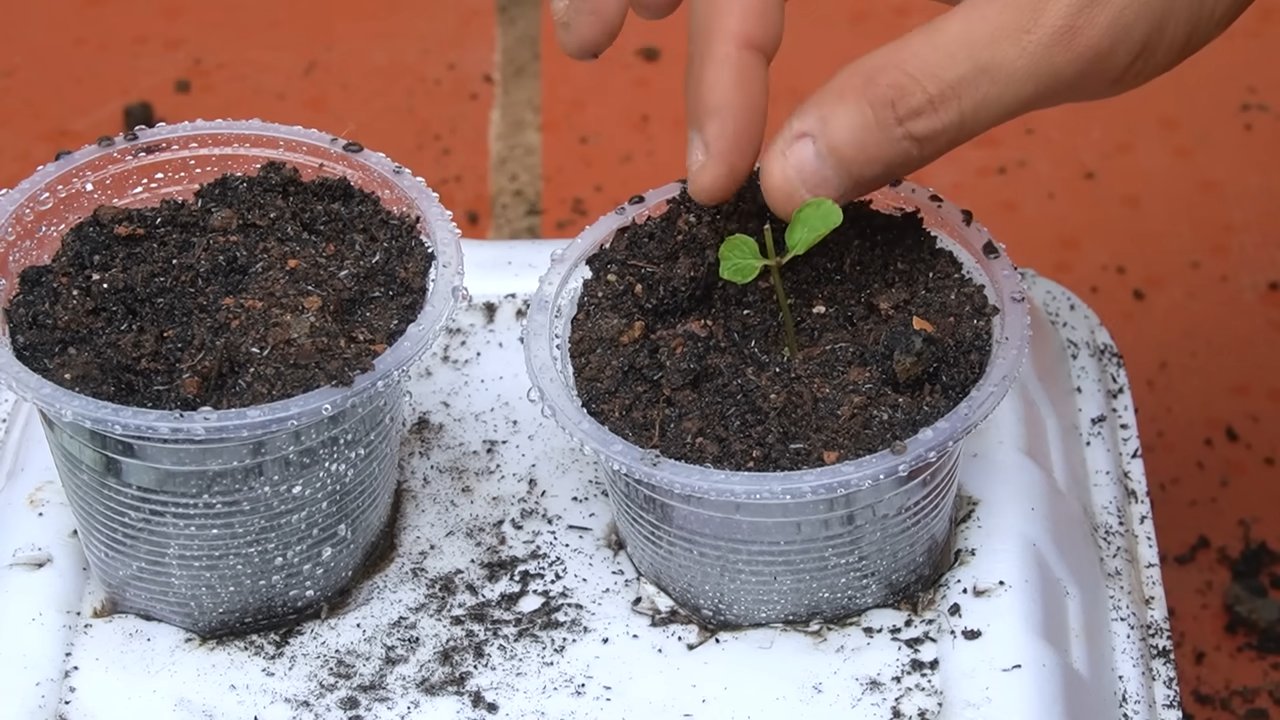
5. Planting the Mint:
- Now comes the best part: planting the mint! Take your mint plants out of their pots and loosen the roots a bit.
- Make small holes in the soil and place the mint plants in them. Make sure the plants have enough space to spread out. I recommend a distance of about 15-20 cm per plant.
- Fill the holes with soil and press it down lightly.
- If you have different mint varieties, you can arrange them as you like. I sorted my mint by scent and color.
6. Watering:
- After planting, you need to water the mint thoroughly. Use a watering can with a shower head attachment to moisten the soil evenly.
- Make sure the water can drain well. If the water remains in the box, you need to check the holes in the bottom again.
7. The Location:
- Mint loves the sun, but it also tolerates partial shade. Place your styrofoam box in a sunny or partially shaded spot.
- Make sure the location is protected from wind, as strong wind can damage the mint leaves.
Care Tips for Your Mint Garden
- Watering: Water your mint regularly, but not too much. The soil should always be slightly moist, but not wet. On hot days, you may need to water daily.
- Fertilizing: Fertilize your mint regularly with an organic herb fertilizer. I prefer to use liquid fertilizer, which I add to the watering can.
- Pruning: Prune your mint regularly to encourage growth and prevent it from becoming too rampant. You can use the cut leaves for cooking, for tea, or as a decoration.
- Overwintering: Mint is hardy, but in cold regions, you should cover the styrofoam box with fleece or jute to protect the plants from frost.
- Warning, risk of spreading: Mint is known to spread quickly. If you plant it in a garden bed, you should use a root barrier to prevent it from spreading uncontrollably. You don’t have this problem in the styrofoam box.
Mint Varieties: A Variety for Every Taste
There are countless mint varieties with different aromas and scents. Here are some of my favorite varieties:
- Peppermint: The classic with an intense, refreshing taste. Perfect for tea, cocktails, and desserts.
- Spearmint: Mild and sweet in taste. Ideal for salads, sauces, and dips.
- Chocolate Mint: With a hint of chocolate. Delicious in desserts, ice cream, and coffee.
- Strawberry Mint: With a fruity strawberry aroma. Perfect for lemonades, smoothies, and fruit salads.
- Moroccan Mint: Very aromatic and refreshing. Indispensable for Moroccan mint tea.
- Lemon Mint: With a lemony scent and taste. Ideal for soft drinks, fish dishes, and poultry.
Common Problems and Solutions
- Yellow leaves: Yellow leaves can be a sign of overwatering or nutrient deficiency. Check the drainage and fertilize the mint if necessary.
- Brown leaves: Brown leaves can be caused by sunburn or drought. Place the box in a shadier location and water the mint regularly.
- Pests: Mint can be infested by aphids or spider mites. Combat the pests with a biological insecticide or with a soap solution.
Conclusion
I hope this guide has helped you create your own mint garden in a styrofoam box. It’s really a simple project.
Conclusion
So, there you have it! Transforming a simple styrofoam box into a thriving mint garden is not just a cost-effective solution, it’s a rewarding experience that brings the fresh, invigorating scent and flavor of mint right to your fingertips. We’ve walked you through the process, highlighting the benefits of using styrofoam for its insulation properties, which help regulate soil temperature and moisture – crucial for healthy mint growth, especially in fluctuating climates.
But why is this DIY trick a must-try? Beyond the obvious cost savings compared to purchasing pre-made planters, this project offers a level of customization that’s hard to beat. You can tailor the size and shape of your styrofoam box to perfectly fit your available space, whether it’s a sunny balcony, a small patio, or even a windowsill. Plus, it’s an excellent way to repurpose styrofoam that might otherwise end up in a landfill, making it an environmentally conscious choice.
The beauty of this project also lies in its versatility. Feel free to experiment with different types of mint! From the classic peppermint and spearmint to more exotic varieties like chocolate mint or orange mint, the possibilities are endless. You can even create a mixed mint garden, planting several varieties in the same box to enjoy a diverse range of flavors and aromas. Consider adding companion plants like marigolds or basil to deter pests and further enhance the health of your mint.
For those looking to take their mint growing to the next level, consider adding a simple self-watering system to your styrofoam box. This can be achieved by placing a layer of gravel at the bottom of the box, covered with a permeable fabric, and then adding your potting soil. This creates a reservoir of water that the mint roots can access as needed, reducing the frequency of watering and ensuring consistent moisture levels.
Another variation is to paint or decorate your styrofoam box to match your outdoor décor. Use non-toxic, weather-resistant paints to add a personal touch and transform your functional planter into a stylish garden feature. You could even try using stencils or mosaic tiles to create a unique and eye-catching design.
We are confident that this DIY mint growing styrofoam box project will not only provide you with a bountiful supply of fresh mint but also give you a sense of accomplishment and connection to nature. The satisfaction of harvesting your own homegrown mint for teas, cocktails, or culinary creations is truly unparalleled.
So, what are you waiting for? Gather your supplies, follow our simple steps, and embark on your mint-growing adventure today! We are eager to hear about your experiences. Share your photos, tips, and variations in the comments section below. Let’s create a community of mint enthusiasts and inspire others to embrace the joys of DIY gardening. Remember, growing your own mint is not just about having fresh herbs on hand; it’s about connecting with nature, fostering creativity, and enjoying the simple pleasures of life. Let us know how your mint growing styrofoam box is working out for you!
Frequently Asked Questions (FAQ)
1. What type of styrofoam box is best for growing mint?
The ideal styrofoam box for growing mint is one that is clean, sturdy, and has sufficient depth to accommodate the root system of the mint plant. Look for boxes that are at least 8-12 inches deep. Food-grade styrofoam is preferable, but any clean styrofoam box will work. Avoid using boxes that have contained harsh chemicals or pesticides. If you are unsure about the previous contents of the box, it’s best to err on the side of caution and choose a different one. Make sure the box has drainage holes to prevent waterlogging.
2. How do I ensure proper drainage in my styrofoam box?
Proper drainage is crucial for preventing root rot and ensuring healthy mint growth. Before adding soil, drill several drainage holes in the bottom of the styrofoam box. A good rule of thumb is to have at least four to five holes, each about ½ inch in diameter, evenly spaced across the bottom. You can also add a layer of gravel or pebbles at the bottom of the box to further improve drainage. This will help to create a buffer between the soil and the bottom of the box, allowing excess water to drain away more easily.
3. What type of soil should I use for growing mint in a styrofoam box?
Mint thrives in well-draining, nutrient-rich soil. A good potting mix specifically formulated for herbs or vegetables is ideal. Avoid using garden soil, as it can be too heavy and compact, hindering drainage and root growth. You can also amend your potting mix with compost or other organic matter to improve its fertility and water-retention capacity. A slightly acidic to neutral pH (around 6.0 to 7.0) is optimal for mint growth.
4. How much sunlight does mint need when grown in a styrofoam box?
Mint prefers partial shade to full sun. Aim for at least 4-6 hours of sunlight per day. In hotter climates, providing some afternoon shade can help prevent the leaves from scorching. If you are growing your mint indoors, place the styrofoam box near a sunny window or use a grow light to supplement natural light. Rotate the box regularly to ensure that all sides of the plant receive adequate sunlight.
5. How often should I water my mint plant in a styrofoam box?
The frequency of watering will depend on factors such as the climate, the type of soil, and the size of the styrofoam box. Generally, you should water your mint plant when the top inch of soil feels dry to the touch. Avoid overwatering, as this can lead to root rot. When watering, water deeply until water drains out of the drainage holes. During hot, dry weather, you may need to water more frequently.
6. How do I fertilize my mint plant in a styrofoam box?
Mint is a relatively heavy feeder and benefits from regular fertilization. Use a balanced liquid fertilizer diluted to half strength every 2-4 weeks during the growing season. You can also amend the soil with compost or other organic matter to provide a slow-release source of nutrients. Avoid over-fertilizing, as this can lead to leggy growth and a less intense flavor.
7. How do I harvest mint from my styrofoam box?
You can begin harvesting mint leaves as soon as the plant is established, typically after a few weeks of growth. To harvest, simply pinch or cut off stems just above a leaf node. This will encourage the plant to branch out and produce more leaves. Avoid removing more than one-third of the plant at a time, as this can stress the plant and slow down its growth. Regular harvesting will also help to prevent the plant from flowering, which can diminish the flavor of the leaves.
8. How do I prevent mint from spreading too aggressively in my styrofoam box?
Mint is known for its aggressive spreading habits, but this is less of a concern when grown in a contained environment like a styrofoam box. However, to prevent it from becoming too crowded, you can prune the roots regularly. Simply lift the plant out of the box and trim away any roots that are circling the bottom or sides. You can also divide the plant every year or two to prevent overcrowding and rejuvenate its growth.
9. Can I grow other herbs alongside mint in the same styrofoam box?
While it’s possible to grow other herbs alongside mint, it’s generally not recommended due to mint’s aggressive growth habits. Mint can quickly outcompete other herbs for resources, such as water and nutrients. If you do choose to grow other herbs with mint, select those that are equally vigorous and can tolerate similar growing conditions. Good companion plants for mint include marigolds, which can help deter pests, and basil, which can benefit from the shade provided by the mint.
10. How do I overwinter my mint plant in a styrofoam box?
In colder climates, mint plants grown in styrofoam boxes may need some protection during the winter months. You can move the box to a sheltered location, such as a garage or shed, or cover it with a layer of mulch to insulate the roots. Water sparingly during the winter, only when the soil is dry to the touch. In the spring, once the weather warms up, you can move the box back outdoors and resume regular watering and fertilizing.
Leave a Comment