
Grow bean sprouts at home – it’s easier than you think, and I’m here to show you how! Forget those bland, pre-packaged sprouts from the grocery store. Imagine biting into crisp, fresh, and flavorful bean sprouts that you nurtured yourself, right in your own kitchen. Sounds amazing, right?
Sprouting beans has a rich history, dating back thousands of years in Asian cultures, where they were valued not only for their delicious taste but also for their nutritional benefits, especially during times of scarcity. Think of it as a miniature, edible garden, packed with vitamins and enzymes, ready to boost your meals.
But why should you learn to grow bean sprouts at home? Well, for starters, it’s incredibly cost-effective. A handful of dried beans can yield a surprising amount of sprouts. Plus, it’s a fantastic way to add a healthy crunch to salads, sandwiches, stir-fries, and more. More importantly, you control the growing environment, ensuring they’re free from harmful chemicals and contaminants. In this article, I’ll walk you through a simple, step-by-step DIY method that requires minimal equipment and effort. Get ready to unleash your inner gardener and enjoy the freshest bean sprouts you’ve ever tasted!
Sprouting Your Own Bean Sprouts: A Super Easy DIY Project for Fresh Vitamins
Hey everyone! Are you in the mood for crunchy, fresh sprouts that are not only super healthy but also taste incredibly delicious? Then you’ve come to the right place! I’ll show you how you can easily sprout your own bean sprouts at home. It’s really child’s play and a lot of fun! And the best part: you know exactly what’s inside – no additives, no pesticides, just pure nature.
What You Need: The Ingredient List
Before we get started, here is a list of everything you need for your sprouting adventure:
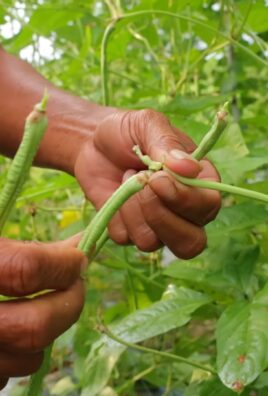
- Beans: Mung beans are best, but adzuki beans or soybeans also work great. Make sure the beans are untreated and viable for sprouting. You can often find them in organic stores or health food shops.
- A sprouting jar or a sprouting tower: A sprouting jar is a jar with a special lid that has a fine sieve. A sprouting tower consists of several tiers in which the sprouts can grow. Both work great, just choose what you like better. Alternatively, you can also use a regular canning jar with a piece of cheesecloth and a rubber band.
- Water: Clear, clean water is essential. It’s best to use filtered water or boiled tap water.
- A dark place: Sprouts germinate best in the dark. A kitchen cabinet or a dark corner in the pantry is ideal.
- A bright place (after germination): Once the sprouts have germinated, they need light to turn green. A windowsill without direct sunlight is perfect.
Step-by-Step Guide: How to Sprout Your Own Bean Sprouts
Okay, let’s go! Here is a detailed guide so that nothing goes wrong with your sprouting project:
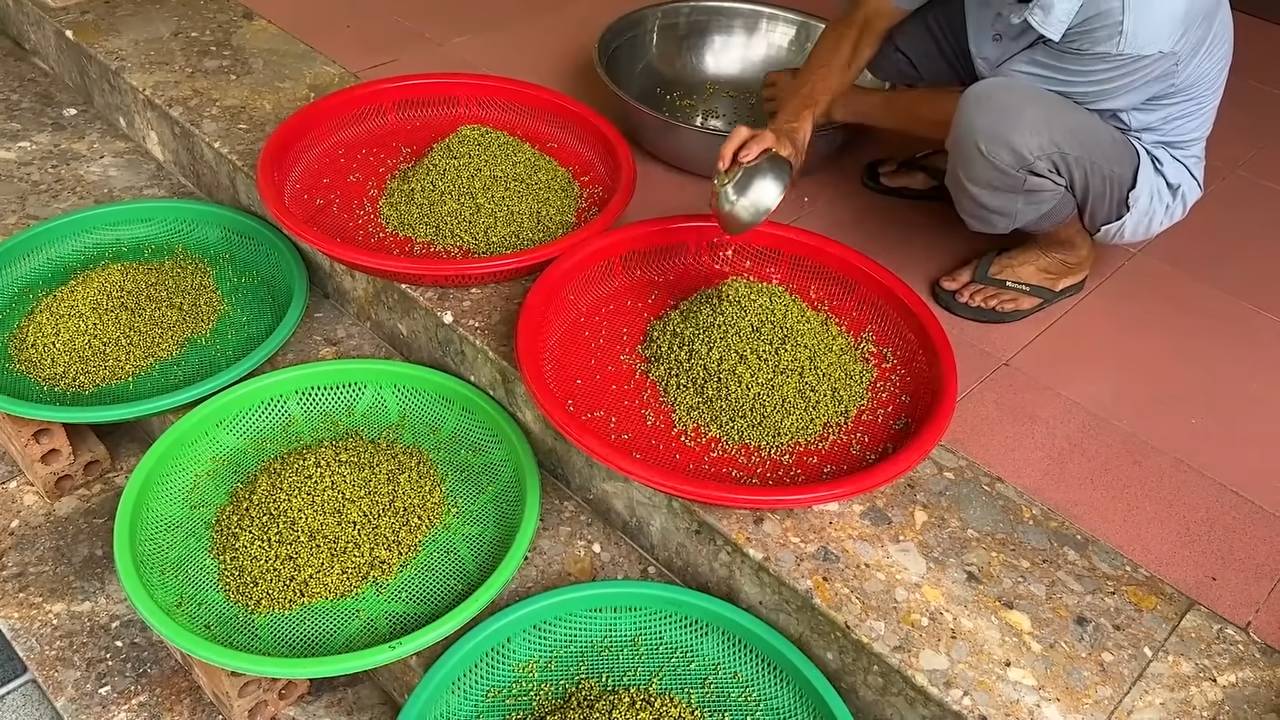
- Soak the beans: Put the beans in a bowl and cover them with plenty of water. Let them soak for 8-12 hours. Soaking wakes up the beans and prepares them for germination. I usually do this overnight, so I can continue the next morning.
- Prepare the sprouting jar: Rinse your sprouting jar or sprouting tower thoroughly with hot water. This is important to kill bacteria and prevent mold.
- Fill the sprouting jar with beans: Drain the soaking water and rinse the beans thoroughly again under running water. Then fill the beans into your sprouting jar or the tiers of your sprouting tower. Make sure the beans are not too dense, so they have enough space to grow.
- First rinse: Fill the sprouting jar with fresh water and swirl it gently so that all the beans are wetted. Then drain the water again. This is the first rinse we do to keep the beans clean.
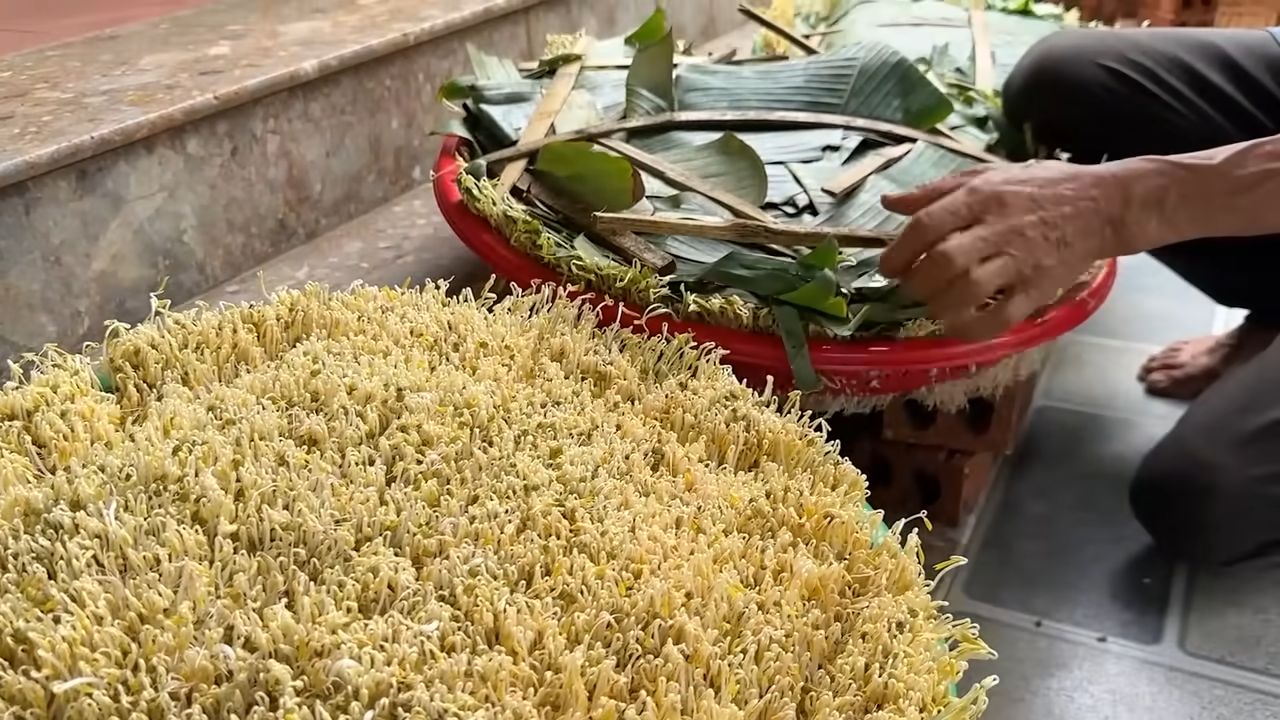
- Store in the dark: Place the sprouting jar or sprouting tower in a dark place. Make sure the jar is tilted so that excess water can drain off. If you are using a regular canning jar, secure the cheesecloth with a rubber band and place the jar upside down in a bowl so the water can drip off.
- Rinse regularly: This is the most important step! Rinse the beans 2-3 times a day with fresh water. This prevents mold and ensures that the beans stay moist. Simply fill the jar with water, swirl, and drain again.
- Be patient: After 2-3 days, the first small sprouts should be visible. Depending on the variety and temperature, it may take a little longer. Be patient, it’s worth it!
- Get some light: Once the sprouts have germinated, you can place them in a bright spot, but avoid direct sunlight. The light causes the sprouts to turn green and produce more chlorophyll.
- Harvest and enjoy: After about 5-7 days, your bean sprouts are ready to be harvested. They should now be about 2-3 cm long. Rinse them thoroughly one more time and remove any remaining husks. Then you can enjoy them right away!
Overcoming Challenges: Tips and Tricks for Perfect Sprouts
Sometimes things don’t go as smoothly as you imagine. Here are a few tips if you have problems:
- Mold: If you discover mold, you should discard the affected sprouts immediately and clean the sprouting jar thoroughly. Make sure you rinse the sprouts regularly and that they are not too moist. Good ventilation is also important.
- No germination: If the beans do not germinate, there can be several reasons. Perhaps the beans were not viable for sprouting, or they were too old. Pay attention to the expiration date when buying. It could also be that the temperature was too low. Sprouts germinate best at room temperature.
- Unpleasant smell: If the sprouts have an unpleasant smell, it is a sign that something is wrong. It’s better to discard them and start over. Make sure you rinse the sprouts regularly and that they do not sit in water for too long.
Variations and Ideas: How to Add Variety to Your Sprout Cuisine
Bean sprouts are incredibly versatile! Here are a few ideas on how you can integrate them into your diet:
- In salads: Bean sprouts give any salad a fresh, crunchy kick.
- In a wok: Briefly stir-fried in a wok, bean sprouts are a delicious side dish with vegetables and meat.
- In soups: As a topping for soups, bean sprouts provide an extra portion of vitamins.
- On bread: On a slice of buttered bread with some chives, bean sprouts are a healthy snack.
- In spring rolls: Bean sprouts are a must in every spring roll.
Cleaning and Care: How to Keep Your Sprouting Jar Clean
After each harvest, you should thoroughly clean your sprouting jar or sprouting tower to prevent bacteria and mold.
- Rinse with hot water: Rinse the jar or tower with hot water and a little dish soap.
- Disinfect with vinegar water: To ensure that all bacteria are killed, you can disinfect the jar or tower with vinegar water. To do this, mix vinegar and water in a 1:1 ratio and let the solution sit for a few minutes.
- Dry thoroughly: Let the jar or tower dry thoroughly before using it again.
Conclusion: Sprouting is a Win for Your Health and the Environment
I hope I was able to get you excited about sprouting! It’s a really great hobby that is not only fun but also super healthy. And the best part: you save money and protect the environment because you no longer have to buy sprouts at the supermarket. So, what are you waiting for? Get started and sprout your own bean sprouts! Good luck
Conclusion
So, there you have it! Growing your own bean sprouts at home is not just a fun project; it’s a gateway to fresher, more nutritious, and significantly cheaper sprouts than you’ll ever find at the grocery store. Forget those limp, slightly slimy sprouts that have been sitting on a shelf for days. Imagine the crisp, vibrant flavor of freshly sprouted beans adding a delightful crunch to your salads, stir-fries, and sandwiches.
This DIY trick is a must-try for several compelling reasons. First, you have complete control over the quality and cleanliness of your sprouts. You know exactly what you’re eating, free from any unwanted additives or preservatives. Second, it’s incredibly economical. A small bag of dried beans can yield a surprisingly large quantity of sprouts, saving you a considerable amount of money in the long run. Third, it’s remarkably easy and requires minimal equipment. You likely already have everything you need in your kitchen right now!
But the benefits extend beyond just cost and convenience. Sprouting actually increases the nutritional value of the beans. The sprouting process unlocks enzymes and vitamins, making them more bioavailable and easier for your body to absorb. You’re essentially supercharging your food with extra goodness!
Looking for variations? Absolutely! While mung beans are the most common choice for bean sprouts, don’t be afraid to experiment with other types of beans and seeds. Lentils, alfalfa, radish seeds, and even broccoli seeds can all be sprouted using the same basic method. Each will offer a unique flavor and nutritional profile. Try mixing different types of sprouts together for a colorful and flavorful blend. You can also adjust the sprouting time to achieve your desired level of sprout length and crunchiness. Some people prefer shorter, more delicate sprouts, while others prefer longer, more robust ones.
Another fun variation is to sprout your beans in different containers. While a mason jar is a classic choice, you can also use a sprouting bag, a multi-tiered sprouting tray, or even a simple colander lined with cheesecloth. Each method has its own advantages and disadvantages, so experiment to find what works best for you.
Ready to embark on your sprouting adventure? We wholeheartedly encourage you to give this DIY trick a try. It’s a rewarding experience that will not only enhance your culinary creations but also connect you to the natural process of growing your own food.
Don’t be intimidated if you’ve never sprouted before. It’s much easier than you might think. Just follow the simple steps outlined in this article, and you’ll be enjoying fresh, delicious bean sprouts in no time.
And most importantly, we want to hear about your experience! Share your tips, tricks, and variations in the comments below. Let us know what types of beans you’ve sprouted, what challenges you’ve encountered, and what delicious dishes you’ve created with your homegrown sprouts. Your feedback will not only help other readers but also inspire us to continue exploring the wonderful world of DIY food projects. So go ahead, get sprouting, and share your story! Let’s all learn and grow together. Mastering the art of growing bean sprouts at home is a skill that will keep on giving.
Frequently Asked Questions (FAQ)
What types of beans are best for sprouting?
Mung beans are the most popular and readily available choice for sprouting, known for their mild flavor and quick sprouting time. However, you can also sprout other types of beans and seeds, including lentils, adzuki beans, chickpeas, alfalfa seeds, radish seeds, broccoli seeds, and even quinoa. Each type will offer a unique flavor and texture. Be sure to use beans specifically intended for sprouting or cooking, as some ornamental beans can be toxic. Avoid sprouting kidney beans, as they contain toxins that are only destroyed through thorough cooking.
How long does it take to grow bean sprouts?
The sprouting time varies depending on the type of bean and the ambient temperature. Mung beans typically take 3-5 days to sprout. Lentils may take 2-3 days, while alfalfa seeds can take up to 5-7 days. Warmer temperatures will generally speed up the sprouting process, while cooler temperatures will slow it down. Keep an eye on your sprouts and harvest them when they reach your desired length and crunchiness.
What is the best way to prevent mold growth?
Mold growth is a common concern when sprouting, but it can be easily prevented by following a few simple guidelines. First, use clean equipment and fresh, high-quality beans. Second, rinse the sprouts thoroughly at least twice a day with cool, clean water. This will help to remove any bacteria or mold spores that may be present. Third, ensure adequate drainage and ventilation. Avoid overcrowding the sprouts in the jar or container, and make sure that air can circulate freely. If you notice any signs of mold, such as a fuzzy white or gray growth, discard the entire batch of sprouts immediately.
How do I store bean sprouts?
Once your bean sprouts have reached your desired length, rinse them thoroughly and drain them well. Pat them dry with a clean towel to remove any excess moisture. Store the sprouts in a clean, airtight container in the refrigerator. They will typically last for up to a week, but it’s best to use them as soon as possible for optimal flavor and freshness. Check the sprouts daily for any signs of spoilage, such as a slimy texture or a foul odor.
Are there any health risks associated with eating raw bean sprouts?
While bean sprouts are generally safe to eat, there is a small risk of foodborne illness, particularly from bacteria such as Salmonella and E. coli. This is because the warm, moist conditions required for sprouting are also ideal for bacterial growth. To minimize this risk, it’s essential to use clean equipment, rinse the sprouts thoroughly, and store them properly. If you are pregnant, elderly, or have a weakened immune system, it’s best to cook bean sprouts before eating them to kill any potential bacteria.
Can I sprout beans that I bought at the grocery store for cooking?
While you can technically sprout beans that you bought at the grocery store for cooking, it’s generally recommended to use beans specifically intended for sprouting. These beans have been tested for germination rates and are less likely to be treated with chemicals that could inhibit sprouting. However, if you do choose to sprout cooking beans, make sure they are whole, uncracked, and free from any signs of damage or mold.
My sprouts are not growing. What am I doing wrong?
There could be several reasons why your sprouts are not growing. First, make sure that your beans are viable and have not expired. Second, ensure that you are rinsing the sprouts regularly and providing them with adequate moisture. Third, check the temperature. Sprouts prefer a warm, but not hot, environment. Fourth, make sure that the sprouts are not exposed to direct sunlight, which can inhibit growth. Finally, be patient! Some types of beans take longer to sprout than others.
Can I eat the sprout roots?
Yes, the sprout roots are perfectly edible and nutritious. They are a natural part of the sprouting process and contain valuable vitamins and minerals. Some people even prefer the taste and texture of the roots.
What can I do with my bean sprouts?
Bean sprouts are incredibly versatile and can be used in a wide variety of dishes. They are a popular addition to salads, stir-fries, sandwiches, soups, and spring rolls. They can also be eaten raw as a snack or added to smoothies for a nutritional boost. Get creative and experiment with different ways to incorporate bean sprouts into your diet.
Leave a Comment