
Growing onions in plastic bottles might sound like something out of a science fiction movie, but trust me, it’s a surprisingly effective and rewarding way to cultivate these flavorful bulbs right in your own home! Are you tired of buying onions from the store, only to have them sprout or go bad before you can use them all? Or perhaps you’re limited on garden space but still dream of harvesting your own fresh produce? Well, you’re in the right place!
For centuries, humans have cultivated onions, with evidence suggesting their use dates back over 5000 years! From ancient Egypt, where they were revered and even used in burial rituals, to the humble kitchen gardens of today, onions have been a staple in cuisines worldwide. But what if I told you that you could bypass the traditional garden bed and embrace a more innovative, space-saving approach?
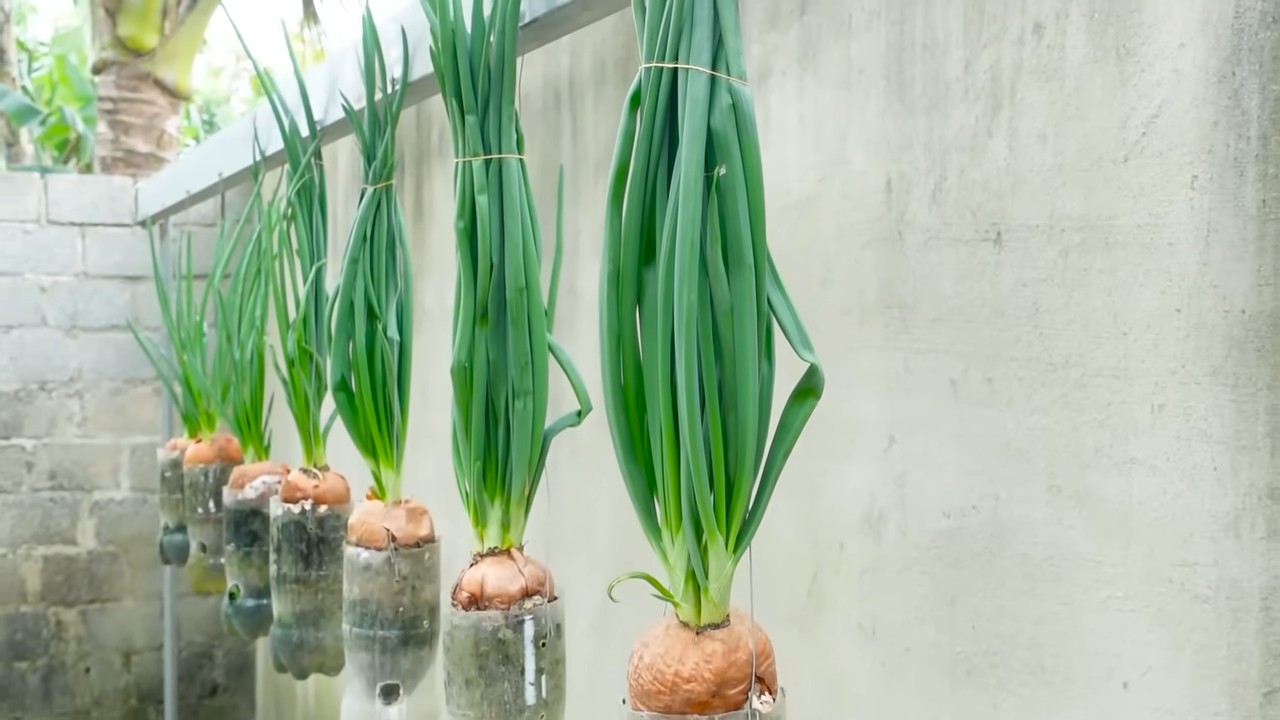
This DIY guide will walk you through the simple steps of growing onions in plastic bottles, transforming discarded containers into miniature onion farms. Not only is this a fantastic way to recycle and reduce waste, but it also allows you to control the growing environment, protect your onions from pests, and enjoy a continuous supply of fresh, homegrown flavor. I’m excited to share this clever trick with you, so let’s get started and unlock the secrets to a bountiful onion harvest, one plastic bottle at a time!
Growing Onions in Plastic Bottles: A DIY Guide for the Small Garden
Hello garden friends! Do you want fresh onions but have little space? Then I have just the thing for you: growing onions in plastic bottles! This is not only super space-saving but also a great way to recycle plastic waste. I’ll show you how it’s done – step by step.
What you need:
- Empty plastic bottles (preferably 1.5 or 2 liters)
- A sharp knife or scissors
- Soil (preferably seed starting mix or vegetable soil)
- Onions (either onion sets or onions that have already sprouted)
- Water
- Optional: Drainage material (gravel, expanded clay pellets, broken pottery)
- Optional: Plant labels
Preparation of the Plastic Bottles
- Cleaning: First, you need to thoroughly clean the plastic bottles. Remove all labels and rinse them with warm water and dish soap. Make sure no soap residue is left behind.
- Cutting: Now comes the exciting part: cutting the bottles. There are different ways you can do this. I’ll show you two variations:
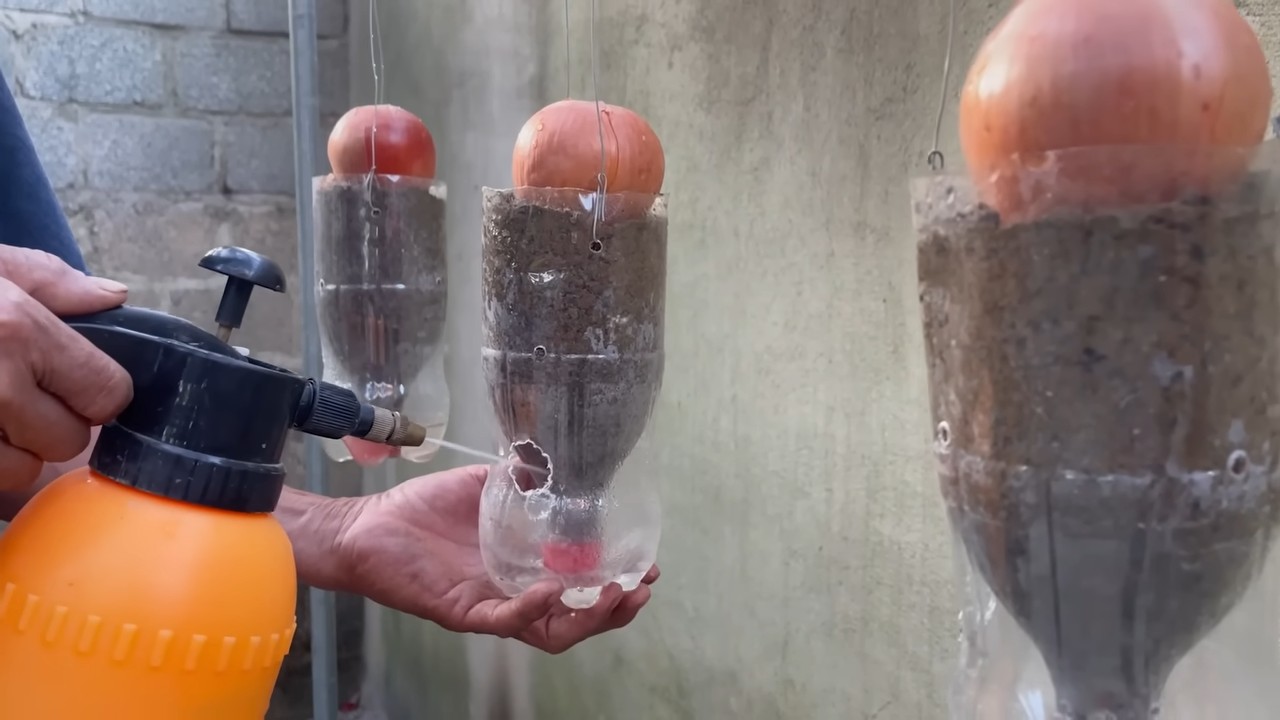
- Variation 1: The “Tiered Bottle”: Cut the bottle about 10-15 cm below the bottleneck. Turn the upper part upside down and place it as a funnel into the lower part of the bottle. This creates a small “pot” with a water reservoir.
- Variation 2: The “Lengthwise Bottle”: Cut the bottle lengthwise so that you have two halves. You can then use these halves as planters. Make sure to smooth the cut edges a bit so you don’t cut yourself on them.
- Drainage: To ensure good water drainage and prevent the onions from rotting, you should add a drainage layer to the bottles. To do this, fill a layer of gravel, expanded clay pellets, or broken pottery (approx. 2-3 cm) at the bottom of the bottle. This is especially important if you use the “Tiered Bottle,” as the water reservoir is directly under the soil.
- Drill holes (optional): If you use the “Lengthwise Bottle,” you can also drill a few small holes in the bottom to allow water to drain better. However, this is not absolutely necessary as long as you don’t forget the drainage layer.
Planting the Bottles
- Fill with soil: Fill the prepared bottles with soil. Make sure the soil is loose and airy. Don’t press it down too firmly, so the onion roots can grow well. Leave about 2-3 cm of space to the rim of the bottle.
- Plant the onions: Now it’s time for the onions!
- Onion sets: Press the onion sets about 2-3 cm deep into the soil. Make sure the tip of the onion is pointing upwards. Leave enough space between the onions (approx. 5-7 cm) so they can develop well.
- Sprouted onions: If you have onions that have already sprouted, you can also use them. Cut the onions about 2-3 cm below the sprout. Then place the onion pieces in the soil so that the sprout points upwards.
- Watering: Gently water the onions after planting. Make sure the soil is well-moistened, but not too wet. Avoid waterlogging, as this can lead to rot.
Care of the Onions in Plastic Bottles
- Location: Onions love the sun! Place the planted bottles in a sunny location. A south-facing window or a sunny balcony is ideal.
- Watering: Water the onions regularly, but not too much. The soil should always be slightly moist, but not wet. Make sure the water can drain well. In the “Tiered Bottle,” you can regularly refill the water reservoir in the lower part of the bottle.
- Fertilizing: Onions are not particularly demanding, but occasional fertilizing can promote growth. It is best to use an organic fertilizer or vegetable fertilizer. Fertilize the onions about every 2-3 weeks.
- Pests and diseases: Watch out for pests and diseases. Onions can be infested by onion flies or fungal diseases. Check the plants regularly and remove any infested leaves or onions. If necessary, you can use organic pesticides.
- Harvest: Depending on the variety and location, the onions can be harvested after about 3-4 months. The onions are ready when the foliage turns yellow and falls over. Gently pull the onions out of the soil and let them dry in a dry place.
Additional Tips and Tricks
- Different varieties: Try different onion varieties! There are red, yellow, and white onions, all with their own unique flavor.
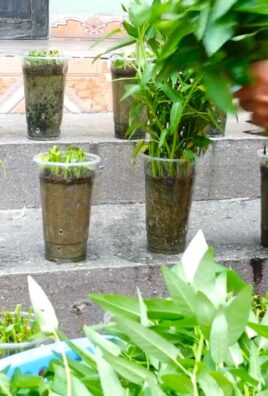
- Add herbs: You can also plant herbs like chives or parsley together with the onions in the bottles. This saves space and looks pretty.
- Labeling: Don’t forget to label the bottles so you know which variety you have planted.
- Overwintering: Some onion varieties are hardy and can be overwintered outdoors. Find out before planting whether your variety is hardy.
- Upcycling: Use different types of plastic bottles! Juice bottles or milk cartons can also be used. Be creative!
The “Tiered Bottle” in Detail
The “Tiered Bottle” is particularly practical because it has an integrated water reservoir. Here are the individual steps in detail again:
- Cut the bottle: Cut the bottle about 10-15 cm below the bottleneck. Make sure the cut is clean.
- Invert the top part: Turn the upper part of the bottle upside down so that the bottleneck points downwards.
- Insert as a funnel: Place the inverted upper part as a funnel into the lower part of the bottle. The bottleneck should not touch the bottom of the lower part, so that water can drain well.
- Add drainage: Fill a layer of gravel, expanded clay pellets, or broken pottery into the lower part of the bottle. The drainage layer should be about 2-3 cm high.
- Fill with soil: Fill the upper part of the bottle with soil. Leave about 2-3 cm of space to the rim.
- Plant onions: Plant the onions in the soil as described above.
- Water: Gently water the onions.
- Fill the water reservoir: Fill the water reservoir in the lower part of the bottle with water. Make sure the water does not reach the soil, as this can lead to waterlogging.
- Check regularly: Regularly check the water level in the reservoir and refill it as needed.
Conclusion
So, there you have it! Growing onions in plastic bottles isn’t just a quirky gardening experiment; it’s a genuinely effective and rewarding way to cultivate fresh, flavorful onions, even if you’re short on space or dealing with challenging soil conditions. We’ve explored the step-by-step process, highlighting the benefits of this method, and hopefully, dispelled any doubts you might have had.
This DIY trick is a must-try for several compelling reasons. First and foremost, it’s incredibly space-efficient. Apartment dwellers, balcony gardeners, and anyone with limited yard space can now enjoy the satisfaction of growing their own onions. Second, it’s a fantastic way to recycle plastic bottles, turning potential waste into a productive mini-garden. Third, the controlled environment of the bottle allows for better water management and reduces the risk of soilborne diseases. Finally, and perhaps most importantly, it’s incredibly satisfying to watch your onions thrive in their repurposed containers.
But don’t stop there! Feel free to experiment with different onion varieties. Shallots, scallions, and even smaller bulb onions can all be successfully grown using this method. Consider adding companion plants like marigolds or basil to your bottle gardens to deter pests and enhance the flavor of your onions. You can also adjust the soil mix to suit the specific needs of your chosen onion variety. For example, adding a bit of bone meal to the soil can promote stronger root development.
Another variation to consider is using different types of plastic bottles. While standard water bottles work well, larger soda bottles or even repurposed juice containers can accommodate more onions or larger varieties. Just be sure to adjust the number of drainage holes accordingly.
We’re confident that once you try growing onions in plastic bottles, you’ll be hooked. It’s a simple, sustainable, and incredibly rewarding gardening project that anyone can undertake. The fresh, homegrown flavor of your onions will elevate your culinary creations, and the satisfaction of knowing you grew them yourself is simply unmatched.
So, grab some plastic bottles, gather your supplies, and get ready to embark on your onion-growing adventure! We encourage you to share your experiences with us. Post photos of your bottle gardens on social media using #BottleOnions or leave a comment below to let us know how it’s going. We’re eager to see your creative setups and hear about your successes (and any challenges you encounter along the way). Happy gardening!
Frequently Asked Questions (FAQ)
What type of onions are best suited for growing in plastic bottles?
While you can experiment with various onion types, smaller varieties tend to thrive best in the limited space of a plastic bottle. Scallions (green onions) are an excellent choice, as they don’t require a large bulb to develop. Shallots also perform well, and you can even try growing smaller bulb onions like pearl onions or cipollini onions. When selecting your onion variety, consider the size of your bottle and the amount of space each plant will need to mature. Remember to choose varieties that are known for their adaptability and resilience.
How often should I water my onions grown in plastic bottles?
Watering frequency depends on several factors, including the climate, the type of soil you’re using, and the size of your plastic bottle. Generally, you should aim to keep the soil consistently moist but not waterlogged. Check the soil moisture level by sticking your finger about an inch into the soil. If it feels dry, it’s time to water. In hotter climates, you may need to water daily, while in cooler climates, watering every other day or even less frequently may suffice. Ensure that the drainage holes in your bottle are functioning properly to prevent water from accumulating at the bottom, which can lead to root rot.
What kind of soil should I use for growing onions in plastic bottles?
A well-draining potting mix is essential for growing healthy onions in plastic bottles. Avoid using garden soil, as it can be too heavy and compact, hindering root growth. A good potting mix will provide adequate aeration and drainage while retaining enough moisture to support the plants. You can also amend your potting mix with compost or other organic matter to improve its fertility and water-holding capacity. Consider adding a slow-release fertilizer to provide your onions with the nutrients they need throughout the growing season.
How much sunlight do onions need when grown in plastic bottles?
Onions require at least 6-8 hours of direct sunlight per day to thrive. Place your plastic bottle gardens in a sunny location where they will receive ample sunlight. If you’re growing onions indoors, you may need to supplement with artificial lighting, such as grow lights, to ensure they receive enough light. Rotate your bottles regularly to ensure that all sides of the plants receive equal exposure to sunlight.
How do I prevent pests and diseases from affecting my onions in plastic bottles?
Prevention is key when it comes to pests and diseases. Start by using a clean potting mix and ensuring that your bottles are properly cleaned before planting. Avoid overwatering, as this can create a favorable environment for fungal diseases. Regularly inspect your plants for signs of pests or diseases, such as aphids, thrips, or onion maggots. If you detect any problems, take action immediately. You can use organic pest control methods, such as insecticidal soap or neem oil, to control pests. For fungal diseases, consider using a copper-based fungicide. Companion planting with marigolds or basil can also help deter pests.
When is the right time to harvest my onions grown in plastic bottles?
The harvesting time depends on the type of onions you’re growing. Scallions can be harvested at any time once they reach a usable size. Bulb onions are typically ready to harvest when the tops begin to fall over and turn yellow. Gently pull the onions from the bottle, being careful not to damage the roots. Allow the onions to cure in a warm, dry place for a week or two before storing them. Curing helps to dry out the outer layers of the onion, which improves their storage life.
Can I reuse the plastic bottles for growing onions again?
Yes, you can definitely reuse the plastic bottles for growing onions again. However, it’s important to thoroughly clean the bottles before reusing them to prevent the spread of diseases. Wash the bottles with soap and water, and then disinfect them with a solution of bleach and water (1 part bleach to 9 parts water). Rinse the bottles thoroughly before using them again. You may also want to consider replacing the potting mix each time you reuse the bottles to ensure that your onions have access to fresh nutrients.
What if I don’t have plastic bottles? Are there any alternatives?
While plastic bottles are a convenient and readily available option, you can also use other containers for growing onions. Yogurt containers, milk jugs, and even repurposed food cans can all be used as alternatives. Just make sure that the containers have adequate drainage holes and are large enough to accommodate the roots of your onions. You can also use fabric grow bags, which are a more sustainable and breathable option.
My onions are growing slowly in the plastic bottles. What could be the reason?
Several factors can contribute to slow growth in onions grown in plastic bottles. Insufficient sunlight is a common culprit. Make sure your onions are receiving at least 6-8 hours of direct sunlight per day. Nutrient deficiencies can also hinder growth. Consider adding a slow-release fertilizer or liquid fertilizer to provide your onions with the nutrients they need. Overwatering or underwatering can also affect growth. Check the soil moisture level regularly and adjust your watering accordingly. Finally, pests or diseases can also slow down growth. Inspect your plants regularly for signs of problems and take action immediately.
Leave a Comment