
Water saving tomato growing is more than just a trend; it’s a necessity for the modern gardener! Are you tired of watching your precious tomato plants wither under the summer sun, despite your best watering efforts? I know I was! It felt like I was constantly battling the elements, and my water bill was skyrocketing. But what if I told you there’s a way to cultivate juicy, delicious tomatoes while drastically reducing your water consumption?
For centuries, gardeners have sought innovative ways to nurture their crops, adapting to diverse climates and resource limitations. From ancient irrigation systems to modern-day hydroponics, the quest for efficient water usage has always been at the forefront. Today, with increasing environmental concerns and rising water costs, mastering water saving tomato growing techniques is more crucial than ever.
This DIY guide is packed with simple, yet effective tricks and hacks that will revolutionize your tomato growing experience. Imagine harvesting a bountiful crop of plump, flavorful tomatoes, all while knowing you’re doing your part to conserve water and protect our planet. I’m going to share my favorite methods, from clever mulching strategies to self-watering container designs, that will help you achieve gardening success without breaking the bank or depleting precious resources. Let’s dive in and discover the secrets to a thriving, water-wise tomato garden!

DIY: Water-Saving Tomato Cultivation – Here’s How!
Hello dear garden friends! Today, I’m going to show you how to grow your tomato plants in a water-saving way using a simple DIY trick. Especially during dry summers, this is a great way to save water and still get a bountiful harvest. For this, we’ll use the so-called “Olla” method, an ancient irrigation technique that is incredibly effective.
What is the Olla Method?
The Olla method (Olla is Spanish for “pot”) is an irrigation technique where unglazed clay pots are buried in the ground and filled with water. The porous clay material slowly releases the water directly to the plant roots. This has several advantages:
- Less water consumption: The water doesn’t evaporate as quickly as with conventional watering because it’s released directly into the soil.
- Healthier plants: The plants get exactly the amount of water they need and are not over- or underwatered.
- Fewer weeds: The surface of the soil stays drier, which reduces weed growth.
- Easy to use: Once installed, the system is low-maintenance.
Materials you need:
- Unglazed clay pots: Two different-sized clay pots that you can nest inside each other work best. However, you can also use a single pot. The size depends on the size of your tomato plants. For larger plants, I recommend pots with a capacity of 5-10 liters.
- Clay saucer or flat stone: To cover the pot to prevent evaporation and keep insects out.
- Drill with a masonry bit (optional): If you want to drill holes in the pot to improve water release.
- Coarse sand or gravel: To fill the bottom of the planting hole to improve drainage.
- Good potting soil: For planting the tomatoes.
- Mulch material (e.g., straw, wood chips): To cover the soil around the plants to retain moisture and suppress weeds.
- Water
Step-by-Step Guide: How to Build Your Own Olla
- Prepare the pots:
- Clean the clay pots thoroughly with water. Avoid using dish soap, as it can penetrate the clay and affect water release.
- Optional: If you wish, you can drill a few small holes (approx. 5-8 mm in diameter) in the lower part of the pot with a masonry bit. This can improve water release but is not strictly necessary. Make sure to secure the pot well while drilling so it doesn’t break.
- If you are using two pots to build a larger one, place the smaller pot inside the larger one. Seal the bottom with clay or silicone.
- Prepare the planting hole:
- Dig a hole large enough to completely bury the clay pot. The top edge of the pot should be about 2-3 cm below the soil surface.
- Fill the bottom of the hole with a layer of coarse sand or gravel. This improves drainage and prevents the pot from sitting in water.
- Insert the Olla:
- Carefully place the clay pot in the hole. Make sure it is stable and cannot tip over.
- Fill the space around the pot with potting soil. Press the soil down lightly to anchor the pot securely in the ground.
- Plant the tomatoes:
- Plant your tomato plants at a distance of about 50-60 cm around the Olla. Make sure the roots of the plants are not directly against the pot but have some space.
- Water the plants thoroughly after planting.
- Fill the Olla:
- Fill the clay pot with water. It’s best to use rainwater or tap water that has been left to stand.
- Cover the pot with a clay saucer or a flat stone. This prevents evaporation and keeps insects out.
- Mulch:
- Cover the soil around the plants with mulch material like straw or wood chips. This helps to retain moisture in the soil, suppresses weeds, and protects the plants from splashing water.
Care and Maintenance:
- Refill the Olla regularly: Check the water level in the Olla regularly and refill it as needed. How often you need to refill depends on the size of the pot, the size of the plants, and the weather. On hot days, you may need to refill the Olla daily.
- Check soil moisture: Regularly check the moisture of the soil around the plants. If the soil is too dry, you can water it additionally.
- Fertilize: Fertilize your tomato plants regularly with an organic fertilizer. Make sure the fertilizer does not go directly into the Olla but into the soil around the plants.
- Protect from pests and diseases: Regularly check your plants for pests and diseases and combat them with appropriate means if necessary.
Additional Tips for Successful Tomato Growing with the Olla Method:
- Choose the right tomato varieties: Some tomato varieties are better suited for the Olla method than others. Robust varieties that require little water are ideal.
- Sunny location: Tomatoes need a lot of sun to grow well. Choose a sunny location for your plants.
- Support: Tomato plants need support to keep from breaking. Use stakes or trellises to support the plants.
- Pruning: Regularly remove the side shoots (suckers) from the tomato plants. This promotes the growth of the main stems and ensures better air circulation for the plants.
- Harvest: Harvest the tomatoes as soon as they are ripe. This encourages the formation of new fruits.
Frequently Asked Questions (FAQ):
- Can I also use plastic pots? No, plastic pots are not suitable because they are not porous and do not release water. Only unglazed clay pots work for the Olla method.
- How big should the Olla be? The size of the Olla depends on the size of your plants. For larger plants, you will need larger pots.
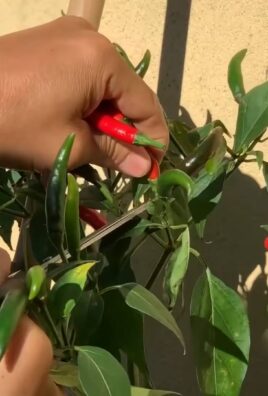
- Can I use the Olla for other plants? Yes, the Olla method is also suitable for other plants that require a lot of water, such as cucumbers, peppers, or zucchini.
- What do I do with the Olla in winter? In winter, you should remove the Olla from the ground and clean it. Store it in a dry place to avoid frost damage.
Advantages of the Olla Method in Detail:
Reduction of diseases: Since the leaves and the surface of the soil remain drier, the risk of fungal diseases is reduced. Many fungal diseases thrive in a moist environment.
Efficient water use: Direct watering of the roots minimizes water waste. Less water evaporates, and it gets exactly where it’s needed. This is a great advantage, especially in dry regions or during water shortages.
Healthy plant growth: The steady water supply promotes healthy and vigorous growth of the tomato plants. The plants are less susceptible to stress from drought or overwatering.
Conclusion
So, there you have it! This simple, yet incredibly effective, water-saving tomato growing trick is more than just a gardening hack; it’s a pathway to healthier plants, bigger yields, and a more sustainable gardening practice. We’ve shown you how easy it is to implement, requiring minimal effort and readily available materials. Think about it: less time spent watering, fewer weeds competing for nutrients, and a thriving tomato patch bursting with juicy, flavorful fruit. What’s not to love?
This method isn’t just about conserving water, although that’s a significant benefit, especially in regions prone to drought. It’s about creating an optimal growing environment for your tomato plants. By delivering water directly to the roots, you minimize water loss through evaporation and runoff. This targeted watering also helps prevent fungal diseases that can plague tomato plants when their leaves are constantly wet. Furthermore, the consistent moisture level encourages strong root development, leading to healthier, more resilient plants that are better equipped to withstand environmental stressors.
But don’t just take our word for it. The real magic happens when you try it yourself. Imagine the satisfaction of harvesting a bumper crop of tomatoes, knowing that you’ve done so in an environmentally responsible way. Picture the vibrant green foliage of your tomato plants, a testament to their health and vitality. Envision the delicious meals you’ll create with your homegrown tomatoes, bursting with flavor and freshness.
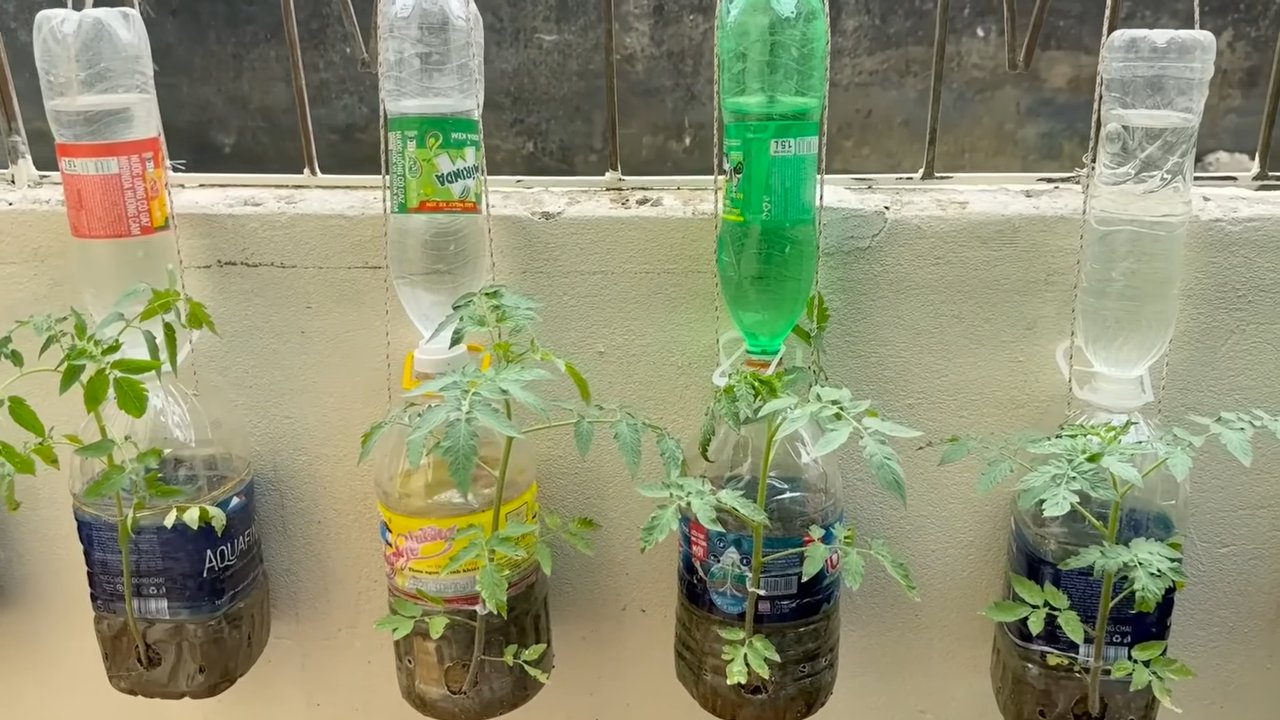
Ready to take your tomato growing to the next level? We encourage you to give this water-saving tomato growing method a try. Experiment with different materials for your watering containers. You could use plastic bottles, clay pots, or even repurposed buckets. Consider adding organic matter, such as compost or worm castings, to the soil around your plants to further enhance their growth. You can also adjust the frequency of watering based on your local climate and soil conditions.
And remember, gardening is a journey of learning and discovery. Don’t be afraid to experiment and adapt this method to suit your specific needs and preferences. The most important thing is to get out there, get your hands dirty, and enjoy the process of growing your own food.
We’re confident that you’ll be amazed by the results. But more than that, we want to hear about your experience. Share your success stories, your challenges, and your tips with us and the rest of the gardening community. Let’s learn from each other and create a more sustainable and bountiful future for all. Post pictures of your thriving tomato plants, tell us about the size and flavor of your harvest, and let us know what variations you tried. Together, we can unlock the full potential of this water-saving tomato growing technique and transform our gardens into thriving ecosystems. So, grab your tools, gather your materials, and get ready to experience the joy of growing your own delicious, water-wise tomatoes!
Frequently Asked Questions
What type of container is best for this water-saving method?
The beauty of this method is its versatility. You can use a variety of containers, from repurposed plastic bottles to terracotta pots. Plastic bottles are readily available and cost-effective, but terracotta pots offer better insulation and breathability. The ideal size depends on the size of your tomato plant and the frequency with which you want to refill the container. A good starting point is a 2-liter bottle or a similarly sized pot. Experiment to see what works best for your specific needs. Remember to ensure the container is clean before using it.
How often should I refill the container?
The frequency of refilling depends on several factors, including the weather, the size of your tomato plant, and the type of soil you’re using. In hot, dry weather, you’ll need to refill the container more frequently than in cooler, wetter weather. A good rule of thumb is to check the soil moisture around the base of the plant every day or two. If the soil feels dry to the touch, it’s time to refill the container. Over time, you’ll develop a sense of how often your plants need watering based on your local conditions.
Will this method work for other plants besides tomatoes?
Yes, this water-saving method can be adapted for other plants that benefit from deep, consistent watering, such as peppers, eggplants, and squash. The key is to adjust the size of the container and the frequency of watering to suit the specific needs of the plant. For example, smaller plants may require smaller containers and less frequent watering. Observe your plants closely and adjust your watering schedule accordingly.
Can I use fertilizer with this method?
Absolutely! In fact, this method is an excellent way to deliver fertilizer directly to the roots of your tomato plants. Simply add a diluted liquid fertilizer to the water when you refill the container. Be sure to follow the instructions on the fertilizer package and avoid over-fertilizing, which can damage your plants. Organic fertilizers, such as compost tea or fish emulsion, are also excellent choices.
What if the container gets clogged with soil?
Clogging can sometimes occur, especially if you’re using a container with small holes. To prevent clogging, use a well-draining soil mix and avoid packing the soil too tightly around the container. You can also place a layer of gravel or small stones at the bottom of the container to improve drainage. If the container does become clogged, you can try using a small stick or wire to clear the holes.
Is this method suitable for container gardening?
Yes, this method is particularly well-suited for container gardening. It allows you to control the watering and fertilization of your tomato plants more precisely, which is especially important in containers where the soil can dry out quickly. Just be sure to choose a container that is large enough to accommodate the mature size of your tomato plant.
Does this method help prevent blossom end rot?
Yes, blossom end rot is often caused by inconsistent watering, which leads to a calcium deficiency in the developing fruit. By providing consistent moisture to the roots, this water-saving method can help prevent blossom end rot. However, it’s also important to ensure that your soil has adequate calcium levels. You can add calcium to the soil by incorporating bone meal or crushed eggshells.
What are the benefits of using this method compared to traditional watering?
This method offers several advantages over traditional watering, including:
* **Water conservation:** It delivers water directly to the roots, minimizing water loss through evaporation and runoff.
* **Reduced weed growth:** By keeping the soil surface dry, it discourages weed germination.
* **Disease prevention:** It helps prevent fungal diseases by keeping the foliage dry.
* **Improved nutrient uptake:** It ensures that the roots have consistent access to water and nutrients.
* **Healthier plants:** It promotes strong root development and overall plant health.
How does this method help with water conservation?
Traditional watering methods often result in significant water loss through evaporation and runoff. This water-saving tomato growing technique minimizes these losses by delivering water directly to the root zone. The water is slowly released into the soil, allowing the plant to absorb it efficiently. This targeted watering reduces the amount of water needed to keep your tomato plants healthy and productive.
Can I use this method in raised garden beds?
Yes, this method works equally well in raised garden beds. Raised beds offer excellent drainage and soil quality, which can further enhance the benefits of this water-saving technique. Simply follow the same steps as you would for in-ground gardening, ensuring that the container is buried deep enough to reach the root zone of your tomato plants.
Leave a Comment