
Growing pineapples at home might sound like an exotic dream reserved for tropical climates, but I’m here to tell you it’s totally achievable, even if you’re miles away from Hawaii! Forget those expensive grocery store pineapples; imagine plucking a sweet, juicy pineapple straight from your own backyard (or even your windowsill!).
For centuries, the pineapple has been a symbol of hospitality and luxury. Originating in South America, it was quickly adopted by cultures worldwide, gracing royal tables and becoming a coveted delicacy. Today, we can bring a touch of that history and tropical flair into our own lives.
But why bother with the effort? Well, store-bought pineapples often travel long distances, losing some of their flavor and nutritional value along the way. Plus, let’s be honest, there’s something incredibly satisfying about nurturing a plant from start to finish and enjoying the fruits (literally!) of your labor. This DIY guide will provide you with easy-to-follow instructions and clever hacks to successfully growing pineapples at home, regardless of your gardening experience. I’ll share my secrets to creating the perfect environment, avoiding common pitfalls, and ensuring a bountiful harvest. Get ready to impress your friends and family with your newfound pineapple-growing prowess!
Growing Your Own Pineapple: A Tropical Dream for Your Home!
Hey everyone! Have you ever wondered what it would be like to grow your own pineapple? I tried it, and it’s easier than you think! It does take some patience, but the result is simply fantastic – a homegrown, juicy pineapple! In this article, I’ll show you step-by-step how you can do it too. Let’s get started!
What You Need: The Ingredients for Your Tropical Garden
Before we begin, here is a list of everything you’ll need:
- A ripe pineapple (preferably from an organic store, as these are often not treated with growth inhibitors).
- A sharp knife.
- A pot (approx. 20-25 cm in diameter) with good drainage.
- High-quality potting soil (a mixture of potting soil, sand, and some compost is best).
- Rooting hormone (optional, but it helps!).
- A spray bottle with water.
- Patience!
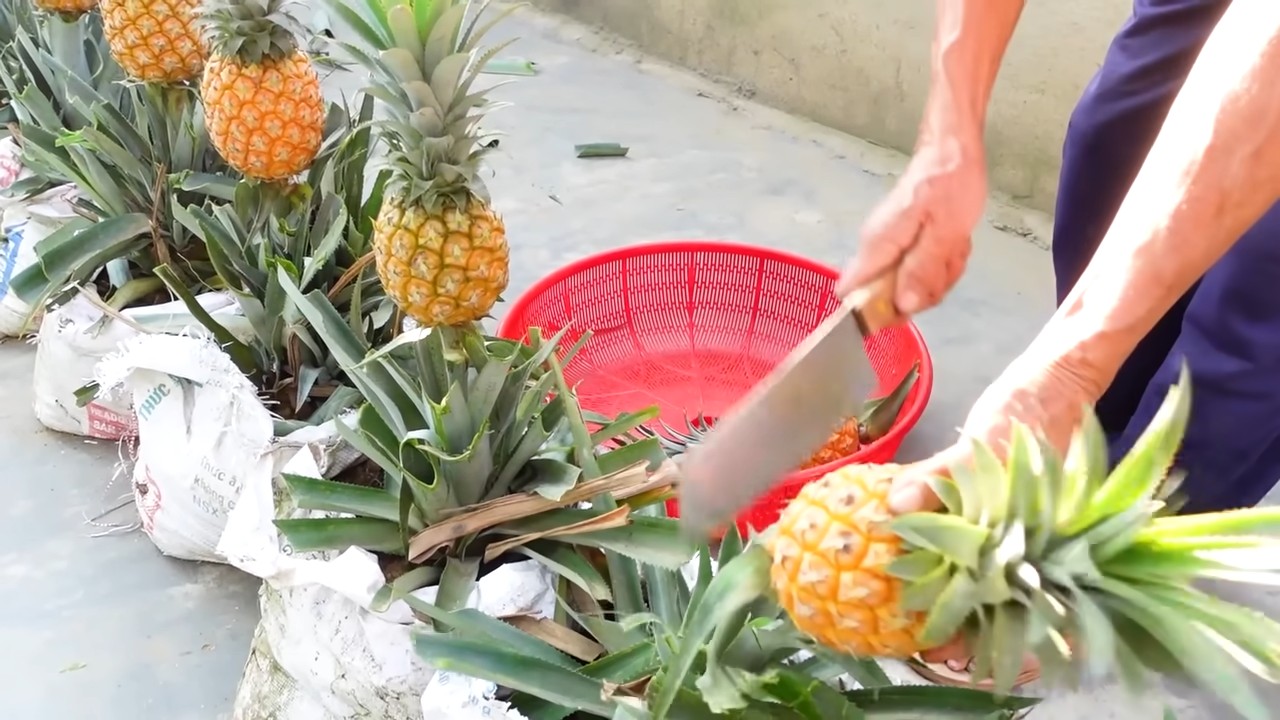
Pineapple Preparation: Off with Its Head!
The most important step is the proper preparation of the pineapple. We need the leafy top to grow a new plant from it.
- Cut off the leafy top: Take your sharp knife and cut off the top with about 2-3 cm of fruit flesh attached. Make sure to make a clean cut.
- Remove the fruit flesh: Carefully remove all the fruit flesh from the top. Leftover pulp can rot and prevent rooting. You can either cut off the flesh or carefully scrape it away.
- Remove the lower leaves: Remove the bottom leaves of the top (about 2-3 cm). This exposes the areas where the roots will grow.
- Let it dry: Let the top dry for 2-3 days in a dry, well-ventilated place. This allows the cut surface to heal and minimizes the risk of rot.
Rooting: Taking Root for Success
There are two methods to root the pineapple top: in water or directly in soil. I prefer the water method because you can observe the root formation better.
Rooting in Water:
- Preparation: Fill a glass or vase with water. The water should be clean and at room temperature.
- Insert the top: Place the top in the water so that only the lower part, where you removed the leaves, is in the water. The leaves should not be in the water, as they could rot.
- Location: Place the glass in a bright, warm place, but not in direct sunlight.
- Change the water: Change the water every 2-3 days to prevent rot.
- Patience: After a few weeks (approx. 4-8 weeks), the first roots should form. Wait until the roots are about 2-3 cm long before planting the top in soil.
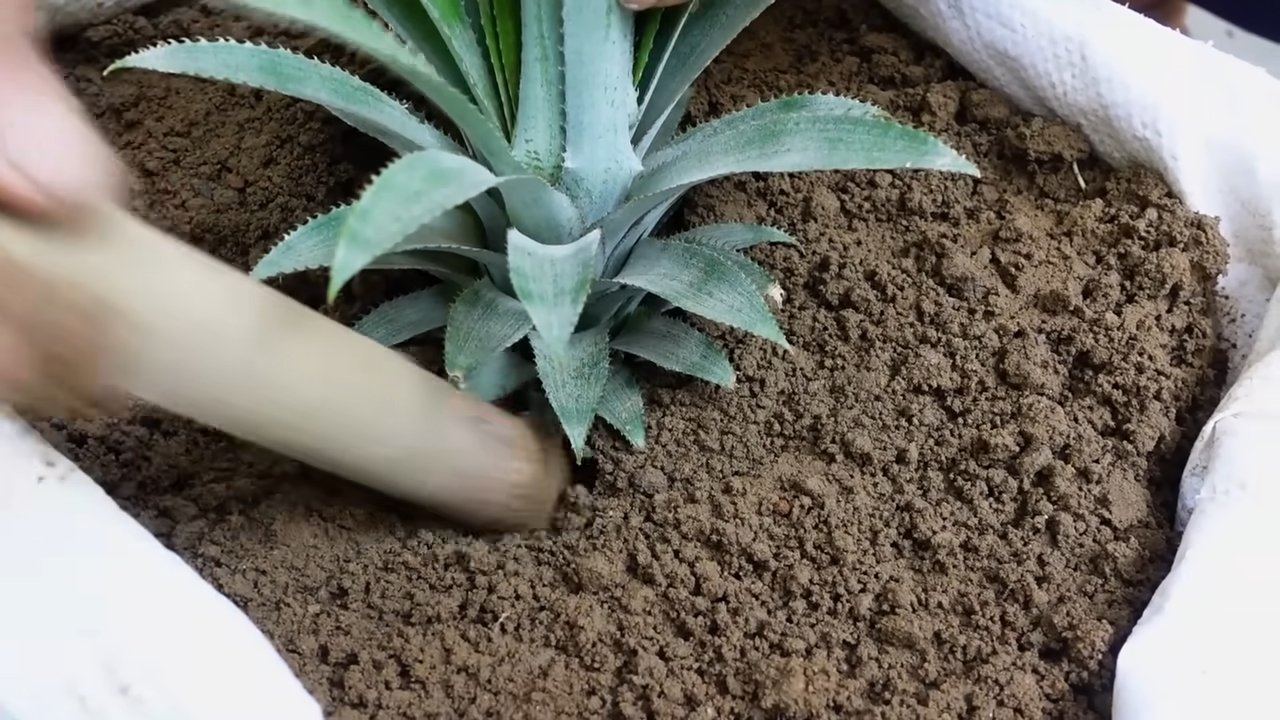
Direct Rooting in Soil:
- Prepare the pot: Fill the pot with the prepared potting soil.
- Dig a planting hole: Dig a small hole in the center of the pot.
- Insert the top: Place the top in the hole and press the soil down lightly.
- Water: Water the soil gently so that it is moist but not wet.
- Location: Place the pot in a bright, warm place, but not in direct sunlight.
- Moisture: Keep the soil moist, but avoid waterlogging.
- Patience: It can take several weeks for the top to take root. You can gently tug on the top to check if it is firm in the soil.
Planting: Into the Soil!
Once the top has formed roots (either in water or directly in soil), it’s time to transplant it into a larger pot.
- Prepare the pot: Choose a pot that is slightly larger than the previous one (approx. 20-25 cm in diameter). Fill the pot with the prepared potting soil.
- Dig a planting hole: Dig a hole in the center of the pot that is large enough to accommodate the roots of the top.
- Insert the top: Carefully remove the top from the water (if you rooted it in water) or from the small pot. Place it in the hole, making sure not to damage the roots.
- Fill with soil: Fill the hole with soil and press the soil down lightly.
- Water: Water the soil gently so that it is moist but not wet.
Care: Keeping Your Pineapple Happy
Proper care is crucial for the growth of your pineapple plant.
- Location: Pineapples love the sun! Place the pot in a sunny location, ideally with at least 6 hours of direct sunlight per day.
- Temperature: Pineapples prefer warm temperatures between 20°C and 30°C. Avoid temperatures below 15°C.
- Watering: Water the pineapple plant regularly, but avoid waterlogging. The soil should always be slightly moist. You will need to water less in the winter.
- Fertilizing: Fertilize the pineapple plant every 2-4 weeks during the growing season (spring and summer) with a liquid fertilizer for houseplants.
- Humidity: Pineapples like high humidity. You can increase the humidity by regularly spraying the leaves with water or by placing the pot on a tray of moist pebbles.
- Repotting: You should repot the pineapple plant into a larger pot every 1-2 years.
Flowering and Fruiting: The Crowning Achievement of Your Work
Flowering and fruiting is the most exciting part! However, it can take some time for your pineapple plant to flower and bear fruit. It usually takes 2-3 years.
- Inducing flowering: To encourage flowering, you can use a simple trick: Place an apple in a plastic bag and put the bag over the pineapple plant. The apple releases ethylene, a gas that can stimulate flowering. Leave the bag over the plant for about a week.
- Patience: Be patient! It can take several months for a fruit to form.
- Harvest: The pineapple is ripe when it has a golden-yellow color and emits a sweet fragrance. You can cut the pineapple off with a sharp knife.
Common Problems and Solutions: Don’t Panic, I’ll Help You!
Problems can also arise when growing pineapples. Here are some common problems and how you can solve them:
Rot: Rot can be caused by too much moisture or poor drainage.
Yellow leaves: Yellow leaves can be a sign of overwatering, underwatering, nutrient deficiency, or the wrong location. Check the soil moisture, fertilize the plant, and if necessary, move it to a brighter location.
Brown leaf tips: Brown leaf tips can be a sign of air that is too dry. Spray the leaves regularly with water or place the pot on a tray of moist pebbles.
Conclusion
So, there you have it! Growing pineapples at home, while it might seem like a tropical dream reserved for expert gardeners, is surprisingly accessible and rewarding. This DIY trick isn’t just about saving money on store-bought fruit; it’s about experiencing the magic of nurturing a plant from a simple pineapple top to a thriving, fruit-bearing beauty. It’s about connecting with nature, learning patience, and ultimately, enjoying the unparalleled flavor of a pineapple you grew yourself.
Why is this a must-try? Because it’s a testament to the power of resourcefulness and the joy of creating something tangible. Imagine the satisfaction of serving a homemade pineapple salsa, knowing that the star ingredient came from your very own garden or even a sunny windowsill. It’s a conversation starter, a source of pride, and a delicious way to reduce your carbon footprint by minimizing the distance your food travels.
But the fun doesn’t stop there! Feel free to experiment with different pineapple varieties. While the smooth Cayenne is a popular choice, explore other options like the Sugarloaf or the Red Spanish, each offering unique flavors and textures. Consider using different potting mixes to see which one your pineapple prefers. Some gardeners swear by a blend of peat moss, perlite, and vermiculite, while others find success with a more basic potting soil.
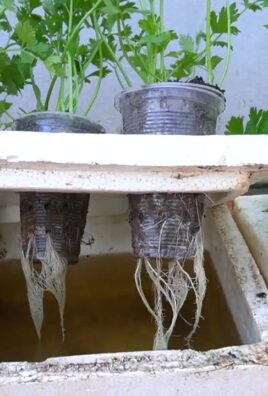
And don’t be afraid to get creative with your growing environment. If you live in a colder climate, you can easily grow your pineapple in a pot that can be moved indoors during the winter months. Supplement with grow lights if needed to ensure your plant gets enough sunlight. You can even try hydroponic growing for a more controlled and efficient approach.
The key to success with this DIY trick is patience. Pineapples take time to mature, so don’t be discouraged if you don’t see fruit right away. Just keep providing your plant with the right conditions – plenty of sunlight, well-draining soil, and regular watering – and it will eventually reward you with a delicious, homegrown pineapple.
We wholeheartedly encourage you to give this DIY trick a try. It’s a fun, educational, and ultimately delicious project that anyone can undertake. And most importantly, we want to hear about your experience! Share your photos, tips, and challenges in the comments below. Let’s create a community of home pineapple growers and learn from each other’s successes and failures. Together, we can unlock the secrets to growing the perfect pineapple at home. So, grab a pineapple, get your hands dirty, and embark on this exciting gardening adventure! You might just surprise yourself with what you can achieve.
Frequently Asked Questions (FAQ)
How long does it take to grow a pineapple from a top?
The million-dollar question! Generally, it takes anywhere from 2 to 3 years for a pineapple plant grown from a top to produce fruit. This timeframe can vary depending on factors like climate, sunlight exposure, soil quality, and the specific pineapple variety. Patience is key! Don’t be discouraged if you don’t see fruit right away. Consistent care and the right conditions will eventually lead to a delicious reward.
What kind of soil is best for growing pineapples?
Pineapples thrive in well-draining, slightly acidic soil. A mix of equal parts peat moss, perlite, and vermiculite is a popular choice, as it provides excellent drainage and aeration. You can also use a commercially available potting mix specifically formulated for bromeliads or tropical plants. Avoid heavy clay soils, as they can retain too much moisture and lead to root rot. Adding organic matter, such as compost or well-rotted manure, can improve soil fertility and drainage.
How much sunlight do pineapples need?
Pineapples are sun-loving plants and require at least 6 hours of direct sunlight per day. If you’re growing your pineapple indoors, place it near a sunny window or supplement with grow lights. Insufficient sunlight can lead to stunted growth and reduced fruit production. During the hottest part of the day, especially in warmer climates, some afternoon shade can be beneficial to prevent leaf burn.
How often should I water my pineapple plant?
Water your pineapple plant regularly, but avoid overwatering. Allow the soil to dry out slightly between waterings. During the growing season (spring and summer), you may need to water more frequently than during the dormant season (fall and winter). A good rule of thumb is to water when the top inch of soil feels dry to the touch. Ensure that the pot has adequate drainage to prevent waterlogging.
How do I fertilize my pineapple plant?
Pineapples are relatively light feeders, but regular fertilization can promote healthy growth and fruit production. Use a balanced fertilizer (e.g., 10-10-10) diluted to half strength. Apply the fertilizer every 2-3 months during the growing season. You can also use a foliar fertilizer, spraying the leaves with a diluted solution. Avoid over-fertilizing, as this can damage the plant.
How do I know when my pineapple is ripe?
Several indicators can help you determine when your pineapple is ripe. The fruit should have a vibrant golden-yellow color, and the eyes (the individual segments of the pineapple) should be relatively flat. The pineapple should also have a sweet, fragrant aroma. Gently tug on one of the leaves near the top of the fruit; if it comes off easily, the pineapple is likely ripe. You can also tap the pineapple; a ripe pineapple will have a dull, solid sound.
Can I grow a pineapple indoors?
Yes, you can absolutely grow a pineapple indoors, especially if you live in a colder climate. Choose a pot that is large enough to accommodate the plant’s root system, and ensure that it has drainage holes. Place the pot near a sunny window or supplement with grow lights. Maintain a consistent temperature and humidity level. Indoor-grown pineapples may take longer to fruit than those grown outdoors, but with proper care, you can still enjoy a homegrown pineapple.
What are some common problems when growing pineapples?
Some common problems when growing pineapples include root rot (caused by overwatering), mealybugs, scale insects, and nutrient deficiencies. Root rot can be prevented by using well-draining soil and avoiding overwatering. Mealybugs and scale insects can be controlled with insecticidal soap or neem oil. Nutrient deficiencies can be addressed by fertilizing the plant regularly with a balanced fertilizer. Regularly inspect your pineapple plant for any signs of pests or diseases and take action promptly to prevent them from spreading.
Can I grow a pineapple in a container?
Yes, growing pineapples in containers is a great option, especially for those with limited space or colder climates. Choose a container that is at least 12 inches in diameter and has drainage holes. Use a well-draining potting mix and place the container in a sunny location. Container-grown pineapples may require more frequent watering and fertilization than those grown in the ground.
What do I do with the pineapple plant after harvesting the fruit?
After harvesting the pineapple, the mother plant will eventually die. However, it will often produce “pups” or suckers around its base. These pups can be separated from the mother plant and replanted to grow new pineapple plants. This is a great way to continue your pineapple-growing journey and expand your collection. You can also propagate new plants from the crown of the harvested pineapple, repeating the initial process.

Leave a Comment