
Grow Swiss Chard Rooftop gardens are becoming increasingly popular, and for good reason! Imagine stepping onto your roof and harvesting vibrant, nutritious Swiss chard, ready to be tossed into a salad or sautéed for a delicious side dish. It’s not just a dream; it’s an achievable reality with a little know-how.
Rooftop gardening, while seemingly modern, has roots stretching back centuries. From the Hanging Gardens of Babylon to the more recent victory gardens of World War II, people have always found creative ways to cultivate food in limited spaces. Today, as urban populations swell and access to fresh produce becomes increasingly important, rooftop gardens offer a sustainable and rewarding solution.
But why Swiss chard? Well, this leafy green is a nutritional powerhouse, packed with vitamins, minerals, and antioxidants. Plus, it’s incredibly resilient and relatively easy to grow, even for beginner gardeners. I know, the thought of starting a rooftop garden can seem daunting, but trust me, with these DIY tricks and hacks, you’ll be harvesting your own Swiss chard in no time. This article will guide you through everything you need to know to successfully grow Swiss Chard Rooftop garden, from choosing the right containers to protecting your plants from the elements. Let’s get started and transform your rooftop into a thriving edible oasis!

Growing Swiss Chard on the Rooftop: Your DIY Guide
Hello, dear garden friends! Have you ever thought about growing your own vegetables on your rooftop? I think it’s a fantastic way to make the most of available space, harvest fresh, healthy food, and do something for the environment at the same time. And what’s better to start with than Swiss chard? It’s robust, easy to care for, and provides a rich harvest over a long period. In this article, I’ll show you how to create your own Swiss chard garden on the rooftop. Let’s get started!
What you need for your rooftop garden
Before we get started, here’s a list of the things you’ll need for your Swiss chard rooftop garden:
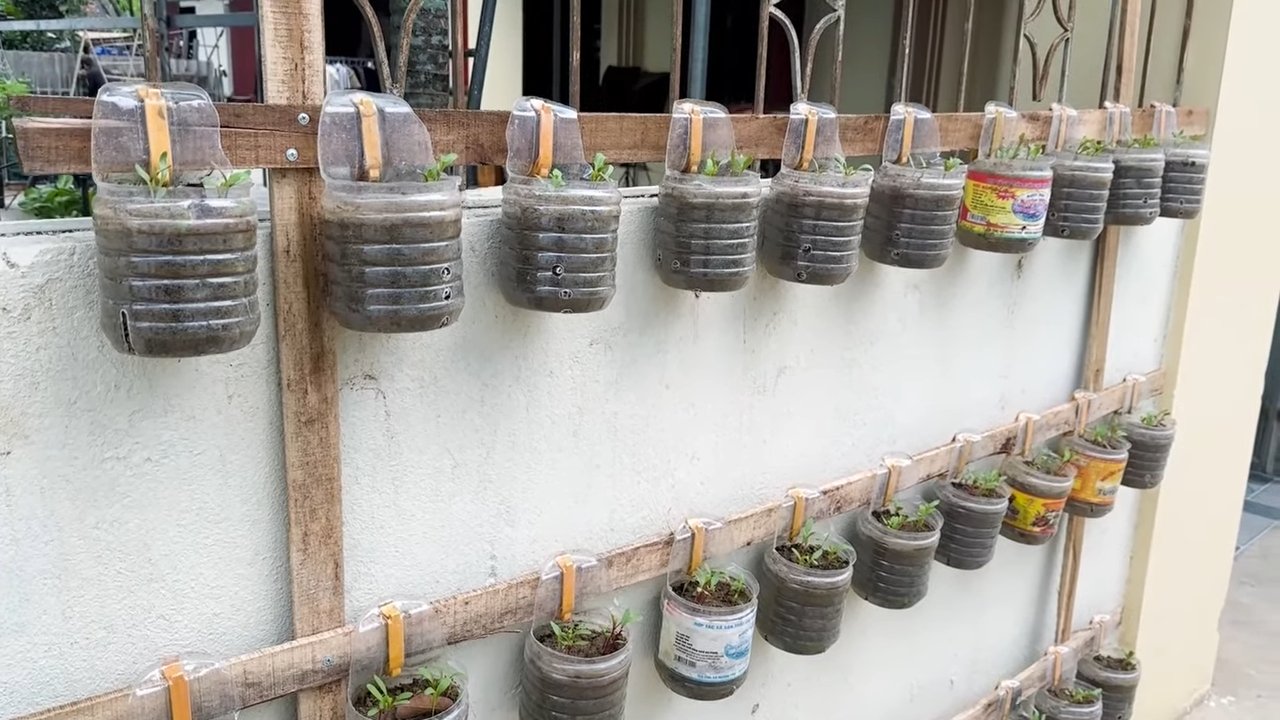
- Suitable planters: Choose lightweight but sturdy containers with good drainage. Plastic pots, grow bags, or even recycled containers are a good choice. Make sure they are large enough (at least 30 cm deep and wide) so that the chard plants have enough space to grow.
- High-quality potting soil: Use a well-draining, nutrient-rich potting soil that is specifically for vegetables. You can also make your own mixture of garden soil, compost, and perlite.
- Swiss chard seeds or seedlings: You can either sow seeds or buy young plants. Young plants are a bit easier as they already have a head start on growth.
- Fertilizer: An organic fertilizer, such as compost tea or a liquid fertilizer for vegetables, will help the plants grow healthy and strong.
- Watering can or garden hose: For regularly watering the plants.
- Gardening tools: A small shovel, a rake, and possibly a trowel.
- Mulch material: Mulch helps to retain moisture in the soil and suppress weeds. Straw, wood chips, or grass clippings are suitable.
- Sun protection (optional): In very hot regions, a shade cloth can be helpful to protect the plants from excessive sunlight.
- Wind protection (optional): On windy rooftops, a windbreak, such as a hedge or a fence, can protect the plants from damage.
Preparing the rooftop
Before you start planting, you should make sure that your roof is suitable for a garden.
- Check the structural integrity: The most important thing first! Make sure your roof can support the weight of the planters, the soil, and the plants. If in doubt, you should consult a structural engineer.
- Check the waterproofing: Inspect the roof’s waterproofing for damage or cracks. Intact waterproofing is crucial to prevent water damage.
- Ensure drainage: Make sure the roof has good drainage so that excess water can run off. Clogged gutters can cause problems.
- Take protective measures: Place a protective sheet under the planters to protect the roof’s waterproofing from damage.
Sowing or planting the Swiss chard
Now let’s get down to it! You have the choice of whether you want to sow seeds or plant young plants.
Sowing Swiss chard seeds
- Choose a sowing time: Swiss chard can be sown directly outdoors from April onwards. You can also start the seeds indoors in March.
- Prepare the seeds: Soak the seeds in lukewarm water for a few hours before sowing. This will speed up germination.
- Sowing: Sow the seeds at a distance of about 5 cm and a depth of 1-2 cm in the potting soil.
- Watering: Water the soil gently and keep it moist, but not wet.
- Germination: The seeds usually germinate within 7-14 days.
- Thinning: Once the seedlings are large enough, thin them to a distance of about 20-30 cm.
Planting Swiss chard seedlings
- Select seedlings: Choose healthy, vigorous young plants with well-developed roots.
- Prepare planting holes: Dig planting holes that are slightly larger than the root balls of the young plants.
- Planting: Place the young plants in the planting holes and fill them with soil. Press the soil down lightly.
- Watering: Water the plants thoroughly.
- Spacing: Maintain a planting distance of about 20-30 cm.
Caring for the Swiss chard
Swiss chard is relatively easy to care for, but there are a few things you should keep in mind for it to grow well.
- Watering: Water the plants regularly, especially in dry weather. The soil should always be slightly moist, but not wet.
- Fertilizing: Fertilize the plants every 2-3 weeks with an organic fertilizer.
- Weeding: Regularly remove weeds so they don’t take nutrients away from the chard plants.
- Mulching: Mulch the soil around the plants to retain moisture and suppress weeds.
- Pests and diseases: Watch out for pests like aphids or slugs. If necessary, you can use organic pesticides. Swiss chard is relatively resistant to diseases, but in damp weather, fungal infections can occur. Ensure good ventilation and remove affected leaves.
- Removing spent leaves: Regularly remove spent leaves to encourage the formation of new ones.
Harvesting the Swiss chard
The best comes last: the harvest!
- Harvesting time: You can harvest Swiss chard as soon as the leaves are large enough (about 20-30 cm long).
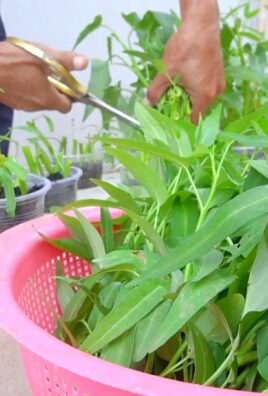
- Harvesting method: Cut the outer leaves with a sharp knife or scissors. Leave the inner leaves so that the plant can continue to grow.
- Regular harvesting: The more often you harvest, the more new leaves the plant will produce.
- Storage: Swiss chard can be stored in the refrigerator for a few days. You can also freeze or preserve it.
Additional tips for your rooftop garden
- Sunlight: Swiss chard needs at least 6 hours of sun per day. Choose a sunny spot for your rooftop garden.
- Wind protection: On windy rooftops, a windbreak can protect the plants from damage.
- Irrigation system: If you can’t water regularly, you can install an automatic irrigation system.
- Companion planting: Plant Swiss chard together with other vegetables, such as lettuce, radishes, or carrots.
- Variety selection: There are different Swiss chard varieties with different colors and flavors. Try different varieties to find your favorite.
I hope this guide has helped you to create your own Swiss chard rooftop garden. It is a rewarding project that will bring you fresh, healthy food and much joy. Happy gardening
Conclusion
So, there you have it! Growing Swiss chard on your rooftop isn’t just a whimsical idea; it’s a practical, rewarding, and surprisingly simple way to bring fresh, nutritious greens right to your doorstep. We’ve walked you through the process, from selecting the right containers and soil to nurturing your plants and harvesting your bounty. But why is this DIY trick a must-try?
Firstly, consider the unparalleled freshness. Imagine stepping onto your rooftop and snipping vibrant, crisp Swiss chard leaves just moments before adding them to your salad, stir-fry, or soup. The flavor difference compared to store-bought produce is remarkable. You’ll experience a depth of flavor and a satisfying crunch that you simply can’t replicate with greens that have traveled miles and sat on shelves.
Secondly, think about the environmental benefits. By growing your own Swiss chard, you’re reducing your carbon footprint by minimizing transportation needs. You’re also avoiding the use of pesticides and herbicides often associated with commercial farming, contributing to a healthier ecosystem. Plus, rooftop gardens can help insulate your home, reducing energy consumption and saving you money on utility bills.
Thirdly, it’s incredibly satisfying! There’s a unique sense of accomplishment that comes from nurturing a plant from seed to harvest. Watching your Swiss chard thrive on your rooftop, knowing that you’re responsible for its growth, is a truly rewarding experience. It’s a connection to nature that can be incredibly grounding and therapeutic.
But the beauty of this DIY project lies in its adaptability. Feel free to experiment with different varieties of Swiss chard. Rainbow chard, with its vibrant stems in shades of red, orange, yellow, and white, adds a splash of color to your rooftop garden and your plate. Fordhook Giant is a classic variety known for its large, dark green leaves and mild flavor. Or try Lucullus, a heat-tolerant variety that’s perfect for warmer climates.
You can also explore different container options. While we’ve suggested using large pots or raised beds, you could also repurpose old containers like plastic tubs or wooden crates. Just make sure they have adequate drainage holes. Consider companion planting as well. Marigolds can help deter pests, while basil can improve the flavor of your Swiss chard.
Don’t be afraid to get creative with your rooftop garden. Add other herbs and vegetables to create a diverse and thriving ecosystem. Consider installing a small rainwater harvesting system to collect water for your plants. Or add a comfortable seating area to create a relaxing oasis where you can enjoy the fruits (and vegetables) of your labor.
Ultimately, growing Swiss chard on your rooftop is more than just a gardening project; it’s a lifestyle choice. It’s a commitment to fresh, healthy food, environmental sustainability, and personal well-being. It’s a way to connect with nature, reduce your carbon footprint, and enjoy the satisfaction of growing your own food.
So, what are you waiting for? Grab your seeds, gather your supplies, and get ready to transform your rooftop into a thriving Swiss chard garden. We’re confident that you’ll be amazed by the results. And don’t forget to share your experiences with us! We’d love to see photos of your rooftop gardens and hear about your successes and challenges. Share your tips and tricks with other readers, and let’s create a community of rooftop gardeners who are passionate about growing their own food. Embrace the joy of **growing Swiss chard** and discover the many benefits it has to offer. Happy gardening!
Frequently Asked Questions (FAQ)
What kind of soil is best for growing Swiss chard in containers?
A well-draining potting mix that is rich in organic matter is ideal for growing Swiss chard in containers. Avoid using garden soil, as it can become compacted in containers and hinder drainage. Look for a potting mix that contains ingredients like peat moss, perlite, and compost. You can also amend your potting mix with additional compost or aged manure to boost its nutrient content. A slightly acidic to neutral pH (around 6.0 to 7.0) is optimal for Swiss chard growth.
How much sunlight does Swiss chard need when grown on a rooftop?
Swiss chard thrives in full sun, which means at least 6 hours of direct sunlight per day. However, it can also tolerate partial shade, especially in hotter climates. If your rooftop receives intense afternoon sun, consider providing some shade during the hottest part of the day to prevent the leaves from scorching. You can use shade cloth or strategically position your containers to take advantage of natural shade from nearby structures. Monitor your plants closely and adjust their location as needed to ensure they are receiving adequate sunlight.
How often should I water my Swiss chard plants on the rooftop?
Water your Swiss chard plants regularly, especially during hot and dry weather. The soil should be kept consistently moist but not waterlogged. Check the soil moisture by sticking your finger about an inch deep into the soil. If it feels dry, it’s time to water. Water deeply, allowing the water to drain out of the bottom of the container. Avoid overhead watering, as this can promote fungal diseases. Consider using a soaker hose or drip irrigation system to deliver water directly to the roots. The frequency of watering will depend on factors such as the weather, the size of your containers, and the type of potting mix you are using.
What are some common pests and diseases that affect Swiss chard, and how can I prevent them?
Common pests that can affect Swiss chard include aphids, flea beetles, and leaf miners. Aphids can be controlled with a strong spray of water or by introducing beneficial insects like ladybugs. Flea beetles can be deterred by using row covers or by applying diatomaceous earth to the leaves. Leaf miners can be prevented by removing and destroying any affected leaves.
Common diseases that can affect Swiss chard include fungal diseases like powdery mildew and downy mildew. These diseases can be prevented by providing good air circulation, avoiding overhead watering, and applying a fungicide if necessary. Choose disease-resistant varieties of Swiss chard to minimize the risk of disease.
How do I harvest Swiss chard, and when is the best time to do it?
You can begin harvesting Swiss chard leaves when they are about 6 inches long. Harvest the outer leaves first, leaving the inner leaves to continue growing. Use a sharp knife or scissors to cut the leaves near the base of the plant. Avoid pulling the leaves, as this can damage the plant.
The best time to harvest Swiss chard is in the morning, after the dew has dried. The leaves will be crisper and more flavorful at this time. You can harvest Swiss chard throughout the growing season, as long as the plants are healthy and producing new leaves.
Can I grow Swiss chard in the winter on my rooftop?
In many regions, Swiss chard can be grown throughout the winter with proper protection. If you live in an area with mild winters, you may be able to grow Swiss chard outdoors without any special precautions. However, if you live in an area with cold winters, you will need to protect your plants from frost and freezing temperatures.
You can use row covers, cold frames, or greenhouses to protect your Swiss chard plants during the winter. You can also move your containers indoors to a sunny location. Water your plants less frequently during the winter, as they will not be growing as actively.
How can I encourage my Swiss chard plants to produce more leaves?
To encourage your Swiss chard plants to produce more leaves, make sure they are receiving adequate sunlight, water, and nutrients. Fertilize your plants regularly with a balanced fertilizer or compost tea. Remove any yellowing or damaged leaves to encourage new growth. Harvest the outer leaves regularly to stimulate the production of new leaves. You can also pinch off the flower stalks to prevent the plants from bolting (going to seed), which will prolong the harvest period.

Leave a Comment