
Grow Choi Sum at Home: Imagine stepping into your backyard and harvesting fresh, vibrant Choi Sum for your dinner, bursting with flavor and nutrients. Sounds dreamy, right? Well, it doesn’t have to be just a dream! This DIY guide will unlock the secrets to cultivating this delicious and nutritious leafy green right in your own garden, no matter how small your space might be.
Choi Sum, also known as Chinese Flowering Cabbage, has been a staple in Asian cuisine for centuries. Its tender stalks and delicate leaves have graced countless family tables, bringing a touch of freshness and vitality to every meal. Beyond its culinary appeal, growing your own Choi Sum connects you to a rich cultural heritage and a tradition of sustainable living.
Why should you embark on this home gardening adventure? In today’s world, knowing where your food comes from is more important than ever. By learning to grow Choi Sum at home, you’re not only ensuring a supply of fresh, organic produce, but you’re also reducing your carbon footprint and saving money. Plus, there’s nothing quite like the satisfaction of nurturing a plant from seed to table. So, grab your gardening gloves, and let’s get started on this exciting journey to cultivate your very own Choi Sum patch!
Growing Choi Sum at Home: Your DIY Guide for Crisp Greens
Hey garden friends! Are you excited to grow your own super-fresh Choi Sum right on your doorstep (or on your balcony!)? Choi Sum, also known as Chinese flowering cabbage, is not only incredibly delicious but also super easy to grow – even if you don’t have a green thumb! I’ll show you how it’s done. I promise, it’s easier than you think!
What You Need for Your Choi Sum Garden
Before we get started, here’s a list of everything you’ll need. Don’t worry, you probably have most of these things at home already!
- Choi Sum seeds: You can get these at a garden center or online. Look for fresh seeds for a better germination rate.
- Seed starting pots or trays: To get started. Small pots or trays with drainage holes are perfect.
- Seed starting mix: Special soil for starting seeds is low in nutrients and loose, ideal for young seedlings.
- Planters (optional): If you don’t want to plant the Choi Sum directly into a garden bed, you’ll need larger pots or containers.
- Garden soil or vegetable soil: For the planters or the garden bed.
- Watering can or spray bottle: For watering.
- Trowel: For repotting and planting.
- Fertilizer (optional): An organic liquid fertilizer can promote growth.
- A sunny spot: Choi Sum loves the sun!
- Patience: The most important thing!
Phase 1: Starting Seeds – How to Get Your Seeds to Germinate
Starting the seeds is the first step and actually quite easy. We’ll start the little seedlings indoors to give them a good head start.
- Prepare the seed starting pots: Fill your seed starting pots or trays with seed starting mix. Press the soil down lightly.
- Sow the seeds: Distribute the Choi Sum seeds evenly on the soil. Make sure they are not too close together. A few seeds per pot are plenty.
- Cover the seeds: Cover the seeds with a thin layer of seed starting mix (about 0.5 cm).
- Watering: Gently moisten the soil with a spray bottle or watering can. The soil should be damp, but not wet.
- Location: Place the seed starting pots in a bright, warm place. A windowsill is ideal.
- Moisture: Keep the soil moist by spraying it regularly. Avoid waterlogging.
- Patience: Now it’s time to wait! The seeds usually germinate within 5-10 days.
Phase 2: Pricking Out – Giving the Seedlings More Space
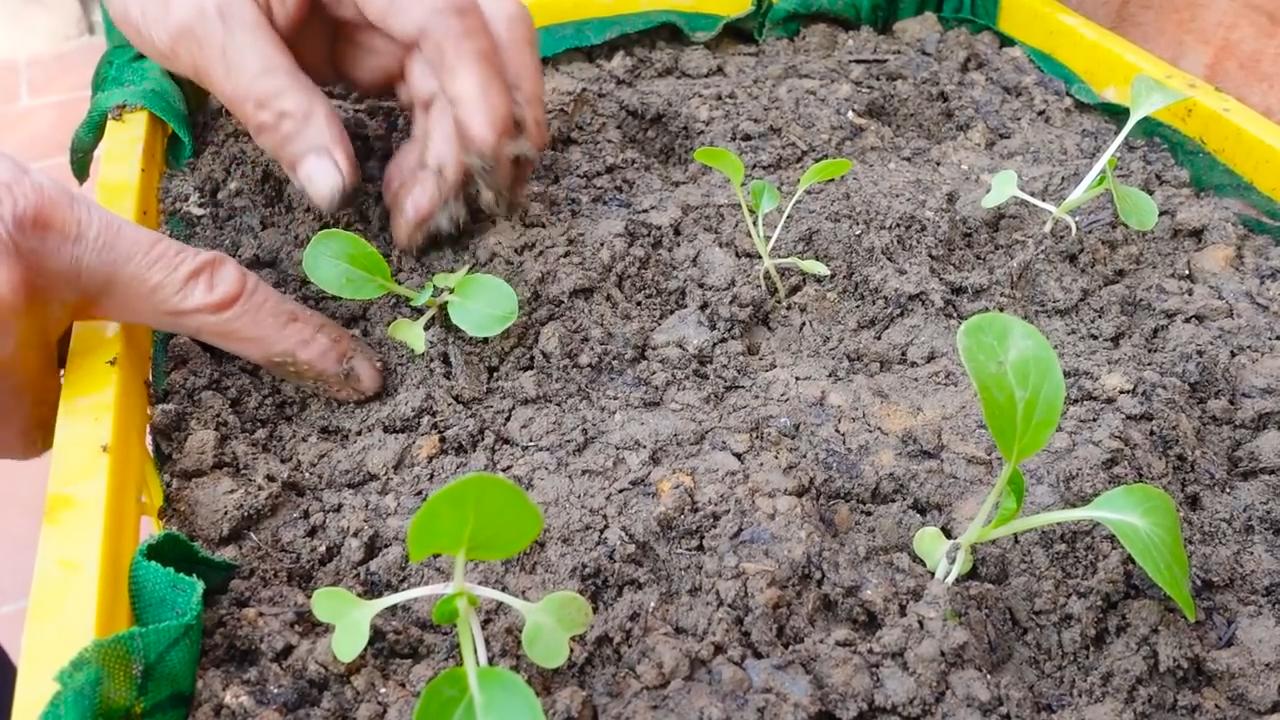
Once the little seedlings have developed their first true leaves (besides the seed leaves), it’s time to prick them out. This means we’re giving them more space to grow.
- Preparation: Fill small pots (about 8-10 cm in diameter) with vegetable or garden soil.
- Lifting the seedlings: Carefully loosen the seedlings from the seed tray with a trowel or a dibber. Be careful not to damage the roots.
- Placing the seedlings: Make a small hole in the soil of the new pot and place the seedling inside. The roots should be well covered.
- Pressing the soil: Gently press the soil around the seedling.
- Watering: Water the seedlings gently.
- Location: Place the pricked-out seedlings in a bright, but not too sunny, spot.
Phase 3: Planting Out – Into the Bed or Pot!
After the seedlings have grown a bit larger (about 10-15 cm high), they can be moved into the garden bed or larger pots.
- Preparing the bed or pots: Loosen the soil in the bed and remove weeds. Fill the pots with vegetable or garden soil.
- Hardening off the seedlings: Before you plant the seedlings out, you should acclimate them to the outdoor conditions for a few days. Place them outside during the day and bring them back in at night.
- Planting out: Make a hole in the soil that is large enough for the root ball. Place the seedling in it and press the soil down lightly.
- Planting distance: Maintain a planting distance of about 20-30 cm.
- Watering: Water the seedlings thoroughly after planting.
Phase 4: Care – How to Keep Your Choi Sum Happy and Healthy
Choi Sum is relatively low-maintenance, but there are a few things you should keep in mind for it to grow well.
- Watering: Choi Sum needs regular water, especially in dry weather. The soil should always be slightly moist. Avoid waterlogging.
- Fertilizing: Fertilize the plants every few weeks with an organic liquid fertilizer. This promotes growth and the harvest.
- Weed control: Regularly remove weeds so they don’t take nutrients away from the Choi Sum.
- Pest protection: Watch out for pests like slugs or aphids. If necessary, you can use organic pesticides.
- Sunshine: Choi Sum loves sun, but it can also tolerate some shade in the scorching midday sun.
Phase 5: Harvest – The Reward for Your Effort!
After about 4-6 weeks, you can harvest your homegrown Choi Sum!
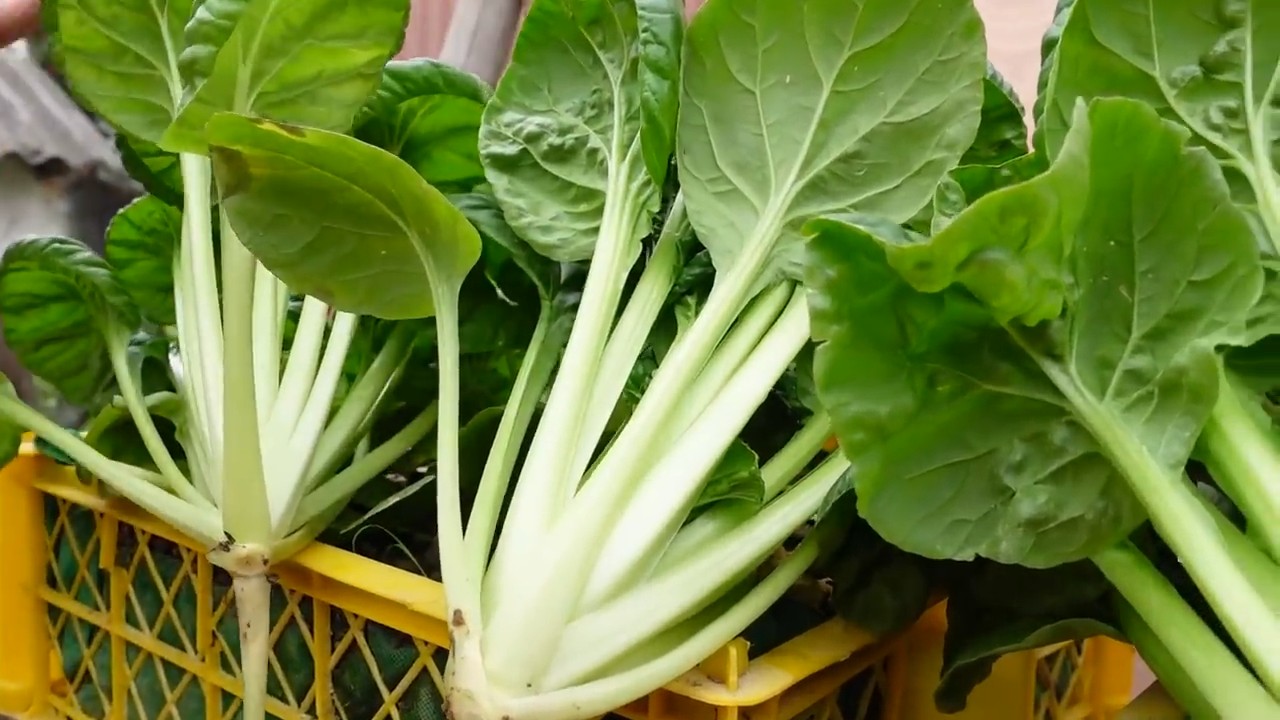
- Harvest time: Harvest the Choi Sum when the stems and leaves are still young and tender.
- Harvesting method: Cut the stems with a sharp knife or scissors just above the ground.
- Multiple harvests: If you only harvest the outer leaves, the Choi Sum can continue to grow, and you can harvest multiple times.
- Use: Choi Sum is versatile. It tastes delicious in salads, soups, stir-fries, or simply steamed as a side dish.
Tips and Tricks for the Perfect Choi Sum
- Direct sowing: If the weather is warm enough, you can also sow Choi Sum directly into the garden bed.
- Succession sowing: Sow new seeds every few weeks to ensure a continuous harvest.
- Prevent bolting: When Choi Sum flowers (bolts), the leaves become bitter. To prevent this, you should harvest regularly.
- Variety: There are different varieties of Choi Sum. Try different ones to find your favorite.
- Slug protection: Slugs love Choi Sum! Protect your plants with slug pellets or slug fences.
Common Problems and Solutions
- Yellow leaves: Can indicate a nutrient deficiency or too much water. Fertilize the plants and ensure good drainage.
- Aphids: Combat aphids with a water-detergent mixture or with beneficial insects like ladybugs.
- Slug damage: Protect your plants with slug pellets or slug fences.
I hope this guide helps you to successfully grow your own Choi Sum. It’s truly a great feeling to harvest fresh vegetables from your own garden! Happy gardening
Conclusion
So, there you have it! Growing your own Choi Sum at home is not only achievable, but it’s also incredibly rewarding. Forget those wilted, overpriced bunches at the supermarket. Imagine stepping into your garden or onto your balcony and harvesting fresh, vibrant Choi Sum whenever you need it. The taste difference alone is enough to convince anyone to give it a try. The satisfaction of nurturing a plant from seed to table is an added bonus.
This DIY trick for growing Choi Sum is a must-try for several reasons. Firstly, it’s cost-effective. A packet of seeds is far cheaper than repeatedly buying Choi Sum from the store. Secondly, you have complete control over the growing process. You can choose organic methods, ensuring that your Choi Sum is free from harmful pesticides and chemicals. Thirdly, it’s incredibly convenient. Fresh Choi Sum is always at your fingertips, ready to be stir-fried, steamed, or added to your favorite dishes.
But the benefits don’t stop there. Growing your own food, even something as simple as Choi Sum, connects you to nature and provides a sense of accomplishment. It’s a fantastic way to de-stress and unwind after a long day. Plus, it’s a great learning experience for kids, teaching them about where their food comes from and the importance of sustainable living.
Looking for variations? Consider experimenting with different varieties of Choi Sum. Some are more heat-tolerant than others, while some have slightly different flavors and textures. You can also try growing Choi Sum in containers of different sizes to see what works best for your space. If you have limited space, consider vertical gardening techniques to maximize your yield. Companion planting is another great way to enhance the growth of your Choi Sum. Planting herbs like basil or mint nearby can help deter pests and attract beneficial insects.
Don’t be intimidated if you’ve never grown anything before. Choi Sum is a relatively easy vegetable to cultivate, making it perfect for beginners. With a little bit of care and attention, you’ll be harvesting your own delicious Choi Sum in no time.
We wholeheartedly encourage you to try this DIY trick for growing Choi Sum at home. It’s a simple, affordable, and rewarding way to enjoy fresh, healthy vegetables. Once you taste the difference between homegrown and store-bought Choi Sum, you’ll never go back.
We’d love to hear about your experiences! Share your tips, tricks, and photos in the comments below. Let’s create a community of home gardeners and inspire others to grow their own food. What are you waiting for? Get planting!
Frequently Asked Questions (FAQ)
What is the best time of year to plant Choi Sum?
Choi Sum thrives in cooler weather, making spring and fall the ideal times to plant. Avoid planting during the hottest months of summer, as the heat can cause the plants to bolt (go to seed prematurely), resulting in a bitter taste. In warmer climates, you can plant Choi Sum in late summer for a fall harvest. In cooler climates, start seeds indoors a few weeks before the last expected frost and transplant them outdoors once the weather warms up.
How much sunlight does Choi Sum need?
Choi Sum requires at least 6 hours of sunlight per day to grow well. Choose a location in your garden or on your balcony that receives plenty of sunlight. If you’re growing Choi Sum indoors, use grow lights to supplement natural sunlight. Insufficient sunlight can lead to leggy growth and reduced yields.
What type of soil is best for growing Choi Sum?
Choi Sum prefers well-drained, fertile soil with a pH of 6.0 to 7.5. Amend your soil with compost or other organic matter to improve drainage and fertility. Avoid heavy clay soils, as they can become waterlogged and inhibit root growth. If you’re growing Choi Sum in containers, use a high-quality potting mix.
How often should I water Choi Sum?
Choi Sum needs consistent moisture to thrive. Water regularly, especially during dry periods. Aim to keep the soil consistently moist but not waterlogged. Check the soil moisture level regularly by sticking your finger into the soil. If the top inch of soil feels dry, it’s time to water. Avoid overhead watering, as it can promote fungal diseases.
How do I fertilize Choi Sum?
Choi Sum is a heavy feeder and benefits from regular fertilization. Use a balanced fertilizer or a fertilizer specifically formulated for leafy greens. Apply fertilizer according to the package directions. You can also side-dress your Choi Sum plants with compost or other organic matter. Avoid over-fertilizing, as it can lead to excessive foliage growth and reduced yields.
What are some common pests and diseases that affect Choi Sum?
Common pests that affect Choi Sum include aphids, cabbage worms, and flea beetles. You can control these pests by handpicking them off the plants, using insecticidal soap, or applying Bacillus thuringiensis (Bt). Common diseases that affect Choi Sum include downy mildew and clubroot. Prevent these diseases by providing good air circulation, avoiding overhead watering, and practicing crop rotation.
When is the best time to harvest Choi Sum?
Harvest Choi Sum when the plants are young and tender, typically about 4-6 weeks after planting. You can harvest the entire plant at once or harvest individual leaves as needed. To harvest the entire plant, cut it off at the base of the stem. To harvest individual leaves, snip them off with scissors or pruning shears.
Can I grow Choi Sum in containers?
Yes, Choi Sum grows well in containers. Choose a container that is at least 6 inches deep and wide. Use a high-quality potting mix and provide adequate drainage. Water and fertilize regularly. Container-grown Choi Sum may need to be watered more frequently than plants grown in the ground.
How do I prevent Choi Sum from bolting?
Bolting is when a plant prematurely flowers and goes to seed. To prevent Choi Sum from bolting, plant it in cooler weather, provide adequate shade during hot weather, and water regularly. Avoid stressing the plants by providing consistent care.
Can I save seeds from my Choi Sum plants?
Yes, you can save seeds from your Choi Sum plants, but it’s important to note that they may not come true to type. This means that the plants grown from the saved seeds may not be identical to the parent plant. To save seeds, allow a few plants to bolt and flower. Once the seed pods are dry and brown, harvest them and extract the seeds. Store the seeds in a cool, dry place.

Leave a Comment