
Grow Napa Cabbage Backyard: Imagine stepping into your backyard and harvesting crisp, delicious Napa cabbage, ready for your favorite Asian-inspired dishes. Sounds dreamy, right? Well, it doesn’t have to be just a dream! This DIY guide will unlock the secrets to successfully cultivating this versatile vegetable right in your own backyard.
Napa cabbage, also known as Chinese cabbage, has a rich history deeply rooted in Asian cuisine. For centuries, it’s been a staple ingredient, prized for its mild flavor and crunchy texture. From kimchi in Korea to stir-fries in China, Napa cabbage has nourished generations. But you don’t need to travel to Asia to enjoy its goodness; you can bring that culinary heritage to your own table.
Why should you bother learning how to grow Napa Cabbage Backyard? Because fresh, homegrown produce tastes infinitely better than anything you can buy at the store! Plus, you’ll know exactly what went into growing it – no harmful pesticides or mystery ingredients. In this article, I’ll share simple, effective DIY tricks and hacks that will help you overcome common challenges and enjoy a bountiful harvest. Whether you’re a seasoned gardener or a complete beginner, I’m here to guide you every step of the way. Let’s get our hands dirty and start growing!
Growing Napa Cabbage in Your Own Garden: A Step-by-Step Guide
Hey garden friends! Have you ever thought about growing Napa cabbage (also called Chinese cabbage) yourself? It’s easier than you think, and the fresh, crisp taste is simply unbeatable, especially in salads or Asian dishes. I’ll show you how to easily do it in your own garden. Let’s get started!
What You Need for Growing Napa Cabbage
Before we begin, here is a list of everything you’ll need:
- Napa Cabbage Seeds: Look for a high-quality variety suitable for your climate zone.
- Seed-Starting Mix: For starting indoors.
- Seed Trays or Seed-Starting Pots: Small pots or a seed tray.
- Garden Soil: Well-draining, nutrient-rich soil for the garden bed.
- Compost or Organic Fertilizer: To enrich the soil.
- Watering Can or Garden Hose: For irrigation.
- Gardening Tools: Spade, rake, trowel.
- Protective Netting (optional): Against pests like cabbage whites.
- Slug Pellets (optional): If you have problems with slugs.
The Best Time to Sow
The timing of sowing is crucial for a successful harvest. Napa cabbage doesn’t like it too hot, so sowing in spring or late summer is ideal.
- Spring Sowing: Start indoors about 6-8 weeks before the last expected frost.
- Late Summer Sowing: Sow directly into the garden bed about 8-10 weeks before the first frost.
Sowing and Starting Indoors (Optional)
If you want to grow in the spring, I recommend starting the seeds indoors. This gives you a head start, and you can plant the seedlings out into the bed later.
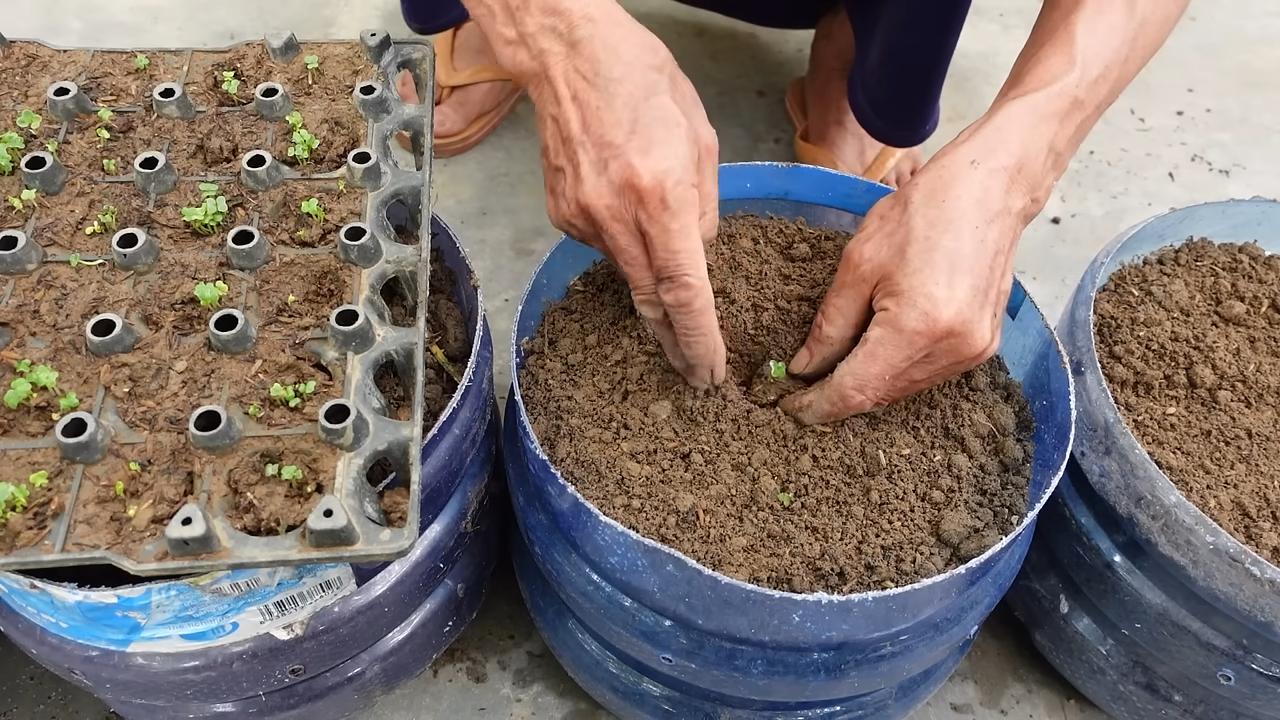
- Prepare Seed Trays: Fill your seed-starting pots or seed tray with seed-starting mix.
- Sow Seeds: Place 2-3 seeds per pot or in the seed tray. Cover the seeds lightly with soil (about 0.5 cm).
- Water: Gently water the soil so it is moist but not wet.
- Keep Warm: Place the seed trays in a warm, bright place (e.g., a windowsill). The ideal germination temperature is 18-22°C.
- Keep Moist: Keep the soil evenly moist, but avoid waterlogging.
- Thinning (Pricking Out): Once the seedlings have 2-3 true leaves, you can thin them. This means you separate the plants so that each one has enough space. Transplant the strongest seedlings into separate pots.
Preparing the Garden Bed
Napa cabbage needs a sunny location and well-prepared soil.
- Choose a Location: Find a sunny spot in the garden where the Napa cabbage will get at least 6 hours of sun per day.
- Prepare the Soil: Loosen the soil thoroughly and remove weeds and stones.
- Enrich the Soil: Mix compost or organic fertilizer into the soil to enrich it with nutrients. Napa cabbage is a heavy feeder and needs a lot of nutrients.
- Level the Soil: Rake the soil smooth to create an even surface.
Planting Out Seedlings or Direct Sowing in the Bed
Now comes the exciting part: planting out the seedlings or direct sowing in the garden bed.
Planting Out Seedlings (after starting indoors)
- Hardening Off: Before you plant the seedlings in the bed, you should harden them off. This means you gradually acclimate them to outdoor conditions. Place the pots outside for a few hours during the day and bring them back in at night. Increase the time outdoors each day until the plants can spend a whole week outside.
- Dig Planting Holes: Dig planting holes about 30-40 cm apart.
- Plant Seedlings: Carefully remove the seedlings from the pots and place them in the planting holes. Be careful not to damage the root ball.
- Water: Water the plants thoroughly.
Direct Sowing in the Bed (Late Summer)
- Make Seed Furrows: Use a rake or a stick to make seed furrows about 30-40 cm apart.
- Sow Seeds: Place the seeds in the furrows and cover them lightly with soil (about 0.5 cm).
- Water: Gently water the soil.
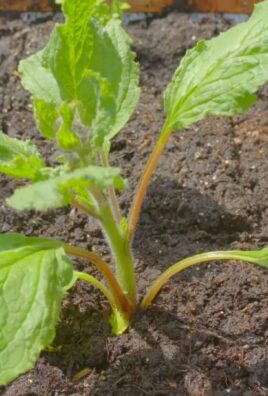
- Thinning: Once the seedlings have emerged and have 2-3 true leaves, you need to thin them. Leave only the strongest plants and remove the others.
Caring for Napa Cabbage
Proper care is crucial for a bountiful harvest.
- Watering: Water Napa cabbage regularly, especially during dry periods. The soil should always be moist but not wet.
- Weeding: Keep the bed weed-free so the Napa cabbage has enough nutrients and light.
- Fertilizing: Fertilize Napa cabbage regularly with organic fertilizer or compost. An additional application of a nitrogen-rich fertilizer can promote growth.
- Pest Control: Napa cabbage is susceptible to pests like cabbage whites, flea beetles, and slugs.
- Cabbage Whites: A protective net can prevent the butterflies from laying their eggs on the plants.
- Flea Beetles: Regular watering and a layer of mulch can help reduce infestation.
- Slugs: Slug pellets or setting up beer traps can help control the slug population.
Harvesting Napa Cabbage
The harvest time depends on the variety and the time of sowing. Generally, you can harvest Napa cabbage about 8-10 weeks after sowing.
- Recognizing Ripeness: The Napa cabbage is ripe when the head is firm and closed.
- Harvesting: Cut the head with a sharp knife just above the ground.
- Storage: Napa cabbage can be stored in the refrigerator for several days.
Common Problems and Solutions
Problems can also occur when growing Napa cabbage. Here are some common problems and how you can solve them:
- Failure to Form Heads: The cause can be a lack of nutrients or too little sun. Fertilize the soil and ensure the Napa cabbage gets enough sun.
- Pests: As already mentioned, Napa cabbage is susceptible to pests. Check the plants regularly and take action if necessary.
- Diseases: Napa cabbage can be affected by various diseases, such as clubroot or downy mildew. Practice good crop rotation and remove affected plants immediately.
Additional Tips for Successful Cultivation
Variety Selection: Choose a variety that is suitable for your climate zone.
Practice Crop Rotation: Do not grow Napa cabbage in the same location every year to prevent diseases and pests.
Mulching: A layer of mulch made of straw or grass clippings can help keep the soil moist and suppress weeds.
Conclusion
So, there you have it! Growing Napa cabbage in your own backyard isn’t just a whimsical gardening dream; it’s a tangible reality that can bring fresh, crisp, and delicious flavors right to your table. We’ve walked through the essential steps, from selecting the right seeds to warding off common pests, and hopefully, you’re feeling empowered to embark on this rewarding journey.
Why is this DIY trick a must-try? Because store-bought Napa cabbage simply can’t compare to the vibrant taste and satisfying crunch of homegrown. You control the growing environment, ensuring the absence of harmful pesticides and herbicides. Plus, there’s an undeniable sense of accomplishment that comes with nurturing a plant from seed to harvest. Imagine the pride you’ll feel serving a salad featuring Napa cabbage you cultivated yourself!
But the benefits extend beyond just taste and satisfaction. Growing your own food is a sustainable practice that reduces your carbon footprint and connects you more deeply to the natural world. It’s a fantastic way to get some exercise, relieve stress, and learn new skills. And let’s not forget the cost savings! Over time, growing your own Napa cabbage can significantly reduce your grocery bill.
Looking for variations? Consider these ideas to personalize your Napa cabbage growing experience:
* Succession Planting: Plant seeds every few weeks to ensure a continuous harvest throughout the growing season.
* Companion Planting: Plant Napa cabbage alongside beneficial herbs like dill or chamomile to attract pollinators and deter pests.
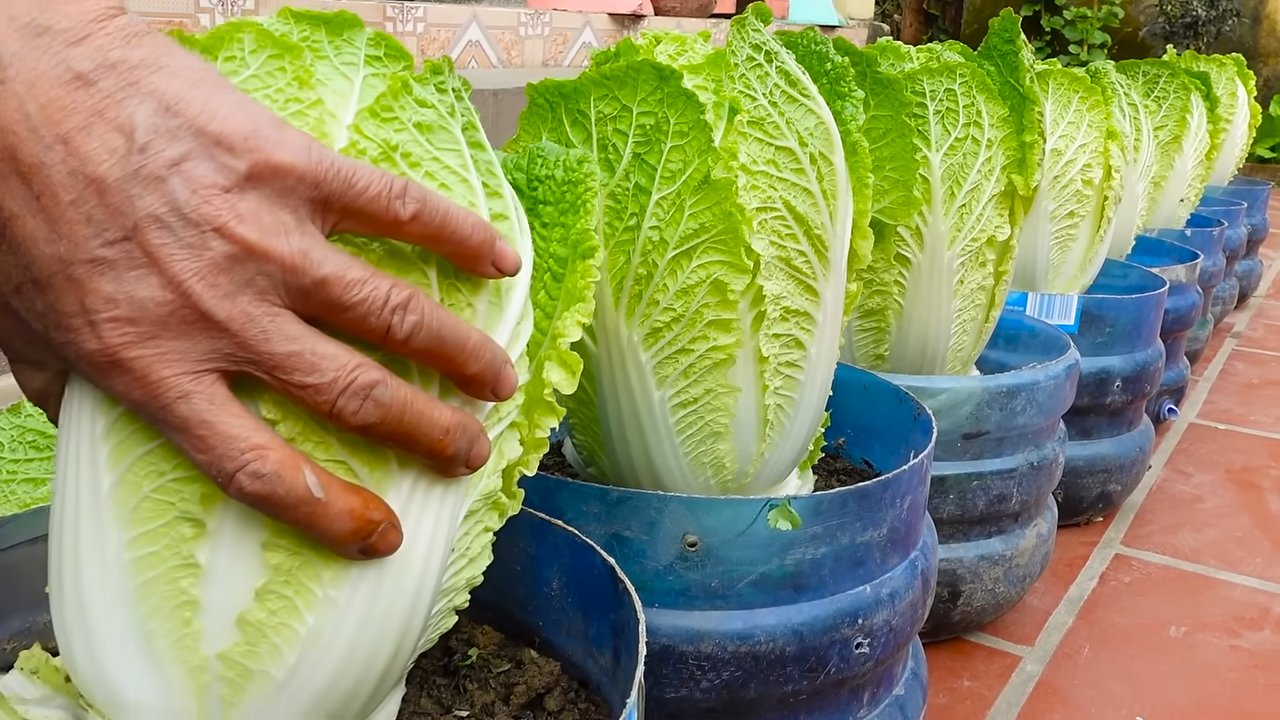
* Container Gardening: If you have limited space, Napa cabbage can thrive in large containers, making it accessible to apartment dwellers and those with small yards.
* Different Varieties: Experiment with different varieties of Napa cabbage to discover your favorite flavor and texture. Some popular choices include ‘Blues’, ‘Optiko’, and ‘Wong Bok’.
We wholeheartedly encourage you to give this DIY trick a try. Don’t be intimidated if you’re a beginner gardener; Napa cabbage is relatively easy to grow, and the rewards are well worth the effort. Start small, be patient, and don’t be afraid to experiment.
And most importantly, we want to hear about your experience! Share your photos, tips, and challenges in the comments below. Let’s create a community of Napa cabbage enthusiasts and learn from each other. Together, we can cultivate a greener, healthier, and more delicious world, one Napa cabbage at a time. So, grab your seeds, get your hands dirty, and start growing your own delicious Napa cabbage today!
Frequently Asked Questions (FAQ)
1. What is the best time of year to plant Napa cabbage?
Napa cabbage is a cool-season crop, meaning it thrives in cooler temperatures and shorter days. The ideal time to plant Napa cabbage is either in the early spring (as soon as the ground can be worked) or in the late summer for a fall harvest. Avoid planting during the hottest months of summer, as the heat can cause the plants to bolt (go to seed prematurely), resulting in bitter-tasting leaves. For spring planting, start seeds indoors 4-6 weeks before the last expected frost. For fall planting, sow seeds directly into the garden in late July or early August, depending on your region’s climate.
2. How much sunlight does Napa cabbage need?
Napa cabbage requires at least 6 hours of direct sunlight per day to thrive. Choose a planting location that receives ample sunlight throughout the day. If you live in a particularly hot climate, providing some afternoon shade can help prevent the plants from bolting.
3. What kind of soil is best for growing Napa cabbage?
Napa cabbage prefers well-drained, fertile soil that is rich in organic matter. Amend your soil with compost or well-rotted manure before planting to improve its fertility and drainage. The ideal soil pH for Napa cabbage is between 6.0 and 7.5. You can test your soil pH using a soil testing kit available at most garden centers.
4. How often should I water Napa cabbage?
Napa cabbage needs consistent moisture to grow properly. Water deeply and regularly, especially during dry periods. Aim to keep the soil consistently moist but not waterlogged. Mulching around the plants can help retain moisture and suppress weeds. A good rule of thumb is to water when the top inch of soil feels dry to the touch.
5. What are some common pests and diseases that affect Napa cabbage, and how can I control them?
Napa cabbage is susceptible to several common pests and diseases, including cabbage worms, aphids, flea beetles, and clubroot.
* Cabbage Worms: These green caterpillars can quickly devour the leaves of your Napa cabbage plants. Handpick them off the plants or use Bacillus thuringiensis (Bt), a natural insecticide, to control them.
* Aphids: These small, sap-sucking insects can weaken your plants and transmit diseases. Spray them off with a strong stream of water or use insecticidal soap.
* Flea Beetles: These tiny beetles can create small holes in the leaves of your Napa cabbage plants. Cover your plants with row covers to prevent flea beetles from reaching them.
* Clubroot: This soilborne disease causes swollen, distorted roots and can stunt the growth of your plants. Prevent clubroot by practicing crop rotation and maintaining a soil pH above 7.0.
6. How do I harvest Napa cabbage?
Napa cabbage is ready to harvest when the heads are firm and compact. The exact time to harvest will depend on the variety and growing conditions, but generally, it takes about 70-80 days from planting to harvest. To harvest, simply cut the head off at the base with a sharp knife.
7. How do I store Napa cabbage?
Napa cabbage can be stored in the refrigerator for several weeks. Wrap the head in a plastic bag or store it in a crisper drawer. You can also ferment Napa cabbage to make kimchi, a traditional Korean side dish.
8. Can I grow Napa cabbage in containers?
Yes, Napa cabbage can be grown in containers, making it a great option for those with limited space. Choose a large container (at least 12 inches in diameter) with drainage holes. Use a well-draining potting mix and water regularly.
9. Is Napa cabbage a good source of nutrients?
Yes, Napa cabbage is a nutritious vegetable that is low in calories and high in vitamins and minerals. It is a good source of vitamin C, vitamin K, folate, and potassium. It also contains antioxidants and fiber.
10. Can I eat the outer leaves of Napa cabbage?
Yes, the outer leaves of Napa cabbage are edible, but they may be tougher and more fibrous than the inner leaves. You can use them in soups, stews, or stir-fries. Be sure to wash them thoroughly before using.
Leave a Comment