
Growing corn on concrete? Sounds impossible, right? I know, I thought so too! But what if I told you that with a few clever tricks and a dash of DIY ingenuity, you could actually harvest delicious corn, even without a traditional garden plot? Forget sprawling acres; we’re talking about bringing the farm to your patio, balcony, or even your driveway!
For centuries, corn has been a staple crop, deeply woven into the fabric of countless cultures. From ancient civilizations in Mesoamerica, where corn was revered as a sacred gift, to modern-day backyard barbecues, this versatile grain has nourished and connected people across generations. But what happens when space is limited, and the dream of fresh, homegrown corn seems out of reach?
That’s where this DIY guide comes in. In today’s world, many of us are living in urban environments with limited access to green spaces. We crave the taste of fresh, homegrown produce, but the lack of a traditional garden can feel like a major obstacle. This article will empower you to overcome that challenge and unlock the secrets to successfully growing corn on concrete. I’ll share simple, step-by-step instructions, insider tips, and proven hacks that will transform your concrete jungle into a thriving corn patch. Get ready to surprise yourself (and your neighbors!) with the bounty you can create, even in the most unexpected places.
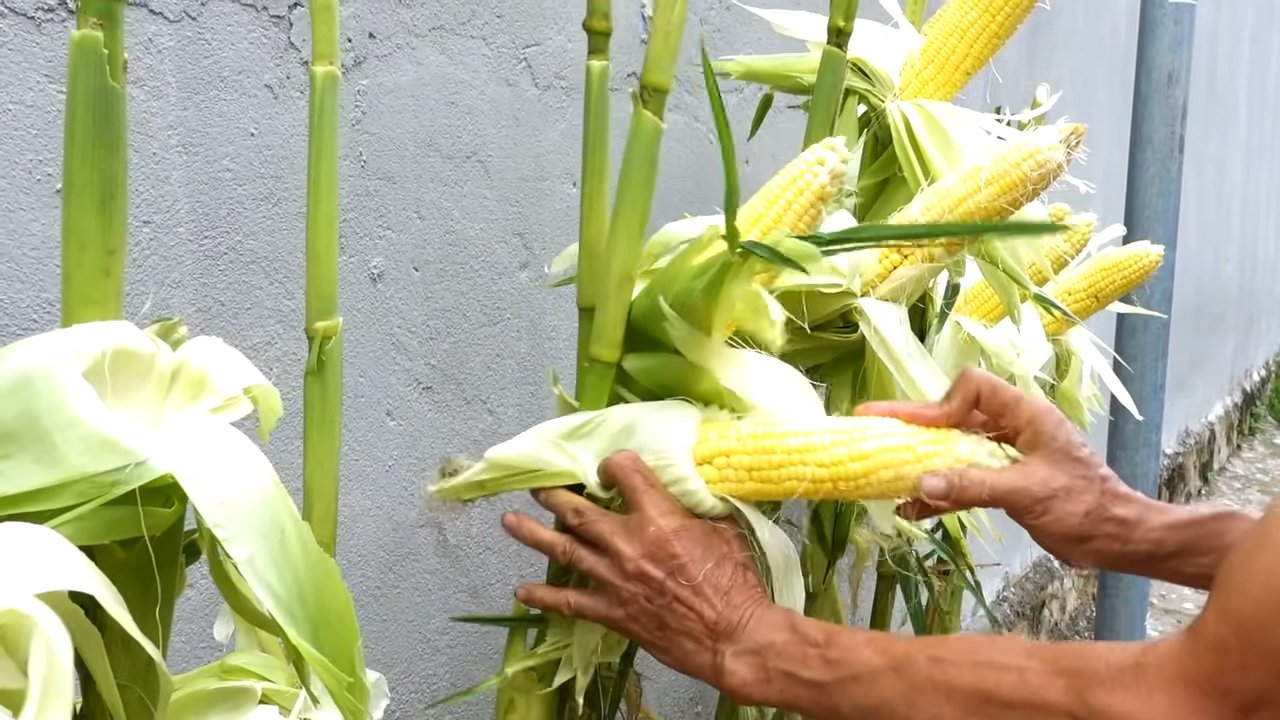
Growing corn on concrete is a fascinating project that, with the right preparation and care, can be surprisingly successful. While you won’t be harvesting vast fields of corn, you can definitely look forward to a few cobs of fresh, homegrown corn.
Proper Preparation is Crucial
Choosing the Right Container and Soil:
For growing corn in pots, selecting the right container is critical. It should have a volume of at least 40 liters (about 10 gallons) and be 50 cm (about 20 inches) deep per plant to provide enough space for the corn’s deep root system. Large builder’s buckets or repurposed rain barrels are well-suited for this. Drainage holes in the bottom are essential to prevent waterlogging. A drainage layer of gravel or expanded clay at the bottom of the container further improves water runoff. Corn is a heavy feeder and therefore requires nutrient-rich, humus-rich, and well-draining soil. A mixture of garden soil, compost, and a little sand is ideal.
Finding the Right Corn Variety:
Not every corn variety is suitable for container gardening. Early-ripening varieties like ‘Golden Bantam’ or ‘Ashworth’ are often a good choice as they require less space and time. There are also special dwarf corn varieties that are well-suited for growing in small spaces. For balcony gardening, for example, varieties like ‘Jade Blue’ with blue cobs or ‘Luther Hill’ with white cobs are suitable. If you want to grow popcorn, varieties like ‘Bear Paw’ or the smaller ‘Strawberry’ corn are recommended.
From Sowing to Harvest
Sowing:
The optimal time for sowing outdoors is after the last frost, usually from mid-May, when the soil temperature is at least 15°C (60°F). To speed up germination, you can pre-soak the corn kernels in lukewarm water for 12 to 24 hours. Sow the kernels about 2-3 cm (1 inch) deep into the soil. It is advisable to sow 3-4 kernels per container and later remove the weakest seedlings, leaving only the strongest plant.
Care:
- Watering: Corn requires regular water, especially during flowering and cob development. It’s best to water in the morning or evening to minimize evaporation.
- Fertilizing: As a heavy feeder, corn needs plenty of nutrients. A first application of a slow-release fertilizer like horn shavings or compost should be done at planting time. During the growing season, you should fertilize every 2-3 weeks. Compost tea or nettle tea are also suitable for this.
- Mulching: A layer of mulch made from straw or grass clippings helps to retain moisture in the soil and suppresses weeds.
- Pollination: Corn is wind-pollinated. Since you’ll usually have only a few plants in a container, pollination can be problematic. To assist pollination, you can group the plants together and gently shake the male flower tassels (at the top) to distribute the pollen onto the female silks (the threads on the cobs).
- Staking: In windy locations, it is advisable to support the plants with stakes to prevent them from toppling over.
Harvesting:
The corn cobs are ready for harvest when the silks turn brown and dry and the cobs feel firm. Another test is the “milk stage”: if you puncture a kernel and a milky-white juice emerges, the corn is ripe.
Companion Planting in a Container: The Milpa Principle
An interesting cultivation method is the “Milpa” or “Three Sisters,” a traditional companion planting system of the Maya, consisting of corn, beans, and squash. This plant combination is also possible in a container. The corn serves as a trellis for the beans, the beans provide the soil with nitrogen, and the squash shades the ground, keeping it moist and suppressing weeds.
Common Problems and Solutions
Pests: In the home garden, corn is relatively less susceptible to pests. In case of an infestation with aphids or the corn borer, natural pesticides can be used.
Yellow Leaves: Can indicate a nutrient deficiency, usually nitrogen. Regular fertilizing helps here.
Poorly Filled Cobs: This is often a sign of inadequate pollination.

Conclusion
So, there you have it! Growing corn on concrete might sound like an impossible feat, but with this simple DIY trick, you can enjoy fresh, homegrown corn even without a traditional garden. This method isn’t just about defying expectations; it’s about resourcefulness, sustainability, and maximizing your space. Think about it: no tilling, reduced weeding, and the ability to control the soil composition perfectly. It’s a game-changer for urban gardeners, apartment dwellers with balconies, or anyone facing challenging soil conditions.
This DIY approach to growing corn on concrete offers a unique opportunity to cultivate your own food source, connecting you to the natural world in a tangible way. The satisfaction of harvesting your own sweet corn, knowing you nurtured it from seed to cob, is truly unparalleled. Plus, it’s a fantastic conversation starter! Imagine the looks of amazement when you tell your friends you’re growing corn… on concrete!
But the benefits extend beyond personal satisfaction. By embracing this method, you’re also contributing to a more sustainable lifestyle. You’re reducing your reliance on commercially grown produce, minimizing transportation costs, and potentially reducing your carbon footprint. It’s a small step with a potentially significant impact.
Don’t be afraid to experiment with variations! Try different corn varieties to see which thrives best in your concrete garden. Consider adding companion plants like beans or squash to create a mini-ecosystem within your containers. You can also adjust the soil mix to suit your specific needs and preferences. For example, if you live in a particularly hot climate, you might want to add more water-retentive materials like vermiculite or coconut coir to your soil mix.
This DIY trick for growing corn on concrete is a must-try for anyone looking to expand their gardening horizons and enjoy the taste of homegrown goodness. It’s a rewarding, sustainable, and surprisingly simple way to bring the bounty of the harvest to even the most unconventional spaces.
We encourage you to give it a try! Document your journey, share your successes (and even your challenges!), and let’s build a community of concrete corn growers. Share your photos and tips on social media using #ConcreteCorn and let us know how it goes. We’re eager to see your innovative approaches and learn from your experiences. Happy growing!
Frequently Asked Questions (FAQ)
What type of corn is best suited for growing on concrete?
While many corn varieties can be grown in containers, smaller, faster-maturing varieties tend to perform best. Look for “early” or “short-season” sweet corn varieties. These varieties typically require less space and time to mature, making them ideal for container gardening. Some popular choices include ‘Early Sunglow,’ ‘Sugar Baby,’ and ‘Honey Select.’ Dent corn can also be grown, but requires larger containers and more support. Experiment to see what works best in your specific climate and growing conditions. Remember to check the seed packet for specific recommendations regarding spacing and growing requirements.
How large of a container do I need for each corn plant?
Corn plants need adequate space for their roots to develop. A general rule of thumb is to provide at least 12 inches of diameter and depth per plant. However, larger containers are always better, especially if you’re growing multiple plants together. A large trough or raised bed on concrete is an excellent option. Aim for a container that holds at least 10-15 gallons of soil per plant. This will provide sufficient space for the roots to spread and access nutrients. Ensure the container has drainage holes to prevent waterlogging.
What type of soil should I use for growing corn in containers?
Corn requires well-draining, nutrient-rich soil. A good potting mix is essential. Avoid using garden soil, as it can become compacted in containers and hinder drainage. A mix of equal parts potting soil, compost, and perlite or vermiculite is a good starting point. The compost provides essential nutrients, while the perlite or vermiculite improves drainage and aeration. You can also add a slow-release fertilizer to the soil mix to provide a steady supply of nutrients throughout the growing season. Consider testing your soil pH to ensure it’s within the optimal range for corn (6.0-6.8).
How often should I water corn grown in containers?
Corn is a thirsty plant, especially during hot weather. Water deeply and regularly, ensuring the soil remains consistently moist but not waterlogged. Check the soil moisture level daily, and water when the top inch feels dry to the touch. Container-grown plants tend to dry out more quickly than those grown in the ground, so you may need to water them more frequently, especially during the peak growing season. Consider using a soaker hose or drip irrigation system to provide a consistent and efficient water supply. Mulching around the base of the plants can also help retain moisture.
How much sunlight does corn need to grow?
Corn requires at least 6-8 hours of direct sunlight per day to thrive. Choose a location on your concrete surface that receives ample sunlight throughout the day. If you’re growing corn on a balcony or patio, make sure it’s not shaded by buildings or trees. Insufficient sunlight can result in stunted growth, poor pollination, and reduced yields. If you’re in a particularly hot climate, some afternoon shade may be beneficial to prevent the plants from overheating.
How do I pollinate corn grown in containers?
Corn is wind-pollinated, meaning the pollen from the tassels (male flowers) needs to reach the silks (female flowers) on the ears. In a container garden, natural wind pollination may be limited. You can assist the pollination process by gently shaking the corn stalks or using a small brush to transfer pollen from the tassels to the silks. Do this in the morning when the pollen is most active. You can also plant corn in blocks rather than rows to increase the chances of successful pollination.
What are some common pests and diseases that affect corn, and how can I prevent them?
Common pests that affect corn include corn earworms, aphids, and spider mites. Diseases include corn smut and leaf blight. To prevent these problems, inspect your plants regularly for signs of infestation or disease. Use organic pest control methods such as insecticidal soap or neem oil to control pests. Ensure good air circulation around the plants to prevent fungal diseases. Remove any infected leaves or plants promptly to prevent the spread of disease. Crop rotation (if possible) can also help reduce the risk of soilborne diseases.
Can I grow other vegetables alongside corn in containers?
Yes, companion planting can be beneficial for corn grown in containers. Good companion plants for corn include beans, squash, and cucumbers. Beans fix nitrogen in the soil, which benefits corn. Squash provides ground cover, which helps retain moisture and suppress weeds. Cucumbers can climb up the corn stalks, providing support and maximizing space. Avoid planting corn near tomatoes or brassicas (cabbage, broccoli, cauliflower), as they can compete for nutrients.
How long does it take for corn to mature when grown in containers?
The time it takes for corn to mature depends on the variety and growing conditions. Generally, sweet corn varieties take 60-90 days to mature. Check the seed packet for specific information on the maturity date of your chosen variety. Monitor the corn ears closely for signs of ripeness. The silks will turn brown and dry, and the kernels will be plump and milky when squeezed.
What do I do with the corn stalks after harvesting the ears?
After harvesting the corn ears, you can cut down the stalks and compost them. Corn stalks are a valuable source of organic matter and can be added to your compost pile to enrich your soil. Alternatively, you can chop up the stalks and use them as mulch around other plants.
Leave a Comment