
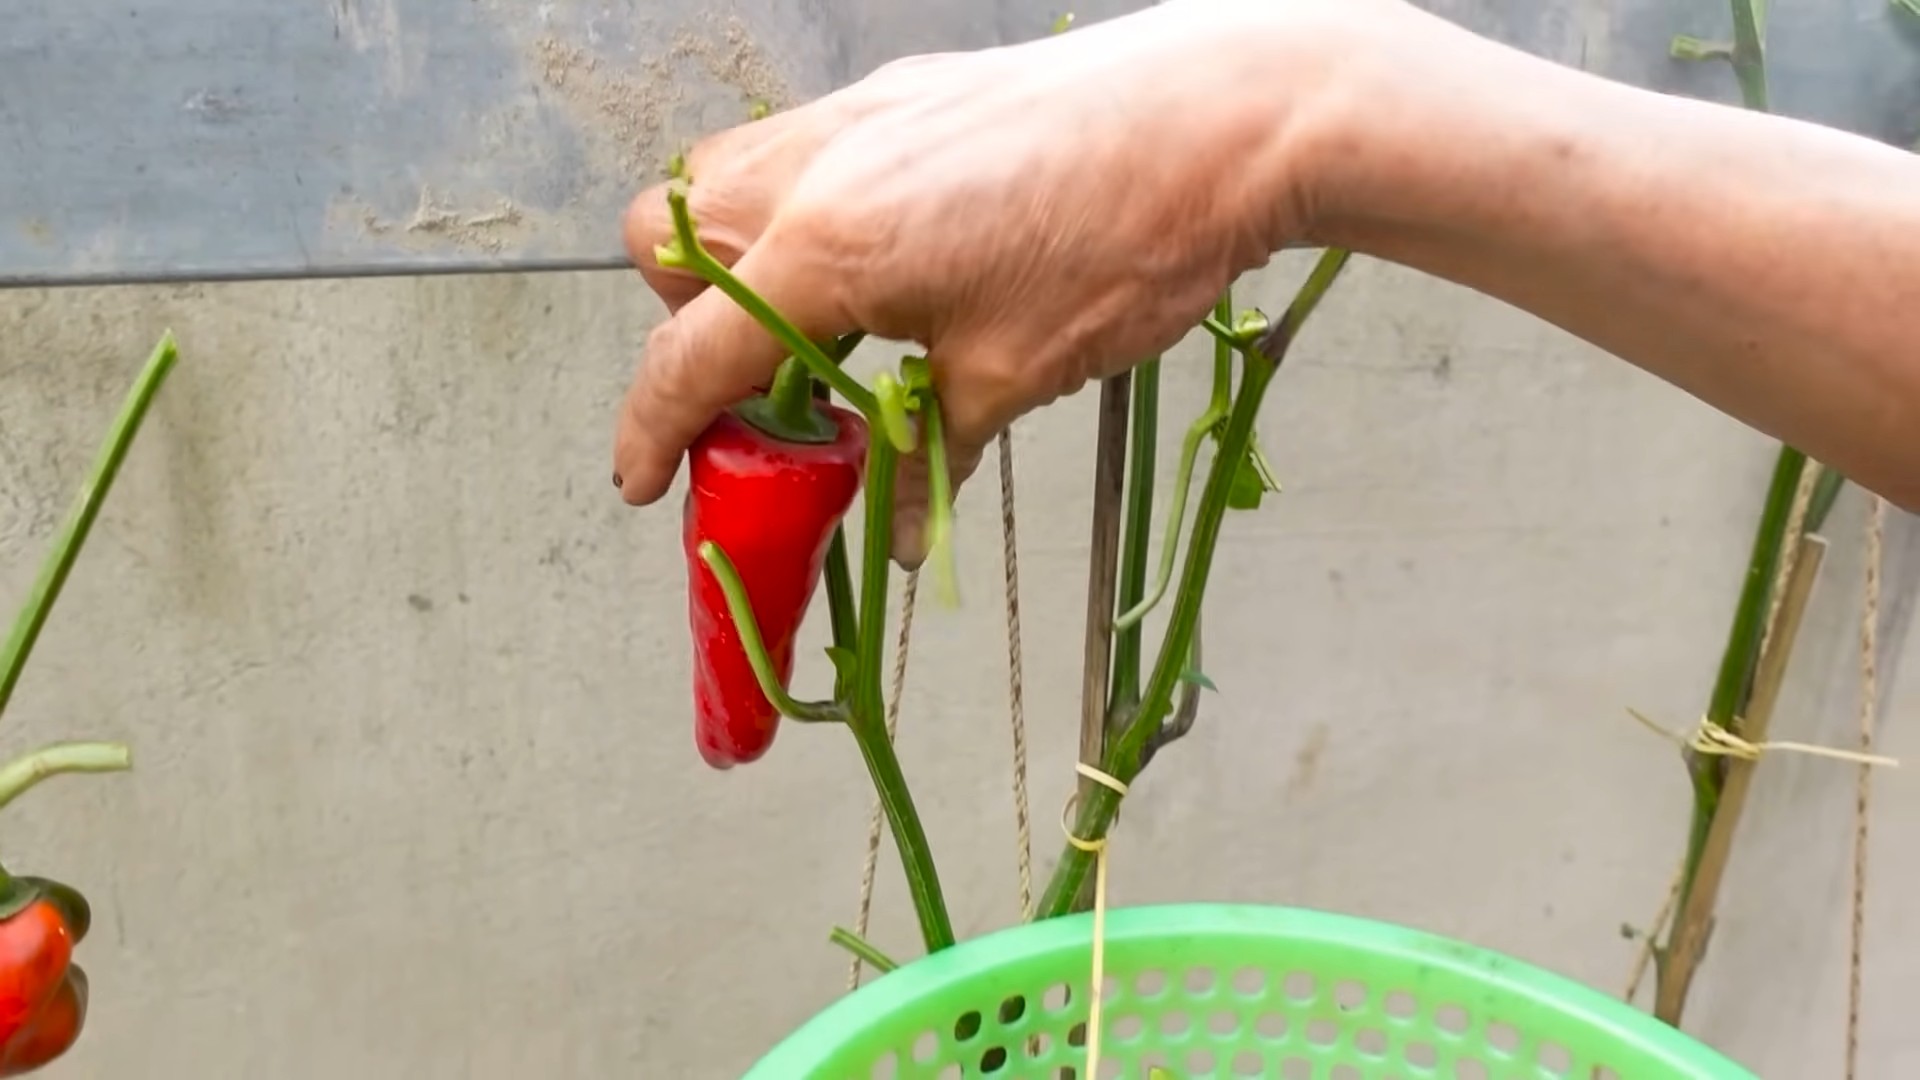
Growing Chili Peppers Anywhere might seem like a fiery dream reserved for seasoned gardeners, but I’m here to tell you it’s absolutely achievable, even if you’re a complete beginner with limited space! Forget those bland, store-bought peppers – imagine the satisfaction of plucking vibrant, spicy chilies straight from your own little garden, ready to add a kick to your favorite dishes.
Chili peppers have a rich history, dating back thousands of years to South America, where they were not only a culinary staple but also held significant cultural and medicinal value. From ancient rituals to modern-day cuisine, these fiery fruits have captivated palates and cultures worldwide. Now, you can bring a piece of that history into your own home.
Why should you learn these DIY tricks for growing chili peppers anywhere? Because let’s face it, fresh, flavorful chilies can be expensive and sometimes hard to find. Plus, there’s something incredibly rewarding about nurturing a plant from seed to harvest. Whether you have a sprawling backyard or just a sunny windowsill, I’m going to share some simple, effective techniques that will empower you to cultivate your own thriving chili pepper plants, no matter where you live. Get ready to spice up your life!
DIY Concrete Countertops: A Step-by-Step Guide
Hey there, fellow DIY enthusiasts! I’m so excited to share this project with you. I recently tackled creating my own concrete countertops, and let me tell you, it was a rewarding experience. Not only did I save a ton of money compared to buying pre-made ones, but I also got to customize them exactly to my liking. It might seem intimidating, but trust me, with a little patience and these instructions, you can totally do it!
Materials You’ll Need:
Before we dive in, let’s gather everything we need. This is crucial for a smooth process.
* Concrete Mix: I used a countertop-specific mix. It’s finer and designed to minimize cracking. You can find it at most home improvement stores. Calculate how much you need based on the dimensions of your countertops and the mix’s instructions. Always buy a little extra – better to have too much than not enough!
* Melamine Boards: These will form the mold for your countertops. I used ¾-inch thick melamine, which is sturdy and has a smooth surface that releases easily from the concrete.
* Screws: For assembling the melamine mold. I recommend using screws that are long enough to securely hold the melamine together but not so long that they poke through.
* Silicone Caulk: This is essential for sealing the seams of the mold to prevent concrete from leaking out. Choose a paintable silicone caulk.
* Reinforcement: I used wire mesh for reinforcement. This helps prevent cracking and adds strength to the countertops. You can also use rebar for thicker countertops.
* Concrete Sealer: This protects your countertops from stains and water damage. Choose a food-safe sealer if you’re using the countertops in your kitchen.
* Concrete Pigment (Optional): If you want to add color to your countertops, you’ll need concrete pigment. Follow the manufacturer’s instructions for adding the pigment to the mix.
* Mixing Tools: A concrete mixer (rent one if you don’t have one), buckets, a shovel, and a trowel.
* Safety Gear: Safety glasses, gloves, and a dust mask are a must! Concrete dust can be harmful, and you don’t want to get concrete on your skin.
* Measuring Tools: A tape measure, a level, and a square. Accuracy is key!
* Vibrating Tool (Optional but Recommended): A concrete vibrator helps remove air bubbles from the concrete, resulting in a smoother, stronger countertop. You can rent these as well.
* Grinder with Diamond Polishing Pads: For smoothing and polishing the concrete after it has cured. Start with a coarse grit and work your way up to a fine grit.
* Wax or Concrete Polish: To give your countertops a final shine and added protection.
Phase 1: Building the Mold
This is arguably the most important step. A well-built mold will result in a beautiful countertop. A poorly built mold… well, let’s just say you’ll be doing a lot of patching!
1. Measure and Cut the Melamine: Carefully measure the dimensions of your desired countertops. Remember to account for any overhangs or special shapes. Cut the melamine boards to size using a circular saw or table saw. Accuracy is crucial here! I always double-check my measurements before cutting.
2. Assemble the Mold: Screw the melamine boards together to form a box. Make sure the corners are square and the seams are tight. I like to use corner clamps to help hold the boards in place while I’m screwing them together.
3. Seal the Seams: Apply a generous bead of silicone caulk to all the seams of the mold, both inside and out. Smooth the caulk with your finger to create a watertight seal. This will prevent concrete from leaking out and creating unsightly blemishes on your countertops. Let the caulk dry completely before moving on.
4. Create Cutouts (If Necessary): If you need to create cutouts for sinks, faucets, or other fixtures, now is the time to do it. Use a jigsaw to cut the holes in the melamine. Make sure the cutouts are slightly larger than the actual fixtures to allow for some wiggle room. You can also use foam to create a void for sinks. Attach the foam securely to the base of the mold with silicone caulk.
5. Reinforce the Mold: For larger countertops, you may want to reinforce the mold with additional supports. You can use wood scraps or metal brackets to add extra strength to the mold. This will prevent the mold from bowing or warping under the weight of the concrete.
Phase 2: Mixing and Pouring the Concrete
Now for the fun part! But remember, safety first! Always wear your safety glasses, gloves, and dust mask.
1. Prepare the Concrete Mix: Follow the manufacturer’s instructions for mixing the concrete. I usually start by adding the water to the mixer, then gradually adding the concrete mix. Mix until the concrete is a smooth, consistent consistency. You want it to be wet enough to pour easily but not so wet that it’s runny. If you’re adding pigment, add it to the water before adding the concrete mix.
2. Pour the First Layer: Pour a layer of concrete into the mold, about halfway up. Use a trowel to spread the concrete evenly and to work it into all the corners and edges of the mold.
3. Add Reinforcement: Place the wire mesh or rebar into the concrete. Make sure the reinforcement is completely embedded in the concrete. You can use small pieces of concrete to hold the reinforcement in place.
4. Pour the Second Layer: Pour the remaining concrete into the mold, filling it to the top. Again, use a trowel to spread the concrete evenly and to work it into all the corners and edges of the mold.
5. Vibrate the Concrete: This is where the vibrating tool comes in handy. Use the vibrator to remove air bubbles from the concrete. Simply insert the vibrator into the concrete and move it around slowly. You’ll see the air bubbles rise to the surface. If you don’t have a vibrator, you can tap the sides of the mold with a rubber mallet to help remove air bubbles.
6. Screed the Surface: Use a screed board (a long, straight piece of wood or metal) to level the surface of the concrete. Rest the screed board on the edges of the mold and move it back and forth to remove any excess concrete.
7. Trowel the Surface: Use a trowel to smooth the surface of the concrete. This will help to create a smooth, even finish. I like to use a steel trowel for this step.
Phase 3: Curing and Demolding
Patience is key here! Don’t rush this process.
1. Cure the Concrete: Cover the concrete with plastic sheeting to prevent it from drying out too quickly. This will help to ensure that the concrete cures properly and doesn’t crack. Keep the concrete covered for at least 7 days. I know it’s hard to resist peeking, but trust me, it’s worth the wait!
2. Demold the Concrete: After 7 days, carefully remove the screws from the mold. Gently tap the sides of the mold with a rubber mallet to loosen the concrete. Carefully lift the concrete countertop out of the mold. This can be a bit tricky, so be patient and take your time.
Phase 4: Grinding and Polishing
This is where your countertops will really start to shine!
1. Grind the Concrete: Use a grinder with a coarse diamond polishing pad to remove any imperfections from the surface of the concrete. Start with a low speed and gradually increase the speed as you become more comfortable. Be sure to wear a dust mask and safety glasses during this step.
2. Polish the Concrete: Switch to a finer diamond polishing pad and continue to polish the concrete. Work your way up through the grits until you achieve the desired level of shine. This process can take several hours, but it’s worth it!
3. Clean the Concrete: After polishing, clean the concrete with a damp cloth to remove any dust or debris.
Phase 5: Sealing and Finishing
The final touches!
1. Seal the Concrete: Apply a concrete sealer to protect your countertops from stains and water damage. Follow the manufacturer’s instructions for applying the sealer. I usually apply two coats of sealer, allowing each coat to dry completely before applying the next.
2. Apply Wax or Concrete Polish (Optional): For added shine and protection, you can apply a wax or concrete polish to your countertops. Follow the manufacturer’s instructions for applying the wax or polish.
3. Install Your Countertops: Carefully install your new concrete countertops in your kitchen or bathroom. Use construction adhesive to secure the countertops to the cabinets.
And there you have it! Your very own DIY concrete countertops! I hope you found this guide helpful. Remember to take your time, be patient, and don’
Conclusion
So, there you have it! Growing chili peppers anywhere, regardless of your space constraints or perceived lack of a green thumb, is entirely achievable with this simple yet effective DIY trick. We’ve walked you through the process, highlighting the ease and accessibility of transforming everyday materials into a thriving chili pepper haven. But why is this a must-try?
Firstly, it’s incredibly cost-effective. Forget expensive gardening equipment or specialized containers. This method leverages readily available resources, making it a budget-friendly option for anyone looking to add a little spice to their life. Secondly, it’s adaptable. Whether you have a sprawling backyard or a tiny balcony, this DIY approach can be scaled to fit your specific needs and available space. Imagine the satisfaction of harvesting your own fiery peppers, grown with your own hands, right outside your kitchen window!
Beyond the practical benefits, this DIY project offers a unique connection to your food. There’s something deeply rewarding about nurturing a plant from seed to harvest, witnessing the miracle of nature unfold before your eyes. You’ll gain a newfound appreciation for the effort that goes into producing the ingredients we often take for granted.
But the journey doesn’t end here! Feel free to experiment with different varieties of chili peppers. From the mild and fruity poblano to the scorching habanero, the possibilities are endless. You can also explore different soil mixtures to optimize growth and flavor. Consider adding companion plants like basil or marigolds to deter pests and enhance the overall health of your chili pepper plants.
Don’t be afraid to get creative! Perhaps you’ll want to decorate your containers with vibrant colors or personalize them with unique designs. This is your chance to express your individuality and create a truly one-of-a-kind chili pepper garden.
We encourage you to embrace this DIY trick and embark on your own chili pepper growing adventure. It’s a fun, rewarding, and ultimately delicious experience. And most importantly, share your experiences with us! We’d love to hear about your successes, challenges, and creative variations. Post photos of your chili pepper plants, share your favorite recipes, and inspire others to join the growing community of DIY chili pepper enthusiasts. Let’s cultivate a world where everyone can enjoy the fresh, vibrant flavors of homegrown chili peppers, no matter where they live. This method of growing chili peppers anywhere is a game changer!
Frequently Asked Questions (FAQ)
What type of container is best for growing chili peppers using this DIY trick?
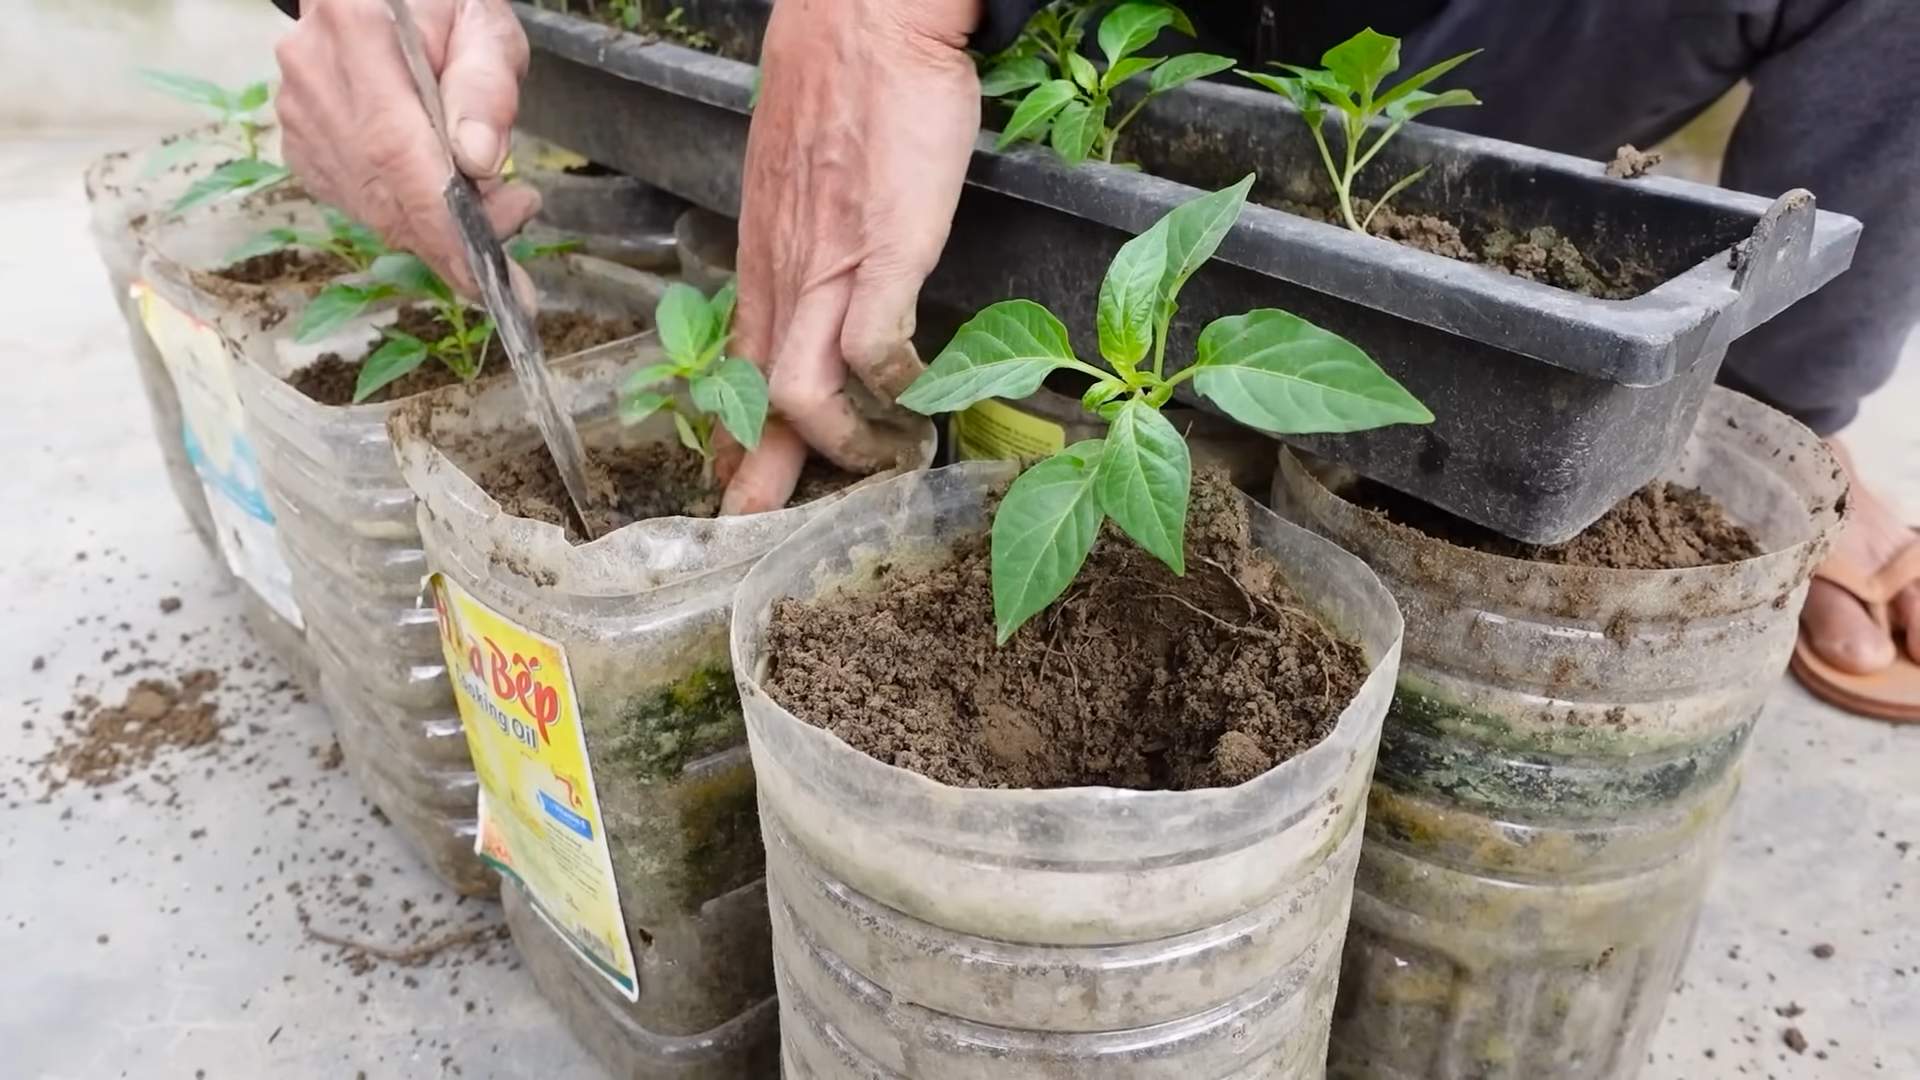
The beauty of this DIY method is its flexibility. You can use a wide range of containers, from repurposed plastic bottles and buckets to old tires and even fabric grow bags. The key is to ensure the container has adequate drainage holes to prevent waterlogging, which can lead to root rot. The size of the container will depend on the variety of chili pepper you’re growing. Smaller varieties like Thai chili peppers can thrive in smaller containers (around 5 gallons), while larger varieties like bell peppers or jalapenos will require larger containers (10 gallons or more). Consider the mature size of the plant when selecting your container. Also, dark-colored containers can absorb more heat, which can be beneficial in cooler climates but detrimental in hotter climates. In hotter regions, opt for lighter-colored containers or provide shade during the hottest part of the day.
What kind of soil should I use for growing chili peppers?
Chili peppers thrive in well-draining, nutrient-rich soil. A good starting point is a mix of equal parts potting soil, compost, and perlite or vermiculite. The potting soil provides a base for the plants to grow, the compost adds essential nutrients, and the perlite or vermiculite improves drainage and aeration. Avoid using garden soil directly in containers, as it can become compacted and doesn’t drain well. You can also amend your soil with slow-release fertilizer to provide a steady supply of nutrients throughout the growing season. Consider testing your soil pH to ensure it’s within the optimal range for chili peppers (6.0 to 7.0). You can purchase a soil testing kit at most garden centers.
How much sunlight do chili peppers need?
Chili peppers are sun-loving plants and require at least 6-8 hours of direct sunlight per day to thrive. If you’re growing your chili peppers indoors, you’ll need to supplement with grow lights. Place your plants in the sunniest location possible, ideally a south-facing window. If you don’t have a sunny window, you can use fluorescent or LED grow lights. Position the lights a few inches above the plants and keep them on for 14-16 hours per day. Rotate your plants regularly to ensure even light exposure. Insufficient sunlight can lead to leggy growth, reduced flowering, and smaller, less flavorful peppers.
How often should I water my chili pepper plants?
Water your chili pepper plants when the top inch of soil feels dry to the touch. Avoid overwatering, as this can lead to root rot. The frequency of watering will depend on factors such as the weather, the size of the container, and the type of soil you’re using. During hot, dry weather, you may need to water your plants daily. In cooler, wetter weather, you may only need to water them every few days. When watering, water deeply and thoroughly, ensuring that the water reaches the roots. Avoid getting water on the leaves, as this can promote fungal diseases. Consider using a watering can or a soaker hose to deliver water directly to the soil.
What are some common pests and diseases that affect chili peppers, and how can I prevent them?
Common pests that affect chili peppers include aphids, spider mites, whiteflies, and pepper weevils. Common diseases include fungal diseases like powdery mildew and blossom end rot. To prevent pests and diseases, start with healthy plants and well-draining soil. Inspect your plants regularly for signs of pests or diseases. If you find pests, you can try spraying them with insecticidal soap or neem oil. For fungal diseases, you can try spraying with a fungicide. You can also prevent pests and diseases by practicing good sanitation, such as removing dead leaves and debris from around your plants. Companion planting with herbs like basil and marigolds can also help deter pests. Blossom end rot is often caused by calcium deficiency, so make sure your soil is rich in calcium or amend it with calcium supplements.
Can I grow chili peppers indoors year-round using this DIY method?
Yes, you can absolutely grow chili peppers indoors year-round using this DIY method. The key is to provide your plants with adequate light, water, and nutrients. You’ll need to supplement with grow lights, especially during the winter months when natural sunlight is limited. You’ll also need to monitor the temperature and humidity levels in your home. Chili peppers prefer temperatures between 70-85°F and moderate humidity. You can increase humidity by placing a tray of water near your plants or using a humidifier. With proper care, you can enjoy fresh, homegrown chili peppers all year long.
How long does it take for chili peppers to mature and be ready for harvest?
The time it takes for chili peppers to mature and be ready for harvest depends on the variety. Some varieties, like Thai chili peppers, can be ready to harvest in as little as 60 days, while others, like habaneros, can take up to 100 days or more. Generally, chili peppers are ready to harvest when they reach their mature size and color. The color will vary depending on the variety. For example, jalapenos are typically harvested when they are dark green, while bell peppers are harvested when they are red, yellow, or orange. You can also test the ripeness of a chili pepper by gently squeezing it. If it feels firm and slightly yields to pressure, it’s likely ripe. Use pruning shears or scissors to harvest your chili peppers, cutting the stem just above the pepper.
Leave a Comment