
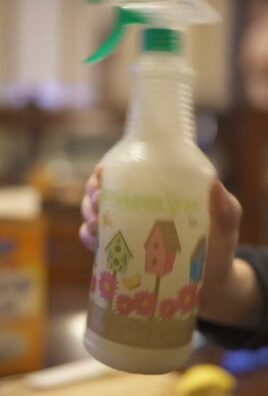
Laundry soap and vinegar cleaning: Sounds like a science experiment, right? Well, it’s actually a super effective and surprisingly simple way to tackle some of your toughest cleaning challenges around the house! For generations, resourceful homemakers have turned to these humble ingredients – laundry soap and vinegar – to keep their homes sparkling. Think of it as your grandmother’s secret weapon, now rediscovered and ready to revolutionize your cleaning routine.
But why laundry soap and vinegar cleaning? In a world saturated with harsh chemicals and expensive cleaning products, many of us are searching for safer, more eco-friendly, and budget-friendly alternatives. That’s where this dynamic duo comes in. Laundry soap is a fantastic degreaser and stain remover, while vinegar is a natural disinfectant and deodorizer. Together, they create a powerful cleaning solution that can tackle everything from grimy bathroom tiles to stubborn laundry stains.
I’m excited to share some amazing DIY tricks and hacks using laundry soap and vinegar. These aren’t just random tips; they’re tried-and-true methods that I’ve personally used to simplify my cleaning routine and create a healthier home. Get ready to ditch the harsh chemicals and embrace the power of these two simple ingredients!

Grow Your Own Angled Luffa Sponges: A Step-by-Step Guide
Hey there, fellow gardening enthusiasts! Ever thought about growing your own sponges? I know, it sounds a little crazy, but it’s totally doable and incredibly rewarding. I’m talking about angled luffa, also known as Chinese okra or ridge gourd. These amazing plants produce edible gourds that, when mature and dried, transform into fantastic natural sponges. I’m going to walk you through everything you need to know to cultivate your own luffa crop right in your backyard.
Choosing the Right Variety and Starting Seeds
First things first, let’s talk about variety. While there are different types of luffa, angled luffa (Luffa acutangula) is generally easier to grow and produces a more textured sponge than smooth luffa (Luffa aegyptiaca).
Here’s what you need to do to get your luffa journey started:
* Source your seeds: You can find angled luffa seeds online or at your local garden center. Make sure you’re getting seeds specifically for angled luffa, as the growing conditions can vary slightly.
* Timing is key: Luffa needs a long growing season (around 150-200 days), so starting seeds indoors is crucial, especially if you live in a cooler climate. I usually start mine about 6-8 weeks before the last expected frost.
* Prepare your seed starting mix: Use a well-draining seed starting mix. I like to use a mix of peat moss, perlite, and vermiculite.
* Soak the seeds: Luffa seeds have a tough outer shell, so soaking them in warm water for 24-48 hours before planting can significantly improve germination rates. I’ve found this step makes a huge difference!
* Planting the seeds: Plant the soaked seeds about 1 inch deep in individual pots or seed trays. I prefer using biodegradable pots because it minimizes root disturbance when transplanting.
* Provide warmth and moisture: Luffa seeds need warmth to germinate. I use a heat mat under my seed trays to maintain a soil temperature of around 75-85°F (24-29°C). Keep the soil consistently moist, but not waterlogged.
* Be patient: Germination can take anywhere from 7 to 21 days, so don’t get discouraged if you don’t see sprouts right away.
Preparing the Garden Bed
Luffa vines are vigorous growers and need plenty of space and sunlight. Choosing the right location and preparing the soil is essential for a successful harvest.
* Sunlight is essential: Luffa plants need at least 6-8 hours of direct sunlight per day. Choose a location in your garden that receives plenty of sunshine.
* Soil preparation: Luffa plants prefer well-drained, fertile soil. Amend your soil with plenty of compost or well-rotted manure before planting. This will improve drainage, add nutrients, and provide a good foundation for healthy growth.
* Spacing: Luffa vines can grow quite large, so space your plants at least 3-4 feet apart. This will allow them plenty of room to spread out and prevent overcrowding.
* Trellising is a must: Luffa vines are climbers and need a strong trellis or support structure to grow on. I’ve used everything from sturdy fences to homemade trellises made from bamboo and twine. The stronger the better, as the mature gourds can get quite heavy.
Transplanting and Ongoing Care
Once your seedlings have developed a few sets of true leaves and the danger of frost has passed, it’s time to transplant them into the garden.
1. Harden off the seedlings: Before transplanting, gradually acclimate your seedlings to outdoor conditions by exposing them to increasing amounts of sunlight and fresh air over a period of 7-10 days. This will help them adjust to the change in environment and prevent transplant shock.
2. Transplant carefully: Gently remove the seedlings from their pots, being careful not to damage the roots. Plant them at the same depth they were growing in their pots.
3. Water thoroughly: After transplanting, water the seedlings thoroughly to help them establish their roots.
4. Mulch around the plants: Apply a layer of mulch around the base of the plants to help retain moisture, suppress weeds, and regulate soil temperature. I like to use straw or wood chips.
5. Watering: Luffa plants need consistent watering, especially during hot, dry weather. Water deeply and regularly, ensuring the soil stays moist but not waterlogged.
6. Fertilizing: Feed your luffa plants with a balanced fertilizer every 2-3 weeks during the growing season. I use a liquid fertilizer diluted to half strength. You can also side-dress with compost or well-rotted manure.
7. Pest and disease control: Keep an eye out for common garden pests like aphids, squash bugs, and cucumber beetles. You can control these pests with insecticidal soap or neem oil. Luffa plants can also be susceptible to fungal diseases like powdery mildew. Ensure good air circulation around the plants and treat with a fungicide if necessary.
8. Pruning: While not essential, pruning can help improve air circulation and encourage fruit production. Remove any dead or yellowing leaves and trim back excessive vine growth.
Harvesting and Processing Your Luffa Sponges
This is the most exciting part! Harvesting and processing your own luffa sponges is incredibly satisfying.
1. Harvesting: Luffa gourds are ready to harvest when they are fully mature and the skin has turned brown and dry. The gourds should feel lightweight and the seeds should rattle inside. I usually wait until after the first frost to harvest, as this helps to dry out the gourds.
2. Drying: After harvesting, allow the gourds to dry completely. You can do this by hanging them in a well-ventilated area or laying them on a screen. Drying can take several weeks, depending on the humidity.
3. Peeling: Once the gourds are completely dry, it’s time to peel off the outer skin. This can be a bit messy, so I recommend doing it outdoors or in a well-ventilated area. You can use your hands to peel off the skin, or you can use a knife to make slits in the skin and then peel it off.
4. Seed removal: After peeling, remove the seeds from the inside of the gourd. You can save these seeds for planting next year.
5. Washing: Wash the luffa sponge thoroughly with soap and water to remove any remaining pulp or debris.
6. Bleaching (optional): If you want a whiter sponge, you can soak it in a diluted bleach solution for a few minutes. Be sure to rinse it thoroughly afterwards.
7. Drying again: Allow the luffa sponge to dry completely before using it.
Using Your Homegrown Luffa Sponges
Now that you have your own homegrown luffa sponges, you can use them for a variety of purposes:
* Exfoliating your skin: Luffa sponges are great for exfoliating your skin in the shower or bath. They help to remove dead skin cells and leave your skin feeling smooth and refreshed.
* Washing dishes: Luffa sponges are a natural and eco-friendly alternative to synthetic sponges for washing dishes. They are abrasive enough to remove food particles but gentle enough not to scratch your dishes.
* Cleaning your home: Luffa sponges can also be used for cleaning your home. They are great for scrubbing sinks, tubs, and other surfaces.
* Making crafts: Luffa sponges can be used to make a variety of crafts, such as soap dishes, bath mats, and even decorative items.
Troubleshooting
Even with the best planning, sometimes things don’t go exactly as expected. Here are a few common problems you might encounter and how to address them:
* Poor germination: If your seeds aren’t germinating, make sure the soil is warm enough and consistently moist. You can also try scarifying the seeds by gently rubbing them with sandpaper before soaking them.
* Slow growth: If your plants are growing slowly, make sure they are getting enough sunlight and nutrients. Fertilize regularly and check the soil pH to ensure it’s within the optimal range (6.0-7.0).
* Pest infestations: Regularly inspect your plants for pests and take action immediately if you see any. Insecticidal soap and neem oil are effective organic options.
* Disease problems: Ensure good air circulation around your plants to prevent fungal diseases. Treat with a fungicide if necessary.
Final Thoughts
Growing your own angled luffa sponges is a fun and rewarding experience. It takes a little time and effort, but the satisfaction of harvesting your own natural sponges is well worth it. Plus, you
Conclusion
So, there you have it! Ditching the expensive, chemical-laden detergents and embracing the power of laundry soap and vinegar cleaning is more than just a trend; it’s a revolution in how we approach laundry. We’ve explored how this simple yet effective combination can transform your laundry routine, leaving your clothes cleaner, fresher, and your wallet a little heavier.
But why is this DIY trick a must-try? It boils down to several compelling reasons. First and foremost, it’s incredibly cost-effective. A bottle of laundry soap and a jug of vinegar are significantly cheaper than most commercial detergents, especially the high-end ones promising the moon and stars. Over time, the savings really add up, freeing up your budget for other things you enjoy.
Secondly, it’s a much gentler option for both your clothes and your skin. Harsh chemicals in conventional detergents can strip fabrics of their natural oils, leading to fading, wear and tear, and even skin irritation, especially for those with sensitive skin or allergies. Laundry soap and vinegar, on the other hand, offer a milder cleaning action that preserves the integrity of your clothes and minimizes the risk of allergic reactions.
Thirdly, and perhaps most importantly, it’s an environmentally friendly choice. By reducing your reliance on chemical-heavy detergents, you’re minimizing your contribution to water pollution and the overall environmental impact of your laundry routine. It’s a small change that can make a big difference in the long run.
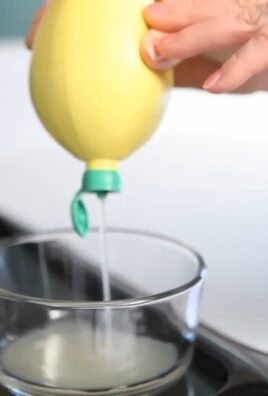
Now, let’s talk about variations and suggestions. While the basic recipe of laundry soap and vinegar is incredibly versatile, you can customize it to suit your specific needs and preferences. For instance, if you prefer a scented laundry, you can add a few drops of your favorite essential oil to the vinegar before adding it to the washing machine. Lavender, lemon, and tea tree oil are all excellent choices for their fragrance and antibacterial properties.
Another variation involves using different types of vinegar. While white distilled vinegar is the most common and readily available option, you can also experiment with apple cider vinegar, which has a slightly milder scent and is also known for its softening properties. Just be sure to use plain, unflavored vinegar for best results.
For heavily soiled clothes, you can pre-treat stains with a paste made from laundry soap and baking soda. Apply the paste to the stain, let it sit for a few minutes, and then wash as usual. This will help to lift stubborn stains and leave your clothes looking their best.
And finally, don’t be afraid to experiment with the ratios of laundry soap and vinegar to find what works best for your washing machine and water hardness. Some people prefer a slightly higher concentration of laundry soap for extra cleaning power, while others find that less is more.
We wholeheartedly encourage you to give this DIY laundry soap and vinegar cleaning trick a try. It’s a simple, affordable, and eco-friendly way to keep your clothes clean and fresh. Once you experience the benefits for yourself, we’re confident that you’ll never go back to conventional detergents.
But don’t just take our word for it! We want to hear about your experiences. Share your tips, variations, and results in the comments section below. Let’s create a community of DIY laundry enthusiasts and help each other discover the best ways to clean our clothes naturally and effectively. Your insights could be invaluable to others who are just starting out on their DIY laundry journey. So, go ahead, give it a try, and let us know what you think!
FAQ
What type of laundry soap should I use?
You can use either liquid or powdered laundry soap for this DIY cleaning method. However, it’s important to choose a soap that is free of dyes, fragrances, and other additives, as these can irritate sensitive skin and leave residue on your clothes. Look for a simple, natural laundry soap with minimal ingredients. Many people prefer using castile soap or a gentle laundry soap specifically designed for babies or those with allergies. If using powdered soap, make sure it dissolves completely in the water before adding your clothes.
How much laundry soap and vinegar should I use per load?
The amount of laundry soap and vinegar you need will depend on the size of your load, the level of soil, and the hardness of your water. As a general guideline, start with about 1-2 tablespoons of laundry soap and 1/4 to 1/2 cup of white distilled vinegar per regular-sized load. For heavily soiled clothes, you may need to increase the amount of laundry soap slightly. For smaller loads, reduce the amounts accordingly. It’s always best to start with less and add more if needed. Experiment to find the perfect ratio for your specific needs.
Will the vinegar make my clothes smell like vinegar?
No, the vinegar smell will dissipate during the wash cycle and will not linger on your clothes. In fact, vinegar acts as a natural deodorizer and can help to remove unpleasant odors from your laundry. If you’re still concerned about the smell, you can add a few drops of your favorite essential oil to the vinegar before adding it to the washing machine. Lavender, lemon, and tea tree oil are all excellent choices for their fragrance and antibacterial properties.
Can I use this method for all types of fabrics?
This DIY cleaning method is generally safe for most types of fabrics, including cotton, linen, and synthetic blends. However, it’s always a good idea to test a small, inconspicuous area of the fabric first to ensure that it doesn’t cause any discoloration or damage. Avoid using vinegar on delicate fabrics like silk or wool, as it can damage the fibers. For these fabrics, it’s best to use a gentle laundry soap specifically designed for delicate items.
Is this method safe for my washing machine?
Yes, using laundry soap and vinegar is generally safe for both top-loading and front-loading washing machines. In fact, vinegar can actually help to clean and deodorize your washing machine, preventing the buildup of mold and mildew. However, it’s important to follow the manufacturer’s instructions for your specific washing machine model. Avoid using too much laundry soap, as this can lead to excessive suds and potentially damage your machine.
Can I use fabric softener with this method?
Vinegar acts as a natural fabric softener, so you don’t need to use a separate fabric softener when using this DIY cleaning method. In fact, using fabric softener can actually counteract the benefits of the vinegar, as it can leave a residue on your clothes and reduce their absorbency. If you prefer a scented fabric softener, you can add a few drops of your favorite essential oil to the vinegar before adding it to the washing machine.
What if I have hard water?
If you have hard water, you may need to use more laundry soap and vinegar to achieve the same results. Hard water can interfere with the cleaning action of the soap and vinegar, making it less effective. You can also add a water softener to your washing machine to help improve the cleaning performance. Borax is a natural water softener that can be added to the wash cycle along with the laundry soap and vinegar.
Can I use this method for HE (High Efficiency) washing machines?
Yes, this method is safe to use in HE washing machines. However, it’s important to use the correct amount of laundry soap and vinegar to avoid oversudsing. HE washing machines use less water than traditional washing machines, so you’ll need to use less soap and vinegar as well. Start with about 1 tablespoon of laundry soap and 1/4 cup of vinegar per load and adjust as needed.
How do I deal with stubborn stains?
For stubborn stains, pre-treat them with a paste made from laundry soap and baking soda. Apply the paste to the stain, let it sit for a few minutes, and then wash as usual. You can also try soaking the stained garment in a solution of water and vinegar before washing. For particularly tough stains, you may need to use a commercial stain remover in addition to the laundry soap and vinegar.
Where do I put the laundry soap and vinegar in my washing machine?
For top-loading washing machines, you can add the laundry soap and vinegar directly to the drum before adding your clothes. For front-loading washing machines, add the laundry soap to the detergent dispenser and the vinegar to the fabric softener dispenser. If your washing machine doesn’t have a fabric softener dispenser, you can add the vinegar directly to the drum along with the laundry soap.
Leave a Comment