
Grow Angled Luffa at Home and unlock the secrets to cultivating your own natural sponges! Have you ever imagined strolling into your backyard and harvesting a fresh, exfoliating luffa sponge, ready to invigorate your skin? It’s not just a dream; it’s an achievable reality with a little know-how and some DIY spirit.
Luffa, also known as angled gourd or Chinese okra, has a rich history, particularly in Asian cultures, where it’s been used for centuries not only as a cleansing tool but also as a delicious and nutritious vegetable in various culinary dishes. Beyond its practical uses, growing your own luffa connects you to a tradition of sustainable living and resourcefulness.
In today’s world, where we’re increasingly conscious of the products we use and their impact on the environment, growing your own luffa offers a fantastic alternative to synthetic sponges. Plus, it’s incredibly rewarding to nurture a plant from seed to harvest, knowing you’re creating something useful and eco-friendly. This DIY guide will walk you through every step, from selecting the right seeds to drying and preparing your homegrown luffa sponges. I’m excited to share these simple yet effective tricks that will help you grow angled luffa at home successfully, even if you’re a beginner gardener. Let’s get started!
Grow Your Own Angled Luffa Sponges: A Complete DIY Guide
Hey there, fellow gardening enthusiasts! Have you ever thought about growing your own sponges? I know, it sounds a little crazy, but it’s totally possible (and incredibly rewarding!) with angled luffa, also known as Chinese okra or ridge gourd. These amazing gourds transform into fantastic, natural sponges perfect for everything from scrubbing dishes to exfoliating your skin. I’m going to walk you through the entire process, from seed to sponge, so you can enjoy the satisfaction of creating something useful and sustainable right in your backyard.
Choosing the Right Variety and Location
Before we dive into the nitty-gritty, let’s talk about selecting the right luffa variety and finding the perfect spot for it to thrive.
* Variety Selection: While there are different types of luffa, angled luffa (Luffa acutangula) is generally easier to grow and produces sponges that are a bit more textured, which I personally prefer. Make sure you’re getting seeds specifically for angled luffa.
* Sunlight: Luffa plants are sun-worshippers! They need at least 6-8 hours of direct sunlight each day to produce a good crop of gourds.
* Soil: Well-draining soil is crucial. Luffa plants don’t like to sit in soggy soil, which can lead to root rot. Amend your soil with compost or other organic matter to improve drainage and fertility.
* Support System: These are vining plants, so they need a strong trellis, fence, or pergola to climb on. I’ve found that a sturdy trellis works best, allowing the gourds to hang freely.
Starting Your Luffa Seeds
Luffa has a long growing season, so starting seeds indoors is usually the best way to get a head start, especially if you live in a cooler climate.
1. Soaking the Seeds: To help with germination, I like to soak my luffa seeds in warm water for 24 hours before planting. This softens the hard outer shell and encourages sprouting.
2. Planting Indoors: Fill small pots (about 3-4 inches in diameter) with a good quality seed-starting mix. Plant one or two seeds per pot, about ½ inch deep.
3. Creating a Warm Environment: Luffa seeds need warmth to germinate. I use a heat mat under my seed trays to keep the soil temperature around 80-85°F (27-29°C). You can also place the seed trays in a warm spot in your house.
4. Watering: Keep the soil consistently moist, but not waterlogged. I use a spray bottle to gently water the seedlings.
5. Germination Time: Be patient! Luffa seeds can take anywhere from 1-3 weeks to germinate, depending on the temperature and moisture levels.
6. Providing Light: Once the seedlings emerge, they need plenty of light. If you don’t have a sunny windowsill, use grow lights to provide 14-16 hours of light per day.
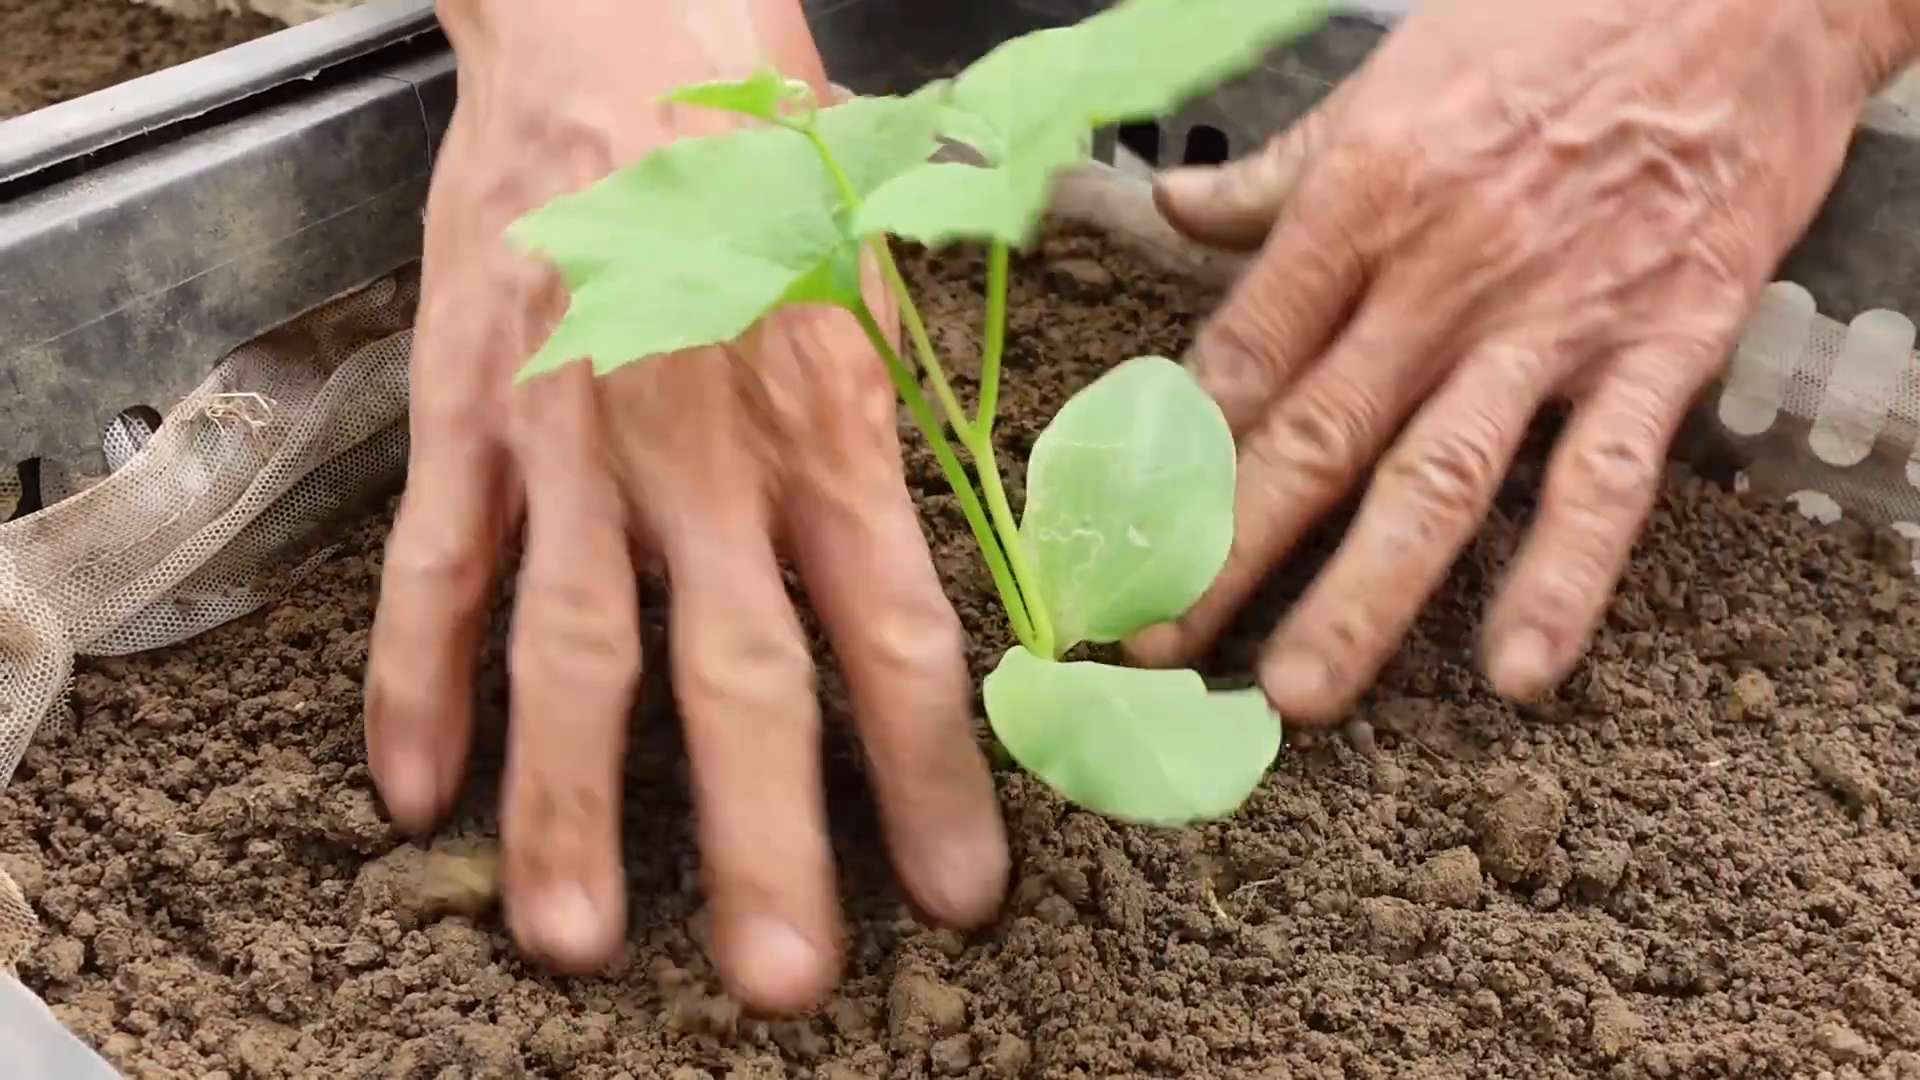
Transplanting Your Luffa Seedlings
Once the danger of frost has passed and the soil has warmed up, it’s time to transplant your luffa seedlings outdoors.
1. Hardening Off: Before transplanting, you need to “harden off” the seedlings. This means gradually exposing them to outdoor conditions over a period of 7-10 days. Start by placing them in a sheltered spot outdoors for a few hours each day, gradually increasing the amount of time they spend outside.
2. Preparing the Planting Site: Dig holes that are slightly larger than the root balls of your seedlings. Space the holes about 2-3 feet apart, depending on the size of your trellis or support system.
3. Transplanting: Gently remove the seedlings from their pots and place them in the prepared holes. Backfill with soil and water thoroughly.
4. Providing Support: Train the vines to climb your trellis or support system. You may need to gently tie them to the structure at first.
Caring for Your Luffa Plants
Luffa plants are relatively easy to care for, but they do need regular watering, fertilizing, and pest control.
1. Watering: Water deeply and regularly, especially during hot, dry weather. Luffa plants need consistent moisture to produce healthy gourds. I usually water them every other day, or more often if the soil feels dry to the touch.
2. Fertilizing: Fertilize your luffa plants every 2-3 weeks with a balanced fertilizer. I like to use a liquid fertilizer diluted to half strength. You can also amend the soil with compost or other organic matter.
3. Pest Control: Keep an eye out for common garden pests like aphids, squash bugs, and cucumber beetles. I prefer to use organic pest control methods, such as insecticidal soap or neem oil. You can also handpick pests off the plants.
4. Pruning: Pruning isn’t strictly necessary, but it can help to improve air circulation and encourage fruit production. I like to prune away any dead or yellowing leaves, as well as any suckers (small shoots that grow from the base of the plant).
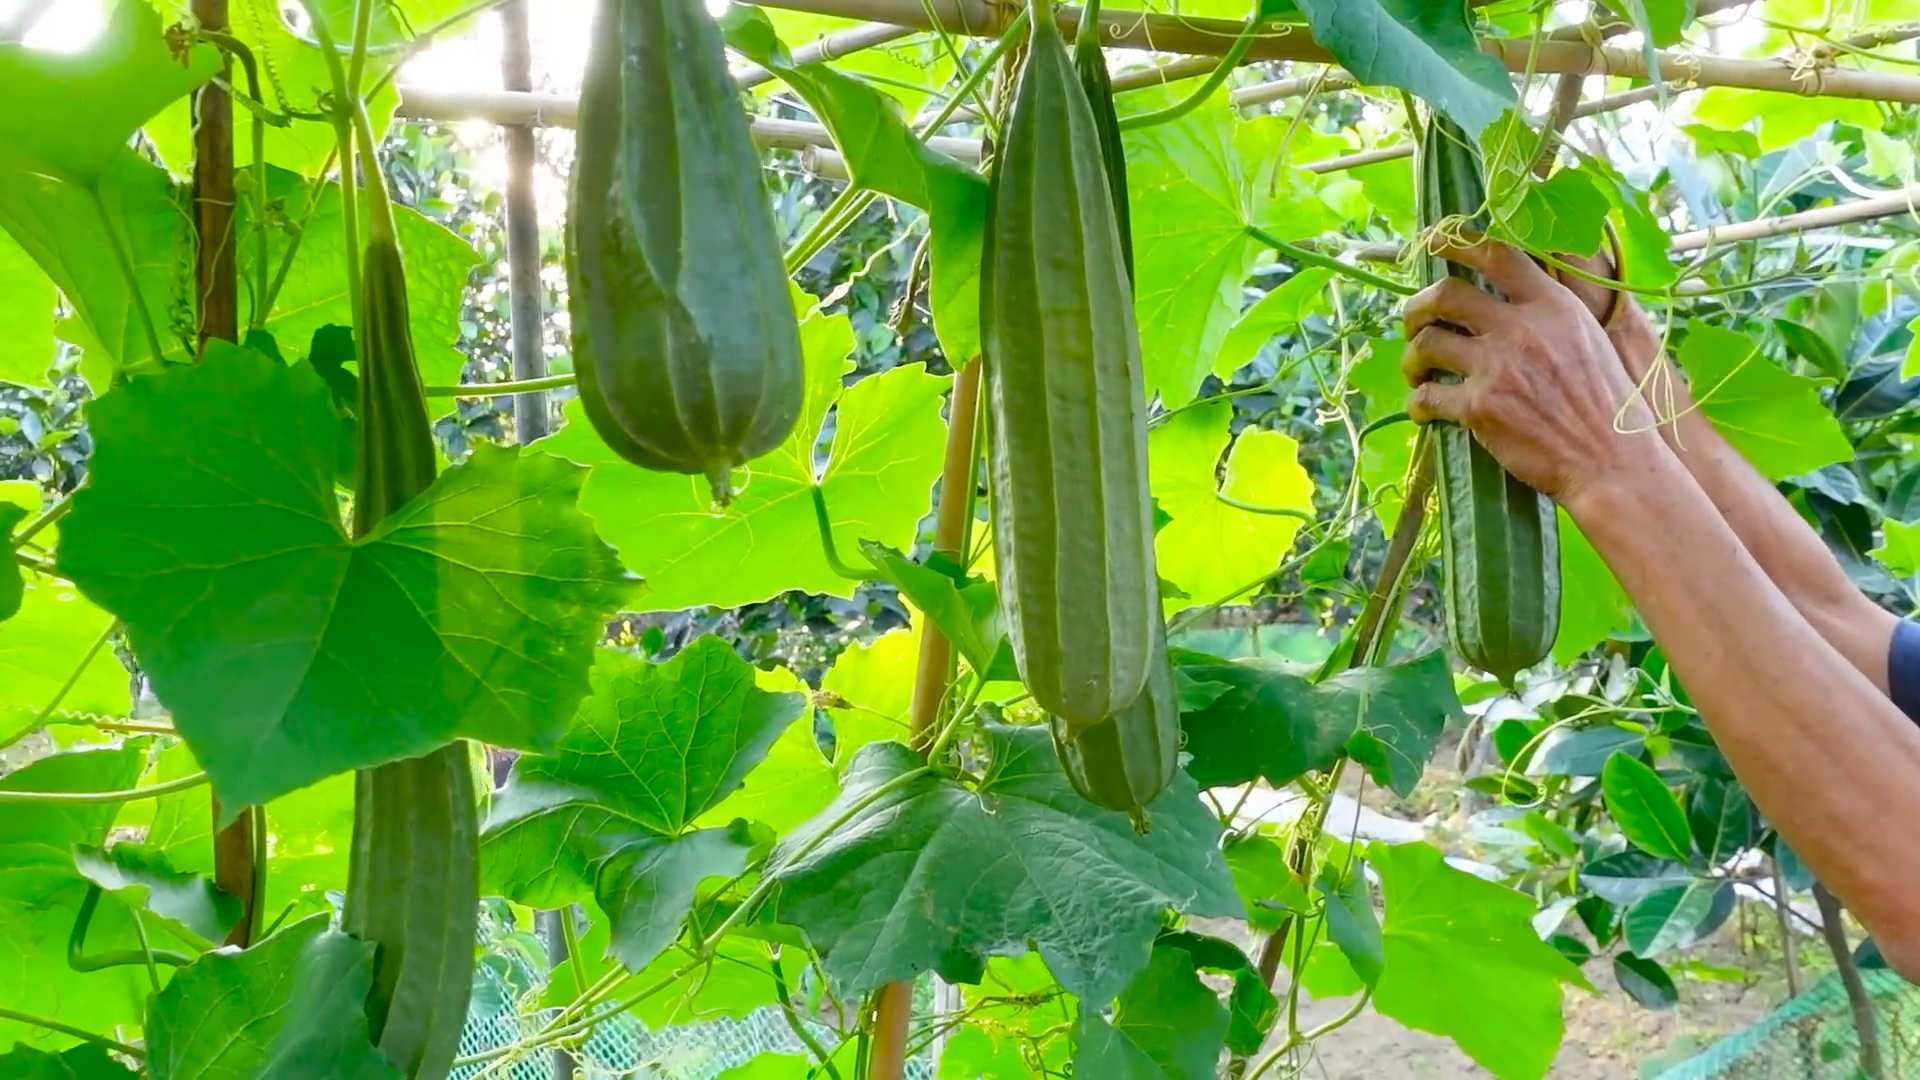
Harvesting Your Luffa Gourds
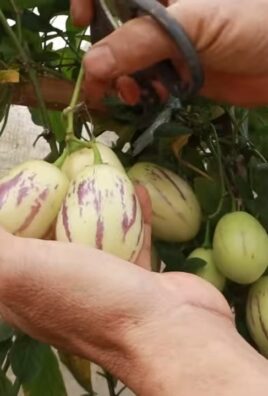
Harvesting is the most exciting part! You’ll know your luffa gourds are ready to harvest when they turn yellow or brown and the skin begins to dry out and separate from the flesh.
1. Timing is Key: Don’t wait too long to harvest, or the gourds will become too fibrous and difficult to process. I usually harvest when the skin is still slightly green, but starting to turn yellow.
2. Cutting the Gourds: Use a sharp knife or pruning shears to cut the gourds from the vine, leaving a few inches of stem attached.
3. Drying the Gourds: Place the harvested gourds in a warm, dry place to dry for several weeks. I usually dry them in my garage or shed. You’ll know they’re dry when the skin is completely brown and brittle.
Processing Your Luffa Sponges
Now for the fun part – turning those dried gourds into usable sponges!
1. Removing the Skin: Once the gourds are completely dry, you can remove the skin. This can be a bit messy, so I recommend doing it outdoors or in a well-ventilated area. You can use your hands to peel away the skin, or you can use a knife to score the skin and then peel it off.
2. Removing the Seeds: After removing the skin, you’ll need to remove the seeds. There’s usually a hole at one end of the gourd. Shake the gourd vigorously to dislodge the seeds. You can save the seeds for planting next year!
3. Washing the Sponge: Rinse the sponge thoroughly with water to remove any remaining debris. You can use a hose or a bucket of water.
4. Bleaching (Optional): If you want a whiter sponge, you can soak it in a diluted bleach solution for a few minutes. I personally prefer to leave my sponges natural, but it’s up to you. Be sure to rinse the sponge thoroughly after bleaching.
5. Drying the Sponge: Allow the sponge to dry completely before using it. You can hang it up to dry or place it in a well-ventilated area.
6. Cutting to Size: Once the sponge is dry, you can cut it into smaller pieces using a sharp knife or scissors. I like to cut mine into different sizes for different uses.
Using and Caring for Your Luffa Sponges
Congratulations! You’ve successfully grown and processed your own luffa sponges. Here are a few tips for using and caring for them:
* For Dishes: Luffa sponges are great for scrubbing dishes. They’re abrasive enough to remove food particles, but gentle enough not to scratch delicate surfaces.
* For Exfoliating: Luffa sponges are also excellent for exfoliating your skin. Use them in the shower to remove dead skin cells and leave your skin feeling smooth and refreshed.
* Cleaning: Rinse your luffa sponge thoroughly after each use and allow it to dry completely. This will help to prevent the growth of bacteria.
* Replacing: Replace your luffa sponge every few weeks, or when it starts to show signs of wear and tear.
Troubleshooting Common Luffa Growing Problems
Even with the best care, you might encounter a few challenges along the way. Here are some common problems and how to address them:
* Poor Germination: If your luffa seeds aren’t germinating, make sure the soil is warm enough and consistently moist. You can also try scarifying the seeds (gently scratching the outer shell) to help them absorb water.
* Slow Growth: If your luffa plants are growing slowly, make sure they
Conclusion
So, there you have it! Growing your own angled luffa at home is not just a fun gardening project; it’s a gateway to sustainable living and a source of incredibly useful, all-natural sponges. Forget those mass-produced, plastic-filled alternatives from the store. Imagine the satisfaction of exfoliating with a luffa you nurtured from seed to shower!
This DIY trick is a must-try for several compelling reasons. First, you gain complete control over the growing process, ensuring your luffas are free from harmful chemicals and pesticides. Second, you significantly reduce your environmental footprint by avoiding the transportation and packaging associated with commercially produced sponges. Third, and perhaps most importantly, you unlock a rewarding connection with nature, witnessing the miracle of growth firsthand.
But the benefits don’t stop there. Angled luffa is incredibly versatile. Beyond its obvious use as a body scrub, consider these variations:
* **Dishwashing Sponge:** Harvest a mature luffa and use it to scrub your dishes. Its natural fibers are tough on grime but gentle on your cookware.
* **Gardening Tool:** Use smaller pieces of luffa as seed starters or to improve soil drainage in potted plants.
* **Craft Projects:** Get creative! Luffa can be dyed, cut, and shaped into unique decorative items, potpourri, or even pet toys.
* **Gifts:** Homemade luffa sponges make thoughtful and eco-friendly gifts for friends and family. Package them with a natural soap for an extra special touch.
For those with limited space, consider growing your angled luffa in large containers on a sunny balcony or patio. Choose a pot that is at least 20 gallons in size to accommodate the plant’s extensive root system. You can also experiment with different trellising methods to maximize vertical space.
Don’t be intimidated by the perceived difficulty of growing your own luffa. With a little patience, attention, and the right conditions, you’ll be amazed at what you can achieve. The process is incredibly rewarding, and the end result is a sustainable, versatile, and all-natural product that you can be proud of.
We wholeheartedly encourage you to embark on this gardening adventure. Try growing your own angled luffa at home and experience the joy of harvesting your own natural sponges. We’re confident that you’ll find it to be a fulfilling and sustainable endeavor.
Once you’ve harvested your first luffa, we’d love to hear about your experience! Share your tips, tricks, and photos in the comments below. Let’s build a community of luffa-loving gardeners and inspire others to embrace this eco-friendly DIY project. What are you waiting for? Get planting!
Frequently Asked Questions (FAQ)
What is the best time to plant angled luffa seeds?
The ideal time to plant angled luffa seeds is in the late spring or early summer, after the last frost has passed and the soil has warmed up to at least 70°F (21°C). Luffa plants require a long growing season (approximately 150-200 days) to mature and produce viable sponges. Starting seeds indoors 6-8 weeks before the last frost can give you a head start, especially in regions with shorter summers.
How much sunlight does angled luffa need?
Angled luffa plants thrive in full sun, requiring at least 6-8 hours of direct sunlight per day. Insufficient sunlight can lead to stunted growth, reduced flowering, and smaller, less dense luffa sponges. Choose a planting location that receives ample sunlight throughout the day. If growing indoors, supplement with grow lights if necessary.
What type of soil is best for growing angled luffa?
Angled luffa prefers well-drained, fertile soil that is rich in organic matter. Amend your soil with compost, aged manure, or other organic amendments before planting to improve drainage, fertility, and water retention. A slightly acidic to neutral soil pH (6.0-7.0) is ideal. Avoid heavy clay soils, as they can become waterlogged and inhibit root growth.
How often should I water my angled luffa plant?
Angled luffa plants require consistent moisture, especially during hot, dry weather. Water deeply and regularly, ensuring the soil remains consistently moist but not waterlogged. Avoid overhead watering, as this can increase the risk of fungal diseases. Mulching around the base of the plant can help retain moisture and suppress weeds. As the luffa fruits develop, increase watering frequency to support their growth.
What kind of trellis should I use for angled luffa?
Angled luffa vines are vigorous climbers and require a sturdy trellis to support their weight. A strong fence, arbor, or custom-built trellis made of wood or metal are all suitable options. Ensure the trellis is at least 6-8 feet tall and wide enough to accommodate the plant’s sprawling growth habit. The trellis should have a grid-like structure with openings that allow the vines to easily grip and climb.
How do I know when my angled luffa is ready to harvest?
Angled luffa fruits are ready to harvest when they turn yellow or brown and the skin becomes dry and brittle. The fruit should feel lightweight and hollow when tapped. Allow the luffa to dry on the vine as long as possible, as this will make the skin easier to remove. If frost threatens before the luffa is fully dry, harvest the fruits and allow them to dry indoors in a well-ventilated area.
How do I process my angled luffa into a sponge?
Once the luffa is fully dry, crack the outer skin and peel it away to reveal the fibrous sponge inside. Shake out any seeds and rinse the sponge thoroughly with water. Soak the sponge in a solution of water and baking soda or vinegar to remove any remaining debris and soften the fibers. Allow the sponge to dry completely before using. You can cut the luffa into smaller pieces for different uses.
Are there any pests or diseases that affect angled luffa?
Angled luffa plants can be susceptible to certain pests and diseases, including squash bugs, vine borers, powdery mildew, and fungal leaf spots. Monitor your plants regularly for signs of infestation or disease and take appropriate action. Use organic pest control methods, such as insecticidal soap or neem oil, to control pests. Improve air circulation and avoid overhead watering to prevent fungal diseases.
Can I save the seeds from my angled luffa to plant next year?
Yes, you can save the seeds from your angled luffa to plant next year. Allow the luffa fruit to fully mature and dry on the vine. Once the fruit is dry, crack it open and collect the seeds. Store the seeds in a cool, dry place in an airtight container. Angled luffa seeds can remain viable for several years if stored properly.
Is angled luffa edible?
Yes, young angled luffa fruits are edible and can be used in a variety of culinary dishes. Harvest the fruits when they are small and tender, before the fibers develop. They can be stir-fried, added to soups and stews, or used in curries. The taste is similar to zucchini or cucumber. However, mature luffa fruits are not edible due to their tough, fibrous texture.
Leave a Comment