
Harvesting String Beans from Seeds: There’s nothing quite like the satisfaction of growing your own food, is there? Imagine stepping into your backyard and plucking fresh, crisp string beans, bursting with flavor, straight from the vine. It’s a feeling that connects us to generations past, where home gardens were a vital part of daily life. From ancient civilizations cultivating beans for sustenance to victory gardens during wartime, the act of growing your own food has always held a special significance.
But let’s be honest, sometimes the journey from seed to table can feel a little daunting. That’s where these simple, yet effective, DIY tricks come in! I’m here to share some of my favorite hacks for successfully harvesting string beans from seeds, ensuring you get the most bountiful and delicious harvest possible. Whether you’re a seasoned gardener or just starting out, these tips will help you avoid common pitfalls and maximize your yield.
Why do you need these tricks? Because store-bought string beans simply can’t compare to the taste and freshness of homegrown. Plus, knowing exactly where your food comes from and how it was grown gives you peace of mind. So, let’s dive in and unlock the secrets to a thriving string bean patch!
DIY: From Seed to Supper – Growing and Harvesting String Beans
Okay, bean lovers, let’s get our hands dirty! I’m going to walk you through the entire process of growing string beans from seeds, all the way to harvesting a delicious crop. It’s easier than you think, and the taste of homegrown beans is simply unbeatable.
Choosing Your Bean Variety
Before we even think about planting, we need to decide what kind of string beans we want to grow. There are two main types: bush beans and pole beans.
* **Bush Beans:** These are compact and don’t require any support. They’re perfect for smaller gardens or containers. They produce a large harvest all at once, making them ideal for canning or freezing. Some popular varieties include Blue Lake Bush, Contender, and Provider.
* **Pole Beans:** These beans are climbers and need a trellis or other support to grow on. They produce beans over a longer period, giving you a steady supply throughout the season. Some popular varieties include Kentucky Wonder, Blue Lake Pole, and Scarlet Runner.
I personally love growing a mix of both! This gives me a continuous harvest and adds some visual interest to my garden. Consider your space, your needs, and your taste preferences when making your choice.
Preparing for Planting
Alright, now that we’ve chosen our bean variety, let’s get our garden ready.
* **Timing is Key:** String beans are warm-weather crops, so you’ll want to plant them after the last frost. Check your local frost dates to be sure. The soil temperature should be at least 60°F (15°C) for optimal germination.
* **Location, Location, Location:** String beans need at least 6-8 hours of sunlight per day. Choose a spot in your garden that gets plenty of sunshine.
* **Soil Preparation:** String beans prefer well-drained soil that is rich in organic matter. Before planting, amend your soil with compost or well-rotted manure. This will improve drainage, fertility, and water retention.
* **Soil pH:** String beans prefer a slightly acidic to neutral soil pH of 6.0 to 7.0. You can test your soil pH with a soil testing kit and amend it accordingly.
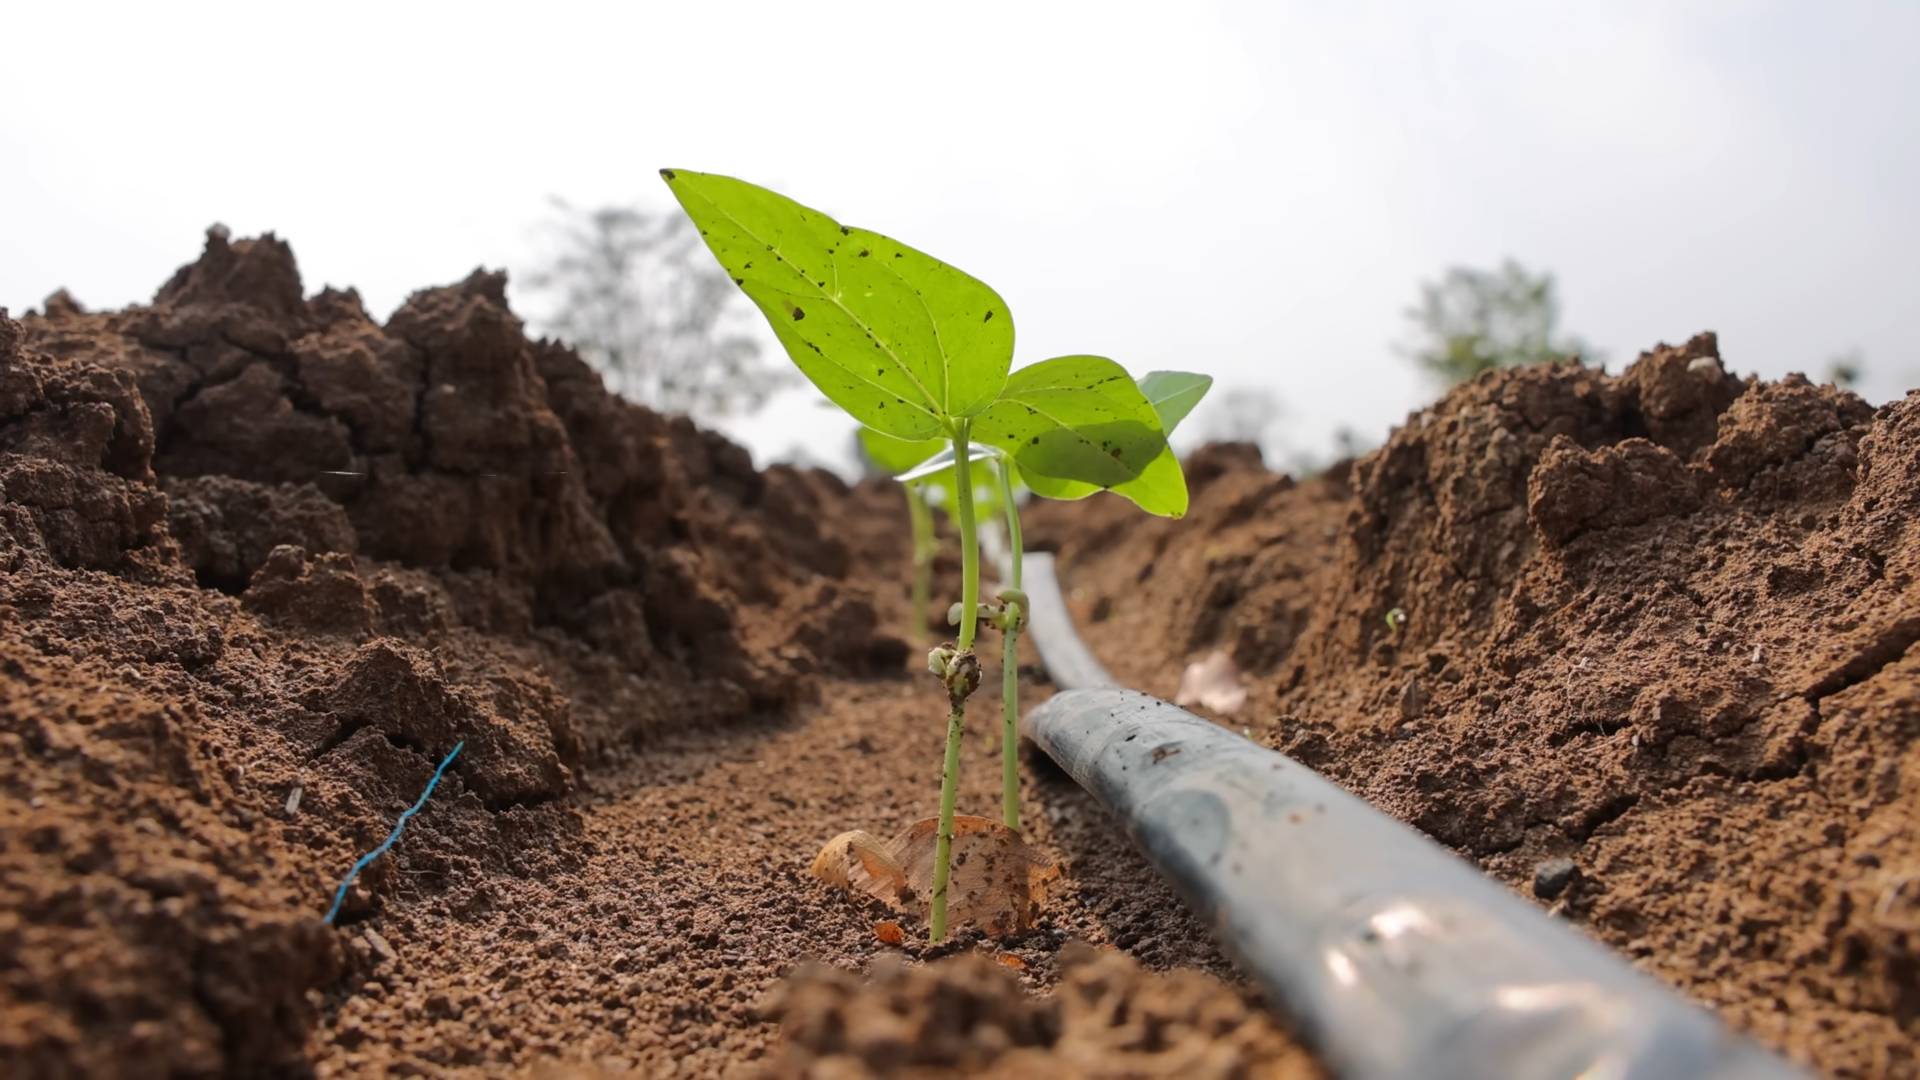
Planting Your String Bean Seeds
Now for the fun part – planting!
1. **Soaking the Seeds (Optional):** Soaking your bean seeds in water for a few hours before planting can help speed up germination. I usually soak mine for about 2-4 hours. Don’t soak them for too long, or they might rot.
2. **Planting Bush Beans:**
* Sow seeds 1 inch deep and 2-3 inches apart in rows that are 18-24 inches apart.
* Gently cover the seeds with soil and water thoroughly.
3. **Planting Pole Beans:**
* Install your trellis or support system before planting.
* Sow seeds 1 inch deep and 4-6 inches apart at the base of the trellis.
* Gently cover the seeds with soil and water thoroughly.
4. **Watering:** Keep the soil consistently moist, but not waterlogged, until the seeds germinate. Germination usually takes 5-10 days, depending on the soil temperature and variety.
5. **Thinning (If Necessary):** Once the seedlings emerge, thin them to the recommended spacing if needed. This will give them enough room to grow and prevent overcrowding.
Caring for Your String Bean Plants
Once your bean plants are up and growing, here’s how to keep them happy and healthy:
* **Watering:** Water regularly, especially during dry spells. String beans need about 1 inch of water per week. Water at the base of the plants to avoid wetting the foliage, which can lead to fungal diseases.
* **Weeding:** Keep the area around your bean plants free of weeds. Weeds compete with the beans for water, nutrients, and sunlight.
* **Fertilizing:** String beans don’t need a lot of fertilizer, but a side dressing of compost or a balanced fertilizer a few weeks after planting can help boost growth. Avoid fertilizers that are high in nitrogen, as this can promote leafy growth at the expense of bean production.
* **Pest Control:** Keep an eye out for common bean pests, such as aphids, bean beetles, and spider mites. You can control these pests with insecticidal soap, neem oil, or by handpicking them off the plants.
* **Supporting Pole Beans:** As your pole beans grow, train them to climb the trellis. Gently guide the vines up the support and tie them loosely if needed.
Recognizing When to Harvest
This is the moment we’ve been waiting for! Knowing when to harvest your string beans is crucial for getting the best flavor and texture.
* **Timing is Everything:** String beans are usually ready to harvest about 50-60 days after planting, depending on the variety.
* **Look and Feel:** The beans should be firm, crisp, and brightly colored. They should be long enough to easily snap, but not so large that the seeds inside are bulging.
* **The Snap Test:** The best way to tell if a bean is ready to harvest is to snap it in half. If it snaps easily and cleanly, it’s ready to go. If it’s tough or stringy, it needs more time.
* **Regular Harvesting:** Harvest your beans regularly, every few days, to encourage continued production. Overripe beans will become tough and stringy, and they will signal to the plant to stop producing new beans.
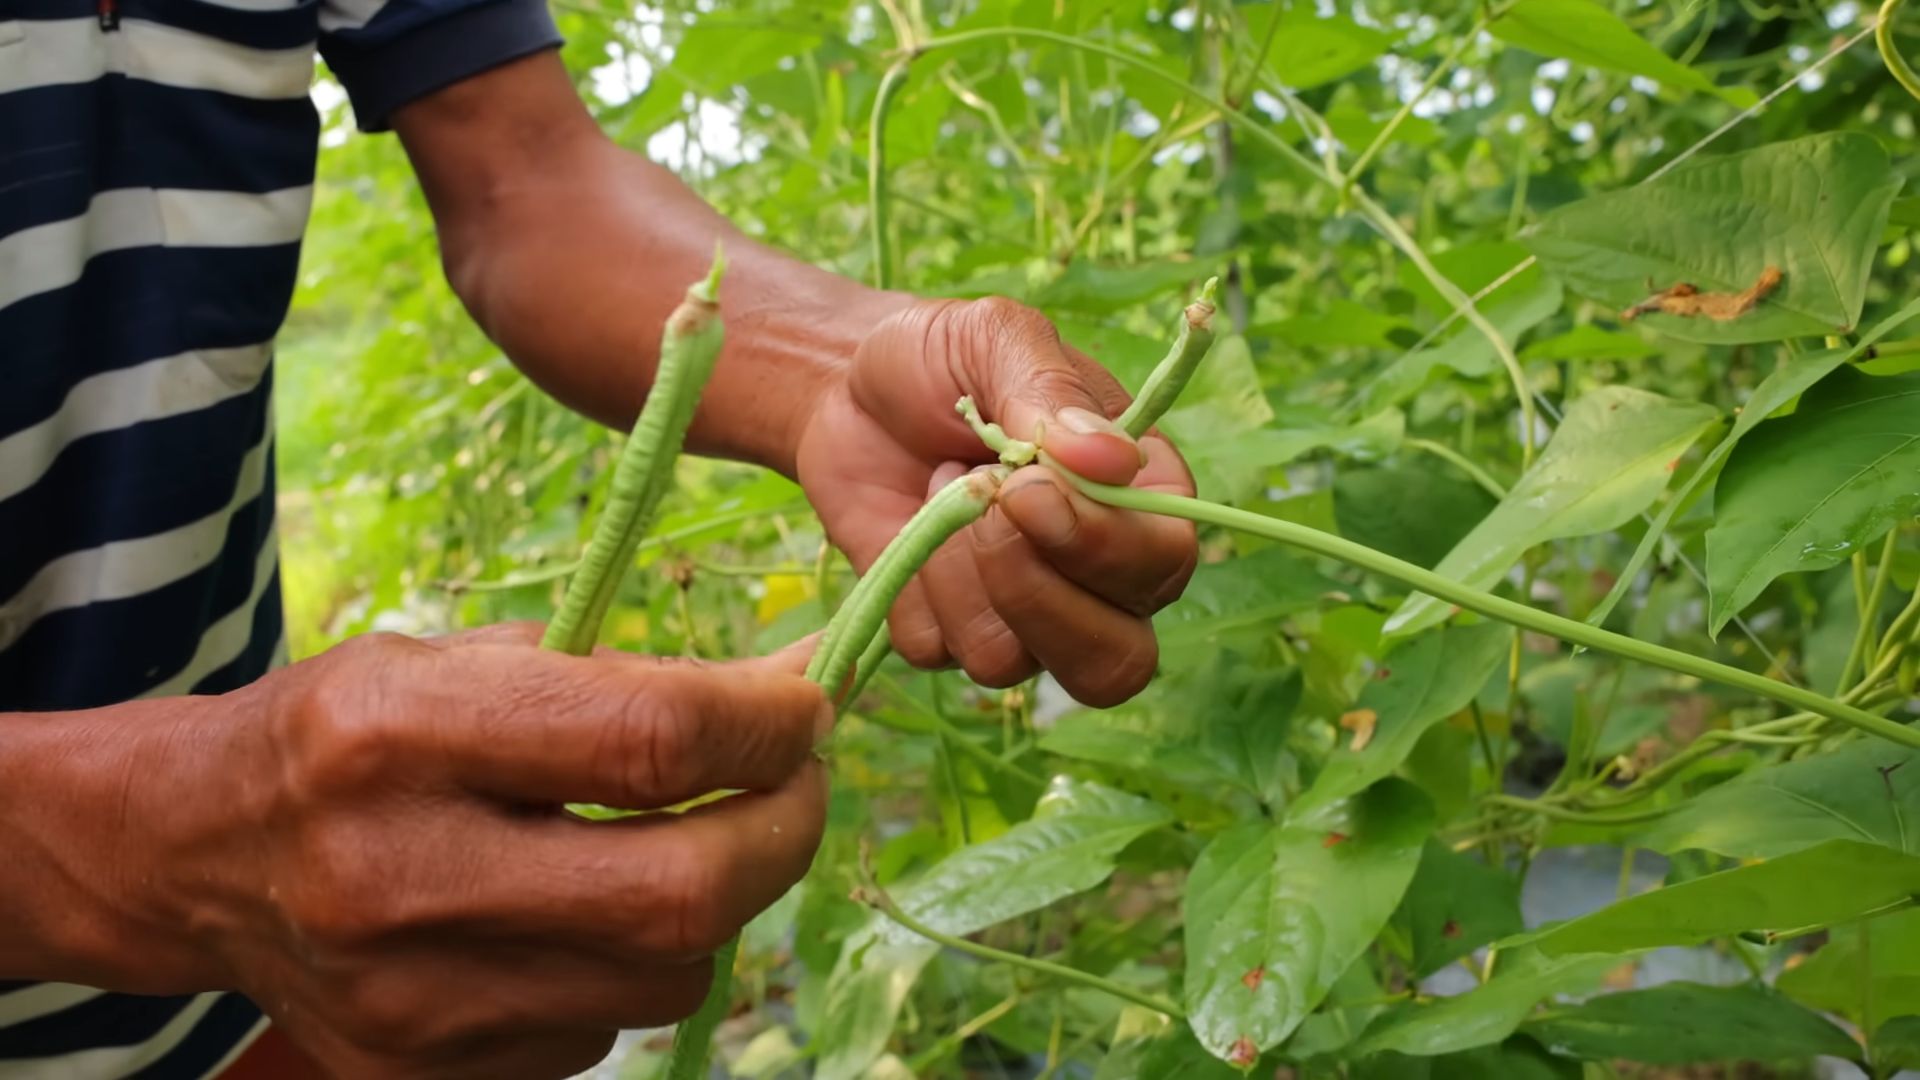
Harvesting Your String Beans
Okay, let’s get those beans!
1. **Gently Grasp:** Hold the bean gently near the stem.
2. **Snap or Cut:** Snap the bean off the plant with a gentle tug, or use scissors or pruning shears to cut it off. Be careful not to damage the plant.
3. **Handle with Care:** Handle the beans gently to avoid bruising them.
4. **Repeat:** Continue harvesting the beans as they ripen.
Storing Your Harvest
Now that you’ve harvested your bounty, here’s how to store your string beans:
* **Refrigeration:** Store unwashed string beans in a plastic bag in the refrigerator for up to a week.
* **Freezing:** For longer storage, you can freeze your string beans. Blanch them in boiling water for 2-3 minutes, then plunge them into ice water to stop the cooking process. Drain them well and freeze them in freezer bags or containers.
* **Canning:** String beans can also be canned for long-term storage. Follow a tested canning recipe to ensure safety.
Troubleshooting Common Problems
Even with the best care, you might encounter some problems while growing string beans. Here are a few common issues and how to address them:
* **Poor Germination:** If your bean seeds aren’t germinating, it could be due to cold soil, poor soil quality, or old seeds. Make sure the soil temperature is at least 60°F (15°C) before planting, and use fresh seeds.
* **Yellowing Leaves:** Yellowing leaves can be a sign of nutrient deficiency, overwatering, or disease. Check the soil drainage and fertilize if needed.
* **Bean Beetles:** Bean beetles can quickly defoliate your bean plants. Handpick them off the plants or use insecticidal soap or neem oil.
* **Powdery Mildew:** Powdery mildew is a fungal disease that can cause a white, powdery coating on the leaves. Improve air circulation around the plants and treat with a fungicide if necessary.
* **Blossom Drop:** Blossom drop is when the flowers fall off the plant without producing beans. This can be caused by hot weather, lack of pollination, or nutrient deficiency. Ensure adequate watering and fertilization.
Enjoying Your Homegrown String Beans
The best part of growing your own string beans is, of course, enjoying them! Here are a few ideas:
* **Steamed or Sautéed:** Simply steam or sauté your string beans with a little butter, garlic, and salt.
* **Salads:** Add cooked string beans to salads for a healthy and flavorful boost.
* **Casseroles:** String beans are a classic ingredient in casseroles.
* **Pickled:** Pickle your string beans for a tangy and delicious treat.
* **Freezing for Later:** As mentioned before, freezing is a great way to preserve your harvest for enjoyment throughout the year.
Growing string beans from seed is a rewarding experience. With a little planning and care, you can enjoy a bountiful harvest of fresh, delicious beans all season long. Happy gardening!
Conclusion
So, there you have it! Harvesting string beans from seeds doesn’t have to be a daunting task. It’s a rewarding process that connects you directly to your food source, offering fresher, more flavorful beans than you’ll ever find at the grocery store. The satisfaction of nurturing a tiny seed into a thriving plant that provides you with delicious, crisp string beans is truly unparalleled.
This DIY trick, focusing on the proper timing and technique for harvesting, is a must-try for any home gardener, whether you’re a seasoned pro or just starting out. By paying close attention to the pod size, seed development, and overall plant health, you can ensure a bountiful harvest of tender, flavorful string beans throughout the growing season.
But don’t stop there! Experiment with different varieties of string beans to discover your favorites. Try bush beans for compact growth, or pole beans for vertical gardening. Explore heirloom varieties for unique flavors and colors. You can also experiment with different cooking methods to showcase the fresh flavor of your homegrown beans. Try them steamed, sautéed, grilled, or even pickled for a tangy treat. Consider adding them to salads, stir-fries, or hearty stews. The possibilities are endless!
We’ve shared our best tips and tricks for successfully harvesting string beans from seeds, but the real magic happens when you get your hands dirty and experience it for yourself. Don’t be afraid to experiment, learn from your mistakes, and adapt the techniques to suit your specific growing conditions.
We wholeheartedly encourage you to give this DIY trick a try. Plant some string bean seeds, nurture them with care, and experience the joy of harvesting your own fresh, delicious beans. And most importantly, we want to hear about your experience! Share your photos, tips, and stories in the comments below. Let’s create a community of string bean enthusiasts and learn from each other’s successes and challenges. Happy gardening!
Frequently Asked Questions (FAQs)
What if I harvest my string beans too early?
Harvesting string beans too early will result in smaller, less developed pods. While they might still be edible, they won’t have the same plumpness and satisfying crunch as properly matured beans. They may also lack the full flavor potential. If you accidentally harvest some beans too early, you can still use them in salads or stir-fries, but be aware that they might be a bit more tender and less flavorful. It’s always better to err on the side of waiting a day or two longer than harvesting too soon.
What if I harvest my string beans too late?
Harvesting string beans too late is a more common problem. Overripe beans become tough, stringy, and less palatable. The seeds inside the pods will also become larger and harder, making the beans less enjoyable to eat. You’ll notice the pods becoming thicker and losing their vibrant green color. If you find yourself with a batch of overripe beans, you can still try to salvage them. Shell the beans and cook them for a longer period to soften them up. You can also use them in soups or stews where the texture is less critical. However, it’s best to avoid letting your beans get to this stage by regularly checking them for ripeness.
How often should I harvest my string beans?
String beans are prolific producers, so you’ll need to harvest them regularly to keep the plants producing. Aim to harvest every 2-3 days during peak season. This will encourage the plants to continue flowering and setting new pods. If you let the beans mature too much on the plant, it will signal to the plant that it has completed its reproductive cycle, and it will slow down or stop producing new beans. Regular harvesting is key to maximizing your yield.
How do I know when my string beans are ready to harvest?
The best way to determine if your string beans are ready to harvest is to look for a few key indicators. The pods should be firm, plump, and brightly colored. They should snap easily when bent. The seeds inside the pods should be small and underdeveloped. Avoid harvesting beans that are bulging or feel hard, as this indicates that the seeds are too mature. The ideal size for harvesting will vary depending on the variety of string bean, so consult your seed packet or plant tag for specific recommendations.
Can I freeze my string beans for later use?
Yes, freezing is an excellent way to preserve your string beans and enjoy them throughout the year. To freeze string beans, first wash and trim them. Then, blanch them in boiling water for 2-3 minutes, followed by an immediate plunge into ice water to stop the cooking process. This helps to preserve their color, texture, and flavor. Drain the beans thoroughly and spread them out on a baking sheet to freeze individually. Once frozen, transfer them to a freezer bag or container. Properly frozen string beans can last for up to 8-12 months.
What are some common pests and diseases that affect string beans?
String beans can be susceptible to a variety of pests and diseases, including aphids, bean beetles, spider mites, and fungal diseases like powdery mildew and bean rust. Regularly inspect your plants for signs of infestation or disease. Use organic pest control methods, such as insecticidal soap or neem oil, to control pests. Ensure good air circulation around your plants to prevent fungal diseases. Remove any infected leaves or plants promptly to prevent the spread of disease. Crop rotation can also help to reduce the risk of pest and disease problems.
How do I store string beans after harvesting?
Freshly harvested string beans are best stored in the refrigerator. Place them in a plastic bag or container lined with a damp paper towel. This will help to keep them hydrated and prevent them from drying out. Properly stored string beans can last for up to a week in the refrigerator. Avoid washing the beans until you are ready to use them, as this can promote spoilage.
What type of soil is best for growing string beans?
String beans prefer well-drained soil that is rich in organic matter. Amend your soil with compost or other organic materials before planting to improve its fertility and drainage. The ideal soil pH for string beans is between 6.0 and 7.0. You can test your soil pH using a soil testing kit and adjust it accordingly. Avoid planting string beans in heavy clay soil, as this can lead to root rot.
How much sunlight do string beans need?
String beans need at least 6-8 hours of sunlight per day to thrive. Choose a sunny location in your garden for planting. If you are growing string beans indoors, provide them with supplemental lighting if necessary. Insufficient sunlight can result in leggy plants and reduced yields.
Can I grow string beans in containers?
Yes, string beans can be successfully grown in containers, especially bush bean varieties. Choose a container that is at least 12 inches deep and wide to provide adequate space for the roots to grow. Use a well-draining potting mix and ensure that the container has drainage holes. Water regularly and fertilize as needed. Place the container in a sunny location. Pole bean varieties can also be grown in containers, but they will require a trellis or other support structure.

Leave a Comment