
Hanging mustard greens vertical garden: Ever dreamed of plucking fresh, peppery mustard greens right from your wall? Imagine stepping outside your kitchen and snipping vibrant, healthy leaves for your salad or stir-fry, all grown in a stunning vertical display. It’s not just a fantasy; it’s an achievable reality with a DIY hanging mustard greens vertical garden!
For centuries, humans have cultivated gardens in innovative ways, adapting to limited spaces and challenging environments. From the Hanging Gardens of Babylon, one of the Seven Wonders of the Ancient World, to the ingenious balcony gardens of modern city dwellers, the desire to connect with nature and grow our own food has always been strong. Mustard greens, with their bold flavor and nutritional punch, have been a staple in cuisines around the world, particularly in Asian and Southern American cooking.
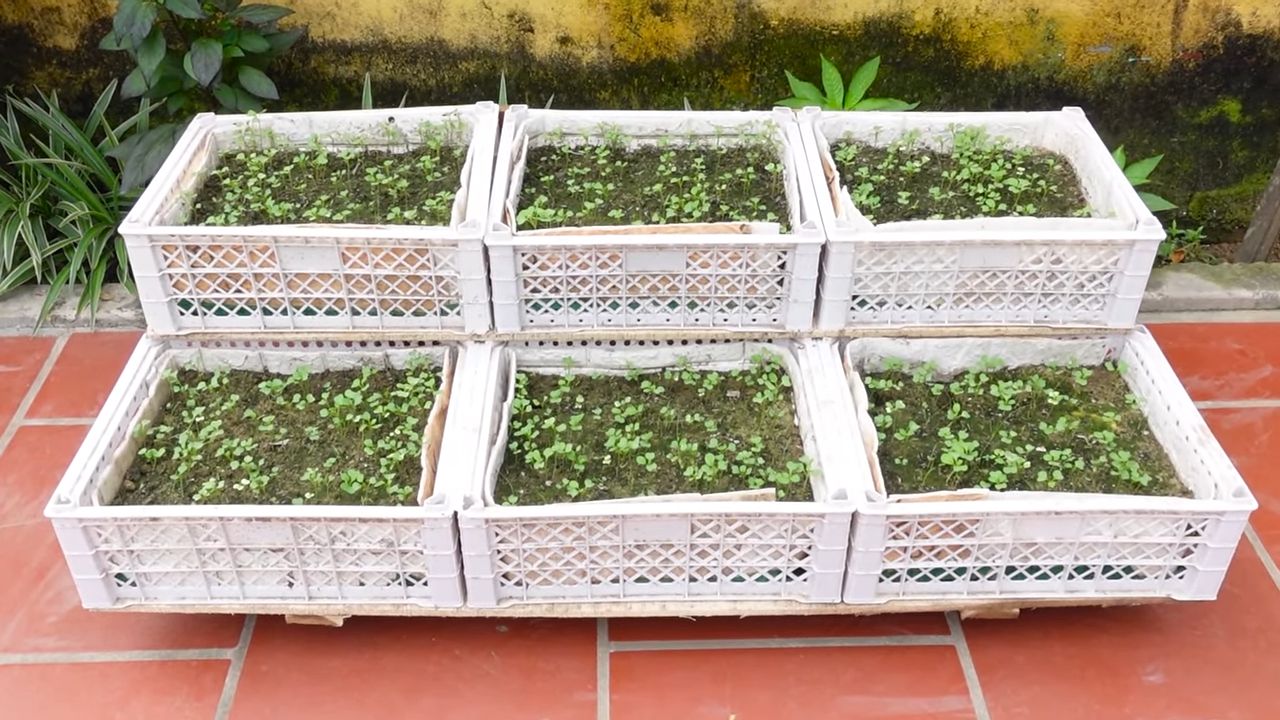
But why should you embark on this DIY adventure? Well, for starters, space is often a premium, especially in urban settings. A hanging mustard greens vertical garden allows you to maximize your growing potential without sacrificing precious square footage. Plus, it’s incredibly rewarding to nurture your own food source, knowing exactly where your produce comes from and avoiding harmful pesticides. Beyond the practical benefits, a vertical garden adds a touch of natural beauty to your home, transforming a dull wall into a vibrant, living masterpiece. I’m excited to show you how easy and fun it is to create your own!
DIY Vertical Mustard Green Garden: How to Build It Yourself!
Hello dear garden friends! I love fresh herbs and vegetables, especially when they come directly from my own garden. But what if you don’t have a large garden? Don’t worry, I have the solution: a vertical mustard green garden! It’s not only space-saving but also a real eye-catcher. And the best part? You can easily build it yourself. Let’s get started!
What you need:
- PVC pipe (approx. 10-15 cm diameter): The length depends on how tall you want your garden to be. I recommend starting with about 1.5 meters.
- PVC end cap: To fit the PVC pipe.
- Drill with a hole saw attachment (approx. 5-7 cm diameter): For the planting holes.
- Drill with a small drill bit: For the drainage holes.
- Geotextile or weed fleece: To prevent soil from being washed out of the holes.
- Cable ties or wire: To secure the geotextile.
- Soil: A high-quality potting mix is best.
- Mustard green seeds or seedlings: Depending on your preference.
- Watering can or hose: For watering.
- Gloves: To protect your hands.
- Safety glasses: Always important when drilling!
- Tape measure or ruler: To measure the planting holes.
- Pen or marker: To mark the planting holes.
- Optional: Spray paint to decorate the PVC pipe.
- Optional: Gravel or expanded clay for drainage at the bottom of the pipe.
Step-by-Step Instructions:
1. Preparing the PVC Pipe:
- Cleaning: First, you should thoroughly clean the PVC pipe to remove dust and dirt. A damp cloth is sufficient.
- Optional: Painting: If you like, you can now paint the pipe with spray paint in your favorite color. Let the paint dry completely before continuing. I painted mine a beautiful shade of green to match the mustard greens!
2. Marking the Planting Holes:
- Spacing: Use the tape measure or ruler to measure the distance between the planting holes. I recommend a distance of about 15-20 cm between the holes and staggering the holes slightly in each row so the plants have enough space.
- Marking: Mark the spots where you want to drill the holes with a pen or marker. Make sure the marks are clearly visible.
3. Drilling the Planting Holes:
- Safety: Put on your safety glasses!
- Hole Saw: Attach the hole saw to your drill.
- Drilling: Carefully drill the planting holes at the marked spots. Don’t apply too much pressure, so the PVC pipe doesn’t crack.
- Removal: Remove the cut-out PVC circles.
4. Making the Drainage Holes:
- Drilling: Use a small drill bit to drill several drainage holes in the bottom of the PVC pipe. This is important so that excess water can drain out and the roots don’t rot. I drilled about 5-6 holes.
5. Lining the Pipe with Geotextile:
- Cutting: Cut the geotextile or weed fleece so that it can line the inside of the PVC pipe. It should be slightly longer than the pipe itself.
- Inserting: Roll up the geotextile and slide it into the PVC pipe.
- Securing: Secure the geotextile with cable ties or wire at the top and bottom ends of the pipe. Make sure the geotextile covers the planting holes so that no soil falls out.
6. Preparing the Soil:
- Optional: Drainage: Fill a layer of gravel or expanded clay (about 10-15 cm high) into the bottom of the pipe. This further improves drainage.
- Filling with soil: Fill the pipe with high-quality potting soil. Leave about 5-10 cm of space at the top.
7. Planting:
- Prepare plants: If you are using seedlings, gently loosen the roots.
- Planting: Place the mustard green plants into the planting holes. Fill the holes with soil and press down lightly. If you are using seeds, sow them according to the instructions on the package.
8. Watering:
- Watering: Water the plants thoroughly. Make sure the soil is evenly moist.
9. Attaching the End Cap:
- Placing: Place the PVC end cap on the bottom of the pipe. This prevents soil from falling out.
10. Setting up the Vertical Garden:
- Location: Choose a sunny location for your vertical garden. Mustard greens need a lot of light to grow well.
- Securing: Make sure the garden is stable and cannot fall over. You can, for example, attach it to a wall or weigh it down with stones.
Caring for Your Mustard Green Garden:
- Watering: Water the plants regularly, especially on hot days. The soil should always be slightly moist, but not wet.
- Fertilizing: Fertilize the plants every few weeks with a liquid fertilizer for vegetables.
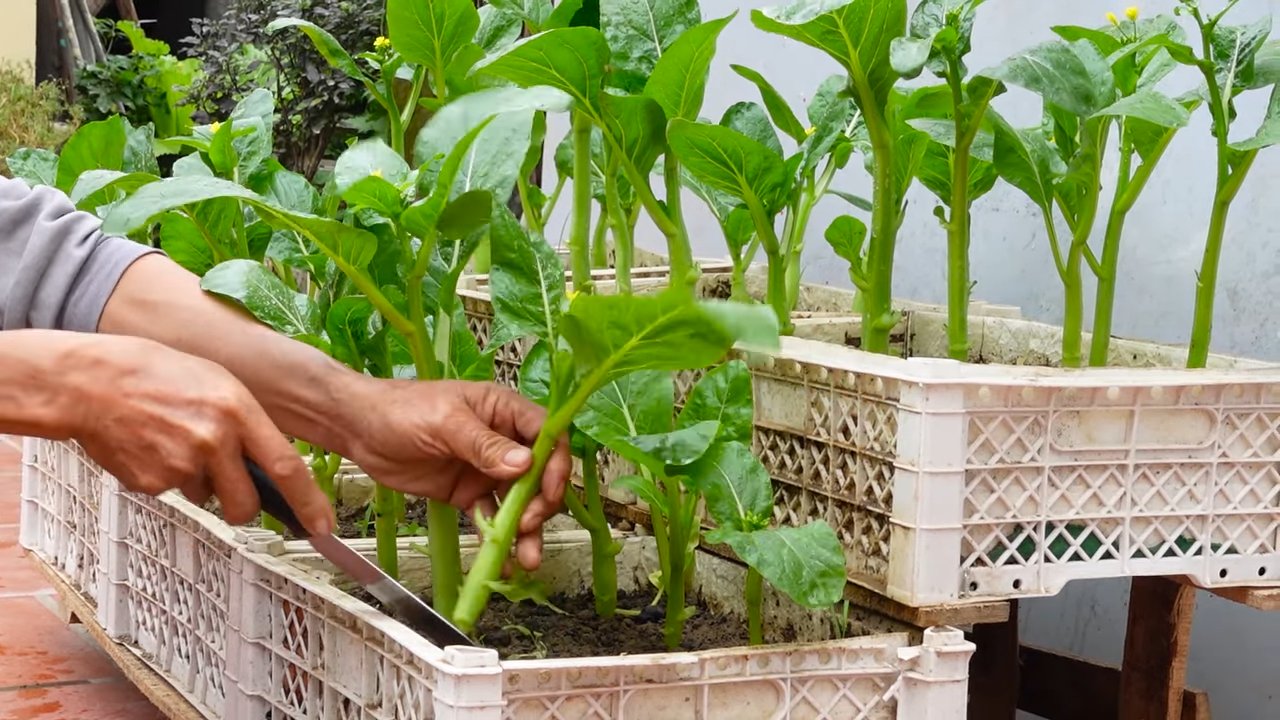
- Harvesting: You can harvest the mustard greens as soon as the leaves are large enough. Simply cut the leaves with scissors. The plant will continue to grow and produce new leaves.
- Pest Control: Check the plants regularly for pests. If necessary, you can use natural pesticides.
Additional Tips:
- Different Varieties: You can grow different varieties of mustard greens in your vertical garden. This provides variety and different flavors.
- Other Plants: You can also grow other herbs and vegetables in your vertical garden, such as lettuce, spinach, or strawberries.
- Upcycling: Instead of a new PVC pipe, you can also use an old one. This is environmentally friendly and saves money.
- Decoration: You can decorate your vertical garden with small decorations, such as stones, shells, or small figures.
I hope this guide helps you build your own vertical mustard green garden. It’s a great project that is not only fun but also brings fresh vegetables right to your doorstep. Happy gardening
Conclusion
So, there you have it! Creating your own hanging mustard greens vertical garden isn’t just a trendy project; it’s a game-changer for anyone looking to maximize space, enjoy fresh, homegrown produce, and add a touch of vibrant greenery to their lives. We’ve walked you through the simple steps, highlighting the ease and affordability of this DIY endeavor.
Why is this a must-try? Because it’s more than just gardening; it’s about reclaiming your space, connecting with nature, and savoring the unparalleled flavor of freshly harvested mustard greens. Imagine stepping outside your door and snipping off a handful of peppery leaves for your salad, stir-fry, or even a vibrant green smoothie. The taste difference between store-bought and homegrown is truly remarkable.
But the benefits extend beyond just taste. A vertical garden is a fantastic way to improve air quality, reduce stress, and even boost your mood. The simple act of tending to your plants can be incredibly therapeutic, offering a welcome respite from the hustle and bustle of daily life. Plus, you’ll be reducing your carbon footprint by growing your own food locally.
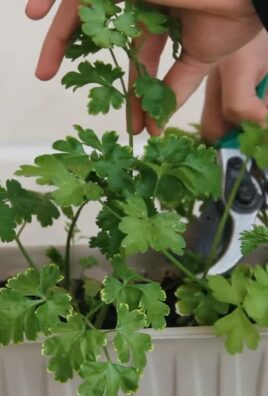
Looking for variations? Absolutely! While we’ve focused on mustard greens, this vertical garden technique can be adapted for a wide variety of leafy greens and herbs. Consider experimenting with spinach, kale, lettuce, arugula, or even herbs like basil, parsley, and cilantro. You can also adjust the size and configuration of your garden to fit your specific space and needs. For a more decorative touch, try painting your containers in bright, cheerful colors or adding decorative elements like pebbles or shells. You could even incorporate companion planting, such as adding marigolds to deter pests naturally.
Don’t be intimidated by the thought of “gardening.” This project is designed to be accessible to everyone, regardless of their experience level. With a little bit of effort and creativity, you can create a thriving vertical garden that will bring you joy and delicious, healthy food for months to come.
We wholeheartedly encourage you to give this DIY hanging mustard greens vertical garden a try. It’s a rewarding project that offers a multitude of benefits, from fresh produce to improved well-being. And most importantly, we want to hear about your experience! Share your photos, tips, and stories with us in the comments below. Let’s create a community of vertical gardeners and inspire others to embrace the joys of homegrown food. What are you waiting for? Get your hands dirty and start growing!
Frequently Asked Questions (FAQ)
What are the best materials to use for my hanging mustard greens vertical garden?
The best materials are durable, weather-resistant, and food-safe. For containers, consider recycled plastic bottles, fabric grow bags, or even repurposed gutters. Ensure they have drainage holes to prevent waterlogging. For the hanging structure, sturdy rope, chains, or even metal shelving can work well. The potting mix should be a well-draining blend of compost, perlite, and vermiculite to provide nutrients and aeration for your mustard greens.
How much sunlight do mustard greens need in a vertical garden?
Mustard greens thrive in full sun to partial shade. Aim for at least 4-6 hours of direct sunlight per day. If you don’t have enough natural sunlight, consider supplementing with grow lights, especially if you’re growing indoors or in a shaded area. Monitor your plants closely and adjust their position as needed to ensure they’re getting adequate light.
How often should I water my hanging mustard greens?
Watering frequency depends on the weather, the type of container you’re using, and the drainage of your potting mix. Generally, you should water when the top inch of soil feels dry to the touch. Avoid overwatering, as this can lead to root rot. In hot, dry weather, you may need to water daily, while in cooler, wetter weather, you may only need to water every few days. Check the moisture level regularly and adjust your watering schedule accordingly.
What kind of fertilizer should I use for my vertical mustard greens garden?
Mustard greens benefit from regular fertilization. Use a balanced, water-soluble fertilizer or an organic fertilizer specifically formulated for leafy greens. Follow the instructions on the fertilizer packaging for application rates. You can also amend your potting mix with compost or worm castings to provide a slow-release source of nutrients. Avoid over-fertilizing, as this can lead to excessive leaf growth and reduced flavor.
How do I protect my mustard greens from pests and diseases in a vertical garden?
Prevention is key to pest and disease control. Start with healthy plants and use a well-draining potting mix. Regularly inspect your plants for signs of pests or diseases. Common pests that affect mustard greens include aphids, flea beetles, and cabbage worms. You can control these pests with insecticidal soap, neem oil, or by handpicking them off the plants. To prevent diseases, ensure good air circulation and avoid overwatering. If you notice any signs of disease, remove the affected leaves immediately.
Can I grow other vegetables or herbs in the same vertical garden as my mustard greens?
Yes, you can definitely companion plant with your mustard greens. Good companion plants include radishes, carrots, and onions, which can help deter pests. Herbs like dill and chamomile can also be beneficial. Avoid planting mustard greens near plants in the brassica family, such as cabbage and broccoli, as they can attract the same pests and diseases.
How long does it take for mustard greens to mature in a vertical garden?
Mustard greens are relatively fast-growing. You can typically start harvesting leaves within 30-45 days of planting. Harvest the outer leaves as needed, allowing the inner leaves to continue growing. This cut-and-come-again method will provide you with a continuous supply of fresh mustard greens throughout the growing season.
How do I harvest mustard greens from my vertical garden?
Harvest mustard greens by snipping off the outer leaves with scissors or garden shears. Leave the inner leaves intact to continue growing. Harvest in the morning, when the leaves are crisp and fresh. Wash the leaves thoroughly before using them.
What are some creative ways to display my hanging mustard greens vertical garden?
Get creative with your display! Use different colored containers, arrange them in interesting patterns, or add decorative elements like fairy lights or wind chimes. You can also create a living wall by attaching multiple vertical gardens to a fence or wall. Consider the overall aesthetic of your space and choose a display that complements your style.
What do I do with my vertical garden during the winter months?
Depending on your climate, you may be able to overwinter your mustard greens in a protected location, such as a greenhouse or indoors. If you live in a colder climate, you may need to start new plants in the spring. You can also use your vertical garden to grow other cold-hardy greens and herbs during the winter months. Clean and store your containers properly to prevent the spread of diseases.
Leave a Comment