
Water spinach plastic bottle gardening is a fantastic way to grow fresh, nutritious greens right in your own home, even if you have limited space! Have you ever dreamed of snipping fresh vegetables just steps from your kitchen? Well, this DIY project makes that dream a reality. For centuries, cultures around the world have practiced resourceful gardening techniques, repurposing materials to cultivate food. Think of ancient civilizations using clay pots and terraced gardens to maximize yields – we’re simply carrying on that tradition with a modern twist!
In today’s world, where sustainability and healthy eating are more important than ever, learning how to grow your own food is incredibly empowering. Many people struggle with access to fresh produce or simply lack the space for a traditional garden. That’s where this water spinach plastic bottle hack comes in. It’s an affordable, eco-friendly, and space-saving solution that allows anyone to enjoy the satisfaction of growing their own vegetables. I’m excited to share this simple yet effective method with you, so you can start harvesting delicious water spinach in no time!
“`html
DIY Water Spinach Cultivation in Plastic Bottles: A Comprehensive Guide
Hello, dear garden friends! Do you want to grow fresh water spinach (also known as Kangkong or Morning Glory) but have limited space? Don’t worry, I’ll show you how you can do it easily in recycled plastic bottles! It’s a great project for balconies, small gardens, or even windowsills. And the best part: it’s environmentally friendly and saves money!
What you need:
- Plastic bottles: 1.5- or 2-liter bottles are best. The bigger, the better for the roots.
- Water spinach seeds: You can find these at many garden centers or online.
- Soil: A good potting mix or a mixture of garden soil and compost is ideal.
- Scissors or knife: For cutting the bottles.
- Drill or nail: For the drainage holes.
- Water: For watering, of course!
- Optional: Coconut coir or gravel for better drainage.
- Optional: Plant labels to keep track.
Preparation of the Plastic Bottles:
- Cleaning: Thoroughly rinse the plastic bottles with water and dish soap to remove all residues.
- Cutting: Cut the bottles in half. You can either use both halves or just the bottom half. If you use both halves, turn the top half upside down and insert it like a funnel into the bottom half. This saves space and water!
- Drainage holes: Drill or poke several small holes in the bottom of the bottle with a nail. This is super important so that the water can drain and the roots don’t rot.
- Optional: Place a layer of coconut coir or gravel at the bottom of the bottle to further improve drainage.
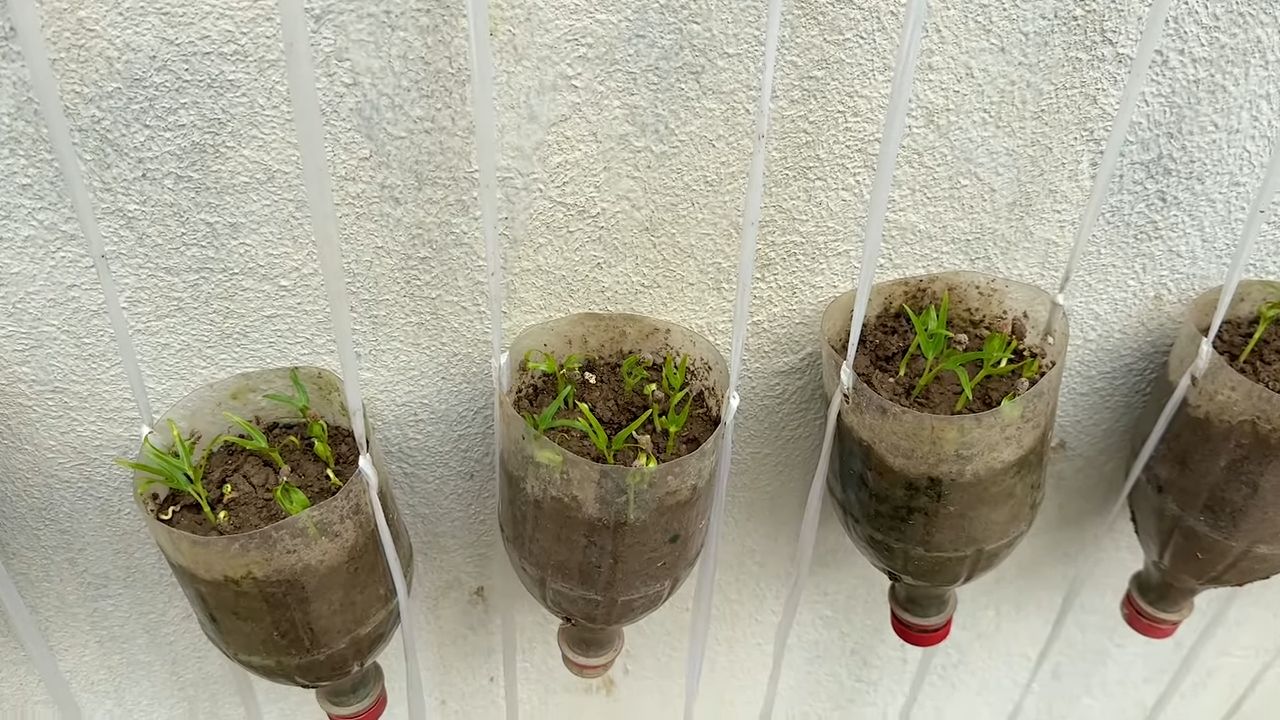
Sowing the Water Spinach Seeds:
- Fill with soil: Fill the prepared bottles with soil. Leave about 2-3 cm of space to the rim.
- Sow seeds: Distribute the water spinach seeds evenly on the soil. Press them down lightly.
- Cover: Cover the seeds with a thin layer of soil (approx. 0.5 cm).
- Water: Water the soil carefully so that it is well moistened. Be careful not to wash the seeds away.
Care of the Water Spinach:
- Location: Place the planted bottles in a sunny location. Water spinach loves the sun!
- Watering: Keep the soil moist, but not wet. Water regularly, especially on hot days. Water spinach likes it moist, but you should avoid waterlogging.
- Fertilizing: Fertilize the water spinach every few weeks with an organic liquid fertilizer. This promotes growth and ensures a rich harvest.
- Pests: Watch out for pests like aphids or snails. If necessary, you can use organic pesticides.
- Support: Water spinach can get quite long. If the shoots get too long, you can support them with small stakes or a trellis.
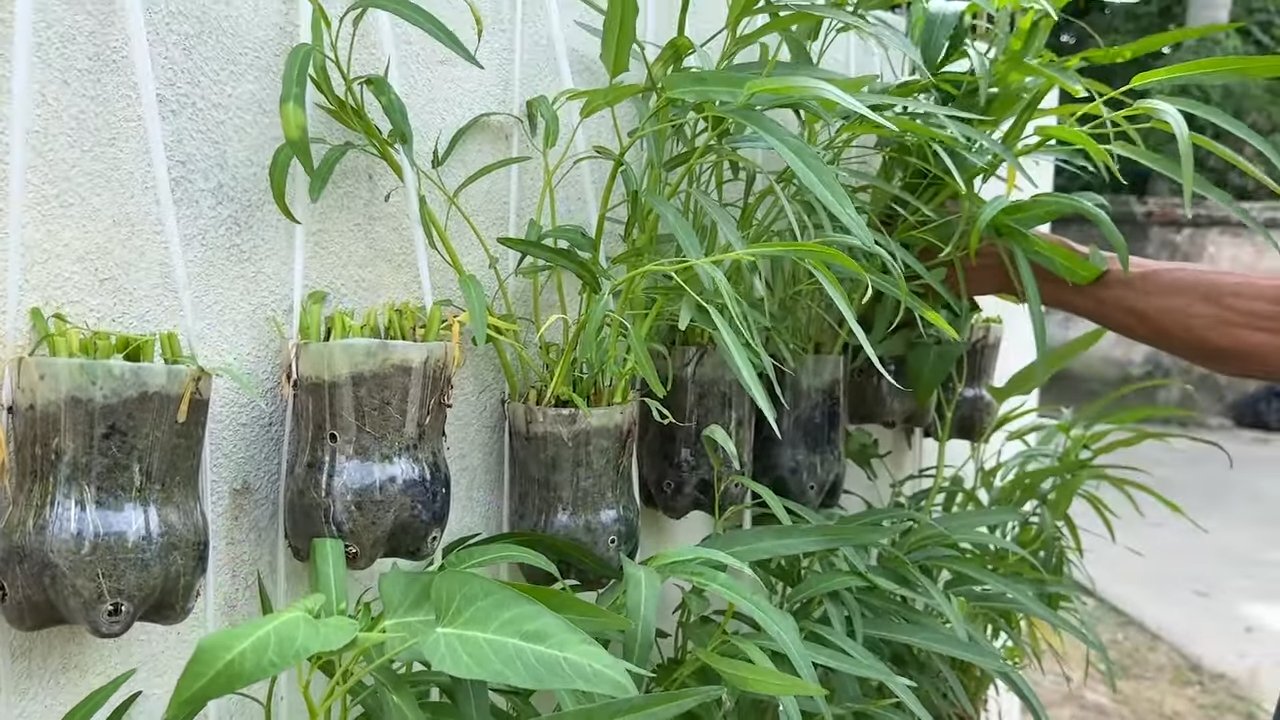
Harvesting the Water Spinach:
- When to harvest: You can harvest the water spinach as soon as the shoots are about 20-30 cm long.
- How to harvest: Cut the shoots with scissors or a knife. Leave a few leaves on the plant so it can continue to grow.
- Harvest regularly: The more often you harvest, the more water spinach will grow back!
Detailed Step-by-Step Guide:
Harvest: You can harvest the water spinach as soon as the shoots are about 20-30 cm long. Cut the shoots with scissors or a knife. Leave a few leaves on the plant so it can continue to grow. The more often you harvest, the more water spinach will grow back!
Collect and prepare bottles: Collect empty plastic bottles. I prefer 2-liter bottles because they offer enough space for the roots. Clean them thoroughly with warm soapy water to remove all residues. This is important so that no unwanted substances get into your soil.
Cut the bottles: Now comes the fun part! Take your scissors or knife and cut the bottles in half. Make sure the edges are not too sharp so you don’t injure yourself. You can also smooth the edges with sandpaper.
Drill drainage holes: Take your drill or nail and make several small holes in the bottom of the bottles. I always make at least 5-6 holes to ensure the water can drain well. This prevents waterlogging, which water spinach does not like at all.
Improve drainage (optional): For even better drainage, you can place a layer of coconut coir or gravel at the bottom of the bottles. This helps to drain the water better and protect the roots from rot. I like to use coconut coir because it also retains moisture.
Fill with soil: Fill the prepared bottles with soil. I use a mixture of garden soil and compost because it provides the water spinach with all the important nutrients. Leave about 2-3 cm of space to the rim so you don’t flood everything when you water.
Sow seeds: Distribute the water spinach seeds evenly on the soil. Press them lightly so they have good contact with the soil. I always sow a few more seeds to ensure that enough plants germinate.
Cover seeds: Cover the seeds with a thin layer of soil (approx. 0.5 cm). This protects the seeds from drying out and helps them germinate.
Water: Water the soil carefully so that it is well moistened. Be careful not to wash the seeds away. I prefer to use a spray bottle for this because the water is then distributed evenly.
Choose a location: Place the planted bottles in a sunny location. Water spinach loves the sun and needs at least 6 hours of sunlight per day to grow well. A south-facing balcony or a sunny windowsill are ideal.
Water regularly: Keep the soil moist, but not wet. Water regularly, especially on hot days. I always check with my finger if the soil is still moist enough. If it feels dry, it’s time to water.
Fertilize (optional): Fertilize the water spinach every few weeks with an organic liquid fertilizer. This promotes growth and ensures a rich harvest. I like to use an algae-based fertilizer because it is particularly good for the growth of leafy greens.
Control pests: Watch out for pests like aphids or snails. If necessary, you can use organic pesticides. I check my plants regularly and remove pests immediately before they can spread.
Support (optional): Water spinach can get quite long. If the shoots get too long, you can support them with small stakes or a trellis. This prevents the shoots from breaking or lying on the ground.
Conclusion
So, there you have it! Transforming a simple plastic bottle into a self-watering system for your water spinach is not just a clever upcycling project; it’s a game-changer for anyone looking to cultivate fresh, vibrant greens with minimal effort. This DIY trick addresses common gardening challenges like inconsistent watering, soil erosion, and even space constraints, making it an ideal solution for both seasoned gardeners and beginners alike.
Why is this a must-try? Because it’s sustainable, cost-effective, and incredibly rewarding. You’re giving a new life to a discarded plastic bottle, reducing waste, and simultaneously creating a thriving environment for your water spinach. The self-watering mechanism ensures your plants receive a consistent supply of moisture, promoting healthy growth and abundant harvests. Imagine the satisfaction of harvesting your own organically grown water spinach, knowing you played a part in its journey from seed to table, all thanks to a simple DIY project.
But the beauty of this method lies in its adaptability. Feel free to experiment with different bottle sizes to accommodate varying plant needs. You can also add organic fertilizers directly to the water reservoir for a nutrient boost. Consider using multiple bottles for larger containers or raised beds, creating a network of self-watering systems. For those living in hotter climates, wrapping the bottle with reflective material can help regulate soil temperature and prevent overheating. You can even get creative with the bottle’s exterior, painting it or decorating it to match your garden’s aesthetic.
Don’t be afraid to personalize this project and make it your own. The possibilities are endless!
We wholeheartedly encourage you to try this DIY water spinach plastic bottle self-watering system. It’s a simple yet effective way to enhance your gardening experience and enjoy the delicious benefits of homegrown water spinach. Once you’ve given it a go, we’d love to hear about your experience. Share your photos, tips, and variations in the comments below. Let’s build a community of sustainable gardeners and inspire others to embrace the joy of growing their own food. Happy gardening!
Frequently Asked Questions (FAQ)
What type of plastic bottle is best for this project?
Ideally, you should use a food-grade plastic bottle, such as those used for water, juice, or soda. These are generally made from PET (polyethylene terephthalate) or HDPE (high-density polyethylene), which are considered safer for gardening purposes. Avoid using bottles that previously contained harsh chemicals or cleaning products, as residue could contaminate the soil and harm your plants. Make sure to thoroughly clean the bottle before using it.
How often do I need to refill the water in the bottle?
The frequency of refilling depends on several factors, including the size of the bottle, the climate, and the water spinach’s growth stage. In hotter, drier climates, you’ll need to refill more often than in cooler, more humid conditions. As a general guideline, check the water level every few days and refill when it’s about halfway empty. You can also monitor the soil moisture around the plant; if it feels dry to the touch, it’s time to refill.
Can I use this self-watering system for other plants besides water spinach?
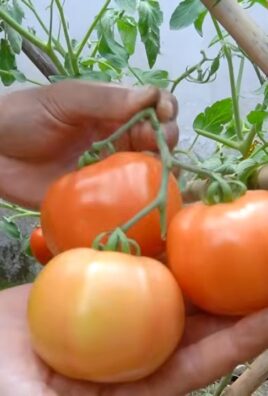
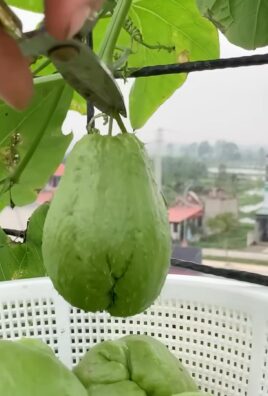
Yes, absolutely! This self-watering system can be adapted for various plants, especially those that prefer consistently moist soil. Herbs like basil and mint, vegetables like tomatoes and peppers, and even some flowering plants can benefit from this method. However, it’s essential to consider the specific water requirements of each plant. Plants that prefer drier soil may not thrive in this system. Adjust the size of the bottle and the number of holes accordingly to match the plant’s needs.
Will the plastic bottle leach harmful chemicals into the soil?
While there’s always a slight risk of leaching with any plastic, using food-grade plastic bottles minimizes this concern. PET and HDPE are relatively stable plastics and are less likely to leach harmful chemicals into the soil, especially when used for short-term gardening projects. To further reduce the risk, avoid exposing the bottle to direct sunlight for extended periods, as heat can accelerate the leaching process. If you’re concerned about plastic leaching, consider using a glass bottle instead, although this may be more fragile.
How do I prevent algae growth inside the bottle?
Algae growth is a common issue in self-watering systems, as the moist environment and sunlight create ideal conditions for algae to thrive. To prevent algae growth, you can wrap the bottle with dark-colored tape or paint it with a non-toxic, opaque paint. This will block sunlight from reaching the water inside the bottle, inhibiting algae growth. You can also add a small amount of hydrogen peroxide to the water reservoir, which acts as a natural algaecide. However, be careful not to add too much, as it can harm your plants.
What if the soil around the water spinach becomes waterlogged?
Waterlogging can occur if the drainage holes in the bottle are too large or if the soil is not well-draining. To prevent waterlogging, ensure that the drainage holes are small enough to allow water to seep out gradually. You can also improve soil drainage by adding perlite or vermiculite to the potting mix. If the soil is already waterlogged, gently loosen the soil around the plant to improve aeration and allow excess water to evaporate.
How do I clean the bottle after harvesting the water spinach?
After harvesting your water spinach, it’s essential to clean the bottle thoroughly before reusing it. Remove any remaining soil or plant debris from the bottle. Wash the bottle with warm, soapy water and rinse it thoroughly. You can also use a bottle brush to scrub the inside of the bottle and remove any stubborn residue. To disinfect the bottle, soak it in a solution of water and bleach (1 part bleach to 10 parts water) for 30 minutes. Rinse the bottle thoroughly with clean water before using it again.
Can I use this system indoors?
Yes, this self-watering system is perfect for indoor gardening, especially if you have limited space or live in an apartment. Place the water spinach in a sunny location, such as near a window, or supplement with grow lights if needed. Be mindful of potential water spills and place a tray underneath the container to catch any excess water.
What are some common problems I might encounter, and how do I fix them?
Some common problems include slow water drainage, pest infestations, and nutrient deficiencies. Slow water drainage can be caused by clogged drainage holes or compacted soil. Clean the drainage holes and loosen the soil to improve drainage. Pest infestations can be addressed with organic pest control methods, such as neem oil or insecticidal soap. Nutrient deficiencies can be corrected by adding organic fertilizers to the water reservoir or by using a balanced potting mix. Regularly inspect your plants for signs of problems and address them promptly to ensure healthy growth.
How does this DIY trick help with water conservation?
This DIY self-watering system significantly contributes to water conservation by delivering water directly to the plant’s roots, minimizing water loss through evaporation and runoff. Unlike traditional watering methods, where a significant portion of water is lost to the environment, this system ensures that the water is used efficiently by the plant. This is particularly beneficial in arid or drought-prone regions, where water resources are scarce. By using this system, you can reduce your water consumption and contribute to a more sustainable gardening practice.
Leave a Comment