
Keep Basil Fresh – ever bought a beautiful bunch of basil, only to watch it wilt and turn black within days? I know I have! It’s incredibly frustrating, especially when you’re dreaming of pesto, Caprese salads, and all those delicious summer dishes that basil elevates. But don’t despair, fellow herb lovers! This DIY guide is your secret weapon to keeping your basil vibrant and flavorful for weeks, not days.
Basil, with its fragrant leaves and rich history, has been cherished for centuries. Originating in Southeast Asia, it made its way across the globe, becoming a staple in Mediterranean cuisine and holding symbolic significance in various cultures. In some traditions, it represents love and good fortune. But regardless of its symbolic meaning, one thing is universal: the desire to enjoy its fresh, aromatic flavor.
Let’s face it, store-bought basil can be expensive, and nobody wants to throw away money (or perfectly good herbs!). Plus, having fresh basil readily available encourages healthier cooking and adds a burst of flavor to everyday meals. That’s why mastering the art of how to keep basil fresh is a game-changer. In this article, I’ll share my tried-and-true DIY trick that will transform the way you store basil, ensuring you always have a vibrant, flavorful supply at your fingertips. Get ready to say goodbye to wilted basil and hello to culinary bliss!
Keeping Basil Fresh: A DIY Guide to Prolonging Its Life
Hey there, fellow herb enthusiasts! Are you tired of buying fresh basil only to watch it wilt and turn black within days? I feel your pain! Basil is a fantastic herb, adding a burst of flavor to everything from pasta sauces to salads. But its delicate nature can be frustrating. That’s why I’m sharing my tried-and-true DIY methods for keeping basil fresh for weeks, not just days. Let’s dive in!
Understanding Why Basil Wilts So Quickly
Before we jump into the solutions, it’s helpful to understand why basil is so prone to wilting. Basil is a tropical plant, and it loves humidity. However, it’s also susceptible to cold damage. The typical refrigerator environment is too cold and dry for basil, causing it to blacken and wilt. The key is to mimic its natural environment as closely as possible.
Method 1: The Water Glass Method (Like a Bouquet!)
This is my go-to method for keeping basil fresh on the countertop. It’s simple, effective, and looks pretty too!
What You’ll Need:
* Fresh basil sprigs
* A clean glass or jar
* Water
* A plastic bag (optional, but recommended)
Step-by-Step Instructions:
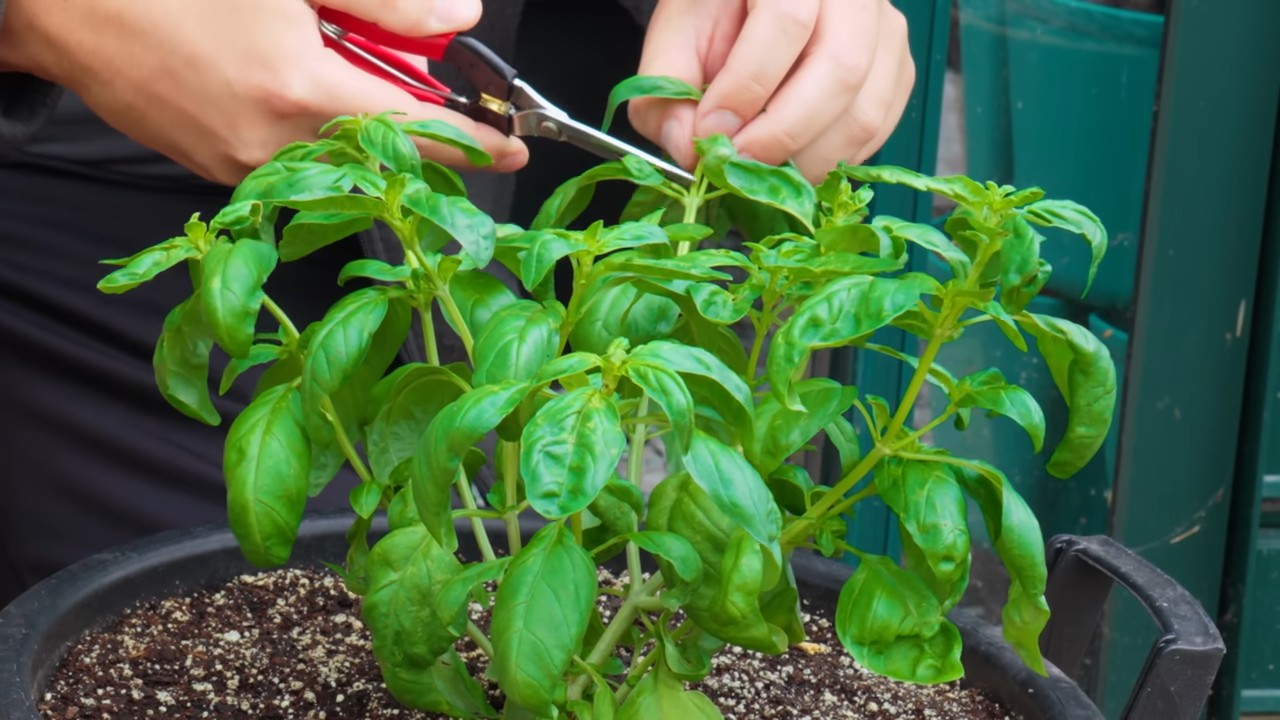
1. Prepare the Basil: Gently remove any yellowing or damaged leaves from the basil sprigs. Trim the bottom of the stems at a 45-degree angle. This helps the basil absorb water more efficiently.
2. Fill the Glass with Water: Fill your glass or jar with about an inch or two of fresh water. Make sure the water is clean and cool.
3. Place the Basil in the Water: Arrange the basil sprigs in the glass, ensuring that the stems are submerged in the water. Don’t overcrowd the glass; give the basil room to breathe.
4. Cover with a Plastic Bag (Optional): This is where the magic happens! Loosely cover the basil with a plastic bag. This creates a humid environment that the basil loves. You can use a produce bag from the grocery store or a larger Ziploc bag. Make sure the bag doesn’t completely seal the basil; you want some air circulation. You can poke a few small holes in the bag for ventilation.
5. Place on the Countertop: Place the glass of basil on your countertop, away from direct sunlight and heat sources. Direct sunlight can scorch the leaves.
6. Change the Water Regularly: This is crucial! Change the water every 1-2 days to prevent bacterial growth and keep the basil hydrated. When you change the water, give the stems another trim.
7. Monitor the Basil: Keep an eye on your basil. If you notice any leaves starting to turn yellow or brown, remove them immediately to prevent them from affecting the other leaves.
Method 2: The Refrigerator Method (For Longer Storage)
If you need to store your basil for longer than a week, the refrigerator is your best bet. But you can’t just toss it in there! You need to protect it from the cold, dry air.
What You’ll Need:
* Fresh basil sprigs
* Paper towels
* A plastic bag or airtight container
Step-by-Step Instructions:
1. Prepare the Basil: As with the water glass method, remove any yellowing or damaged leaves. Don’t wash the basil yet! We’ll do that right before using it.
2. Wrap in a Damp Paper Towel: Lightly dampen a paper towel and gently wrap it around the basil sprigs. The damp paper towel will help maintain humidity.
3. Place in a Plastic Bag or Container: Place the wrapped basil in a plastic bag or airtight container. If using a plastic bag, leave it slightly open to allow for some air circulation.
4. Store in the Refrigerator: Store the basil in the refrigerator, preferably in the crisper drawer. The crisper drawer is designed to maintain higher humidity levels.
5. Check and Re-Dampen: Check the basil every few days. If the paper towel is dry, re-dampen it.
6. Wash Before Use: Only wash the basil right before you’re ready to use it. Washing it beforehand can promote spoilage.
Method 3: Freezing Basil (For Long-Term Preservation)
If you have a large amount of basil and want to preserve it for several months, freezing is a great option. While the texture might change slightly, the flavor will remain intact.
What You’ll Need:
* Fresh basil leaves
* Blender or food processor
* Olive oil (optional)
* Ice cube tray or freezer bags
Step-by-Step Instructions:
1. Wash and Dry the Basil: Thoroughly wash the basil leaves and pat them dry with a paper towel. Make sure they are completely dry before freezing to prevent ice crystals from forming.
2. Puree the Basil (Optional): For a smoother texture, you can puree the basil leaves in a blender or food processor. Add a little olive oil to help create a paste. The olive oil also helps preserve the color and flavor of the basil.
3. Fill Ice Cube Trays or Freezer Bags: If you pureed the basil, spoon the mixture into ice cube trays. If you’re freezing whole leaves, you can pack them into freezer bags.
4. Freeze: Place the ice cube trays or freezer bags in the freezer. If using ice cube trays, once the basil cubes are frozen solid, you can transfer them to a freezer bag for easier storage.
5. Label and Date: Don’t forget to label and date your freezer bags or containers so you know when you froze the basil.
6. Use as Needed: When you need basil, simply grab a cube or a handful of leaves from the freezer. The frozen basil is best used in cooked dishes, as the texture may be slightly different than fresh basil.
Method 4: Drying Basil (For a Different Flavor Profile)
Drying basil is another way to preserve it, although the flavor will be more concentrated and slightly different than fresh basil. Dried basil is great for adding to soups, stews, and sauces.
What You’ll Need:
* Fresh basil sprigs
* Rubber band or twine
* Paper bag (optional)
* Dehydrator (optional)
* Oven (optional)
Step-by-Step Instructions:
1. Wash and Dry the Basil: Gently wash the basil sprigs and pat them dry with a paper towel.
2. Bundle the Basil: Gather the basil sprigs into small bundles and secure them with a rubber band or twine.
3. Hang to Dry: Hang the bundles of basil upside down in a cool, dry, and well-ventilated area. You can hang them from a hook or a clothesline. You can also place the bundles in a paper bag with holes punched in it to protect them from dust.
4. Dry in a Dehydrator (Optional): If you have a dehydrator, you can dry the basil leaves on the dehydrator trays according to the manufacturer’s instructions.
5. Dry in the Oven (Optional): You can also dry the basil leaves in the oven on the lowest setting. Spread the leaves out on a baking sheet and bake for several hours, or until they are completely dry and brittle.
6. Store in an Airtight Container: Once the basil is completely dry, crumble the leaves and store them in an airtight container in a cool, dark place.
Tips for Success
* Start with Fresh Basil: The fresher the basil is when you start, the longer it will last.
* Handle with Care: Basil is delicate, so handle it gently to avoid bruising the leaves.
* Avoid Overcrowding: Whether you’re using the water glass method or storing basil in the refrigerator, avoid overcrowding the basil. Give it room to breathe.
* Keep it Clean: Cleanliness is key to preventing spoilage. Make sure your glasses, containers, and utensils are clean.
* Experiment: Try different methods to see what works best for you and your environment.
Troubleshooting
* Basil is turning black: This is usually caused by cold damage. Make sure you’re not storing the basil in too cold of an environment.
* Basil is wilting: This is usually caused by lack of humidity. Make sure you’re providing enough moisture.
* Basil is molding: This is usually caused by too much moisture or poor air circulation. Make sure you’re not overwatering the basil and that there’s adequate ventilation.
I hope these tips help you keep your basil fresh and flavorful for longer! Happy cooking!
Conclusion
So, there you have it! The secret to perpetually perky basil, right at your fingertips. This simple DIY trick for keeping basil fresh is more than just a kitchen hack; it’s a game-changer for anyone who loves the vibrant flavor of fresh basil in their cooking. Think about it: no more slimy, sad basil leaves languishing in the crisper drawer. No more last-minute grocery store runs just to grab a handful of basil for that perfect pesto or Caprese salad. This method empowers you to have fresh, fragrant basil readily available whenever inspiration strikes.
Why is this a must-try? Because it’s effective, economical, and incredibly easy. You’re essentially creating a mini-hydroponic system right in your kitchen, providing your basil with the moisture it needs to thrive without drowning it. The visual appeal is an added bonus – a little green oasis on your countertop, a constant reminder of the delicious meals to come.
But don’t stop there! Feel free to experiment with variations. For instance, if you live in a particularly dry climate, consider loosely covering the basil with a plastic bag (making sure to poke a few holes for ventilation) to create a more humid environment. You can also add a small amount of liquid fertilizer to the water every couple of weeks to give your basil an extra boost. Another variation is to use a mason jar instead of a glass, which can add a rustic charm to your kitchen decor.
And if you’re feeling adventurous, try this method with other herbs like mint, parsley, or cilantro. While basil tends to be the most finicky, many herbs will benefit from this water-based preservation technique.
Ultimately, the best way to discover the magic of this DIY trick is to try it yourself. We’re confident that you’ll be amazed by how long you can keep your basil fresh and vibrant. So, grab a bunch of basil, find a suitable glass or jar, and get started!
We’re eager to hear about your experiences. Did this method work wonders for you? Did you try any variations? Share your tips, tricks, and photos in the comments below. Let’s build a community of basil-loving cooks who are committed to keeping their herbs fresh and flavorful! Your insights could help others discover the joy of always having fresh basil on hand. Don’t hesitate to share any challenges you faced, too – we’re here to help troubleshoot and ensure everyone achieves basil-keeping success. Happy cooking!
Frequently Asked Questions (FAQ)
What kind of basil works best with this method?
This method works well with most common varieties of basil, including sweet basil (the most popular type), Genovese basil, and Thai basil. However, larger-leaved varieties might require a larger glass or jar to accommodate their size. Experiment with different types to see which ones thrive best in your environment.
How often should I change the water?
It’s recommended to change the water every one to two days. This helps prevent the growth of bacteria and keeps the basil stems healthy. Stagnant water can lead to rot and shorten the lifespan of your basil. When you change the water, give the glass a quick rinse to remove any buildup.
What if the basil leaves start to turn yellow or brown?
Yellowing or browning leaves can indicate a few things. First, check the water level – make sure the stems are always submerged. Second, ensure the basil isn’t getting too much direct sunlight, which can scorch the leaves. Third, consider that the basil might be nearing the end of its lifespan. Even with this method, basil won’t last forever. If only a few leaves are affected, you can carefully remove them.
Can I put the basil in the refrigerator using this method?
While this method is designed for countertop storage, you can refrigerate the basil if you need to slow down its growth or if your kitchen is particularly warm. However, be aware that refrigeration can sometimes dull the flavor of basil. If you do refrigerate it, loosely cover the basil with a plastic bag to prevent it from drying out.
How long will the basil stay fresh using this method?
With proper care, basil can stay fresh for up to two weeks, sometimes even longer, using this method. This is significantly longer than the few days you typically get with traditional storage methods. The key is to change the water regularly, provide adequate light, and avoid extreme temperatures.
Is it okay if some of the leaves are submerged in the water?
Ideally, only the stems should be submerged in the water. Submerging the leaves can lead to them rotting and contaminating the water. If some leaves are accidentally submerged, remove them promptly. You can also trim the lower leaves to ensure they stay above the waterline.
Can I use tap water, or should I use filtered water?
Tap water is generally fine to use, but if your tap water is heavily chlorinated or contains other chemicals, filtered water might be a better option. The goal is to provide the basil with clean, fresh water that won’t harm its delicate stems.
What kind of light does the basil need?
Basil needs bright, indirect light. Avoid placing it in direct sunlight, which can scorch the leaves. A spot near a window that receives morning sun or filtered afternoon sun is ideal. If you don’t have a suitable window, you can use a grow light to provide the basil with the light it needs.
Can I propagate new basil plants from the cuttings using this method?
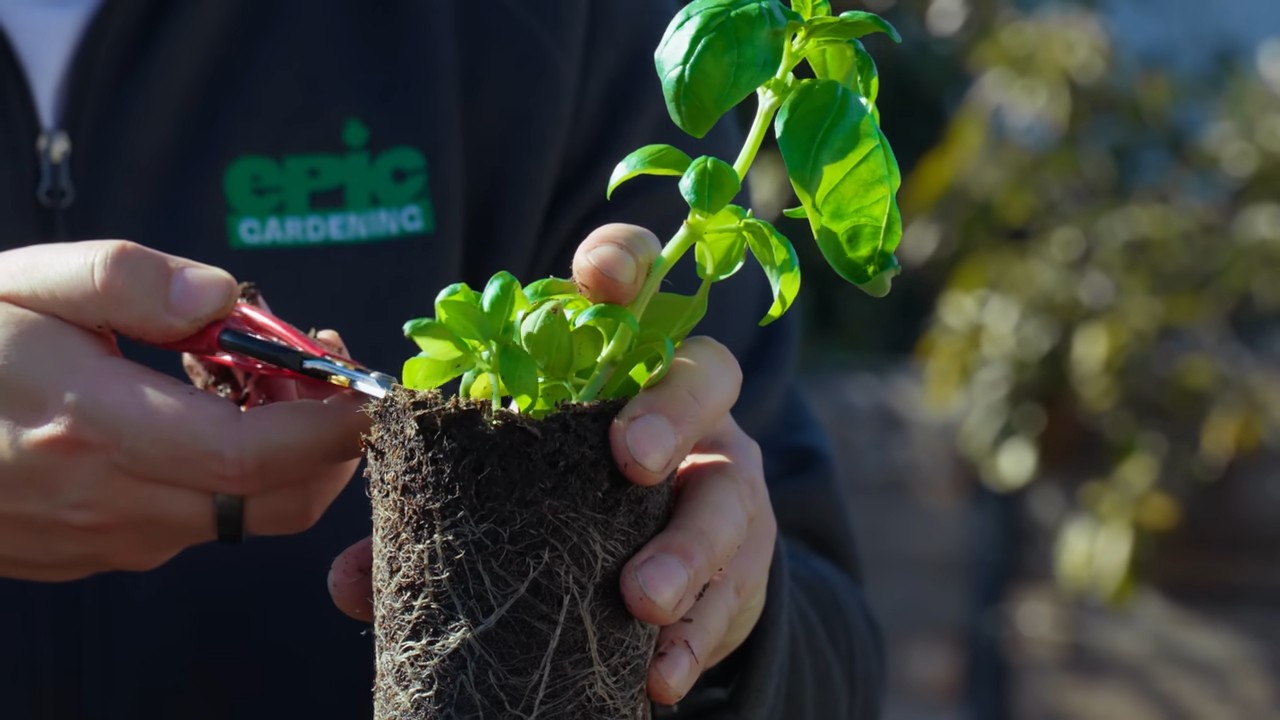
Yes, absolutely! This method is not only great for keeping basil fresh but also for propagating new plants. After a few weeks, you may notice roots growing from the submerged stems. Once the roots are a few inches long, you can carefully transplant the cuttings into pots filled with potting soil. This is a fantastic way to expand your basil collection and enjoy fresh basil year-round.
What if I see mold growing in the water or on the stems?
If you notice any mold, immediately discard the basil and thoroughly clean the glass or jar with soap and hot water. Mold indicates that the water wasn’t changed frequently enough or that the basil was contaminated. To prevent mold growth, change the water every day and ensure the basil is not overcrowded in the glass.
Leave a Comment