
Easy Tomato Growing Home – sounds like a dream, right? Imagine stepping outside your door and plucking juicy, sun-ripened tomatoes straight from your own garden. No more bland, store-bought imitations! For centuries, cultivating tomatoes has been a cherished tradition, from their origins in South America to their adoption into Italian cuisine and beyond. They’re not just a food source; they’re a symbol of summer, freshness, and the simple pleasures of life.
But let’s be honest, getting those perfect tomatoes can sometimes feel like a battle. Pests, diseases, and unpredictable weather can all throw a wrench in your plans. That’s where these DIY tricks and hacks come in! I’m going to share some of my favorite, tried-and-true methods for achieving easy tomato growing home success, even if you’re a complete beginner.
Why do you need these tricks? Because everyone deserves to experience the joy of homegrown tomatoes. These tips will help you bypass common pitfalls, maximize your yield, and enjoy the most flavorful tomatoes you’ve ever tasted. Get ready to transform your garden (or even your balcony!) into a tomato-lover’s paradise!
DIY: Grow Delicious Tomatoes at Home – Even Without a Garden!
Hey there, fellow tomato lovers! I’m so excited to share my tried-and-true method for growing juicy, flavorful tomatoes right at home. You don’t need a sprawling garden or a green thumb to enjoy the taste of homegrown goodness. This guide will walk you through everything you need to know, from choosing the right variety to harvesting your bounty. Let’s get started!
Choosing the Right Tomato Variety
First things first, selecting the right tomato variety is crucial for success, especially if you’re growing in containers. Here’s what I consider:
* Determinate vs. Indeterminate: Determinate varieties grow to a specific size and produce all their fruit at once, making them ideal for canning. Indeterminate varieties keep growing and producing fruit throughout the season. For containers, I usually lean towards determinate or compact indeterminate varieties.
* Size Matters: Consider the size of the fruit. Cherry and grape tomatoes are generally easier to grow in containers than larger beefsteak varieties.
* Disease Resistance: Look for varieties labeled with disease resistance codes (e.g., V, F, N, T, A). This can save you a lot of headaches down the road.
* My Personal Favorites: I’ve had great success with ‘Roma’ (determinate, great for sauces), ‘Patio’ (determinate, compact), ‘Sungold’ (indeterminate cherry, incredibly sweet), and ‘Early Girl’ (indeterminate, early producer).
Gathering Your Supplies
Okay, now that we’ve picked our tomato stars, let’s gather the necessary supplies. Here’s what you’ll need:
* Tomato Seeds or Seedlings: You can start from seed or buy seedlings from a local nursery. Seedlings are faster, but starting from seed is more economical.
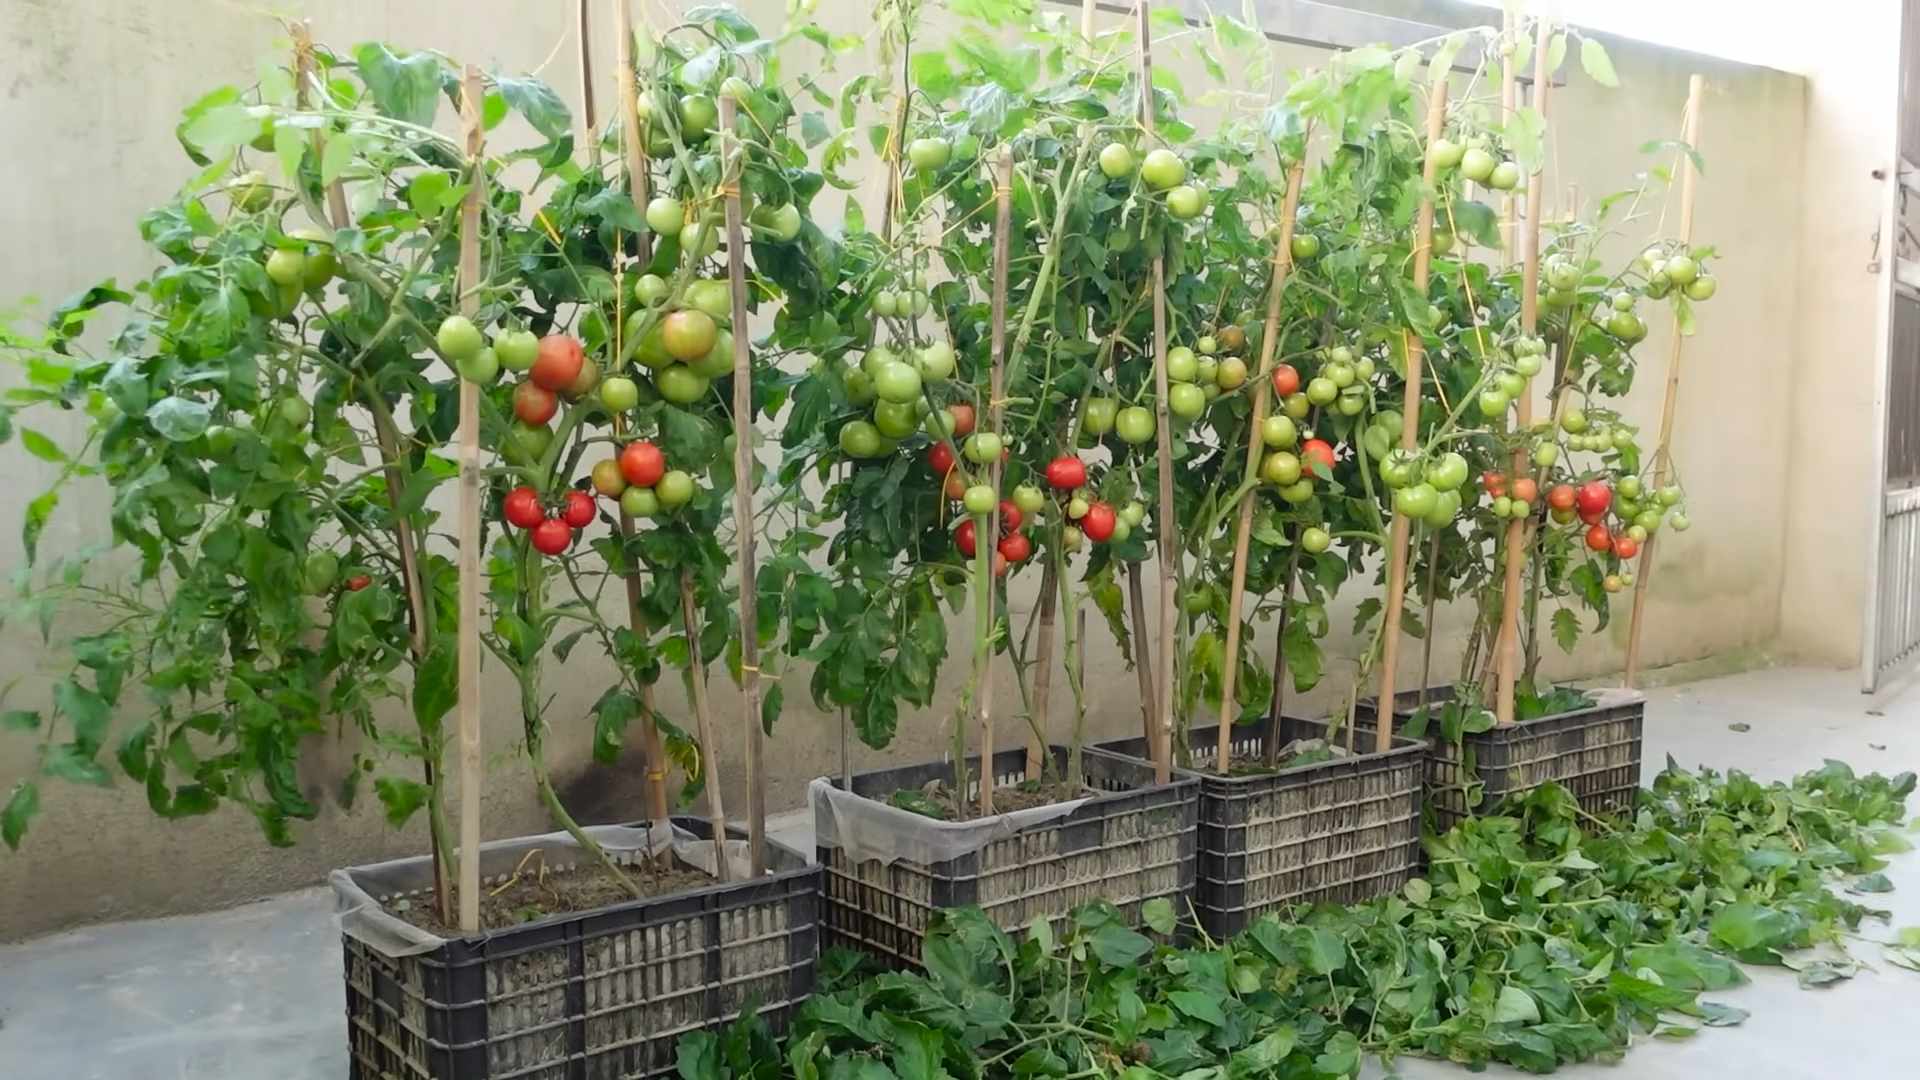
* Large Containers: Tomatoes need plenty of room to grow. I recommend containers that are at least 18 inches in diameter and 18 inches deep. Fabric pots are also a great option as they allow for better drainage and aeration.
* High-Quality Potting Mix: Don’t use garden soil! It’s too heavy and doesn’t drain well. Opt for a lightweight, well-draining potting mix specifically formulated for containers.
* Tomato Cage or Stakes: Tomatoes need support as they grow. A sturdy tomato cage or stakes will prevent them from toppling over.
* Slow-Release Fertilizer: This will provide your tomatoes with a steady supply of nutrients throughout the growing season.
* Watering Can or Hose: Essential for keeping your plants hydrated.
* Gardening Gloves: To protect your hands.
* Optional: Epsom salts (for added magnesium), bone meal (for phosphorus), and a spray bottle for foliar feeding.
Starting from Seed (Optional)
If you’re feeling ambitious, starting from seed is a rewarding experience. Here’s how I do it:
1. Sow Seeds Indoors: About 6-8 weeks before the last expected frost, sow your tomato seeds in seed-starting trays or small pots filled with seed-starting mix.
2. Provide Warmth and Light: Keep the soil consistently moist and provide warmth (around 70-75°F). A heat mat can be helpful. Place the trays under grow lights or in a sunny window.
3. Thin Seedlings: Once the seedlings have their first true leaves (the second set of leaves), thin them out, leaving only the strongest seedling in each cell or pot.
4. Harden Off Seedlings: Before transplanting outdoors, gradually acclimate the seedlings to outdoor conditions. Start by placing them outside for a few hours each day, increasing the time over a week or two.
Transplanting Seedlings or Buying Seedlings
Whether you started from seed or bought seedlings, the transplanting process is the same.
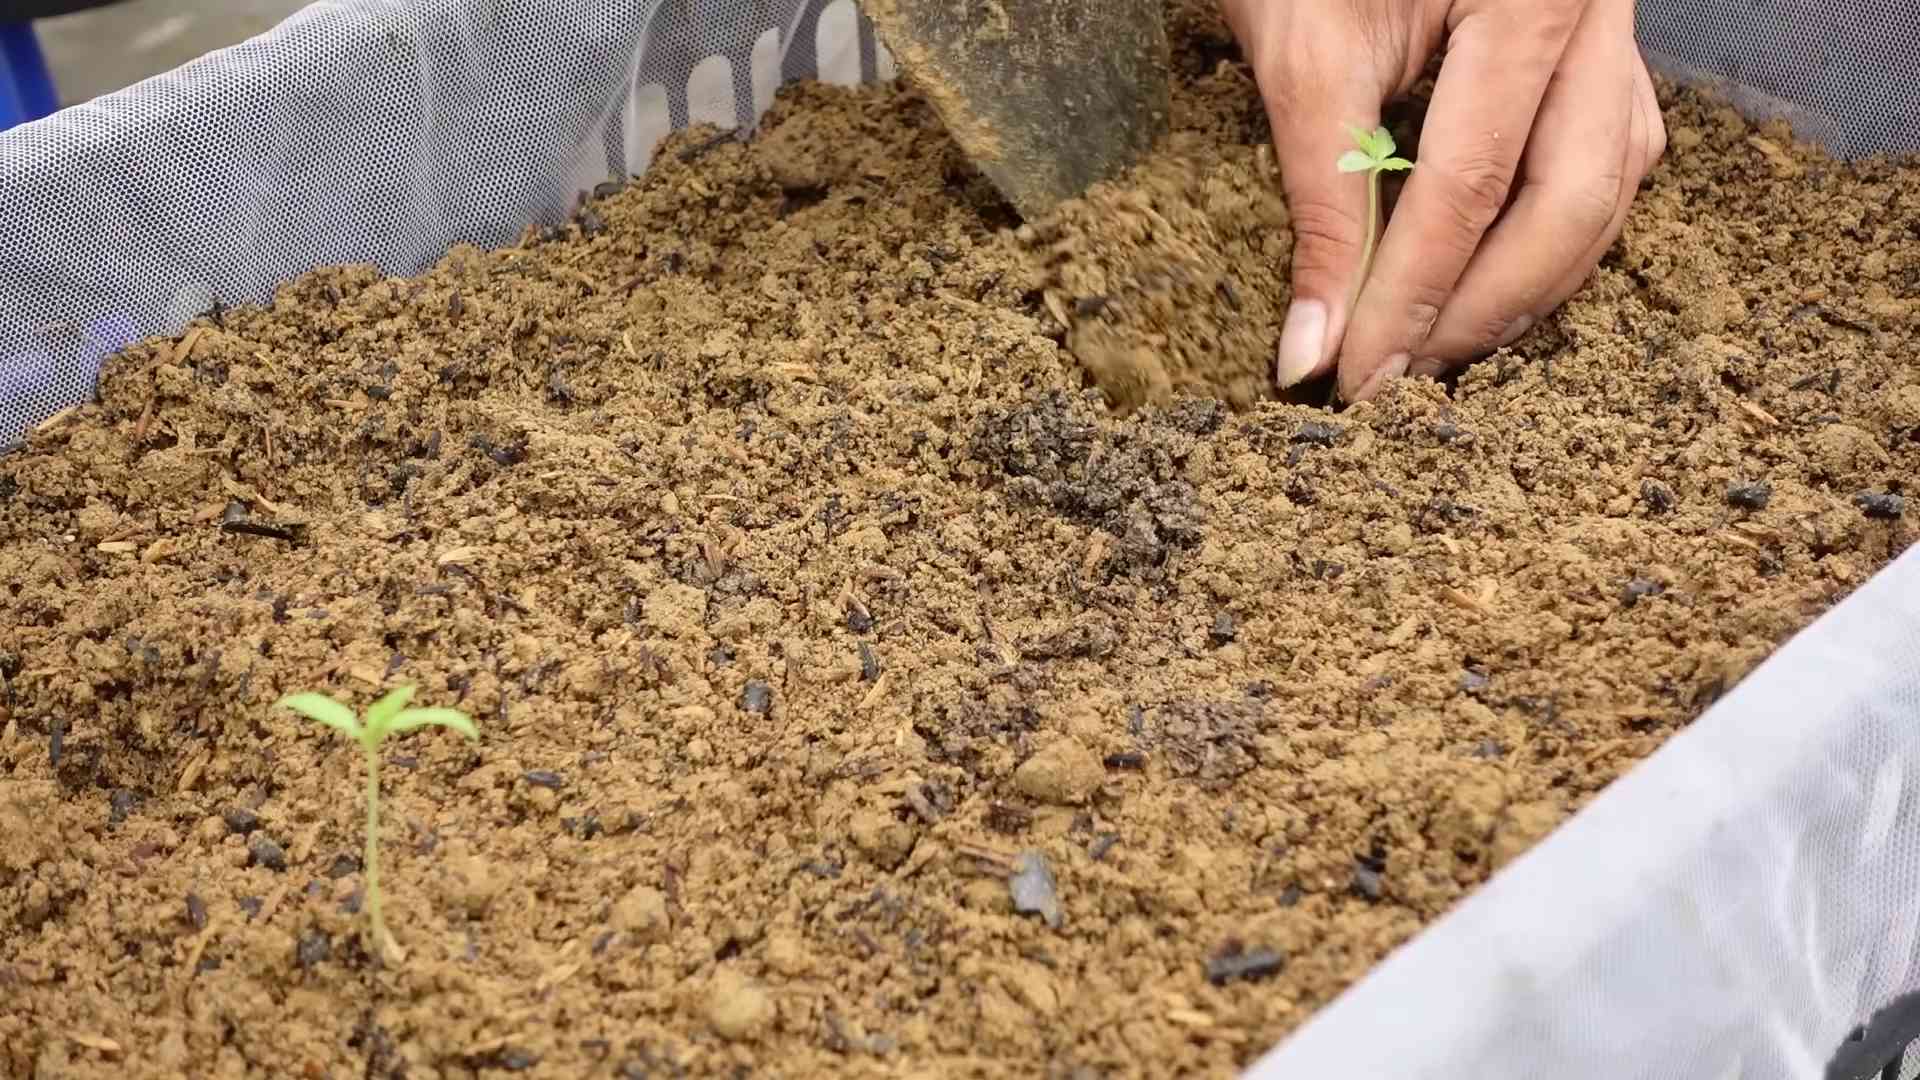
1. Prepare Your Containers: Fill your containers with potting mix, leaving a few inches of space at the top.
2. Dig a Hole: Dig a hole in the center of each container that’s large enough to accommodate the root ball of the seedling.
3. Remove Seedling from Pot: Gently remove the seedling from its pot, being careful not to damage the roots. If the roots are tightly bound, gently loosen them.
4. Plant Deep: Plant the seedling deep, burying the stem up to the first set of leaves. Tomatoes can grow roots along their stems, which will make them stronger and more productive.
5. Add Support: Place a tomato cage or stake in the container next to the seedling.
6. Water Thoroughly: Water the seedling thoroughly after planting.
7. Add Slow-Release Fertilizer: Sprinkle slow-release fertilizer around the base of the plant, following the package instructions.
Caring for Your Tomato Plants
Now comes the fun part – watching your tomato plants grow! Here’s how I keep them happy and healthy:
1. Watering: Tomatoes need consistent watering, especially during hot weather. Water deeply whenever the top inch of soil feels dry to the touch. Avoid overhead watering, as this can lead to fungal diseases. I prefer to water at the base of the plant.
2. Fertilizing: In addition to the slow-release fertilizer, I like to give my tomato plants a boost with liquid fertilizer every 2-3 weeks. Use a balanced fertilizer or one specifically formulated for tomatoes.
3. Sunlight: Tomatoes need at least 6-8 hours of sunlight per day. Choose a sunny location for your containers.
4. Pruning: Pruning can help improve air circulation and fruit production. Remove suckers (the small shoots that grow between the main stem and the branches) on indeterminate varieties. Determinate varieties generally don’t need much pruning.
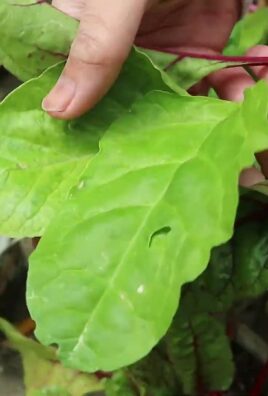
5. Pest and Disease Control: Keep an eye out for pests like aphids, whiteflies, and tomato hornworms. Handpick them off or use insecticidal soap. For fungal diseases, ensure good air circulation and avoid overhead watering. You can also use a fungicide if necessary.
6. Epsom Salts: I like to add a tablespoon of Epsom salts to a gallon of water and use it to water my tomato plants every few weeks. The magnesium in Epsom salts can help prevent blossom-end rot.
7. Blossom-End Rot Prevention: Blossom-end rot is caused by a calcium deficiency. To prevent it, ensure consistent watering and add bone meal to the soil before planting. You can also use a calcium supplement if needed.
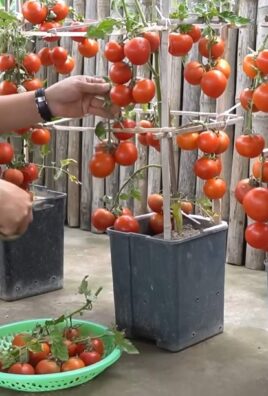
Harvesting Your Tomatoes
The moment we’ve all been waiting for! Here’s how to know when your tomatoes are ready to pick:
1. Color: The tomato should be fully colored and slightly soft to the touch.
2. Smell: Ripe tomatoes have a sweet, fragrant aroma.
3. Ease of Picking: The tomato should easily detach from the vine with a gentle twist.
4. Taste Test: The ultimate test! Take a bite and enjoy the fruits (or vegetables!) of your labor.
Troubleshooting Common Tomato Problems
Even with the best care, you might encounter some problems along the way. Here are a few common issues and how to address them:
* Yellowing Leaves: Can be caused by overwatering, underwatering, nutrient deficiencies, or pests. Adjust your watering schedule, fertilize, and check for pests.
* Blossom Drop: When flowers fall off without producing fruit. This can be caused by extreme temperatures, lack of pollination, or stress. Ensure consistent watering and try hand-pollinating the flowers.
* Cracked Tomatoes: Caused by inconsistent watering. Water deeply and consistently.
* Pests: Aphids, whiteflies, tomato hornworms, etc. Handpick them off, use insecticidal soap, or introduce beneficial insects like ladybugs.
* Fungal Diseases: Early blight, late blight, septoria leaf spot, etc. Ensure good air circulation, avoid overhead watering, and use a fungicide if necessary.
Extra Tips for Tomato Growing Success
Here are a few extra tips I’ve learned over the years:
* Rotate Your Crops: Don’t plant tomatoes in the same spot year after year. This can help prevent soilborne diseases.
* Mulch: Add a layer of mulch around your tomato plants to help retain moisture and suppress weeds.
* Companion Planting: Plant basil, marigolds, or other companion plants near your tomatoes to deter pests and attract pollinators.
* Hand-Pollination: If you’re growing tomatoes indoors or in a sheltered location, you may need to hand-pollinate the flowers. Simply use a small brush to transfer pollen from one flower to another.
* Don’t Give Up! Tomato growing can be challenging, but it’s also incredibly rewarding. Don’t be discouraged if you encounter problems. Learn from your mistakes and keep trying!
I hope this guide has inspired you to
Conclusion
So, there you have it! This simple yet effective DIY trick for easy tomato growing at home is a game-changer for both novice and experienced gardeners. We’ve shown you how to bypass the common pitfalls of traditional tomato cultivation, offering a method that promotes healthier plants, reduces water waste, and ultimately, yields a more bountiful harvest.
Why is this a must-try? Because it simplifies the entire process. By focusing on deep watering and providing consistent nutrient delivery directly to the roots, you’re creating an environment where your tomato plants can thrive. No more guessing about watering schedules, no more worrying about nutrient deficiencies. This method streamlines the process, allowing you to focus on enjoying the fruits (or rather, vegetables!) of your labor.
But don’t think this is a one-size-fits-all solution. Feel free to experiment! Consider adding different types of organic fertilizers to your watering reservoir. Bone meal can provide a boost of phosphorus for strong root development, while Epsom salts can address magnesium deficiencies. You can also adjust the size of your container based on the variety of tomato you’re growing. Larger varieties like beefsteak tomatoes will benefit from larger containers, while smaller varieties like cherry tomatoes can thrive in smaller spaces.
Another variation to consider is the type of container you use. While plastic containers are readily available and affordable, terracotta pots can offer better drainage and breathability. Just be mindful that terracotta pots tend to dry out faster, so you may need to adjust your watering schedule accordingly. You can also explore using self-watering planters, which automate the watering process even further.
The key is to observe your plants closely and adjust your approach as needed. Are the leaves turning yellow? You might need to add more nitrogen to your fertilizer. Are the fruits developing blossom end rot? This could indicate a calcium deficiency. By paying attention to your plants’ needs, you can fine-tune this DIY trick to achieve optimal results.
We are confident that this method will revolutionize your tomato growing experience. It’s efficient, cost-effective, and incredibly rewarding. Imagine the satisfaction of harvesting your own juicy, flavorful tomatoes, knowing that you nurtured them from seed to table using a simple, sustainable technique.
Don’t just take our word for it, though. We encourage you to try this DIY trick for easy tomato growing at home and see the difference for yourself. Share your experiences with us in the comments below! We’d love to hear about your successes, your challenges, and any variations you’ve discovered. Let’s build a community of tomato-growing enthusiasts and learn from each other. Happy gardening!
Frequently Asked Questions (FAQ)
What type of container should I use for this DIY tomato growing method?
The best type of container depends on your preferences and the size of your tomato plants. Plastic containers are affordable and readily available, but terracotta pots offer better drainage and breathability. Self-watering planters can also be a convenient option. For larger tomato varieties, choose a container that is at least 15-20 gallons in size. Smaller varieties can thrive in containers as small as 5 gallons. Ensure the container has drainage holes at the bottom, even if you’re using a self-watering planter, to prevent waterlogging.
How often should I water my tomato plants using this method?
The frequency of watering will depend on several factors, including the size of your container, the weather conditions, and the type of soil you’re using. As a general rule, you should water your tomato plants when the top inch of soil feels dry to the touch. During hot, sunny weather, you may need to water them daily. In cooler, cloudier weather, you may only need to water them every few days. The key is to monitor the moisture level of the soil and adjust your watering schedule accordingly. With this DIY method, you’ll be watering into the buried container, so check the moisture level of the soil around the main plant, not just the buried container.
What type of fertilizer should I use for my tomato plants?
Tomato plants are heavy feeders and require a balanced fertilizer to thrive. Look for a fertilizer that is specifically formulated for tomatoes, or one that has an NPK ratio of around 5-10-5. You can also use organic fertilizers, such as compost tea, fish emulsion, or bone meal. Apply fertilizer according to the instructions on the package. With this DIY method, you can dilute the fertilizer in the water you pour into the buried container, ensuring consistent nutrient delivery to the roots.
How do I prevent blossom end rot in my tomato plants?
Blossom end rot is a common problem in tomato plants that is caused by a calcium deficiency. To prevent blossom end rot, make sure your soil is rich in calcium. You can add lime or bone meal to the soil before planting. You can also spray your plants with a calcium chloride solution. Consistent watering is also important, as fluctuations in soil moisture can exacerbate calcium deficiencies. This DIY method helps with consistent watering, but you still need to ensure your soil has adequate calcium.
Can I use this DIY method for other types of plants?
Yes, this DIY method can be used for other types of plants that benefit from deep watering and consistent nutrient delivery. Some examples include peppers, eggplants, and cucumbers. However, you may need to adjust the size of the container and the type of fertilizer you use depending on the specific needs of the plant.
What if I don’t have a plastic container to bury?
If you don’t have a plastic container, you can use other materials, such as a terracotta pot or even a large coffee can. Just make sure the material is durable and won’t decompose quickly in the soil. You’ll also want to make sure the container has holes drilled into it to allow water to seep out into the surrounding soil.
How do I know if I’m overwatering or underwatering my tomato plants?
Overwatering can lead to root rot, while underwatering can cause the plants to wilt and dry out. Signs of overwatering include yellowing leaves, stunted growth, and a foul odor coming from the soil. Signs of underwatering include wilting leaves, dry soil, and slow growth. The key is to monitor your plants closely and adjust your watering schedule accordingly. This DIY method helps to prevent both overwatering and underwatering by providing a consistent supply of water to the roots.
What are some common pests and diseases that affect tomato plants, and how can I prevent them?
Common pests that affect tomato plants include aphids, whiteflies, and tomato hornworms. Common diseases include early blight, late blight, and powdery mildew. To prevent pests and diseases, choose disease-resistant varieties of tomatoes, practice good sanitation in your garden, and water your plants at the base to avoid wetting the foliage. You can also use organic pesticides and fungicides to control pests and diseases.
How long does it take for tomato plants to produce fruit?
The time it takes for tomato plants to produce fruit depends on the variety of tomato and the growing conditions. In general, it takes about 60-85 days from transplanting for tomato plants to produce ripe fruit. This DIY method can help to speed up the process by providing consistent water and nutrients to the plants.
What is the best time of year to plant tomatoes?
The best time of year to plant tomatoes is after the last frost in your area. Tomatoes are warm-season plants and cannot tolerate freezing temperatures. You can start your tomato seeds indoors 6-8 weeks before the last frost and then transplant them outdoors once the weather has warmed up.
Leave a Comment