
Time-saving cleaning tips are the holy grail for anyone juggling work, family, and, well, life! Let’s be honest, who actually enjoys spending hours scrubbing and tidying? I know I don’t! For centuries, people have sought ways to streamline their chores, from ancient Roman bathhouses employing elaborate cleaning systems to the invention of the vacuum cleaner in the early 20th century. The desire for a sparkling home without sacrificing precious time is a timeless pursuit.
In today’s fast-paced world, finding effective time-saving cleaning tips is more crucial than ever. We’re constantly bombarded with demands on our attention, and spending an entire weekend cleaning just isn’t feasible for most of us. That’s why I’ve compiled this collection of DIY cleaning hacks and strategies that will help you reclaim your weekends and enjoy a cleaner, more organized home with minimal effort. Get ready to discover simple yet powerful techniques that will transform your cleaning routine from a dreaded chore into a manageable task. Let’s dive in and unlock the secrets to a sparkling home, faster!
DIY Time-Saving Cleaning Hacks: Reclaim Your Weekend!
Okay, let’s be honest, nobody *loves* cleaning. But it’s a necessary evil, right? I’m here to share some of my favorite DIY cleaning hacks that will seriously cut down on your cleaning time and leave you with more free time to actually enjoy your life. These aren’t just quick fixes; they’re smart strategies that tackle the root of the problem and prevent future messes. Get ready to say goodbye to endless scrubbing and hello to a sparkling clean home with minimal effort!
Hack 1: The Microwave Miracle – Steam Cleaning Power!
This is one of my go-to tricks for a sparkling clean microwave. No more scrubbing baked-on food!
What you’ll need:
* 1 cup of water
* 1 tablespoon of white vinegar or lemon juice (I prefer lemon for the fresh scent!)
* Microwave-safe bowl
Step-by-step instructions:
1. Mix the solution: In your microwave-safe bowl, combine the water and vinegar (or lemon juice).
2. Microwave it: Place the bowl in the microwave and heat on high for 5-7 minutes. You want the solution to boil and create a lot of steam.
3. Let it sit: Don’t open the microwave immediately! Let the steam work its magic for another 3-5 minutes. This will loosen all the grime and splatters.
4. Wipe it clean: Carefully remove the bowl (it will be hot!). Use a damp cloth or sponge to easily wipe away all the loosened food particles. You’ll be amazed at how easily everything comes off!
5. Dry it off: Finally, dry the inside of the microwave with a clean cloth.
Why this works: The steam softens the dried-on food, making it incredibly easy to wipe away. The vinegar or lemon juice helps to dissolve grease and deodorize the microwave.
Hack 2: Sparkling Shower Head – Vinegar Soak for the Win!
Hard water deposits can wreak havoc on your shower head, reducing water pressure and making it look grimy. This simple vinegar soak will restore it to its former glory.
What you’ll need:
* White vinegar
* Plastic bag (a sandwich bag works well)
* Rubber band or twist tie
Step-by-step instructions:
1. Fill the bag: Pour enough white vinegar into the plastic bag to completely submerge the shower head.
2. Secure the bag: Carefully attach the bag to the shower head, ensuring the shower head is fully immersed in the vinegar. Use a rubber band or twist tie to secure the bag tightly.
3. Soak overnight: Let the shower head soak in the vinegar overnight (or for at least a few hours).
4. Remove and rinse: Remove the bag and discard the vinegar. Rinse the shower head thoroughly with water to remove any remaining vinegar and loosened deposits.
5. Wipe clean: Use a clean cloth to wipe down the shower head. If there are any stubborn deposits remaining, use an old toothbrush to gently scrub them away.
Why this works: Vinegar is a natural acid that dissolves hard water deposits like calcium and lime. Soaking the shower head in vinegar allows the acid to penetrate and break down these deposits, restoring water flow and leaving your shower head sparkling.
Hack 3: Blinds Cleaning Made Easy – Sock Puppet Power!
Cleaning blinds can be a tedious task, but this hack makes it surprisingly quick and easy.
What you’ll need:
* Old sock (clean, of course!)
* White vinegar and water solution (equal parts)
* Spray bottle (optional)
Step-by-step instructions:
1. Prepare the sock: Dampen the sock with the vinegar and water solution. You can either spray the solution directly onto the sock or dip the sock into a bowl of the solution. Make sure the sock is damp, not soaking wet.
2. Slip it on: Put the sock on your hand like a puppet.
3. Clean the blinds: Use your sock-covered hand to wipe each slat of the blinds. The sock will pick up dust and grime easily.
4. Rinse and repeat: If the sock gets too dirty, rinse it with clean water and re-dampen it with the vinegar and water solution.
5. Dry the blinds: Once you’ve cleaned all the slats, use a clean, dry cloth to wipe them down and remove any excess moisture.
Why this works: The sock provides a soft, absorbent surface that effectively picks up dust and grime. The vinegar and water solution helps to loosen dirt and disinfect the blinds. The “sock puppet” method allows you to clean both sides of the slats simultaneously, saving you time and effort.
Hack 4: Garbage Disposal Refresh – Citrus Power!
A smelly garbage disposal can stink up your whole kitchen. This simple hack will freshen it up and keep it smelling clean.
What you’ll need:
* Citrus peels (lemon, lime, orange, grapefruit – any combination works!)
* Ice cubes
* Salt (optional, but helps to scrub)
Step-by-step instructions:
1. Gather your ingredients: Collect citrus peels from your favorite fruits.
2. Add ice and salt: Toss a handful of ice cubes and a tablespoon of salt (if using) into the garbage disposal.
3. Grind it up: Turn on the cold water and run the garbage disposal.
4. Add the citrus peels: While the disposal is running, gradually add the citrus peels.
5. Continue running: Let the disposal run for about 30 seconds to a minute, allowing the ice, salt, and citrus peels to thoroughly clean and freshen the disposal.
Why this works: The ice cubes help to dislodge any food particles that are stuck to the blades of the disposal. The salt acts as a mild abrasive, scrubbing the sides of the disposal. The citrus peels release their natural oils, which help to deodorize and freshen the disposal.
Hack 5: Bathtub Grime Buster – Grapefruit and Salt Scrub!
This is a natural and effective way to clean your bathtub without harsh chemicals.
What you’ll need:
* Grapefruit (halved)
* Coarse salt (sea salt or kosher salt works best)
Step-by-step instructions:
1. Wet the tub: Lightly wet the surface of your bathtub.
2. Sprinkle with salt: Sprinkle a generous amount of coarse salt onto the wet surface of the tub.
3. Scrub with grapefruit: Take one half of the grapefruit and use it to scrub the salt into the tub. The grapefruit juice will help to dissolve soap scum and grime, while the salt will act as an abrasive to scrub away stubborn stains.
4. Rinse thoroughly: Rinse the tub thoroughly with water to remove all traces of salt and grapefruit juice.
5. Dry with a cloth: Dry the tub with a clean cloth to prevent water spots.
Why this works: The citric acid in the grapefruit juice helps to break down soap scum and hard water stains. The coarse salt provides a gentle abrasive action that helps to scrub away dirt and grime without scratching the tub. Plus, it smells amazing!
Hack 6: Dust-Repelling Furniture Polish – Olive Oil Magic!
Commercial furniture polish can be expensive and often contains harsh chemicals. This DIY alternative is natural, effective, and will actually help to repel dust.
What you’ll need:
* 1/4 cup olive oil
* 1/2 cup white vinegar or lemon juice
* Soft cloth
Step-by-step instructions:
1. Mix the ingredients: In a small bowl, combine the olive oil and vinegar (or lemon juice).
2. Apply to furniture: Dip a soft cloth into the mixture and wring out any excess.
3. Polish the furniture: Wipe the furniture with the damp cloth, following the grain of the wood.
4. Buff to a shine: Use a clean, dry cloth to buff the furniture to a shine.
Why this works: The olive oil moisturizes the wood and creates a protective barrier that helps to repel dust. The vinegar or lemon juice helps to clean and disinfect the surface. This polish not only cleans but also conditions your furniture, keeping it looking its best.
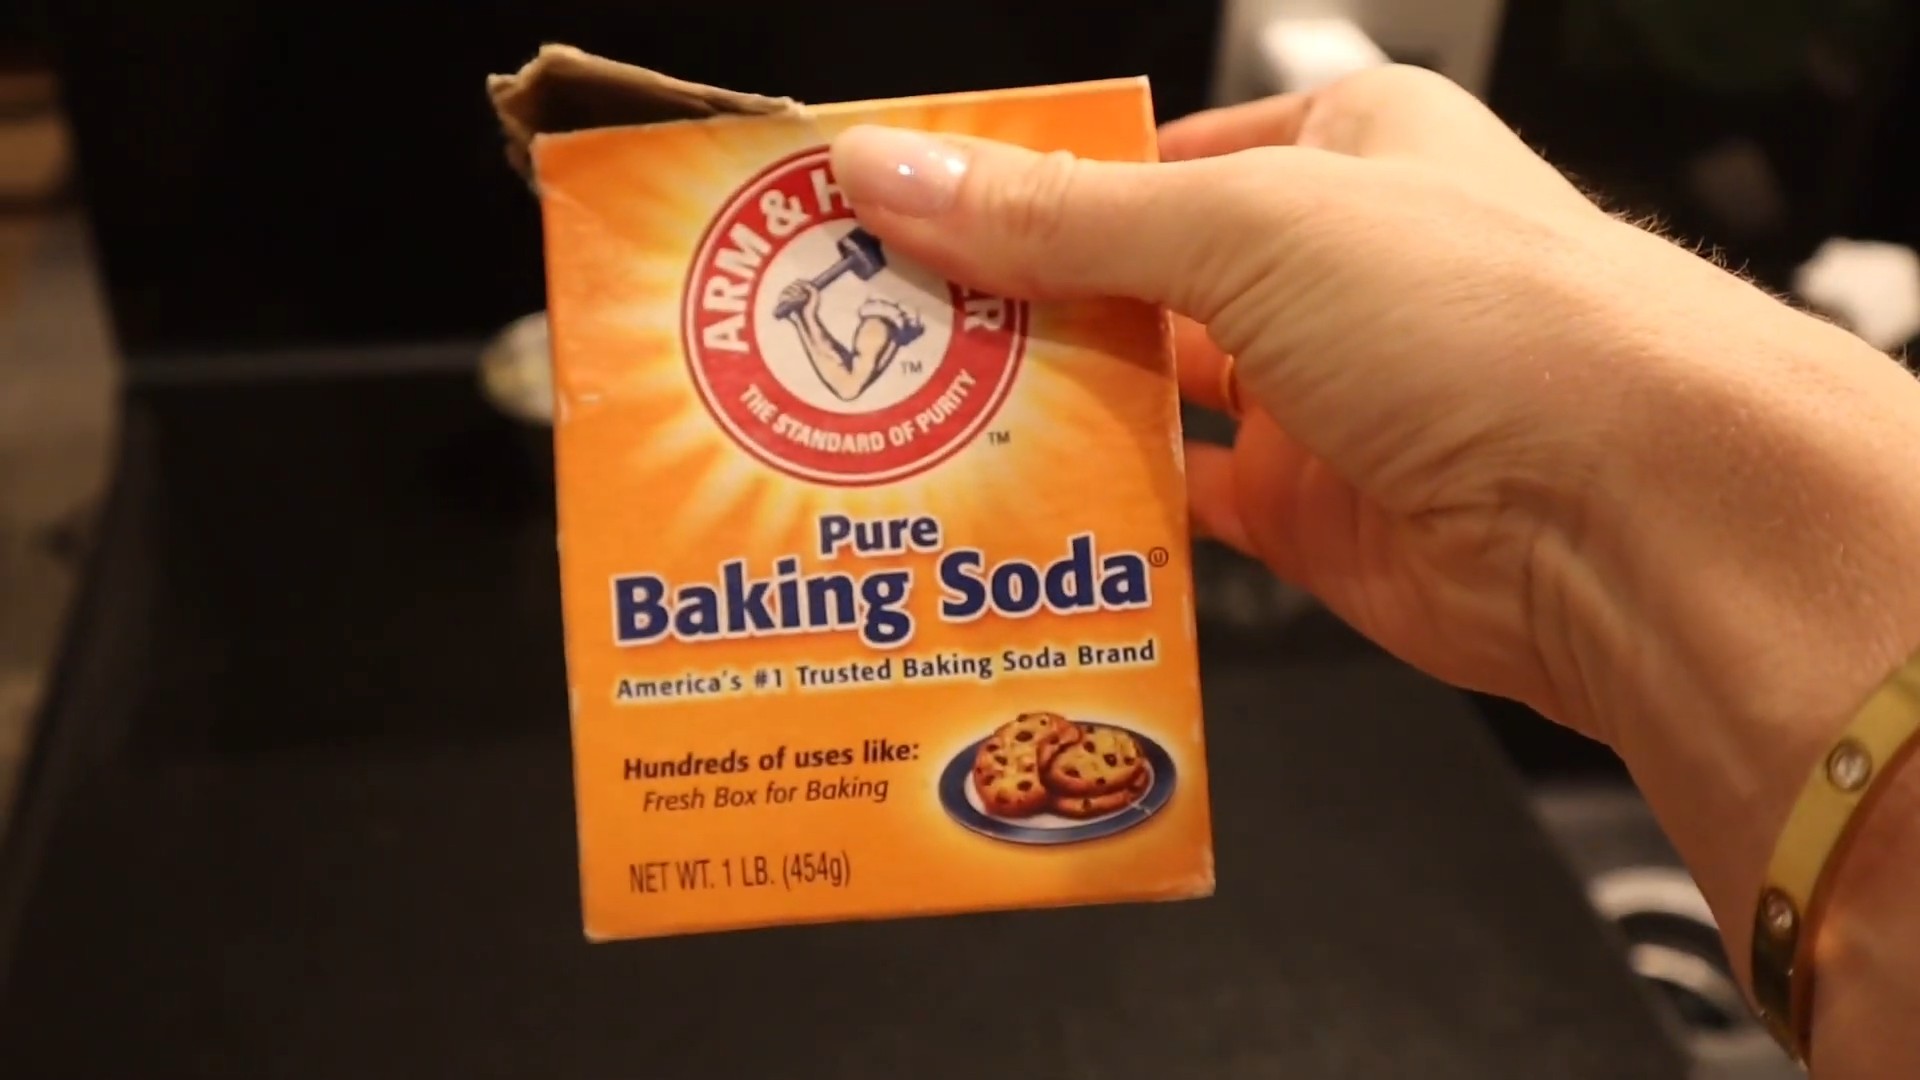
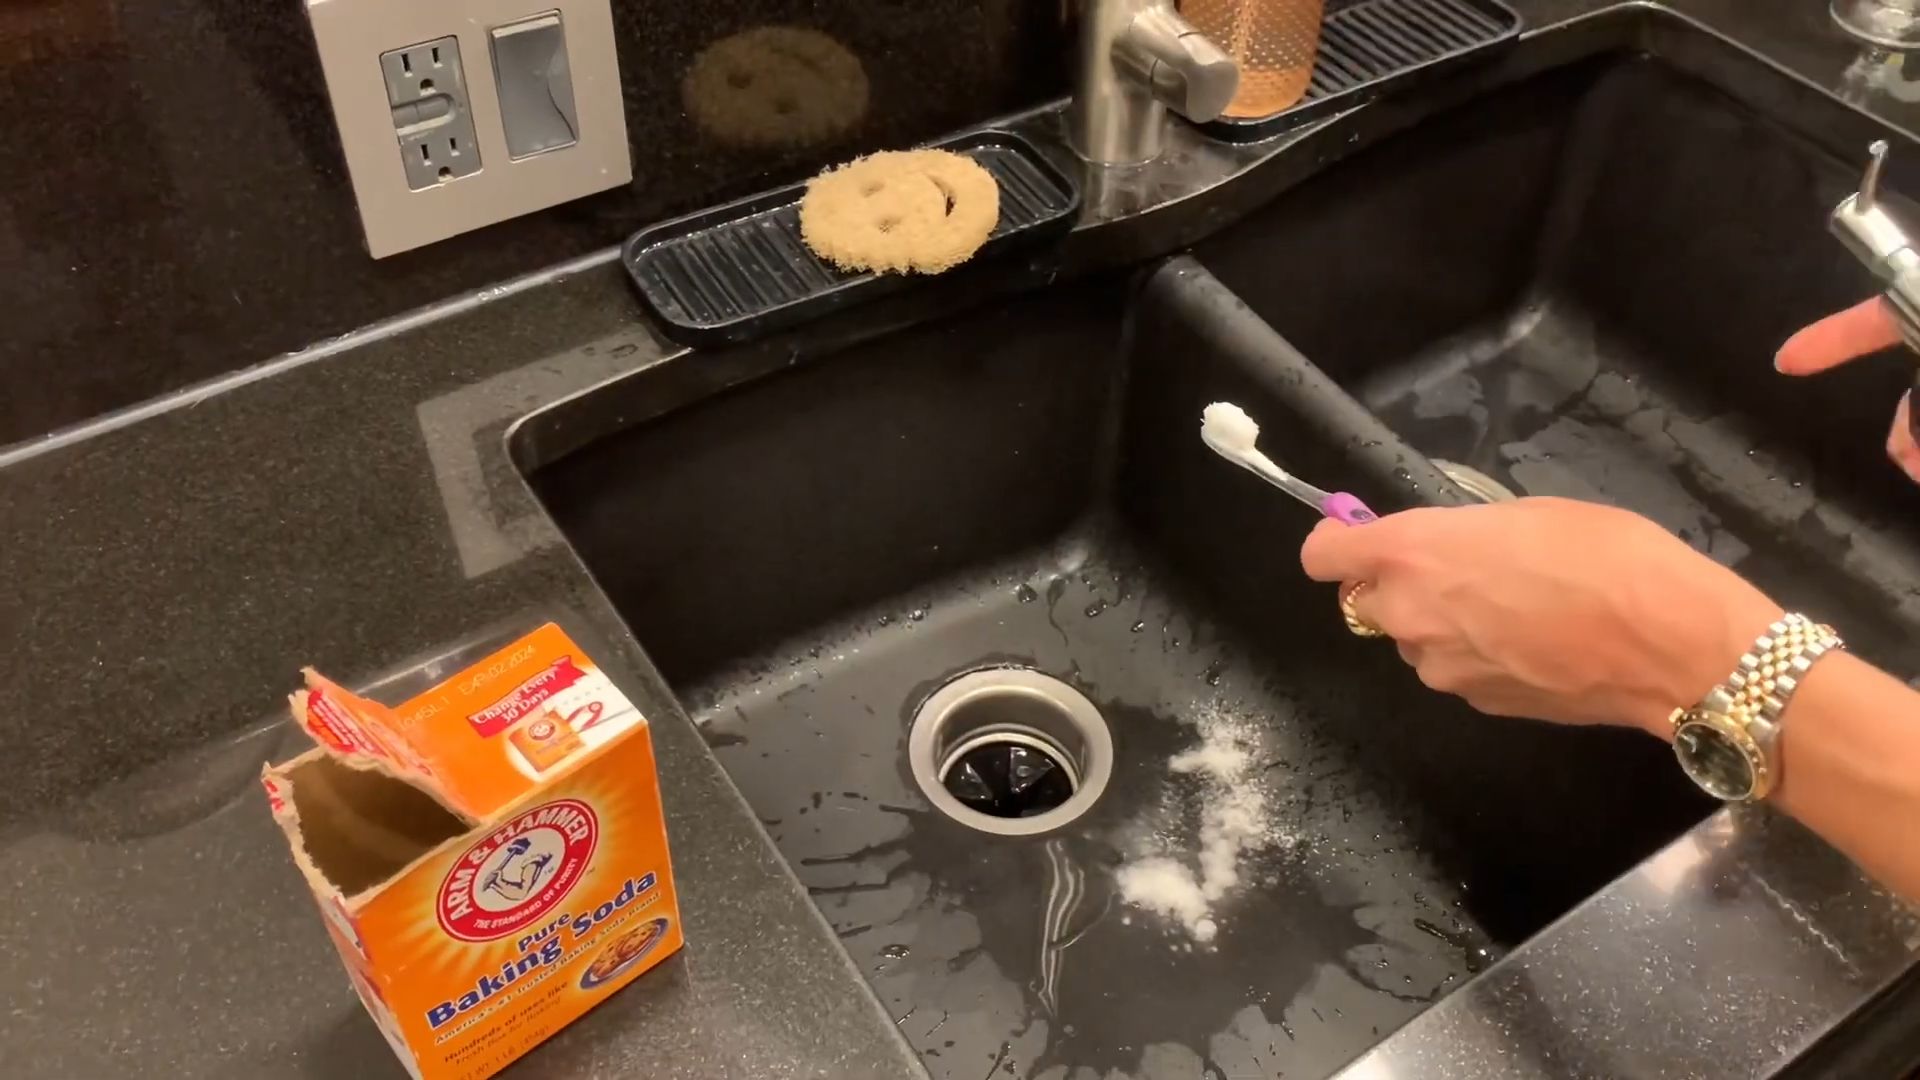
Hack 7: Sink Stain Remover – Baking Soda Paste!
Sinks, especially stainless steel ones, can easily develop stains. This simple baking soda paste will remove those stains and leave your sink sparkling.
What you’ll need:
* Baking soda
* Water
* Soft cloth or sponge
Step-by-step instructions:
1. Make a paste: Mix baking soda with a small amount of water to create a thick paste.
2. Apply to stains:
Conclusion
So, there you have it! This simple yet incredibly effective DIY trick for creating your own cleaning solution is a game-changer for anyone looking to save time and money while maintaining a sparkling clean home. We’ve walked you through the process, highlighting its ease and adaptability. But why is this a must-try?
Firstly, consider the sheer convenience. No more frantic trips to the store when you’re out of your favorite cleaner. With just a few common household ingredients, you can whip up a batch in minutes. This is especially valuable for those unexpected spills and messes that demand immediate attention.
Secondly, think about the cost savings. Store-bought cleaning products can be surprisingly expensive, especially if you opt for eco-friendly or specialized formulas. By making your own, you’re significantly reducing your cleaning budget, freeing up funds for other household needs or even a little treat for yourself.
Thirdly, and perhaps most importantly, you have complete control over the ingredients. This is a huge advantage for those with sensitivities to certain chemicals or who simply prefer a more natural approach to cleaning. You can tailor the recipe to your specific needs and preferences, ensuring a safe and healthy environment for your family and pets.
But the benefits don’t stop there! This DIY cleaning solution is incredibly versatile. While we’ve provided a basic recipe, feel free to experiment with different essential oils to create your own signature scent. Lavender, lemon, tea tree, and eucalyptus are all excellent choices, each offering unique aromatherapy benefits in addition to their cleaning properties.
Want to boost the cleaning power? Add a tablespoon of borax for extra stain-fighting action. Dealing with stubborn grease? A squirt of dish soap can work wonders. The possibilities are endless!
Don’t be afraid to get creative and customize the recipe to suit your specific cleaning challenges.
We understand that trying something new can sometimes feel daunting, but we promise this DIY cleaning solution is incredibly easy to make and use. The results speak for themselves – a clean, fresh-smelling home without the harsh chemicals or hefty price tag.
We are confident that this time saving cleaning tips will revolutionize your cleaning routine. It’s a simple, effective, and eco-friendly way to keep your home sparkling.
So, what are you waiting for? Gather your ingredients, follow the simple steps, and experience the difference for yourself. We encourage you to try this DIY cleaning solution and share your experience with us. Let us know what variations you tried, what scents you loved, and how it transformed your cleaning routine. Your feedback is invaluable and helps us continue to provide helpful and informative content. Share your tips and tricks in the comments below – let’s build a community of clean-home enthusiasts!
Frequently Asked Questions (FAQ)
Q: What kind of vinegar should I use for this DIY cleaning solution?
A: White distilled vinegar is generally recommended for cleaning purposes. It’s inexpensive, readily available, and has a high acidity level, making it effective at cutting through grease, grime, and hard water stains. Avoid using other types of vinegar, such as apple cider vinegar or balsamic vinegar, as they may contain sugars or coloring that could leave a residue on surfaces.
Q: Can I use essential oils other than the ones mentioned in the recipe?
A: Absolutely! Feel free to experiment with different essential oils to create your own custom scent and cleaning blend. Lavender, lemon, tea tree, eucalyptus, orange, and peppermint are all popular choices for cleaning due to their antibacterial, antiviral, and antifungal properties. Just be sure to use pure essential oils and avoid synthetic fragrances, which may not offer the same benefits. Always test a small, inconspicuous area first to ensure the essential oil doesn’t damage the surface.
Q: Is this DIY cleaning solution safe to use on all surfaces?
A: While this cleaning solution is generally safe for most surfaces, it’s always a good idea to test it in an inconspicuous area first, especially on delicate materials like marble, granite, or wood. The acidity of vinegar can potentially damage or etch these surfaces over time. Avoid using this solution on waxed furniture or unsealed grout. For these surfaces, consider using a milder cleaning solution or consulting a professional cleaner.
Q: How long will this DIY cleaning solution last?
A: This DIY cleaning solution can typically last for several weeks when stored in a cool, dark place. However, it’s best to use it within a month or two for optimal effectiveness. Over time, the essential oils may lose their potency, and the vinegar may start to degrade. To ensure the solution remains fresh, store it in an airtight container away from direct sunlight and heat.
Q: Can I use this DIY cleaning solution in a spray bottle?
A: Yes, this cleaning solution is perfect for use in a spray bottle. Make sure the spray bottle is clean and free of any residue from previous cleaning products. Label the bottle clearly to avoid confusion. When spraying the solution, hold the bottle a few inches away from the surface and spray evenly. Wipe the surface clean with a microfiber cloth.
Q: What if I don’t have essential oils? Can I still make this cleaning solution?
A: Yes, you can still make this cleaning solution without essential oils. The vinegar and water mixture will still provide effective cleaning power. However, essential oils add a pleasant scent and can also enhance the cleaning properties of the solution. If you don’t have essential oils, you can add a few drops of lemon juice or a small amount of your favorite natural fragrance oil for a similar effect.
Q: How do I clean up spills with this solution?
A: For spills, immediately blot up as much of the liquid as possible with a clean cloth or paper towel. Then, spray the affected area with the DIY cleaning solution and let it sit for a few minutes to penetrate the stain. Wipe the area clean with a fresh cloth. For stubborn stains, you may need to repeat the process or use a slightly stronger concentration of vinegar.
Q: Can I use this solution to clean my bathroom?
A: Yes, this DIY cleaning solution is excellent for cleaning bathrooms. It can effectively remove soap scum, hard water stains, and mildew from showers, tubs, sinks, and toilets. For toilets, you can pour a cup of the solution into the bowl and let it sit for 30 minutes before scrubbing and flushing. For shower doors and walls, spray the solution and let it sit for a few minutes before wiping clean.
Q: Is this cleaning solution safe for pets and children?
A: While this DIY cleaning solution is generally considered safe for pets and children, it’s still important to take precautions. Keep the solution out of reach of children and pets when not in use. Avoid spraying the solution directly onto pets or allowing them to ingest it. If your pet or child accidentally ingests the solution, contact your veterinarian or poison control center immediately.
Q: Can I use this solution to clean my kitchen counters?
A: This solution is generally safe for most kitchen counters, but it’s important to test it in an inconspicuous area first, especially on delicate surfaces like granite or marble. Avoid using this solution on unsealed wood counters. For granite and marble, consider using a pH-neutral cleaner specifically designed for these surfaces. For everyday cleaning, this solution can be effective at removing grease, grime, and food stains from most kitchen counters.
Q: How can I make this solution even more eco-friendly?
A: To make this solution even more eco-friendly, consider using organic vinegar and sourcing your essential oils from sustainable and ethical suppliers. You can also reuse old spray bottles and containers to reduce waste. When cleaning, use reusable microfiber cloths instead of paper towels. By making these small changes, you can minimize your environmental impact and create a more sustainable cleaning routine. Remember, embracing time saving cleaning tips can also be eco-friendly by reducing the need for multiple cleaning products.
Leave a Comment