
Grow Taro Organically Kitchen: Have you ever dreamed of cultivating your own exotic, starchy staple right in your kitchen? I know I have! Forget those bland, store-bought vegetables; imagine the satisfaction of harvesting fresh, organic taro from your very own indoor garden. This isn’t just a gardening project; it’s a culinary adventure waiting to happen!
Taro, a root vegetable with a rich history spanning thousands of years, holds significant cultural importance in many parts of the world, particularly in Polynesian and Asian cuisines. For generations, it has been a dietary cornerstone, providing essential nutrients and playing a vital role in traditional ceremonies. Now, you can bring this ancient tradition into your modern home.
Why should you learn to grow taro organically in your kitchen? Well, for starters, you’ll have access to a fresh, pesticide-free source of this delicious and nutritious vegetable. Plus, it’s a fantastic way to reduce your carbon footprint and connect with nature, even in a small apartment. I’m going to show you some simple, DIY tricks and hacks that will make growing taro organically in your kitchen easier than you ever thought possible. Get ready to transform your kitchen into a thriving, edible oasis!
Growing Taro Organically in Your Kitchen: A Beginner’s Guide
Hey there, fellow plant enthusiasts! Ever thought about growing your own taro? It’s surprisingly easy to do, even if you don’t have a sprawling garden. I’m going to walk you through how to cultivate this delicious and nutritious root vegetable right in your kitchen, using organic methods, of course! Get ready to get your hands dirty (in a good way!).
What You’ll Need
Before we dive in, let’s gather our supplies. This is what I’ve found works best:
* Taro Corm (the “seed”): You can usually find these at Asian grocery stores or specialty produce markets. Look for firm, healthy-looking corms without any soft spots or blemishes.
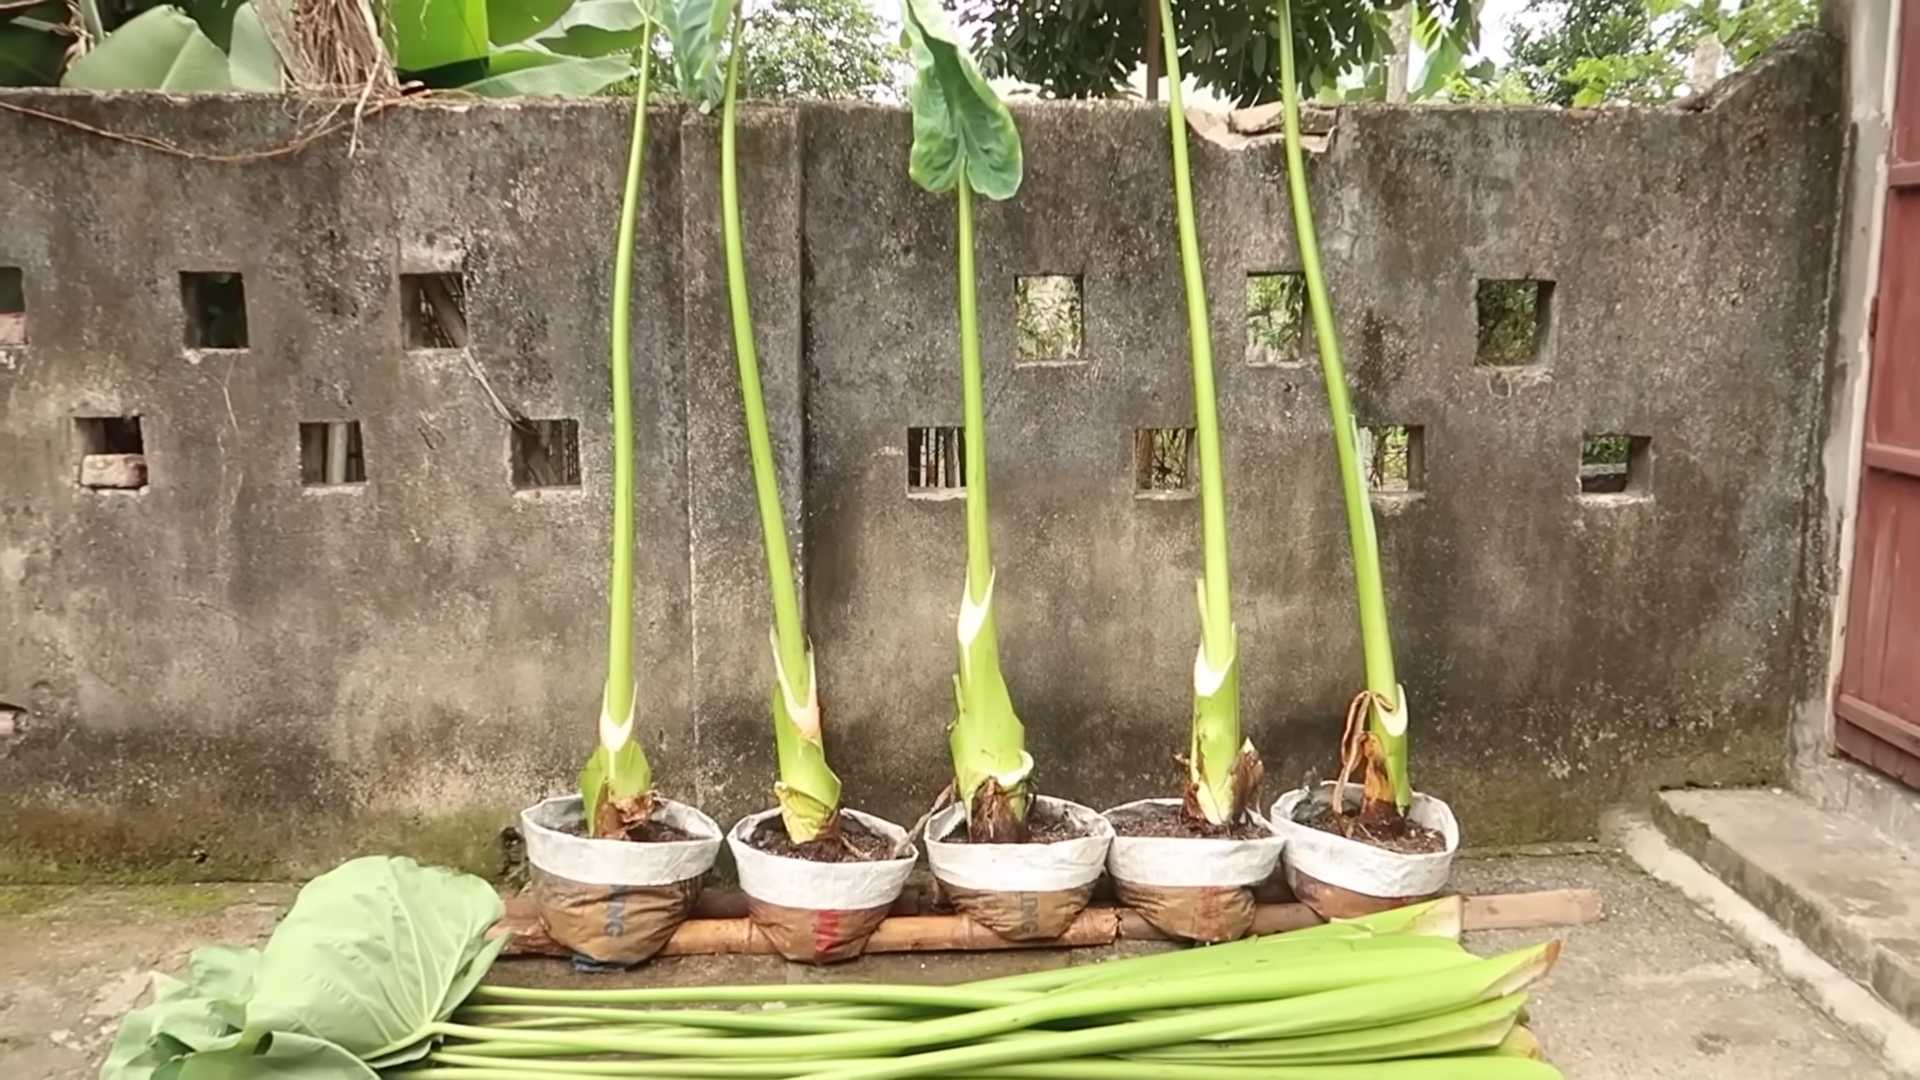
* Large Container: Think big! Taro needs space for its roots to spread. A container at least 12 inches in diameter and 12 inches deep is ideal. A large bucket, a plastic tub, or even a repurposed container will work.
* Organic Potting Mix: This is crucial for providing the nutrients your taro needs. Make sure it’s well-draining to prevent root rot. I like to use a mix of compost, coco coir, and perlite.
* Water: Taro loves water, so have a good supply ready.
* Sunlight: Taro thrives in bright, indirect sunlight. A spot near a sunny window is perfect.
* Optional: Organic Fertilizer: While not strictly necessary, a slow-release organic fertilizer can give your taro a boost.
* Optional: Pebbles or Gravel: For drainage at the bottom of the container.
Preparing the Taro Corm
This is a crucial step to get your taro off to a good start.
1. Inspect the Corm: Carefully examine your taro corm. Remove any dried or damaged roots. If there are any small shoots already emerging, be extra careful not to break them off.
2. Clean the Corm: Gently wash the corm under cool water to remove any dirt or debris.
3. Optional: Sprouting (Pre-sprouting): While not essential, pre-sprouting can speed up the process. Place the corm in a shallow dish of water, ensuring the bottom is submerged but the top is exposed. Keep it in a warm, bright location. Change the water every day or two. You should see small roots and shoots emerging within a week or two. This step isn’t necessary, but I find it gives me a head start.
Planting Your Taro
Now for the fun part – getting your taro into its new home!
1. Prepare the Container: If your container doesn’t have drainage holes, drill some in the bottom. Add a layer of pebbles or gravel to improve drainage. This is important to prevent the roots from sitting in water, which can lead to rot.
2. Fill with Potting Mix: Fill the container with your organic potting mix, leaving about 2-3 inches of space at the top.
3. Plant the Corm: Make a hole in the center of the potting mix, deep enough to accommodate the taro corm. Place the corm in the hole, ensuring the top of the corm (where the shoots will emerge) is slightly above the soil level. If you pre-sprouted your corm, be extra careful not to damage the new roots or shoots.
4. Cover with Soil: Gently cover the corm with potting mix, leaving the top exposed.
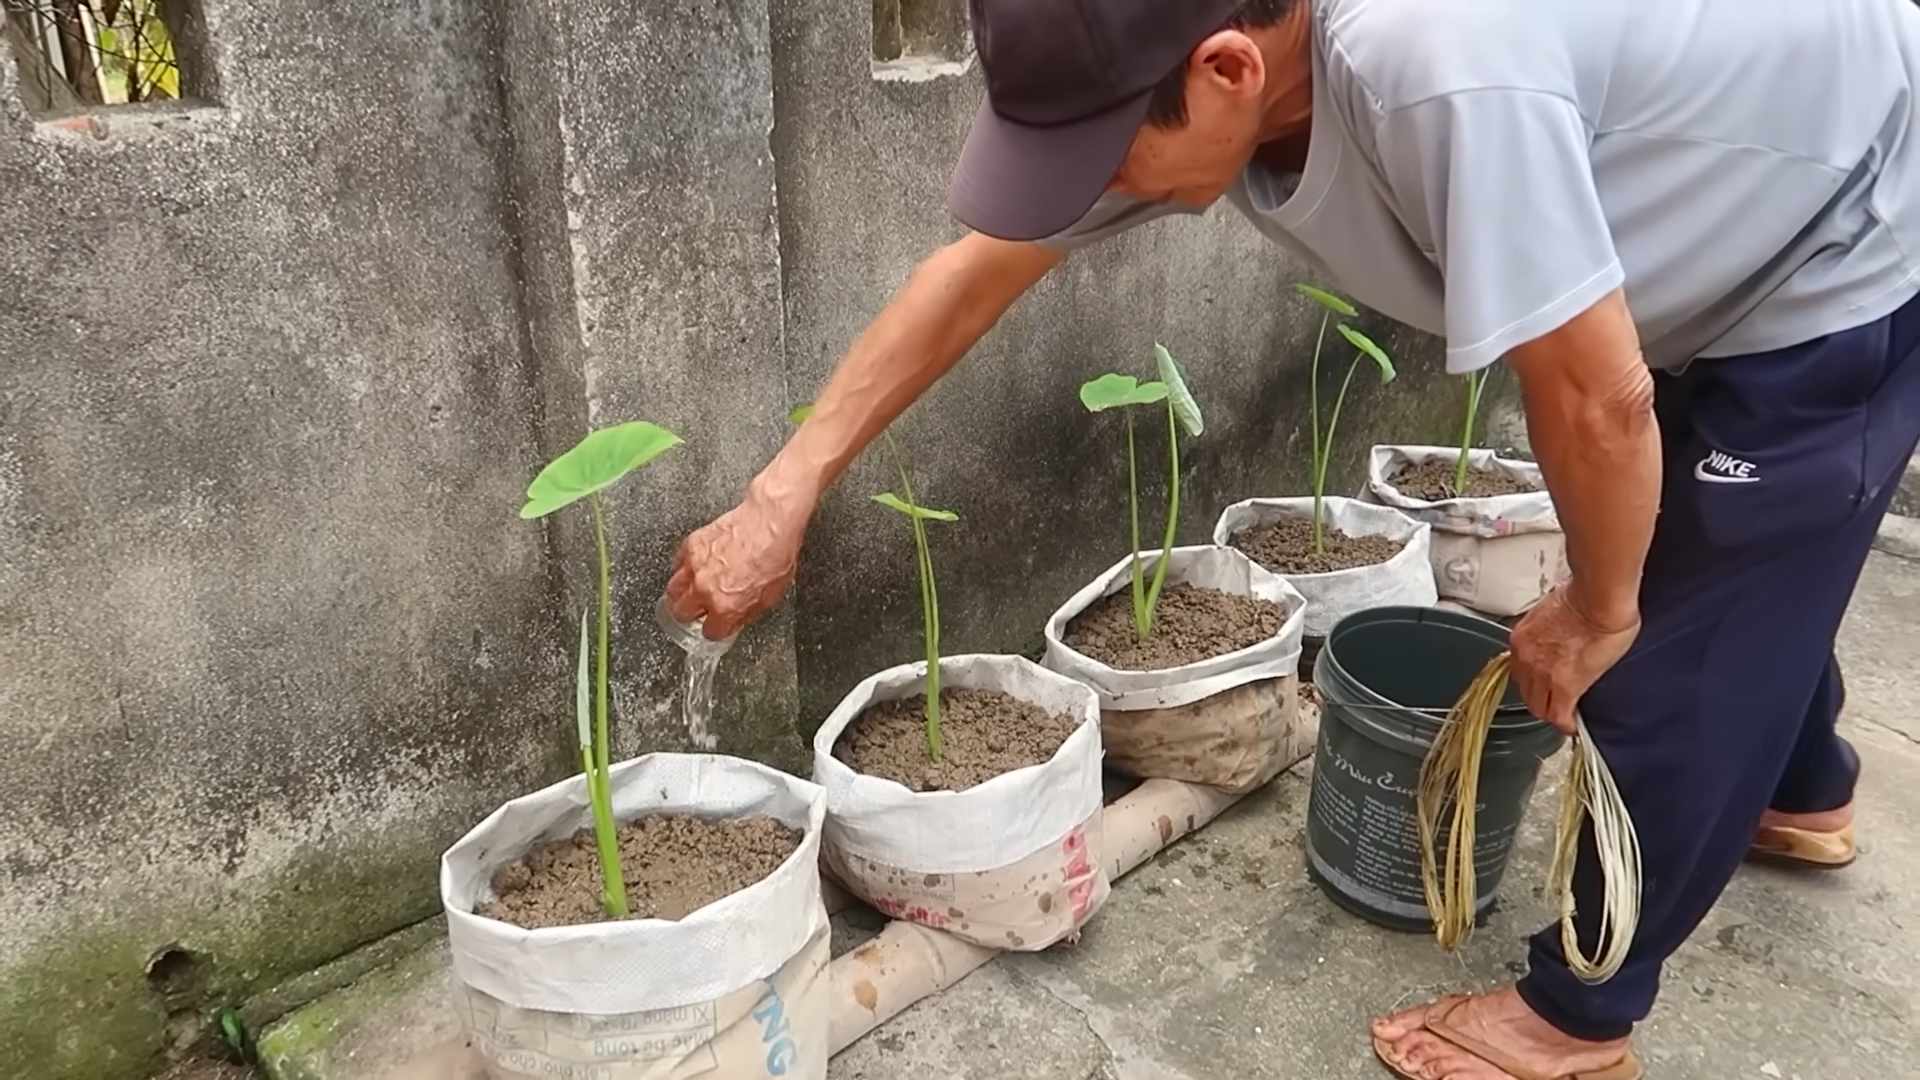
5. Water Thoroughly: Water the soil thoroughly until water drains out of the bottom of the container. This will help settle the soil and ensure the corm has access to moisture.
Caring for Your Taro Plant
Taro is relatively low-maintenance, but here are a few key things to keep in mind:
1. Watering: Taro loves water! Keep the soil consistently moist, but not soggy. Water deeply whenever the top inch of soil feels dry to the touch. In hot weather, you may need to water daily. I usually check the soil moisture every morning.
2. Sunlight: Taro needs bright, indirect sunlight. A spot near a sunny window is ideal. Avoid direct sunlight, which can scorch the leaves. If you don’t have a sunny window, you can supplement with a grow light.
3. Fertilizing (Optional): If you choose to fertilize, use a slow-release organic fertilizer according to the package directions. I usually fertilize every few months during the growing season (spring and summer).
4. Humidity: Taro thrives in humid environments. If your home is dry, you can increase humidity by misting the leaves regularly or placing the container on a tray filled with water and pebbles. Make sure the bottom of the container isn’t sitting directly in the water.
5. Pruning: As your taro plant grows, you may need to prune away any yellowing or damaged leaves. This will help keep the plant healthy and encourage new growth.
6. Pest Control: Taro is generally pest-resistant, but keep an eye out for common houseplant pests like aphids or spider mites. If you spot any pests, treat them with an organic insecticide or insecticidal soap.
7. Temperature: Taro prefers warm temperatures, ideally between 65°F and 85°F (18°C and 29°C). Avoid exposing your plant to cold drafts or sudden temperature changes.
Harvesting Your Taro
This is the most rewarding part!
1. When to Harvest: Taro typically takes 6-12 months to mature. You’ll know it’s ready to harvest when the leaves start to turn yellow and die back. This indicates that the plant is diverting its energy to the corm.
2. Harvesting the Corm: Gently loosen the soil around the plant. Carefully lift the entire plant out of the container. The corm will be attached to the roots.
3. Cleaning the Corm: Wash the corm thoroughly under cool water to remove any dirt or debris.
4. Storing the Corm: Store the harvested corm in a cool, dry place. It should keep for several weeks.
Important Considerations
* Calcium Oxalate: Taro contains calcium oxalate crystals, which can cause irritation if ingested raw. Always cook taro thoroughly before eating. Boiling, steaming, or baking are all good options.
* Variety Selection: Some taro varieties are better suited for container growing than others. Look for varieties that are known to be compact and productive.
* Patience: Growing taro takes time and patience. Don’t get discouraged if you don’t see results immediately. With proper care, you’ll be enjoying your own homegrown taro in no time!
* Experimentation: Don’t be afraid to experiment with different potting mixes, fertilizers, and growing conditions to find what works best for you.
Troubleshooting
* Yellowing Leaves: This could be a sign of overwatering, underwatering, or nutrient deficiency. Adjust your watering schedule and consider fertilizing.
* Root Rot: This is caused by overwatering. Make sure your container has good drainage and allow the soil to dry out slightly between waterings.
* Slow Growth: This could be due to insufficient sunlight, poor soil, or lack of nutrients. Move your plant to a brighter location, repot with fresh potting mix, and consider fertilizing.
* Pests: Inspect your plant regularly for pests and treat them promptly with an organic insecticide or insecticidal soap.
Enjoying Your Homegrown Taro
Now that you’ve harvested your taro, it’s time to enjoy the fruits (or rather, roots) of your labor! Taro can be used in a variety of dishes, from soups and stews to chips and fries. It has a slightly sweet, nutty flavor that is delicious and unique.
Cooking Tips:
* Always cook taro thoroughly before eating.
* Peel the corm before cooking.
* Taro can be boiled, steamed, baked, or fried.
* It can be used in both sweet and savory dishes.
I hope this guide has inspired you to try growing your own taro at home. It’s a rewarding and educational experience, and you’ll have the satisfaction of knowing that you’re growing your own food organically. Happy gardening!
Conclusion
So, there you have it! Growing taro organically in your kitchen is not only achievable but also incredibly rewarding. We’ve walked through the simple steps, from selecting the right taro corm to providing the ideal environment for its growth. This method offers a fantastic way to enjoy fresh, homegrown taro without the use of harmful chemicals, ensuring a healthier and more sustainable food source for you and your family.
Why is this DIY trick a must-try? Because it empowers you to take control of your food source, reduces your reliance on commercially grown produce (often laden with pesticides), and connects you with the natural world in a tangible way. Imagine the satisfaction of harvesting your own taro, knowing exactly where it came from and how it was grown. Plus, it’s a fantastic conversation starter and a unique addition to your indoor gardening repertoire.
But the fun doesn’t stop there! Feel free to experiment with different varieties of taro to discover your favorite flavor profiles. You can also adjust the growing medium to see how it affects the plant’s growth and the size of the corms. Consider adding companion plants to your indoor garden to create a more diverse and thriving ecosystem. Perhaps some herbs like basil or mint, which can also benefit from the humid environment taro enjoys.
Don’t be afraid to get creative with your taro harvest either. While the corms are the most commonly used part of the plant, the leaves are also edible when cooked properly. They can be used in soups, stews, or even as a wrap for other ingredients. Just remember to cook them thoroughly to remove any potential irritants.
We strongly encourage you to give this DIY taro growing method a try. It’s a simple, cost-effective, and environmentally friendly way to enjoy this delicious and nutritious root vegetable. And most importantly, we want to hear about your experience! Share your photos, tips, and challenges in the comments below. Let’s build a community of indoor taro growers and learn from each other. Your insights could be invaluable to someone just starting out.
Remember, growing taro organically is a journey, not a destination. There will be successes and setbacks along the way. But with patience, persistence, and a little bit of love, you’ll be enjoying homegrown taro in no time. So, grab a taro corm, get your hands dirty, and start growing! We can’t wait to see what you create.
Frequently Asked Questions (FAQ)
1. What kind of taro corm should I use for growing?
The best type of taro corm to use for growing is one that is firm, healthy, and free from any signs of rot or disease. Look for corms that have small “eyes” or buds, as these are where the new shoots will emerge. You can typically find taro corms at Asian grocery stores or specialty produce markets. If possible, choose organic taro corms to ensure that they haven’t been treated with any harmful chemicals. Different varieties of taro exist, each with slightly different flavors and textures. Experiment to find your favorite!
2. How much sunlight does my indoor taro plant need?
Taro plants thrive in bright, indirect sunlight. Avoid placing them in direct sunlight, as this can scorch the leaves. A spot near an east-facing or west-facing window is ideal. If you don’t have access to enough natural light, you can supplement with artificial grow lights. Aim for at least 6-8 hours of light per day. If the leaves start to look pale or leggy, it’s a sign that your plant isn’t getting enough light.
3. What kind of soil should I use for growing taro indoors?
Taro plants prefer a well-draining, nutrient-rich soil. A mixture of potting soil, compost, and perlite is a good option. The potting soil provides a base for the plant to grow in, the compost adds essential nutrients, and the perlite improves drainage. You can also add a small amount of peat moss to help retain moisture. Make sure the pot you use has drainage holes to prevent waterlogging.
4. How often should I water my indoor taro plant?
Taro plants need consistently moist soil, but they don’t like to sit in standing water. Water your plant thoroughly when the top inch of soil feels dry to the touch. Allow the excess water to drain out of the pot. During the growing season (spring and summer), you may need to water your plant more frequently. In the winter, when the plant is dormant, you can reduce watering.
5. How do I know when my taro is ready to harvest?
Taro is typically ready to harvest when the leaves start to turn yellow and die back. This usually takes about 6-9 months. Gently dig around the base of the plant to expose the corms. If the corms are large and firm, they are ready to harvest. Use a garden fork to carefully lift the corms out of the soil. Be careful not to damage the corms during harvesting.
6. Are taro leaves edible?
Yes, taro leaves are edible, but they must be cooked thoroughly before consumption. Raw taro leaves contain calcium oxalate crystals, which can cause irritation and discomfort. Cooking the leaves breaks down these crystals and makes them safe to eat. Taro leaves can be used in soups, stews, or as a wrap for other ingredients.
7. How can I prevent pests and diseases from affecting my indoor taro plant?
To prevent pests and diseases, it’s important to provide your taro plant with the right growing conditions. This includes adequate sunlight, well-draining soil, and proper watering. Regularly inspect your plant for any signs of pests or diseases. If you notice any problems, take action immediately. You can use organic pest control methods, such as neem oil or insecticidal soap, to treat infestations. Ensure good air circulation around the plant to prevent fungal diseases.
8. Can I grow taro in water only?
While taro thrives best in soil, it can be initially sprouted in water. Place the corm in a container with enough water to cover the bottom third. Once roots develop, transplant it to a pot with soil for optimal growth and corm development. Growing taro organically in soil provides the necessary nutrients for a healthy and productive plant.
9. My taro leaves are turning yellow. What could be the problem?
Yellowing leaves can indicate several issues. Overwatering is a common culprit, leading to root rot. Ensure your pot has good drainage and allow the soil to dry slightly between waterings. Nutrient deficiencies can also cause yellowing. Try fertilizing with a balanced organic fertilizer. Insufficient light can also be a factor; move your plant to a brighter location.
10. How do I store harvested taro corms?
Store harvested taro corms in a cool, dry, and dark place. They can be stored in a paper bag or wrapped in newspaper. Avoid storing them in the refrigerator, as this can cause them to become mushy. Properly stored taro corms can last for several weeks.

Leave a Comment