
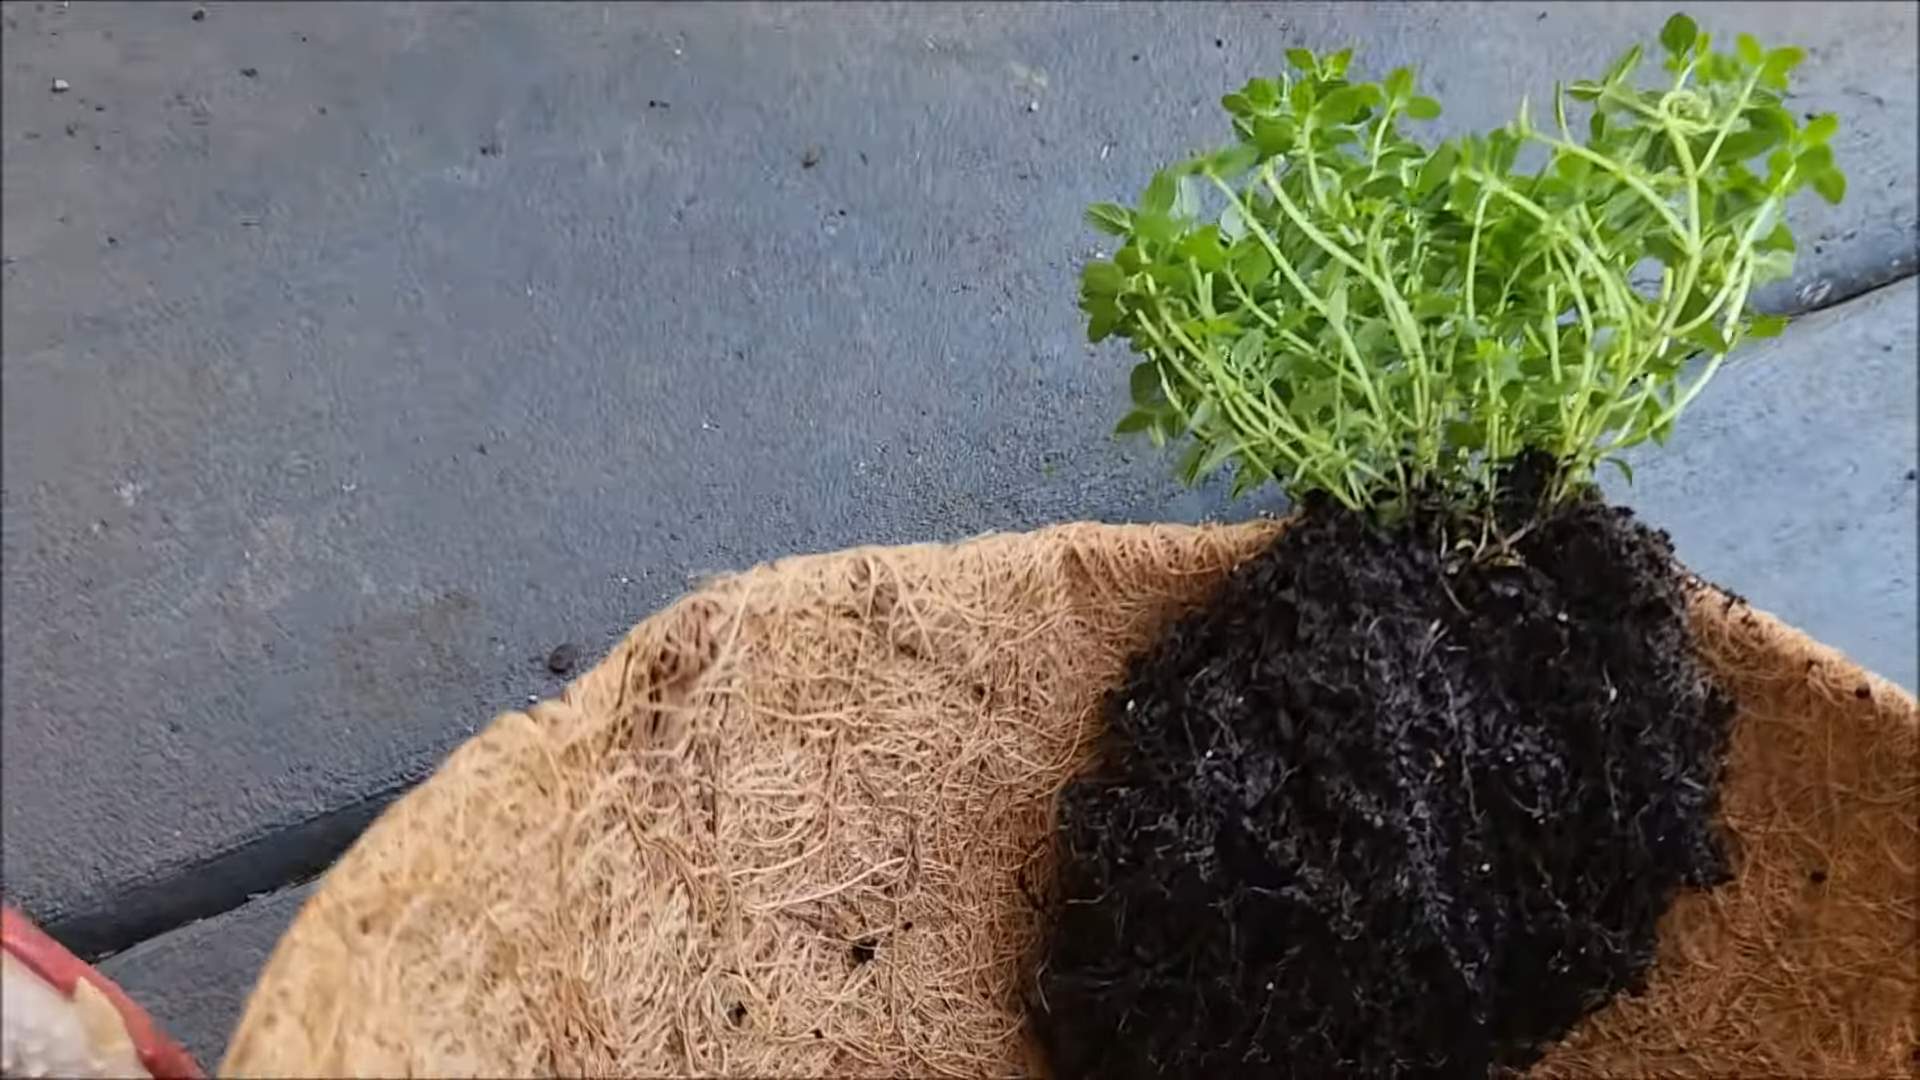
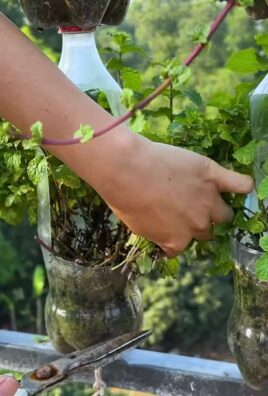
Grow Thyme Indoors Year Round? Absolutely! Imagine having fresh, fragrant thyme at your fingertips, no matter the season. Forget those sad, dried-up jars from the supermarket – we’re talking vibrant, flavorful thyme ready to elevate your culinary creations all year long.
Thyme, with its rich history dating back to ancient Egypt where it was used for embalming, and its association with courage and bravery in ancient Greece, has always been more than just a herb. It’s a symbol of resilience, and now, you can bring that resilience into your home. For centuries, people have relied on thyme for its medicinal properties and culinary uses. But what if you could bypass the unpredictable weather and limited growing seasons and grow thyme indoors year round?
That’s where this DIY guide comes in! Many of us dream of a thriving herb garden, but struggle with outdoor space, unpredictable weather, or simply the time commitment. This article is your solution. I’m going to share simple, effective tricks and hacks that will empower you to cultivate a flourishing thyme plant right on your windowsill. Say goodbye to expensive store-bought herbs and hello to a constant supply of fresh, aromatic thyme. Let’s get started!
Grow Radishes at Home: A Speedy Guide to Crunchy Goodness
Hey there, fellow gardening enthusiasts! I’m so excited to share my tried-and-true method for growing radishes at home. These little root veggies are incredibly rewarding because they sprout and mature super quickly. Seriously, you can go from seed to salad in just a few weeks! Plus, they add a delightful peppery crunch to everything from salads to tacos. Let’s dive in!
Why Radishes?
Before we get our hands dirty, let’s quickly cover why radishes are awesome:
* Fast Growers: As I mentioned, they’re ready to harvest in as little as 3-4 weeks. Perfect for impatient gardeners like me!
* Easy to Grow: They’re very forgiving and don’t require a ton of fuss.
* Space-Saving: Radishes don’t need a lot of room, making them ideal for small gardens, containers, or even balconies.
* Succession Planting: You can plant them every couple of weeks for a continuous harvest throughout the growing season.
* Nutritious: Radishes are packed with vitamins and minerals.
What You’ll Need
Here’s a list of everything you’ll need to get started:
* Radish Seeds: Choose your favorite variety! I personally love ‘Cherry Belle’ for its classic flavor and quick growth, but ‘French Breakfast’ and ‘Easter Egg’ are also great options.
* Potting Soil (or Garden Soil): If you’re using containers, a good quality potting mix is essential. If you’re planting directly in the garden, make sure your soil is loose and well-draining.
* Container (Optional): If you’re container gardening, choose a pot that’s at least 6 inches deep.
* Watering Can or Hose: For keeping your radishes consistently moist.
* Gardening Gloves (Optional): To keep your hands clean.
* Hand Trowel or Small Shovel: For planting the seeds.
* Fertilizer (Optional): A balanced fertilizer can give your radishes a boost, but it’s not strictly necessary.
Getting Started: Planting Your Radish Seeds
This is where the magic begins! Follow these steps carefully for the best results.
1. Prepare the Soil: Whether you’re using a container or planting directly in the garden, make sure your soil is loose and free of any large clumps or rocks. If you’re using garden soil, you might want to amend it with some compost or well-rotted manure to improve drainage and fertility. I like to use a hand trowel to break up the soil and create a smooth surface.
2. Sow the Seeds: Radish seeds are small, so you don’t need to plant them very deep. I usually aim for about ½ inch deep. Space the seeds about 1 inch apart. If you’re planting in rows, space the rows about 6 inches apart. A good trick is to use your finger to make a small indentation in the soil, drop in the seed, and then gently cover it with soil.
3. Water Gently: After planting, water the soil gently but thoroughly. You want to make sure the soil is moist but not waterlogged. I prefer to use a watering can with a gentle rose head to avoid disturbing the seeds.
4. Label Your Planting: It might seem obvious now, but trust me, you’ll thank yourself later! Label your planting with the date and the variety of radish you planted. This will help you keep track of when to expect your harvest.
Caring for Your Radishes: The Key to Success
Radishes are relatively low-maintenance, but there are a few things you need to keep in mind to ensure a bountiful harvest.
1. Watering: Consistent moisture is crucial for radishes. They need to be kept evenly moist, but not soggy. I usually water them every day or two, depending on the weather. A good rule of thumb is to stick your finger into the soil – if it feels dry an inch or two below the surface, it’s time to water.
2. Thinning: Once your radish seedlings emerge (usually within a few days), you’ll need to thin them out. This means removing some of the seedlings to give the remaining ones enough space to grow. I know it can be hard to pull out those tiny plants, but it’s essential for getting good-sized radishes. Aim to have about 1-2 inches between each plant. You can use small scissors to snip the seedlings at the soil line if you don’t want to disturb the roots of the remaining plants.
3. Weeding: Keep your radish patch free of weeds. Weeds compete with your radishes for water and nutrients, so it’s important to remove them regularly. I like to hand-pull weeds when they’re small to avoid disturbing the radish roots.
4. Fertilizing (Optional): If your soil is poor, you can give your radishes a boost with a balanced fertilizer. I usually use a liquid fertilizer diluted to half strength. Apply the fertilizer according to the package directions. Be careful not to over-fertilize, as this can lead to excessive foliage growth at the expense of root development.
5. Sunlight: Radishes prefer full sun (at least 6 hours of direct sunlight per day), but they can tolerate some shade, especially in hot climates. If you’re growing them in a container, you can move it around to ensure they get enough sunlight.
Dealing with Pests and Diseases
Radishes are generally pest-resistant, but there are a few things to watch out for.
* Flea Beetles: These tiny beetles can chew small holes in the leaves of your radishes. To prevent flea beetle damage, you can cover your plants with row covers. You can also spray them with insecticidal soap if necessary.
* Root Maggots: These pests can tunnel into the roots of your radishes, causing them to become distorted and inedible. To prevent root maggot damage, you can rotate your crops and avoid planting radishes in the same spot year after year. You can also use row covers to prevent the adult flies from laying their eggs near your plants.
* Downy Mildew: This fungal disease can cause yellow spots on the leaves of your radishes. To prevent downy mildew, make sure your plants have good air circulation and avoid overhead watering. If you see signs of downy mildew, remove the affected leaves and spray your plants with a fungicide.
Harvesting Your Radishes: The Moment of Truth!
This is the most exciting part! Radishes are ready to harvest when their roots are about 1 inch in diameter. The exact time will depend on the variety you’re growing.
1. Check for Readiness: Gently brush away some of the soil around the base of the plant to check the size of the radish root. If it’s the size you want, it’s time to harvest.
2. Pull Them Up: Grasp the radish leaves near the base of the plant and gently pull straight up. The radish should come out of the ground easily. If it doesn’t, you can loosen the soil around the radish with a hand trowel.
3. Wash and Store: After harvesting, wash the radishes thoroughly to remove any dirt. You can store them in the refrigerator for up to a week. To keep them fresh, trim off the leaves and store the radishes in a plastic bag with a damp paper towel.
Succession Planting for a Continuous Harvest
One of the best things about radishes is that you can plant them every couple of weeks for a continuous harvest throughout the growing season. This is called succession planting.
1. Plan Your Plantings: Decide how often you want to harvest radishes and plan your plantings accordingly. I usually plant a new batch of radishes every two weeks.
2. Prepare the Soil: Before planting each new batch of radishes, make sure the soil is loose and free of weeds.
3. Sow the Seeds: Follow the same planting instructions as before.
4. Enjoy Your Harvest! With succession planting, you’ll have a steady supply of fresh, crunchy radishes all season long.
Troubleshooting: Common Radish Problems and Solutions
Even with the best care, you might encounter some problems when growing radishes. Here are a few common issues and how to fix them:
* Radishes are too small: This is usually caused by overcrowding or lack of sunlight. Make sure you thin your seedlings properly and that your radishes are getting enough sunlight.
* Radishes are cracked: This can be caused by inconsistent watering. Make sure you’re keeping the soil evenly moist.
* Radishes are too spicy: This can be caused by hot weather or letting the radishes grow too large. Harvest your radishes when they’re the right size and try growing them in a shadier spot during the hottest part of the summer.
* Rad
Conclusion
So, there you have it! Growing thyme indoors year-round isn’t just a whimsical dream for culinary enthusiasts; it’s an achievable reality with a few simple steps. We’ve walked you through the process, from selecting the right thyme variety and providing optimal lighting to ensuring proper watering and drainage. The beauty of this DIY project lies not only in its practicality – fresh thyme at your fingertips whenever you need it – but also in its therapeutic nature. Nurturing a plant, watching it thrive, and then using its fragrant leaves in your favorite dishes is an incredibly rewarding experience.
Why is this DIY trick a must-try? Because it empowers you to take control of your herb supply, ensuring you always have access to fresh, flavorful thyme, regardless of the season. Think of the possibilities! Imagine adding a sprig of freshly harvested thyme to your roasted chicken, infusing your olive oil with its earthy aroma, or garnishing your favorite cocktails with its delicate leaves. The difference between dried thyme and fresh thyme is significant, and once you’ve experienced the vibrant flavor of homegrown thyme, you’ll never want to go back.
But the journey doesn’t end here. Feel free to experiment with different varieties of thyme. Lemon thyme adds a citrusy twist, while creeping thyme can be used as a fragrant ground cover in larger indoor containers. You can also try propagating your thyme plant from cuttings, expanding your indoor herb garden even further. Consider using different types of containers, from terracotta pots to self-watering planters, to find what works best for your space and lifestyle. The key is to observe your plant, learn its needs, and adapt your approach accordingly.
We’ve provided you with the knowledge and the tools; now it’s time to put them into action. Don’t be intimidated if you’ve never grown herbs indoors before. This project is beginner-friendly, and the rewards are well worth the effort. Start small, be patient, and enjoy the process.
We are confident that you can successfully grow thyme indoors year-round. We encourage you to embark on this green adventure and discover the joy of having fresh herbs readily available in your own home.
And now, we want to hear from you! Have you tried growing thyme indoors? What challenges did you face, and how did you overcome them? What are your favorite ways to use fresh thyme in your cooking? Share your experiences, tips, and photos in the comments below. Let’s create a community of indoor herb gardeners and inspire each other to cultivate a greener, more flavorful life. Your insights could be invaluable to someone just starting out, and we’re eager to learn from your successes (and even your failures!). So, get planting, get cooking, and get sharing! Let’s grow together!
Frequently Asked Questions (FAQ)
1. What is the best variety of thyme to grow indoors?
The best thyme varieties for indoor growing are generally those that remain relatively compact and are known for their flavor. Common thyme (Thymus vulgaris) is a popular choice due to its robust flavor and ease of cultivation. Lemon thyme (Thymus citriodorus) is another excellent option, offering a delightful citrusy aroma and flavor that complements many dishes. Creeping thyme (Thymus serpyllum) can also be grown indoors, but it tends to spread more, so it’s best suited for larger containers or hanging baskets. Ultimately, the best variety depends on your personal preferences and culinary needs. Consider trying a few different varieties to see which ones thrive best in your indoor environment and which flavors you enjoy the most.
2. How much sunlight does indoor thyme need?
Thyme thrives in bright, sunny conditions. Ideally, your indoor thyme plant should receive at least 6 hours of direct sunlight per day. A south-facing window is usually the best option, but east- or west-facing windows can also work if they provide sufficient light. If you don’t have access to enough natural sunlight, you can supplement with artificial grow lights. Fluorescent or LED grow lights are effective and energy-efficient options. Position the grow light a few inches above the plant and keep it on for 12-14 hours per day. Insufficient light can lead to leggy growth and reduced flavor in your thyme.
3. How often should I water my indoor thyme plant?
Watering is crucial for the health of your indoor thyme plant, but overwatering can be detrimental. Thyme prefers well-draining soil and doesn’t like to sit in soggy conditions. Water your thyme plant when the top inch of soil feels dry to the touch. When you water, water thoroughly until the water drains out of the bottom of the pot. Be sure to empty the saucer underneath the pot to prevent root rot. During the winter months, when growth slows down, you may need to water less frequently. Always check the soil moisture before watering to avoid overwatering.
4. What type of soil is best for growing thyme indoors?
Thyme prefers well-draining soil that is slightly alkaline. A good potting mix for thyme should be light and airy, allowing for good drainage and aeration. You can use a commercially available potting mix specifically formulated for herbs, or you can create your own mix by combining equal parts of potting soil, perlite, and coarse sand. Perlite and sand help to improve drainage and prevent the soil from becoming compacted. Avoid using heavy, clay-based soils, as they can retain too much moisture and lead to root rot.
5. How do I fertilize my indoor thyme plant?
Thyme is not a heavy feeder, so it doesn’t require frequent fertilization. However, a light feeding every few months can help to promote healthy growth. Use a balanced liquid fertilizer diluted to half strength. Apply the fertilizer after watering to avoid burning the roots. Avoid over-fertilizing, as this can lead to leggy growth and reduced flavor. Alternatively, you can amend the soil with compost or worm castings at the time of planting to provide a slow-release source of nutrients.
6. How do I harvest thyme from my indoor plant?
Harvesting thyme regularly encourages bushier growth and prevents the plant from becoming leggy. To harvest thyme, simply snip off stems with clean scissors or pruning shears. Avoid cutting more than one-third of the plant at a time, as this can stress the plant. The best time to harvest thyme is in the morning, after the dew has dried. You can use fresh thyme immediately, or you can dry it for later use. To dry thyme, tie the stems together and hang them upside down in a cool, dry place until they are completely dry.
7. How do I deal with pests and diseases on my indoor thyme plant?
Indoor thyme plants are generally less susceptible to pests and diseases than outdoor plants, but they can still be affected. Common pests that may attack thyme include aphids, spider mites, and whiteflies. To control these pests, you can try spraying the plant with insecticidal soap or neem oil. Be sure to follow the instructions on the product label carefully. Overwatering can lead to fungal diseases such as root rot. To prevent root rot, ensure that your thyme plant is planted in well-draining soil and that you are not overwatering. Good air circulation can also help to prevent fungal diseases.
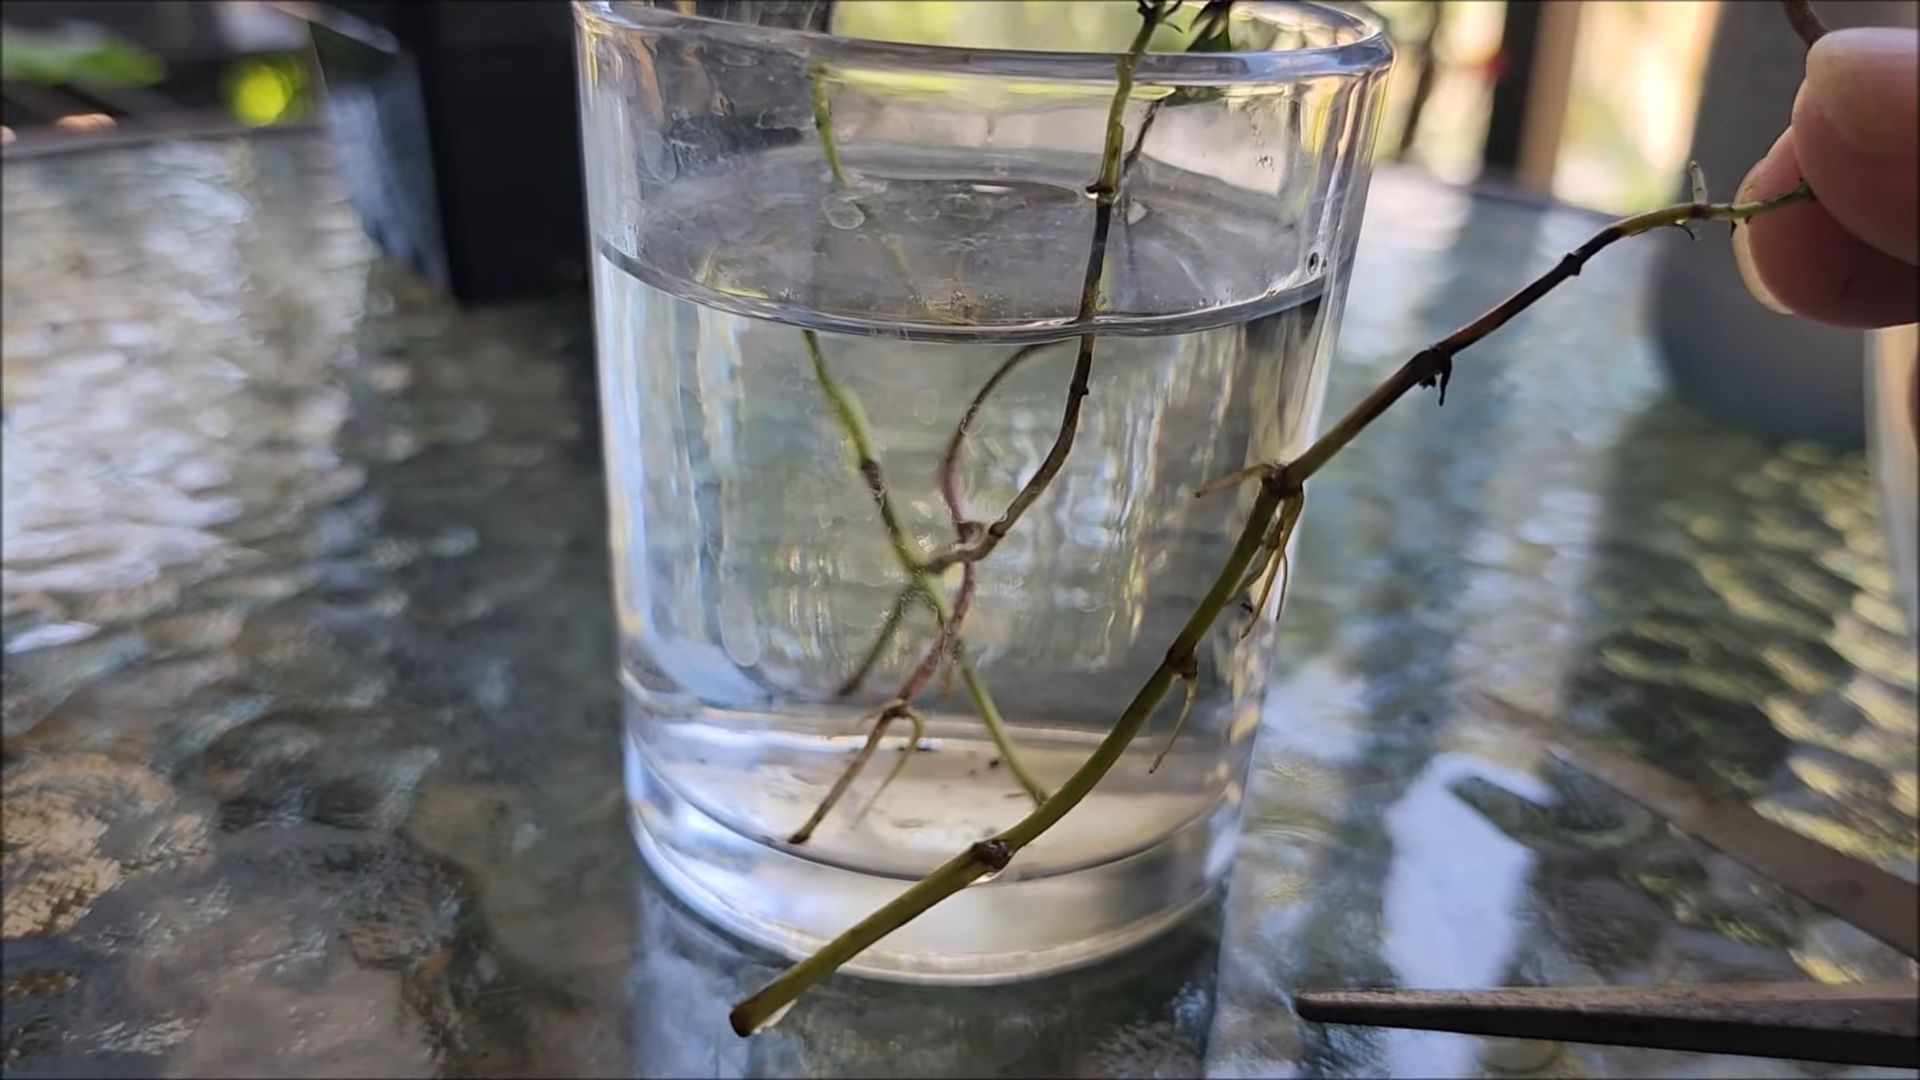
8. Can I propagate thyme from cuttings?
Yes, propagating thyme from cuttings is a relatively easy and effective way to expand your indoor herb garden. To propagate thyme from cuttings, take a 4-6 inch cutting from a healthy stem. Remove the leaves from the bottom inch of the cutting and dip the cut end in rooting hormone. Plant the cutting in a small pot filled with moist potting mix. Cover the pot with a plastic bag or humidity dome to create a humid environment. Place the pot in a warm, bright location, but out of direct sunlight. Keep the soil moist, but not soggy. After a few weeks, the cutting should develop roots. Once the roots are established, you can transplant the cutting into a larger pot.
9. My thyme plant is getting leggy. What should I do?
Leggy growth in thyme is often caused by insufficient light. If your thyme plant is getting leggy, try moving it to a sunnier location or supplementing with artificial grow lights. Pruning the plant regularly can also help to encourage bushier growth. Simply snip off the tips of the stems to promote branching. Avoid over-fertilizing, as this can also contribute to leggy growth.
10. How long will my indoor thyme plant live?
With proper care, your indoor thyme plant can live for several years. Regular pruning, adequate sunlight, and well-draining soil are essential for the longevity of your thyme plant. Repotting the plant every year or two can also help to keep it healthy and vigorous. By providing your thyme plant with the right conditions, you can enjoy fresh, flavorful thyme for years to come.
Leave a Comment