
Grow Microgreens at Home – ever dreamt of having a tiny, vibrant garden bursting with flavor right on your kitchen counter? Imagine snipping fresh, nutrient-packed greens to sprinkle on your salad, sandwich, or even your morning smoothie, all grown by your own two hands! This isn’t some futuristic fantasy; it’s the reality of growing microgreens, and I’m here to show you how incredibly easy and rewarding it can be.
While the modern microgreen trend might seem new, the practice of sprouting seeds for food has roots stretching back centuries. Cultures around the world have long recognized the power of young sprouts, valuing them for their concentrated nutrients and ease of cultivation, especially during lean times. Think of it as a miniature, edible history lesson!
But why should *you* bother learning to grow microgreens at home? In today’s world, we’re all looking for ways to eat healthier, save money, and connect with nature. Microgreens tick all those boxes! They’re packed with vitamins and minerals, often more so than their mature counterparts. Plus, store-bought microgreens can be surprisingly expensive. With just a few simple supplies and a little bit of your time, you can have a constant supply of these delicious and nutritious greens, all while reducing your carbon footprint. I’m going to share some simple DIY tricks and hacks that will have you harvesting your own microgreens in no time. Get ready to unleash your inner urban farmer!
Grow Your Own Delicious Microgreens: A Beginner’s Guide
Hey there, fellow food enthusiasts! Ever wanted to add a burst of fresh flavor and nutrients to your meals without even leaving your kitchen? Well, you’re in the right place! I’m going to walk you through the super simple process of growing your own microgreens at home. Trust me, it’s easier than you think, and the rewards are totally worth it.
Microgreens are basically baby versions of vegetables and herbs, harvested just a few weeks after germination. They’re packed with vitamins, minerals, and antioxidants, and they add a delightful crunch and vibrant color to salads, sandwiches, soups, and just about anything else you can imagine. Plus, growing them yourself is incredibly satisfying!
What You’ll Need
Before we dive in, let’s gather our supplies. Don’t worry, you probably already have most of this stuff lying around:
* **Seeds:** This is the most important part! Choose microgreen seeds specifically. Some popular and easy-to-grow options include:
* Radish
* Broccoli
* Sunflower
* Pea shoots
* Mustard
* Arugula
* Cress
I recommend starting with radish or broccoli – they germinate quickly and are pretty forgiving. You can find microgreen seeds online or at your local garden center.
* **Growing Trays:** You’ll need two trays: one with drainage holes and one without. The tray without holes will act as a reservoir for water. You can buy these specifically designed for microgreens, or repurpose plastic containers like takeout containers (just make sure they’re clean!).
* **Growing Medium:** I prefer using coconut coir (also known as coco coir) because it’s sustainable, holds moisture well, and is relatively inexpensive. You can also use seed starting mix or potting soil, but make sure it’s fine-textured and doesn’t contain large chunks of bark.
* **Spray Bottle:** For misting the seeds and seedlings.
* **Water:** Filtered water is best, but tap water works fine too.
* **Weight (Optional):** A small weight, like a book or a brick wrapped in plastic, can help with germination and even growth.
* **Light Source:** While microgreens don’t need intense sunlight, they do need some light to grow properly. A sunny windowsill works well, but if you don’t have one, you can use a grow light.
Step-by-Step Instructions: From Seed to Sprout
Okay, let’s get our hands dirty! Here’s a detailed breakdown of the growing process:
1. Soaking the Seeds (Optional but Recommended)
* Some seeds, like pea shoots and sunflower seeds, benefit from being soaked before planting. This helps to soften the seed coat and speed up germination.
* To soak, place the seeds in a bowl and cover them with water.
* Soak pea shoots for 8-12 hours and sunflower seeds for 2-4 hours.
* Drain the water and rinse the seeds before planting.
2. Preparing the Growing Tray
* Take the tray with drainage holes and line it with your chosen growing medium.
* Moisten the growing medium thoroughly with water. You want it to be damp, but not soggy. I usually add water slowly and mix it with my hands until it feels like a wrung-out sponge.
* Level the surface of the growing medium with your hand or a small trowel.
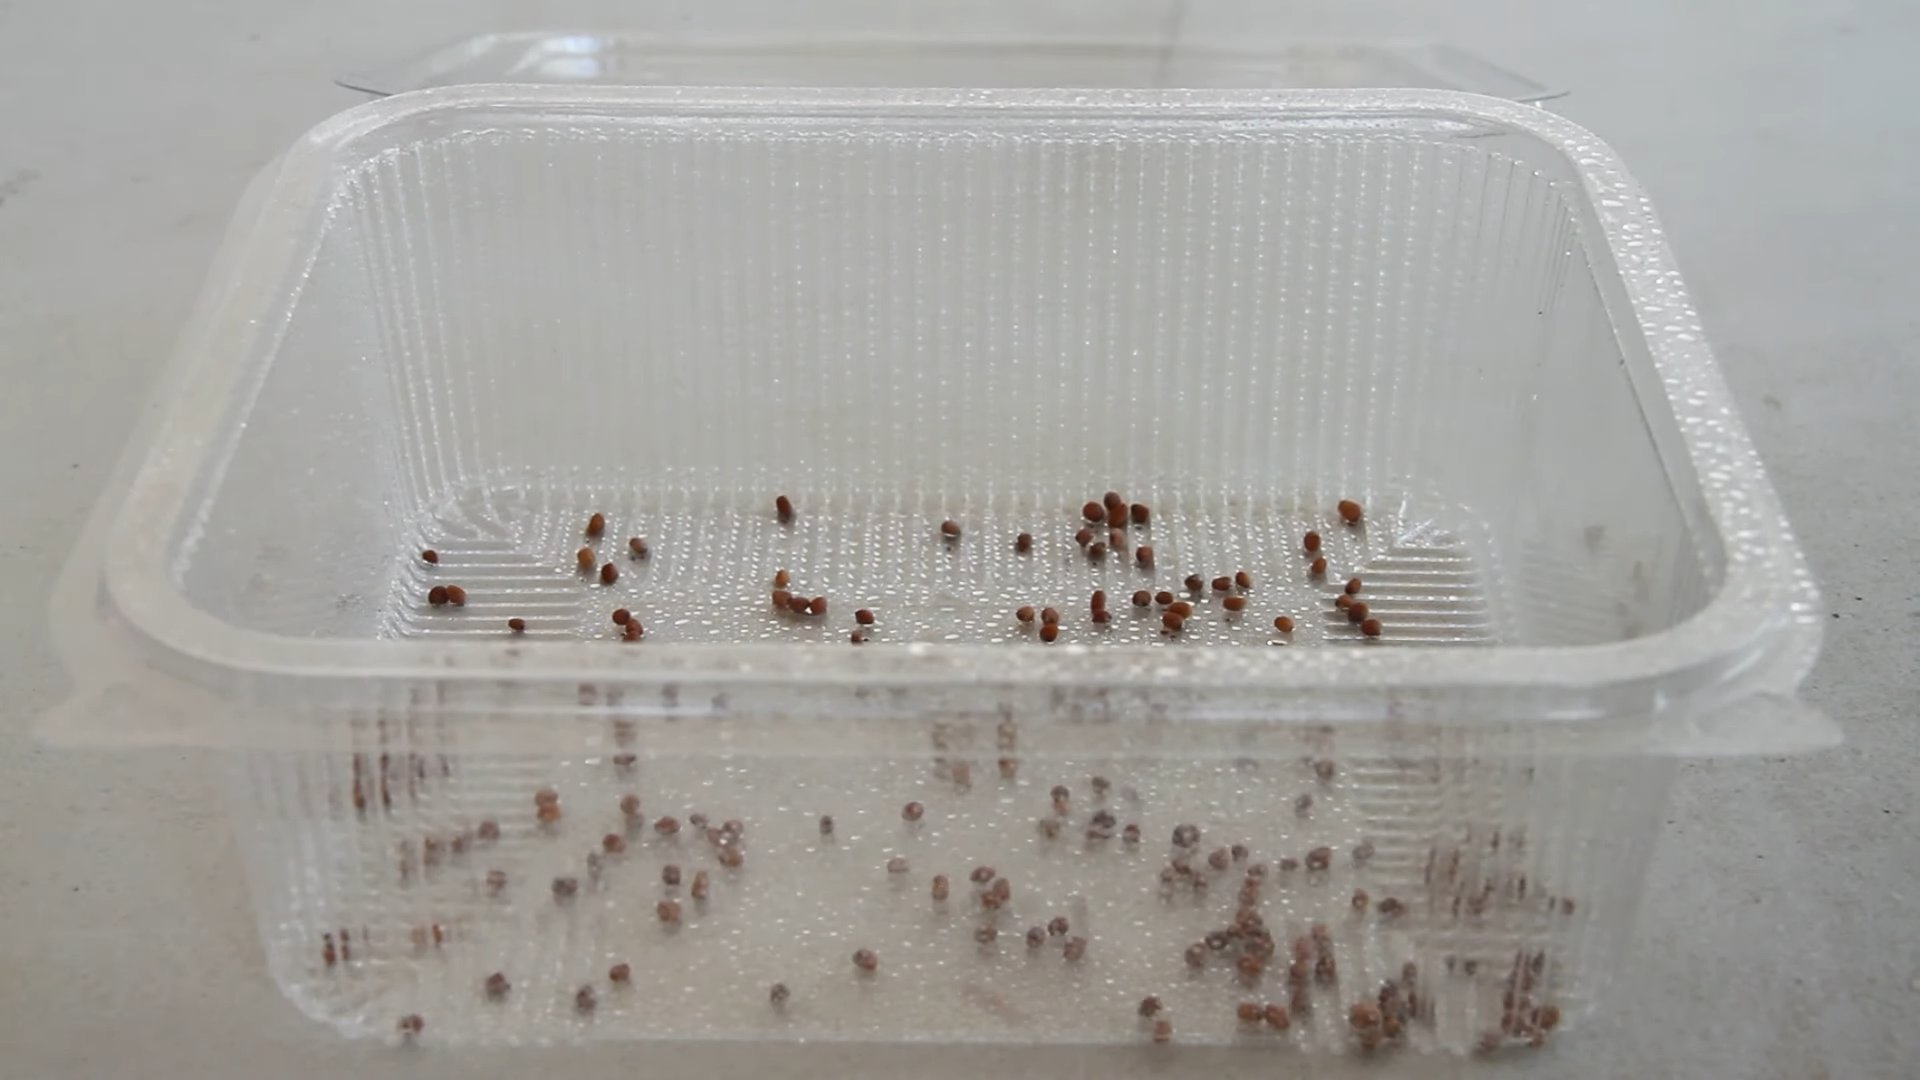
3. Sowing the Seeds
* This is where the magic happens! Sprinkle the seeds evenly over the surface of the growing medium.
* Don’t overcrowd the seeds, but don’t be too sparse either. You want a good, even layer of seeds covering the surface. Think of it like sprinkling salt and pepper on your food – you want it to be distributed evenly.
* For smaller seeds like radish and broccoli, you can use a shaker or your fingers to distribute them. For larger seeds like pea shoots and sunflower seeds, you can place them individually.
4. Covering the Seeds
* After sowing the seeds, gently mist them with water using your spray bottle.
* Then, cover the seeds with a thin layer of the growing medium. This helps to keep them moist and dark, which is essential for germination.
* Mist the top layer of growing medium again.
5. Weighting the Seeds (Optional)
* This step is optional, but I find that it helps to promote even germination and stronger growth.
* Place a small weight, like a book or a brick wrapped in plastic, on top of the tray.
* The weight should be light enough not to crush the seeds, but heavy enough to provide gentle pressure.
6. Germination: The Dark Phase
* Now, we need to create a dark and humid environment for the seeds to germinate.
* Place the tray with the seeds and weight (if using) inside the tray without drainage holes.
* Cover the entire setup with a lid or a dark towel. This will help to retain moisture and block out light.
* Keep the tray in a cool, dark place for 2-4 days, or until the seeds have germinated.
* Check the tray daily to make sure the growing medium is still moist. If it’s dry, mist it with water.
7. Introducing Light: The Green Phase
* Once the seeds have germinated and you see tiny sprouts emerging, it’s time to introduce light.
* Remove the weight and the lid or towel.
* Place the tray in a sunny windowsill or under a grow light.
* If you’re using a grow light, position it a few inches above the seedlings.
* Rotate the tray regularly to ensure that the seedlings receive even light exposure. This will prevent them from leaning towards the light source.
8. Watering and Maintenance
* Microgreens need consistent moisture to thrive.
* Water the seedlings regularly, but be careful not to overwater them. You want the growing medium to be damp, but not soggy.
* I usually water them once or twice a day, depending on the humidity and temperature.
* The easiest way to water them is to pour water into the bottom tray (the one without drainage holes). The growing medium will absorb the water from the bottom up, which helps to prevent fungal growth.
* You can also mist the seedlings with water using your spray bottle.
* Keep an eye out for any signs of mold or mildew. If you see any, remove the affected seedlings immediately and improve air circulation.
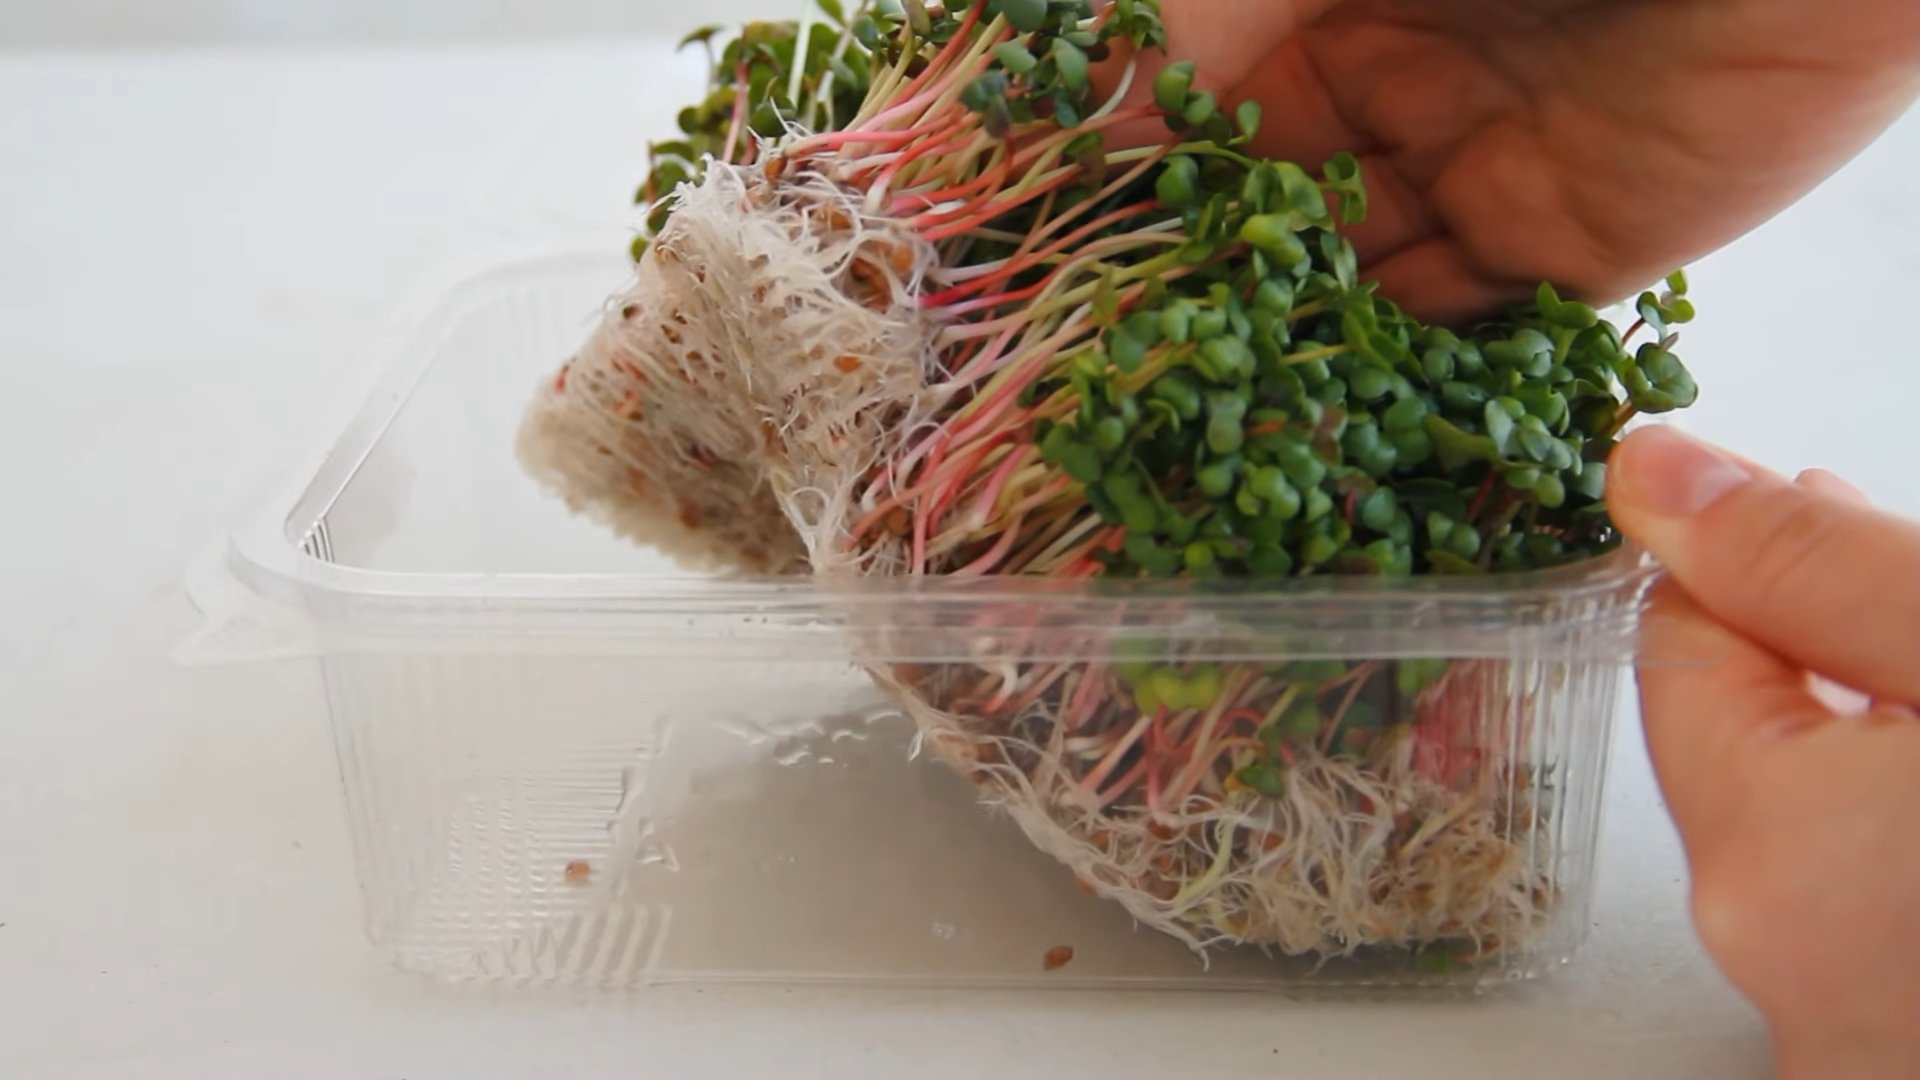
9. Harvesting Your Microgreens
* This is the best part! Your microgreens are ready to harvest when they have developed their first set of true leaves (the leaves that appear after the initial seed leaves).
* This usually takes about 7-14 days, depending on the type of seed and the growing conditions.
* To harvest, simply snip the microgreens with scissors just above the growing medium.
* Rinse the microgreens gently with water and pat them dry.
10. Enjoying Your Harvest
* Now it’s time to enjoy the fruits (or rather, the greens!) of your labor.
* Add your microgreens to salads, sandwiches, soups, smoothies, or use them as a garnish for your favorite dishes.
* They’re also delicious on their own as a healthy snack.
* Store any leftover microgreens in the refrigerator in a sealed container for up to a week.
Troubleshooting Tips
Even with the best intentions, sometimes things don’t go exactly as planned. Here are a few common problems and how to fix them:
* **Poor Germination:** This could be due to several factors, including old seeds, dry growing medium, or improper temperature. Make sure your seeds are fresh, keep the growing medium moist, and maintain a consistent temperature.
* **Mold or Mildew:** This is usually caused by overwatering or poor air circulation. Reduce watering and improve air circulation by placing a small fan near the tray.
* **Leggy Seedlings:** This means the seedlings are stretching towards the light because they’re not getting enough of it. Move the tray to a sunnier location or use a grow light.
* **Uneven Growth:** This could be due to uneven light exposure or uneven watering. Rotate the tray regularly and make sure the growing medium is evenly moist.
Experiment and Have Fun!
Growing microgreens is a fun and rewarding experience. Don’t be afraid to experiment with different types of seeds and growing techniques. The more you grow, the better you’ll become. And who knows, you might even discover your new favorite hobby! Happy growing!
Conclusion
So, there you have it! Growing microgreens at home is not only surprisingly simple, but it’s also an incredibly rewarding experience that brings a burst of fresh flavor and vital nutrients right to your kitchen counter. Forget those expensive, pre-packaged containers from the grocery store. With minimal effort and a few readily available supplies, you can cultivate your own vibrant, nutrient-packed microgreens, tailored to your exact taste preferences.
The benefits extend far beyond cost savings. You’ll have complete control over the growing environment, ensuring your microgreens are free from harmful pesticides and herbicides. Plus, the sheer satisfaction of nurturing something from seed to sprout is a unique joy in itself. Imagine adding a peppery radish microgreen garnish to your salad, a vibrant sunflower shoot to your sandwich, or a delicate pea tendril to your soup – all grown by your own hand!
This DIY trick is a must-try because it empowers you to take control of your food source, adding a healthy and delicious element to your diet in a sustainable and affordable way. It’s a fantastic project for families, a great way to introduce children to the wonders of gardening, and a perfect solution for anyone looking to add more fresh, living foods to their meals.
Don’t be afraid to experiment with different varieties of seeds to discover your favorites. Try a spicy mix of mustard and arugula, a mild blend of broccoli and kale, or a colorful combination of beets and chard. You can also adjust the growing medium to suit your needs. While soil is a classic choice, coconut coir or even hydroponic setups can offer unique advantages. Consider adding a small amount of organic fertilizer to the growing medium after the first week to boost growth and nutrient content.
Another variation to consider is the lighting. While a sunny windowsill works well for many microgreens, supplementing with a grow light can significantly improve yields, especially during the darker months. LED grow lights are energy-efficient and provide the optimal spectrum of light for plant growth.
We encourage you to embark on this microgreen adventure and discover the joys of growing your own food. It’s a simple, satisfying, and incredibly healthy way to enhance your culinary creations.
Ready to get started? We’re confident that you’ll be amazed at how easy and rewarding it is to grow microgreens at home.
Once you’ve harvested your first batch, we’d love to hear about your experience! Share your photos, tips, and favorite microgreen varieties in the comments below. Let’s build a community of home microgreen growers and inspire others to embrace this simple and sustainable practice. What are you waiting for? Get those seeds soaking!
Frequently Asked Questions (FAQ)
What exactly are microgreens, and why should I grow them?
Microgreens are young vegetable greens that are harvested just after the cotyledon leaves (the first leaves that emerge from the seed) have developed, and sometimes after the first true leaves appear. They are typically about 1-3 inches tall and are packed with nutrients, often containing higher concentrations of vitamins and minerals than their mature counterparts. Growing them at home allows you to have a constant supply of fresh, flavorful, and nutrient-rich greens readily available, without the need for frequent trips to the grocery store. Plus, you control the growing environment, ensuring they are free from pesticides and herbicides.
What kind of seeds can I use to grow microgreens?
The possibilities are vast! Some popular choices include:
* **Brassicas:** Broccoli, kale, cabbage, cauliflower, arugula, mustard
* **Legumes:** Peas, lentils, chickpeas
* **Amaranthaceae:** Beets, chard, spinach
* **Asteraceae:** Sunflower, lettuce, endive
* **Apiaceae:** Carrot, celery, dill, fennel
Avoid using seeds that are treated with fungicides or other chemicals. Look for seeds specifically labeled for sprouting or microgreen production. Also, avoid nightshade family seeds like tomato, eggplant, and pepper, as their leaves can be toxic.
What kind of container and growing medium do I need?
You can use almost any shallow container with drainage holes. Recycled plastic containers, seed trays, or even repurposed takeout containers work well. The ideal depth is around 2-3 inches.
For the growing medium, you have several options:
* **Potting soil:** A good quality potting mix is a classic choice.
* **Coconut coir:** This is a sustainable alternative to peat moss and provides excellent drainage and aeration.
* **Soilless mix:** A blend of peat moss, vermiculite, and perlite can also be used.
* **Hydroponic mats:** These mats provide a sterile and easy-to-use growing surface.
How much light do microgreens need?
Microgreens need plenty of light to thrive. A sunny windowsill that receives at least 4-6 hours of direct sunlight per day is ideal. However, if you don’t have a sunny windowsill, or if you’re growing microgreens during the darker months, you can supplement with a grow light. LED grow lights are energy-efficient and provide the optimal spectrum of light for plant growth. Position the light a few inches above the microgreens.
How often should I water my microgreens?
Keep the growing medium consistently moist, but not soggy. Water gently from the bottom by placing the container in a tray of water and allowing the medium to absorb the water. Alternatively, you can use a spray bottle to mist the surface of the medium. Avoid overwatering, as this can lead to mold growth.
How long does it take to grow microgreens?
The growing time varies depending on the variety of seed, but most microgreens are ready to harvest in 7-14 days. You’ll know they’re ready when the cotyledon leaves are fully developed and the first true leaves have emerged.
How do I harvest microgreens?
Use sharp scissors or a knife to cut the microgreens just above the soil line. Harvest them just before you’re ready to use them for the best flavor and nutritional value.
Can I regrow microgreens after harvesting?
Unfortunately, microgreens typically don’t regrow after being harvested. You’ll need to start a new batch of seeds for each harvest.
What are some common problems when growing microgreens, and how can I prevent them?
* **Mold:** This is usually caused by overwatering or poor ventilation. Ensure good drainage, avoid overwatering, and provide adequate airflow. You can also use a diluted hydrogen peroxide solution to spray the affected areas.
* **Damping off:** This is a fungal disease that can kill seedlings. Use sterile growing medium and avoid overwatering.
* **Leggy growth:** This is caused by insufficient light. Provide more light, either by moving the container to a sunnier location or by using a grow light.
How do I store microgreens after harvesting?
Store harvested microgreens in an airtight container in the refrigerator. They will typically last for up to a week. Wash them just before using them.
Can I use microgreens in cooking?
Absolutely! Microgreens are incredibly versatile and can be used in a variety of dishes. Add them to salads, sandwiches, soups, smoothies, omelets, or use them as a garnish for almost any dish. Their vibrant flavors and textures will add a delicious and nutritious boost to your meals.
Is it safe to eat microgreens?
Generally, yes, microgreens are safe to eat. However, it’s important to use clean seeds, sterile growing medium, and practice good hygiene to minimize the risk of contamination. Wash the microgreens thoroughly before eating them.

Leave a Comment