
Grow Bok Choy at Home – and unlock a world of fresh, flavorful, and incredibly rewarding gardening experiences! Have you ever dreamt of snipping vibrant, crisp greens right from your backyard to add to your stir-fries or soups? Well, dream no more! This DIY guide is your key to cultivating this delicious and nutritious vegetable with ease.
Bok choy, also known as Chinese cabbage, has been a staple in Asian cuisine for centuries, with its cultivation dating back to the 5th century in China. It’s not just a tasty addition to your meals; it’s packed with vitamins and minerals, making it a healthy choice too. But beyond its nutritional value, growing your own bok choy connects you to a rich agricultural heritage.
Why should you embark on this DIY adventure? Because store-bought vegetables often lack the freshness and flavor of homegrown produce. Plus, you have complete control over what goes into your garden, ensuring that your bok choy is free from harmful pesticides and chemicals. I’m here to show you that growing your own food, especially something as versatile as bok choy, is easier than you think. With a few simple tricks and hacks, you’ll be harvesting your own bounty in no time. Let’s get started and grow bok choy at home, transforming your garden into a source of fresh, healthy, and delicious greens!
Growing Bok Choy at Home: A Beginner’s Guide
Hey there, fellow gardening enthusiasts! I’m so excited to share my experience with growing bok choy at home. It’s surprisingly easy, even if you’re a complete newbie like I was not too long ago. Bok choy, also known as pak choi, is a delicious and nutritious leafy green that’s perfect for stir-fries, soups, and salads. Plus, it grows relatively quickly, so you’ll be enjoying your homegrown harvest in no time!
What You’ll Need
Before we dive in, let’s gather all the necessary supplies. Trust me, having everything ready beforehand will make the process much smoother.
* Bok Choy Seeds: You can find these at most garden centers or online. Look for varieties that are suitable for your climate.
* Seed Starting Trays or Small Pots: These are essential for starting your seeds indoors.
* Seed Starting Mix: This is a light and airy soil mix specifically designed for seedlings.
* Watering Can or Spray Bottle: For gentle watering.
* Grow Lights (Optional): If you’re starting seeds indoors and don’t have a sunny window.
* Garden Soil: Rich, well-draining soil for transplanting your seedlings.
* Compost or Aged Manure: To enrich the soil.
* Fertilizer (Optional): A balanced fertilizer to give your bok choy a boost.
* Gardening Gloves: To keep your hands clean.
* Trowel or Small Shovel: For transplanting.
* Row Covers (Optional): To protect your plants from pests and extreme weather.
Starting Your Seeds Indoors (Recommended)
Starting your bok choy seeds indoors gives them a head start, especially if you live in an area with a short growing season. I highly recommend this method!
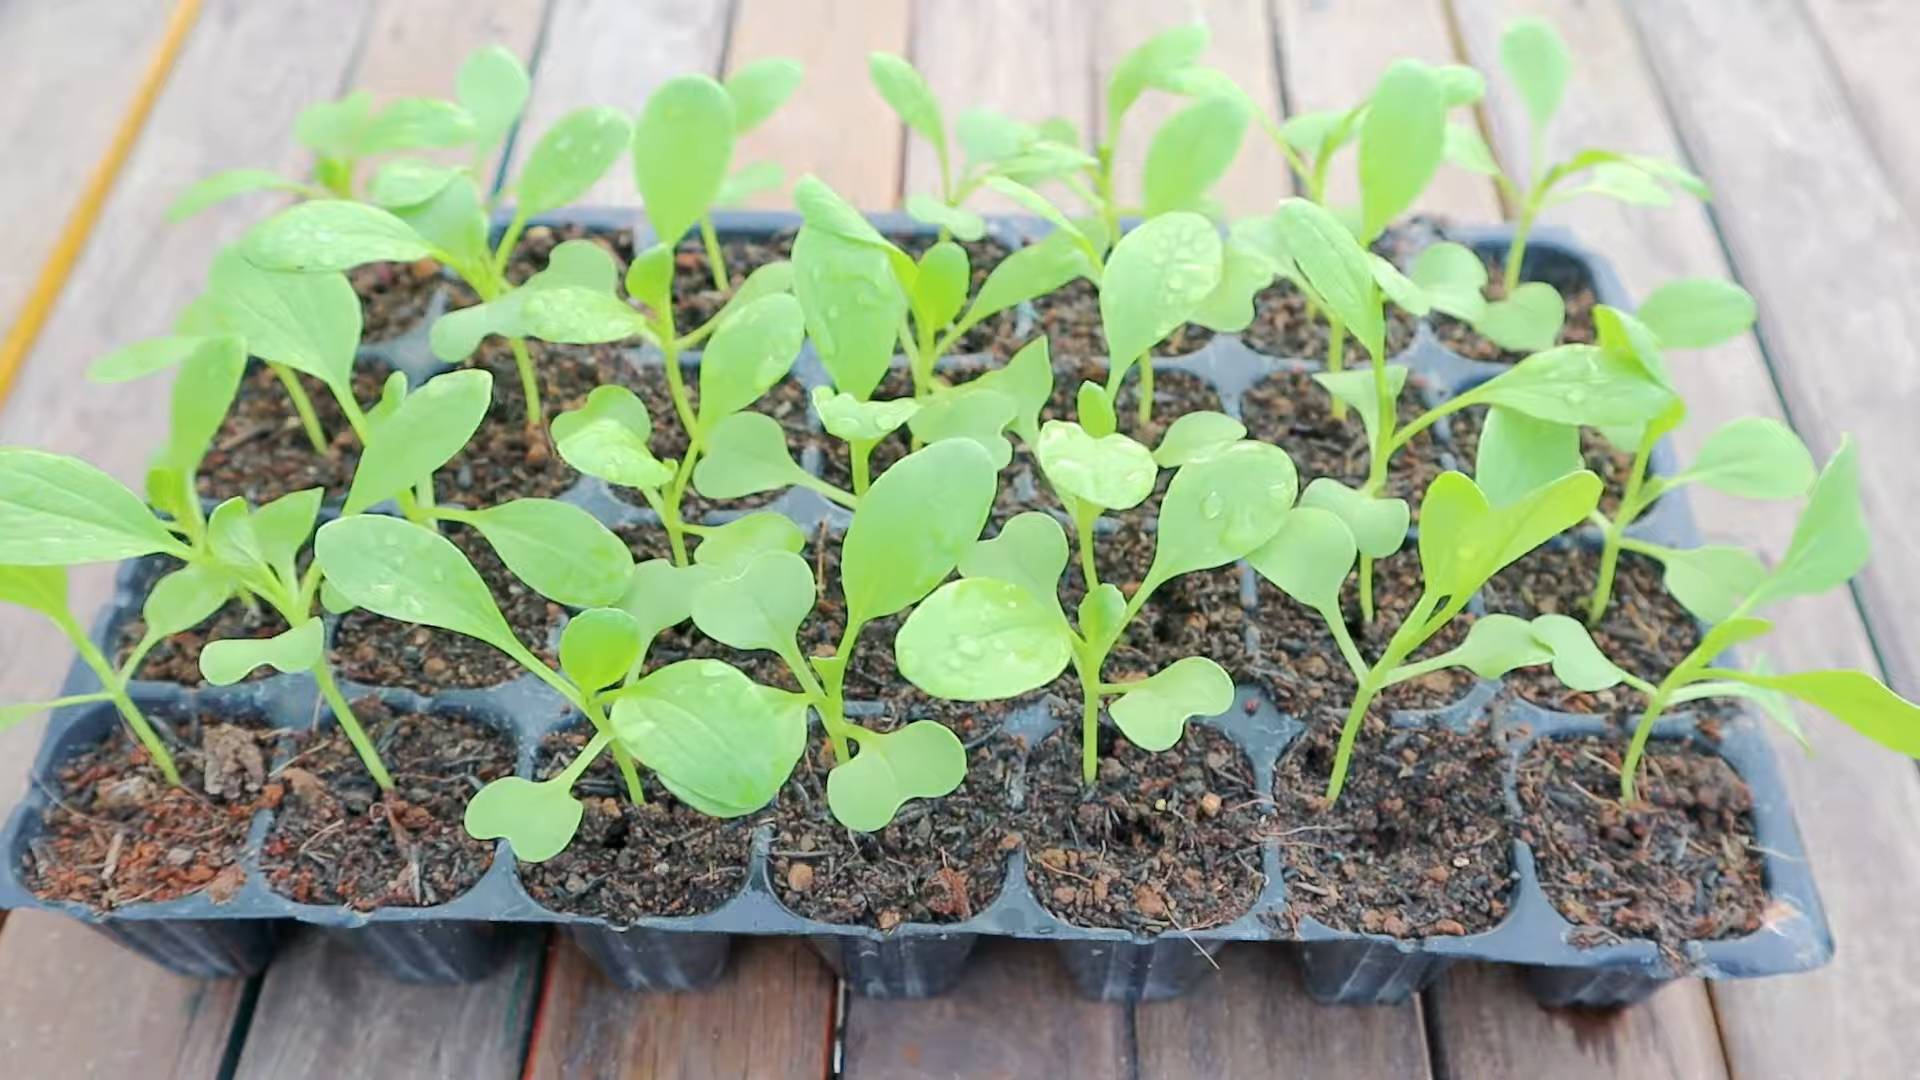
1. Prepare Your Seed Starting Trays: Fill your seed starting trays or small pots with seed starting mix. Gently pat down the soil to remove any air pockets.
2. Sow the Seeds: Sow 2-3 bok choy seeds per cell or pot, about ¼ inch deep.
3. Water Gently: Water the soil gently using a watering can or spray bottle. You want the soil to be moist but not soggy.
4. Provide Light: Place the trays or pots in a warm, sunny location or under grow lights. If using grow lights, keep them on for about 14-16 hours per day.
5. Keep the Soil Moist: Check the soil daily and water as needed to keep it consistently moist.
6. Thin the Seedlings: Once the seedlings have emerged and have a couple of true leaves (the second set of leaves), thin them out by snipping off the weaker seedlings with scissors, leaving only one strong seedling per cell or pot. This gives the remaining seedling room to grow.
Transplanting Your Seedlings Outdoors
Once your seedlings are strong enough, it’s time to transplant them into your garden. This is a crucial step, so pay close attention!
1. Harden Off the Seedlings: Before transplanting, you need to “harden off” the seedlings. This means gradually exposing them to outdoor conditions over a period of 7-10 days. Start by placing them outside for a few hours each day in a sheltered location, gradually increasing the amount of time they spend outdoors. This helps them acclimate to the sun, wind, and temperature changes.
2. Prepare the Garden Bed: Choose a location in your garden that receives at least 4-6 hours of sunlight per day. Bok choy prefers well-draining soil that is rich in organic matter. Amend the soil with compost or aged manure to improve its fertility and drainage.
3. Transplant the Seedlings: Dig small holes in the garden bed, spacing them about 6-8 inches apart. Gently remove the seedlings from their trays or pots and place them in the holes. Make sure the top of the root ball is level with the surrounding soil.
4. Water Thoroughly: Water the transplanted seedlings thoroughly to help them settle in.
5. Mulch (Optional): Apply a layer of mulch around the plants to help retain moisture, suppress weeds, and regulate soil temperature. Straw, wood chips, or shredded leaves work well.
Direct Sowing (Alternative Method)
If you prefer, you can also sow bok choy seeds directly into your garden bed. This method is best suited for areas with a longer growing season.
1. Prepare the Garden Bed: Choose a location in your garden that receives at least 4-6 hours of sunlight per day. Bok choy prefers well-draining soil that is rich in organic matter. Amend the soil with compost or aged manure to improve its fertility and drainage.
2. Sow the Seeds: Sow the seeds directly into the garden bed, about ¼ inch deep and 1-2 inches apart.
3. Water Gently: Water the soil gently using a watering can or spray bottle. You want the soil to be moist but not soggy.
4. Thin the Seedlings: Once the seedlings have emerged and have a couple of true leaves, thin them out by snipping off the weaker seedlings with scissors, leaving only one strong seedling every 6-8 inches.
Caring for Your Bok Choy
Now that your bok choy is planted, it’s time to provide it with the care it needs to thrive.
1. Watering: Bok choy needs consistent moisture to grow well. Water regularly, especially during dry periods. Aim to keep the soil consistently moist but not waterlogged.
2. Fertilizing (Optional): If your soil is not very fertile, you can fertilize your bok choy with a balanced fertilizer every few weeks. Follow the instructions on the fertilizer package. I personally prefer using organic fertilizers.
3. Weeding: Keep the garden bed free of weeds, as they can compete with your bok choy for nutrients and water. Hand-pull weeds regularly or use a hoe to cultivate the soil.
4. Pest Control: Bok choy can be susceptible to pests such as aphids, cabbage worms, and flea beetles. Inspect your plants regularly for signs of pests and take action if necessary. You can use organic pest control methods such as insecticidal soap, neem oil, or row covers to protect your plants. I’ve found that row covers are particularly effective at preventing pest infestations.
5. Bolting: Bok choy is prone to bolting (going to seed) in hot weather. To prevent bolting, plant your bok choy in early spring or late summer, and provide it with some shade during the hottest part of the day. If your bok choy starts to bolt, harvest it immediately, as the leaves will become bitter.
Harvesting Your Bok Choy
The best part! Harvesting your own homegrown bok choy is incredibly rewarding.
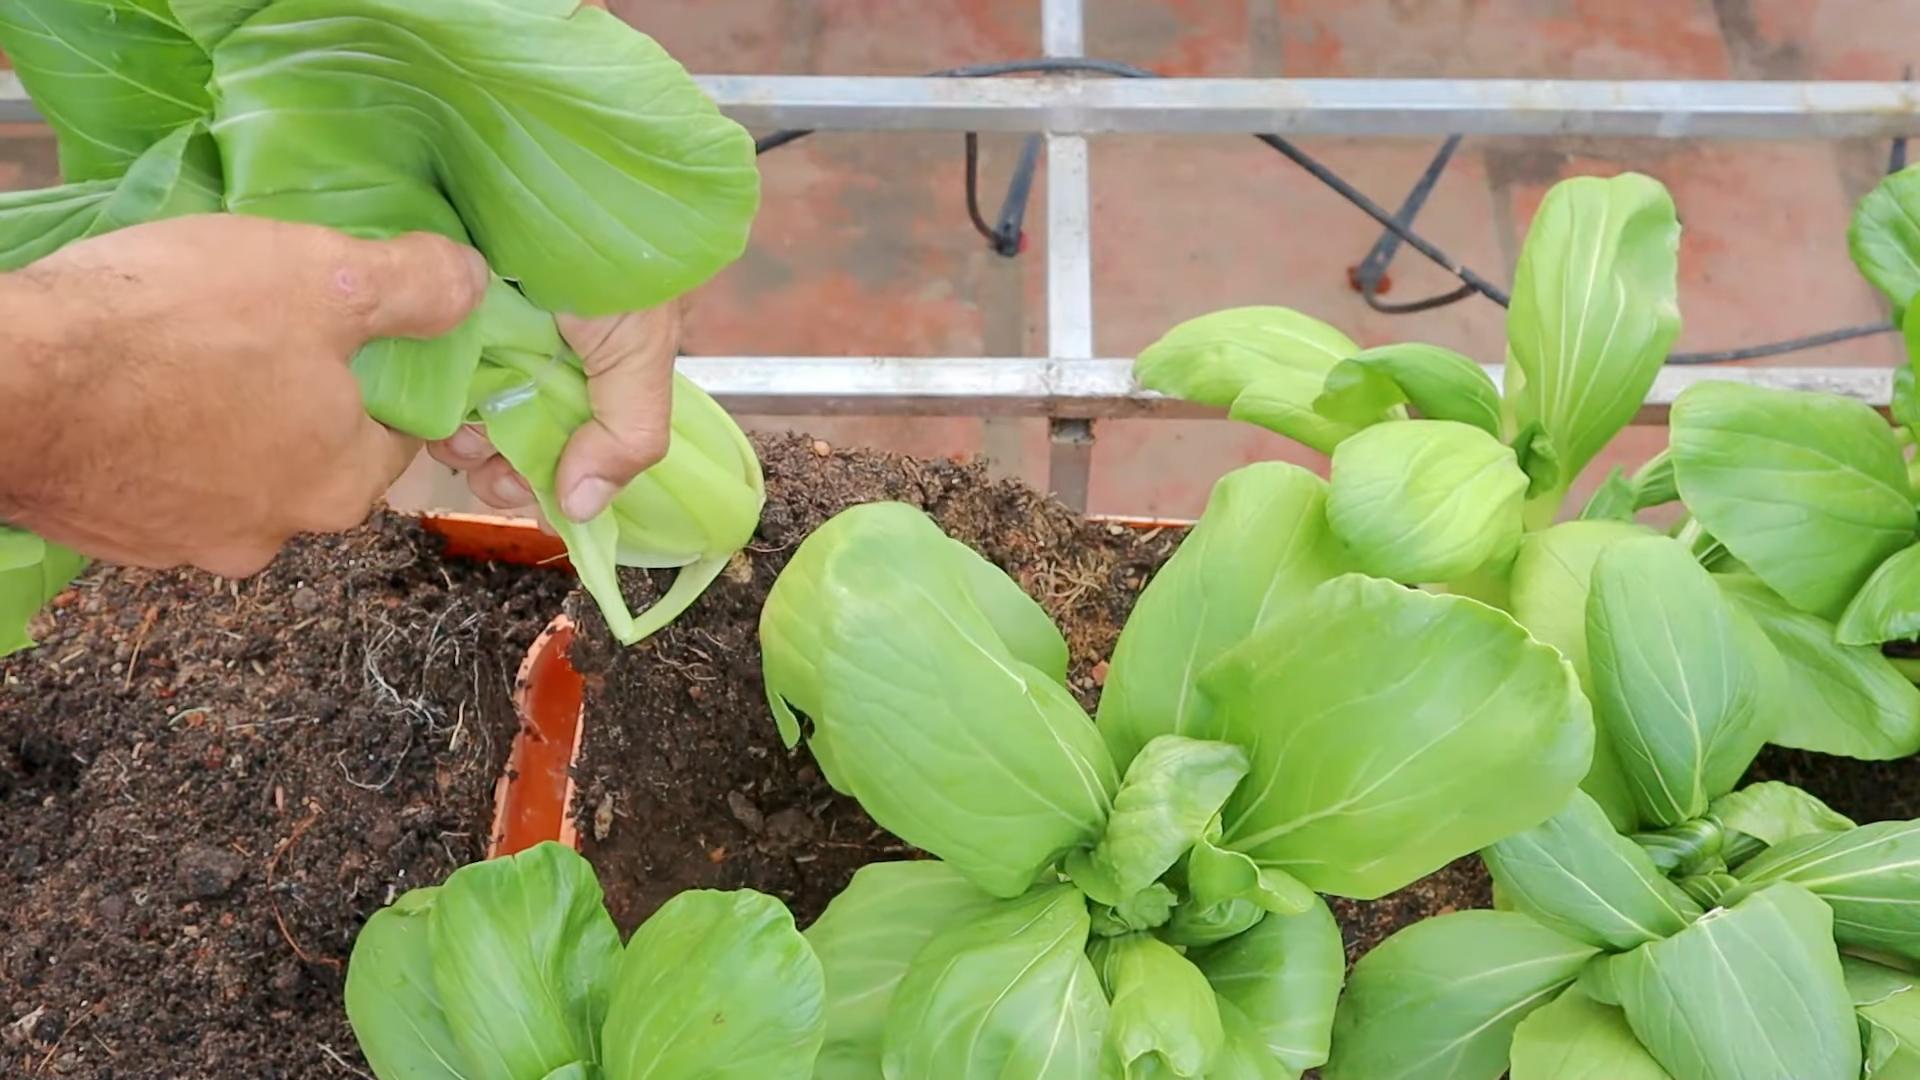
1. When to Harvest: You can harvest bok choy at any stage of growth, depending on your preference. For baby bok choy, harvest when the leaves are about 4-6 inches long. For mature bok choy, harvest when the heads are about 8-12 inches tall.
2. How to Harvest: To harvest bok choy, simply cut the entire head off at the base with a sharp knife. You can also harvest individual leaves as needed.
3. Storage: Store harvested bok choy in the refrigerator for up to a week. To keep it fresh, wrap it in a damp paper towel and place it in a plastic bag.
Troubleshooting
Even with the best care, you might encounter some challenges along the way. Here are a few common problems and how to address them:
* Yellowing Leaves: This could be a sign of nutrient deficiency, overwatering, or underwatering. Check the soil moisture and fertilize if necessary.
* Holes in Leaves: This is likely caused by pests such as cabbage worms or flea beetles. Inspect your plants for pests and take action if necessary.
* Bolting: As mentioned earlier, bolting is caused by hot weather. Plant your bok choy in early spring or late summer to avoid bolting.
Enjoy Your Homegrown Bok Choy!
Growing bok choy at home is a fun and rewarding experience. With a little bit of care and attention, you can enjoy a delicious and nutritious harvest of your own homegrown greens. I hope this guide has been helpful. Happy gardening!
Conclusion
So, there you have it! Growing your own bok choy at home is not only achievable, but it’s also incredibly rewarding. From seed to stir-fry, the journey is filled with the satisfaction of nurturing your own food source. We’ve walked you through the simple steps, highlighting the ease and accessibility of this DIY project. Why settle for store-bought bok choy when you can have fresh, crisp, and organically grown leaves right at your fingertips?
This isn’t just about saving a few dollars at the grocery store; it’s about connecting with nature, understanding the growing process, and enjoying the unparalleled flavor of homegrown produce. Imagine the pride you’ll feel serving a dish featuring bok choy you cultivated yourself. It’s a conversation starter, a testament to your green thumb, and a delicious addition to any meal.
But the benefits don’t stop there. Growing your own bok choy allows you to control the entire process, ensuring that your plants are free from harmful pesticides and chemicals. You can choose organic fertilizers and growing methods, creating a truly healthy and sustainable food source for yourself and your family.
Ready to take your bok choy cultivation to the next level? Consider experimenting with different varieties. While we focused on standard bok choy, there are numerous cultivars available, each with its own unique flavor and texture. Try growing baby bok choy for a more delicate flavor, or explore the vibrant colors of red bok choy for a visually stunning addition to your garden and your plate.
Another variation to consider is succession planting. By planting new seeds every few weeks, you can ensure a continuous harvest of fresh bok choy throughout the growing season. This is especially useful if you enjoy using bok choy frequently in your cooking.
Don’t be afraid to get creative with your growing methods, too. While we recommended starting seeds indoors, you can also direct sow them in your garden if the weather is mild enough. Experiment with different soil types and fertilizers to see what works best for your specific growing conditions.
The key to successful bok choy cultivation is observation and adaptation. Pay close attention to your plants, noting their growth patterns and any signs of stress or disease. Adjust your watering and fertilizing schedule as needed, and don’t hesitate to seek out additional resources if you encounter any challenges.
We are confident that with a little patience and effort, you can successfully grow your own delicious and nutritious bok choy at home. So, grab your seeds, prepare your soil, and get ready to embark on this exciting gardening adventure!
We encourage you to try this DIY trick and share your experience with us. Post photos of your bok choy plants on social media using #HomegrownBokChoy and tag us so we can see your progress. We’d love to hear about your successes, challenges, and any tips you have to share with other aspiring gardeners. Let’s create a community of bok choy enthusiasts and inspire others to embrace the joys of growing their own food!
Frequently Asked Questions (FAQ)
Q: How long does it take to grow bok choy from seed?
A: Bok choy is a relatively fast-growing vegetable. From seed to harvest, you can expect it to take approximately 45-60 days. Baby bok choy can be harvested even sooner, around 30-40 days. The exact time will depend on factors such as the variety of bok choy, the growing conditions, and the time of year. Consistent watering and proper fertilization will help to speed up the growing process.
Q: What are the best growing conditions for bok choy?
A: Bok choy thrives in cool weather, making it an ideal crop for spring and fall gardens. It prefers temperatures between 55°F and 70°F (13°C and 21°C). It needs at least 4-6 hours of sunlight per day, but can tolerate partial shade, especially in hotter climates. The soil should be well-draining and rich in organic matter. A slightly acidic to neutral pH (6.0-7.0) is ideal.
Q: How often should I water my bok choy plants?
A: Bok choy needs consistent moisture to thrive. Water your plants deeply whenever the top inch of soil feels dry to the touch. Avoid overwatering, as this can lead to root rot. During hot and dry weather, you may need to water more frequently. Mulching around the plants can help to retain moisture in the soil.
Q: What kind of fertilizer should I use for bok choy?
A: Bok choy benefits from regular fertilization. Use a balanced fertilizer with equal amounts of nitrogen, phosphorus, and potassium (e.g., 10-10-10) or a fertilizer specifically formulated for leafy greens. You can also amend the soil with compost or other organic matter to provide essential nutrients. Follow the instructions on the fertilizer package for application rates. Avoid over-fertilizing, as this can lead to excessive leaf growth and reduced flavor.
Q: What are some common pests and diseases that affect bok choy?
A: Bok choy can be susceptible to several pests and diseases, including aphids, cabbage worms, flea beetles, and downy mildew. Regularly inspect your plants for signs of infestation or disease. You can control aphids and cabbage worms with insecticidal soap or Bacillus thuringiensis (Bt). Flea beetles can be deterred with row covers or diatomaceous earth. Downy mildew can be prevented by ensuring good air circulation and avoiding overhead watering. If you encounter any serious pest or disease problems, consult with your local garden center or agricultural extension office for advice.
Q: Can I grow bok choy in containers?
A: Yes, bok choy can be successfully grown in containers. Choose a container that is at least 12 inches deep and wide to provide enough room for the roots to grow. Use a well-draining potting mix and ensure that the container has drainage holes. Water regularly and fertilize as needed. Container-grown bok choy may need more frequent watering than plants grown in the ground.
Q: How do I harvest bok choy?
A: You can harvest bok choy at any stage of growth, depending on your preference. For baby bok choy, harvest when the leaves are about 4-6 inches long. For mature bok choy, harvest when the head is firm and the leaves are fully developed. You can harvest the entire head at once by cutting it off at the base, or you can harvest individual leaves as needed, starting with the outer leaves.
Q: How do I store bok choy after harvesting?
A: To store bok choy, wrap it loosely in a damp paper towel and place it in a plastic bag in the refrigerator. It will keep for up to a week. Avoid washing the bok choy before storing it, as this can promote spoilage. Wash it just before you are ready to use it.
Q: Can I grow bok choy indoors during the winter?
A: Yes, you can grow bok choy indoors during the winter, but you will need to provide adequate light. A sunny windowsill or a grow light can provide the necessary illumination. Keep the soil moist and fertilize regularly. Indoor-grown bok choy may not grow as large as plants grown outdoors, but you can still enjoy a fresh harvest of greens.
Q: Is bok choy nutritious?
A: Absolutely! Bok choy is a nutritional powerhouse. It’s an excellent source of vitamins A, C, and K, as well as folate, calcium, and potassium. It’s also low in calories and high in fiber. Adding bok choy to your diet can help to boost your immune system, improve bone health, and promote healthy digestion. Growing your own bok choy ensures that you are getting the freshest and most nutritious greens possible.

Leave a Comment