
Grow Carrots in Containers? Absolutely! Imagine plucking fresh, vibrant carrots straight from your patio, balcony, or even your kitchen windowsill. No sprawling garden needed! For centuries, humans have cultivated food in limited spaces, from ancient rooftop gardens in bustling cities to medieval monastery plots. This resourceful approach to gardening is more relevant than ever, especially for those of us with limited space or less-than-ideal soil conditions.
Let’s be honest, who wouldn’t love the satisfaction of growing their own food? But the thought of tilling a large garden can be daunting. That’s where the magic of container gardening comes in. This DIY guide will unlock the secrets to successfully grow carrots in containers, offering a simple, rewarding, and space-saving solution. We’ll walk you through every step, from choosing the right container and soil to nurturing your carrot crop for a bountiful harvest. Get ready to enjoy the sweet, crunchy taste of homegrown carrots, no matter where you live!
Grow Your Own Delicious Carrots in Containers: A Step-by-Step Guide
Hey there, fellow gardening enthusiasts! Dreaming of pulling fresh, crunchy carrots straight from your own little garden? Well, you don’t need acres of land to make that dream a reality. Growing carrots in containers is surprisingly easy and rewarding, even if you’re a complete beginner. I’ve been doing it for years, and I’m excited to share my secrets with you. Let’s get started!
Choosing the Right Container and Carrot Variety
First things first, we need to talk about the container and the carrot. Not all carrots are created equal, and not all containers are suitable for carrots.
* Container Depth: This is crucial! Carrots need room to grow downwards. Opt for a container that’s at least 12 inches deep, but 18-24 inches is even better, especially if you’re planning on growing longer carrot varieties. Trust me, you don’t want to end up with stunted, misshapen carrots because they ran out of space.
* Container Material: Plastic, terracotta, wood – it’s really up to you! Just make sure the container has drainage holes. Carrots hate sitting in soggy soil.
* Container Size: The wider the container, the more carrots you can grow. A good rule of thumb is to allow about 2-3 inches of space between each carrot. A 12-inch diameter pot can comfortably house 4-5 carrots.
* Carrot Variety: This is where it gets fun! Consider shorter, rounder varieties like ‘Thumbelina,’ ‘Paris Market,’ or ‘Little Finger’ if you’re using a smaller container. For deeper containers, you can try longer varieties like ‘Nantes,’ ‘Danvers,’ or ‘Imperator.’ I personally love ‘Nantes’ for their sweet flavor and reliable growth.
Preparing the Perfect Soil Mix
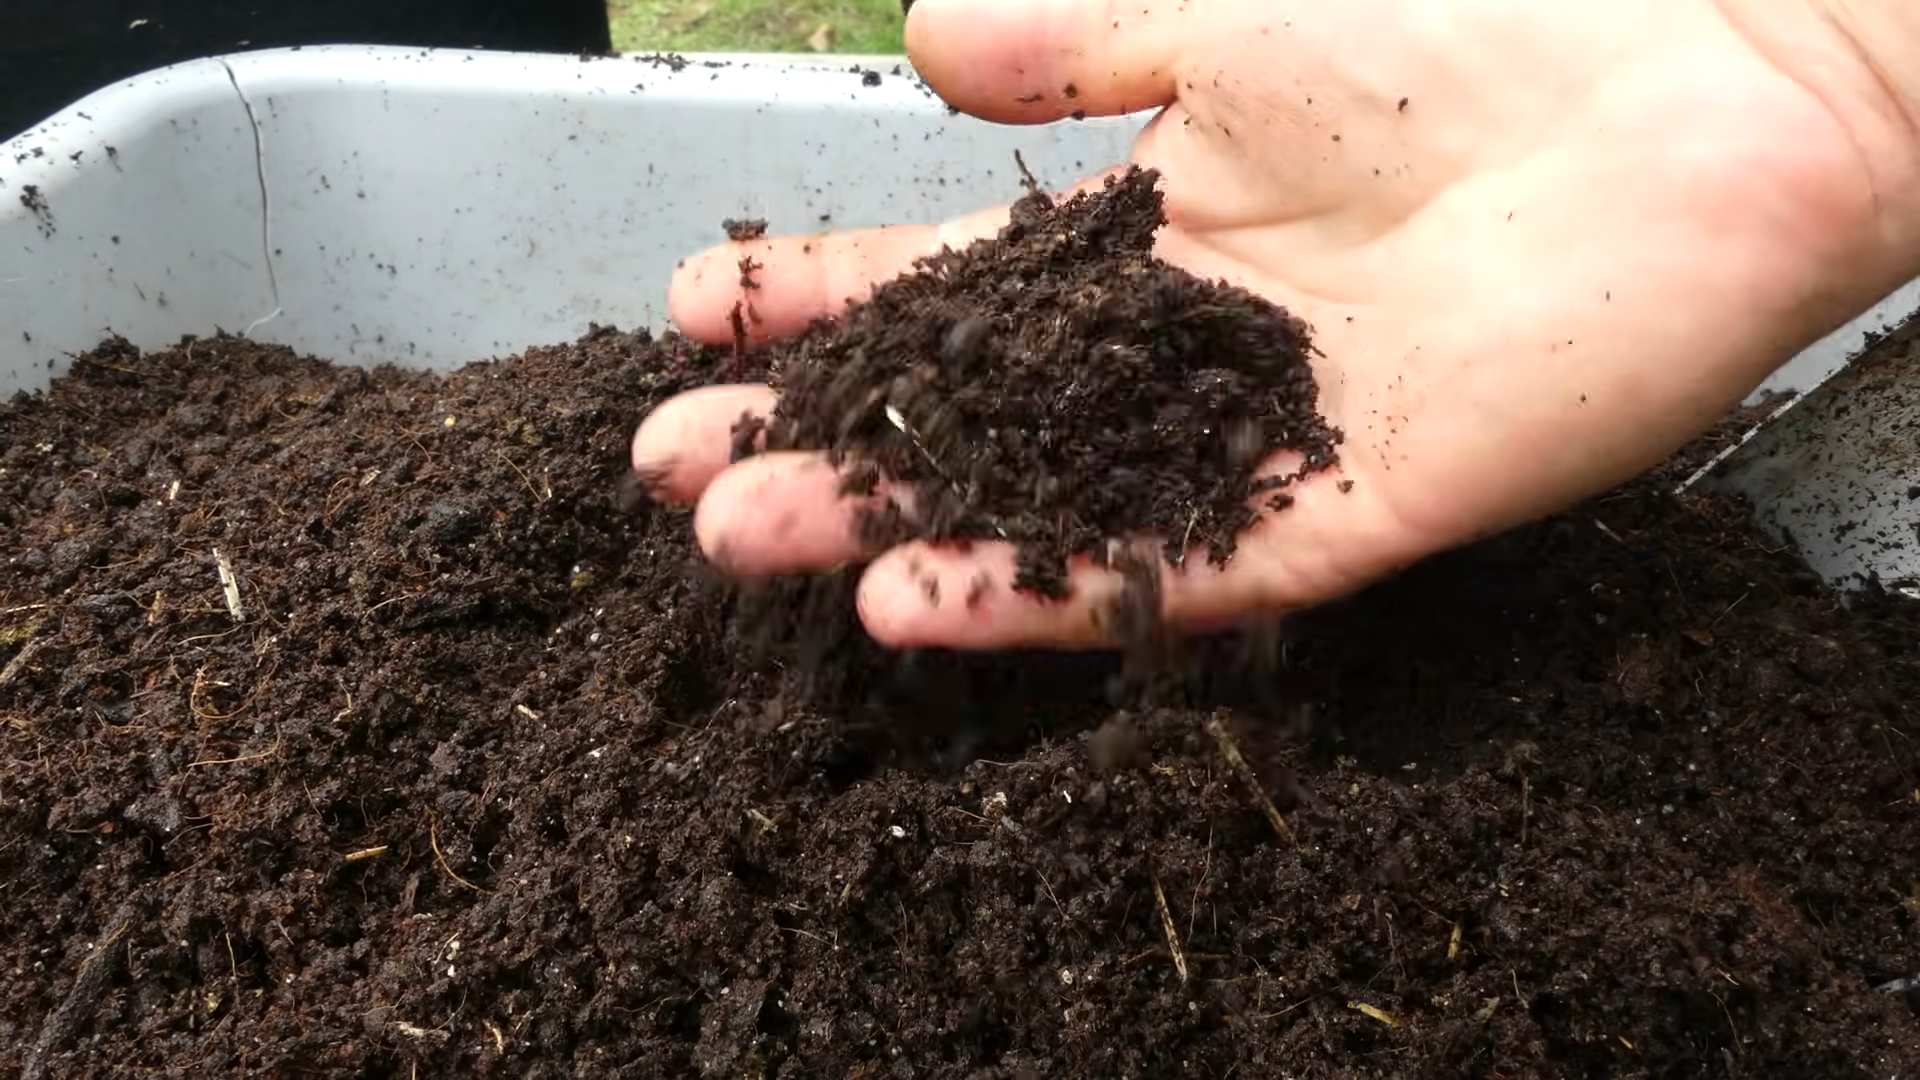
Carrots need loose, well-draining soil to thrive. Heavy, compacted soil will result in short, stubby, and often forked carrots. Here’s my go-to soil mix recipe:
* Equal parts:
* Potting mix (not garden soil – it’s too heavy)
* Compost (for nutrients and drainage)
* Sand (to improve drainage and aeration)
I usually mix this in a large bucket or wheelbarrow until it’s light and fluffy. You can also add a slow-release fertilizer to the mix to give your carrots a boost.
Planting Your Carrot Seeds
Now for the exciting part – planting!
1. Fill the container: Fill your chosen container with the soil mix, leaving about an inch or two of space at the top.
2. Water the soil: Gently water the soil until it’s evenly moist but not soggy.
3. Sow the seeds: Carrot seeds are tiny, so it’s easy to over-sow. Sprinkle the seeds thinly over the surface of the soil, spacing them about 1/2 inch apart.
4. Cover the seeds: Lightly cover the seeds with a thin layer (about 1/4 inch) of soil or vermiculite. Vermiculite helps retain moisture and prevents the soil from crusting over.
5. Water gently: Water the seeds very gently using a spray bottle or watering can with a rose attachment. You don’t want to dislodge the seeds.
6. Label your container: Don’t forget to label your container with the carrot variety and planting date!
Caring for Your Carrot Seedlings
This is where patience comes in. Carrot seeds can take anywhere from 1 to 3 weeks to germinate, depending on the temperature and moisture levels.
1. Keep the soil moist: The key to successful germination is to keep the soil consistently moist. Check the soil daily and water gently whenever the top inch feels dry.
2. Provide sunlight: Once the seedlings emerge, they need plenty of sunlight. Place the container in a location that receives at least 6-8 hours of direct sunlight per day.
3. Thin the seedlings: This is a crucial step! Once the seedlings are about 2 inches tall, thin them out so that they are spaced about 2-3 inches apart. Use small scissors to snip off the unwanted seedlings at the soil line. Don’t try to pull them out, as you might disturb the roots of the remaining seedlings.
4. Fertilize regularly: Carrots are heavy feeders, so they need regular fertilization. Use a balanced liquid fertilizer diluted to half strength every 2-3 weeks.
5. Weed carefully: Keep the container free of weeds. Gently hand-pull any weeds that appear, being careful not to disturb the carrot roots.
6. Monitor for pests: Keep an eye out for common carrot pests like carrot rust flies and aphids. If you spot any pests, treat them with an organic insecticide like neem oil or insecticidal soap.
Watering Your Container Carrots
Watering is crucial for healthy carrot growth.
* Consistent Moisture: Carrots need consistent moisture, especially during germination and early growth. Aim to keep the soil evenly moist, but not waterlogged.
* Deep Watering: Water deeply and less frequently, rather than shallowly and often. This encourages the roots to grow deeper, which will result in longer, healthier carrots.
* Watering Time: Water in the morning to allow the foliage to dry before nightfall, which can help prevent fungal diseases.
* Check the Drainage: Make sure your container has good drainage. If water is pooling on the surface, it means the soil is not draining properly.
Harvesting Your Homegrown Carrots
The moment you’ve been waiting for! Carrots are typically ready to harvest 60-80 days after planting, depending on the variety.
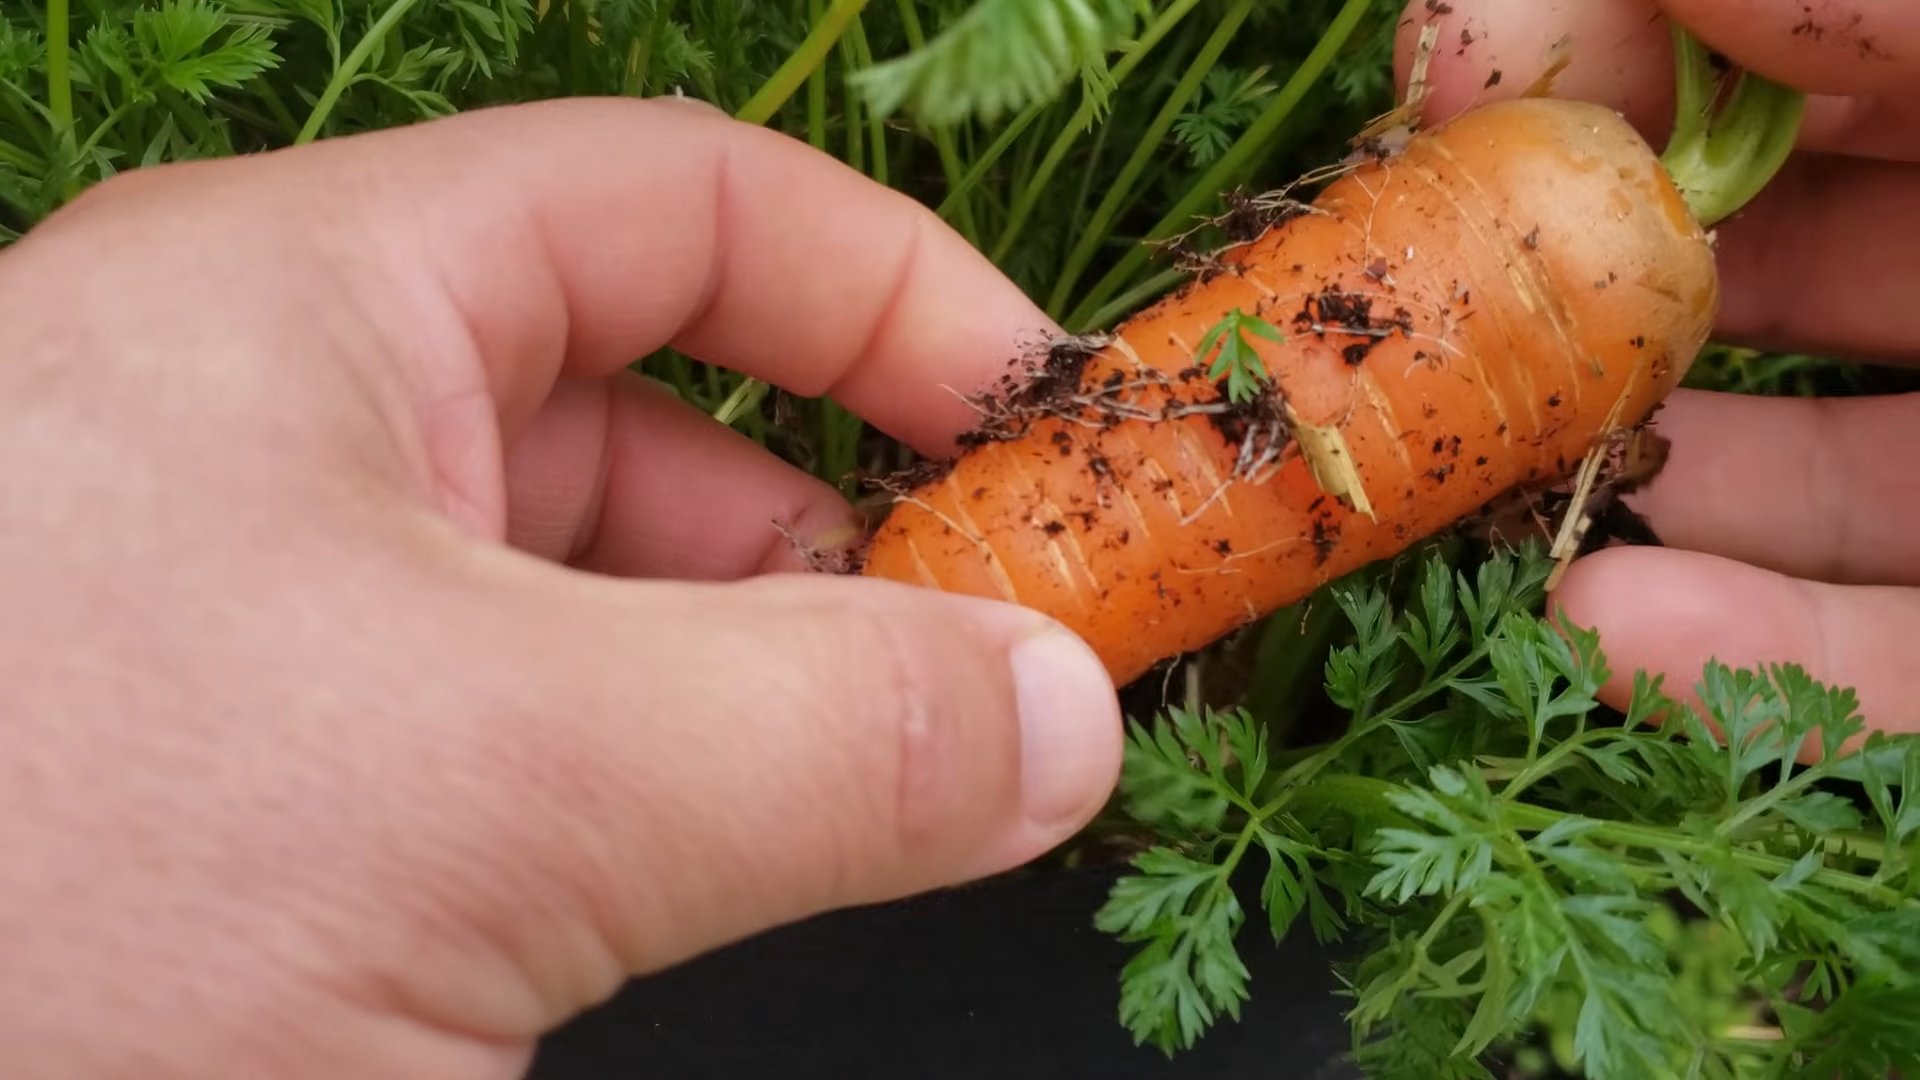
1. Check the size: Gently brush away the soil around the base of the carrot to check its size. If it’s the size you want, it’s time to harvest.
2. Loosen the soil: Before pulling the carrots, loosen the soil around them with a trowel or garden fork. This will make it easier to pull them out without breaking them.
3. Pull gently: Grasp the carrot by the base of the foliage and gently pull upwards with a twisting motion. If the carrot is stuck, loosen the soil further.
4. Wash and enjoy: Wash the carrots thoroughly and enjoy them fresh from the garden! They’ll taste so much better than store-bought carrots.
Troubleshooting Common Carrot Problems
Even with the best care, you might encounter some problems along the way. Here are a few common issues and how to fix them:
* Forked carrots: This is usually caused by compacted soil or rocks in the soil. Make sure your soil mix is loose and well-draining, and remove any rocks or debris.
* Stunted growth: This could be due to insufficient sunlight, lack of nutrients, or overcrowding. Make sure your carrots are getting enough sunlight, fertilize regularly, and thin the seedlings properly.
* Pests: Keep an eye out for common carrot pests like carrot rust flies and aphids. Treat them with an organic insecticide like neem oil or insecticidal soap.
* Bolting: Bolting (when the plant prematurely flowers) can occur if the carrots are exposed to extreme temperature fluctuations or stress. Try to provide consistent growing conditions and avoid letting the soil dry out completely.
Extending Your Carrot Growing Season
Want to enjoy fresh carrots for as long as possible? Here are a few tips for extending your growing season:
* Succession planting: Sow a new batch of carrot seeds every 2-3 weeks to ensure a continuous harvest.
* Cold frames or row covers: Use cold frames or row covers to protect your carrots from frost and extend the growing season into the fall and winter.
* Choose cold-hardy varieties: Select carrot varieties that are known for their cold hardiness, such as ‘Nantes’ or ‘Danvers.’
Enjoying Your Homegrown Harvest
Congratulations! You’ve successfully grown your own carrots in containers. Now it’s time to enjoy the fruits (or rather, roots) of your labor.
* Eat them fresh: Freshly harvested carrots are incredibly sweet and crunchy. Enjoy them raw in salads, as a snack with hummus, or as a side dish.
* Cook them: Carrots can be roasted, steamed, boiled, or added to soups and stews.
* Store them: To store carrots, remove the foliage and store them in a plastic bag in the refrigerator. They should last for several weeks.
Growing carrots in containers is a fun and rewarding experience. With a little bit of care and attention, you can enjoy fresh, delicious carrots all season long. Happy gardening!
Conclusion
So, there you have it! Growing carrots in containers isn’t just a possibility; it’s a rewarding and surprisingly simple way to enjoy fresh, homegrown goodness, even if you’re short on space. We’ve walked through the steps, from choosing the right container and soil to nurturing your little orange treasures until they’re ready to harvest.
Why is this DIY trick a must-try? Because it democratizes gardening! It removes the barriers of large plots and demanding soil conditions. It allows apartment dwellers, balcony enthusiasts, and anyone with a sunny spot to experience the joy of nurturing life from seed to table. Imagine the satisfaction of pulling up a vibrant, perfectly formed carrot that you grew yourself! The taste difference alone, compared to store-bought varieties, is reason enough to give it a go. Freshly harvested carrots are sweeter, crisper, and bursting with flavor.
But the benefits extend beyond taste. Container gardening gives you complete control over the growing environment. You can choose organic soil, avoid harmful pesticides, and ensure your carrots receive the optimal amount of sunlight and water. Plus, it’s a fantastic way to reduce your carbon footprint by sourcing food locally – from your own container!
Don’t be afraid to experiment! Try different carrot varieties. Nantes are a classic choice, but consider shorter, rounder varieties like Parisian carrots if you’re using shallower containers. Explore companion planting. Marigolds can deter pests, while radishes can help break up the soil. You can also try succession planting, sowing new seeds every few weeks to ensure a continuous harvest throughout the growing season.
For a fun twist, try growing rainbow carrots! These colorful varieties add visual appeal to your garden and your plate. You can also experiment with different container materials. Terracotta pots are beautiful but can dry out quickly, while plastic containers retain moisture better. Consider using self-watering containers for added convenience.
The key to successful container carrot growing is consistent care. Keep the soil consistently moist, but not waterlogged. Thin your seedlings to ensure they have enough space to develop. And be patient! Carrots take time to mature, but the wait is well worth it.
We wholeheartedly encourage you to try this DIY trick. It’s a fun, educational, and delicious way to connect with nature and enjoy the fruits (or vegetables!) of your labor. Once you’ve harvested your first batch of homegrown carrots, you’ll be hooked!
And now, we want to hear from you! Share your experiences, tips, and photos in the comments below. What varieties did you grow? What challenges did you face? What successes did you celebrate? Let’s create a community of container carrot growers and learn from each other. Happy gardening! Remember, mastering the art of growing carrots in containers is easier than you think, and the rewards are immeasurable.
Frequently Asked Questions (FAQ)
What is the best size container for growing carrots?
The ideal container depth depends on the carrot variety you choose. For longer varieties like Nantes, you’ll need a container that’s at least 12 inches deep. Shorter, rounder varieties like Parisian carrots can thrive in containers that are 6-8 inches deep. The width of the container will depend on how many carrots you want to grow. A good rule of thumb is to allow at least 2-3 inches of space between each carrot. A 12-inch diameter pot can comfortably accommodate 4-5 carrots. Remember, adequate space is crucial for proper root development.
What type of soil is best for container carrots?
Carrots need loose, well-draining soil to grow properly. Heavy, compacted soil can lead to stunted growth and misshapen roots. A good potting mix specifically designed for vegetables is ideal. You can also create your own mix by combining equal parts of compost, peat moss (or coconut coir), and perlite or vermiculite. Avoid using garden soil, as it tends to be too heavy and may contain pests or diseases. The soil pH should be between 6.0 and 6.8 for optimal carrot growth.
How often should I water my container carrots?
Carrots need consistent moisture to thrive, but they don’t like to be waterlogged. Water deeply whenever the top inch of soil feels dry to the touch. The frequency of watering will depend on the weather conditions, the type of container you’re using, and the size of your carrots. During hot, dry weather, you may need to water daily. In cooler, wetter weather, you may only need to water every few days. Check the soil moisture regularly and adjust your watering schedule accordingly. Using a moisture meter can be helpful.
How much sunlight do container carrots need?
Carrots need at least 6 hours of direct sunlight per day to grow properly. Choose a sunny location for your container garden. If you don’t have a spot that gets full sun, you can supplement with grow lights. Rotate your containers regularly to ensure that all sides of the plants receive adequate sunlight. Insufficient sunlight can lead to leggy growth and poor root development.
How do I thin my carrot seedlings?
Thinning is essential for giving your carrots enough space to grow. Once your seedlings are a few inches tall, thin them to about 2-3 inches apart. Gently pull out the weaker seedlings, being careful not to disturb the roots of the remaining plants. You can use small scissors to snip the seedlings at the soil line if you prefer. Thinning allows the remaining carrots to develop larger, healthier roots.
What are some common pests and diseases that affect container carrots?
Common pests that can affect container carrots include aphids, carrot rust flies, and nematodes. Aphids can be controlled with insecticidal soap or neem oil. Carrot rust flies can be deterred by covering your containers with row covers. Nematodes can be a problem in some soils, so it’s important to use a high-quality potting mix. Diseases that can affect container carrots include leaf blight and root rot. Leaf blight can be prevented by ensuring good air circulation and avoiding overhead watering. Root rot can be prevented by using well-draining soil and avoiding overwatering.
When are my container carrots ready to harvest?
Carrots are typically ready to harvest 60-80 days after planting, depending on the variety. You can check the size of the carrots by gently digging around the top of the soil. If they’re the size you want, you can pull them up. To harvest, loosen the soil around the carrot and gently pull it out of the container. If the soil is dry, water it beforehand to make harvesting easier.
Can I grow carrots in containers during the winter?
In mild climates, you can grow carrots in containers during the winter. Choose a cold-hardy variety and protect your containers from frost. You may need to move them indoors or cover them with a blanket on particularly cold nights. In colder climates, you can grow carrots indoors under grow lights.
Can I reuse the soil from my container carrots?
It’s generally not recommended to reuse the soil from your container carrots, especially if you’ve had any pest or disease problems. Used soil can be depleted of nutrients and may contain harmful pathogens. If you do reuse the soil, amend it with fresh compost and fertilizer to replenish the nutrients. Sterilizing the soil by baking it in the oven can also help to kill any pests or diseases. However, it’s often easier and more effective to simply start with fresh potting mix.
What fertilizer should I use for container carrots?
Carrots benefit from a balanced fertilizer with a slightly higher phosphorus content. Look for a fertilizer with an NPK ratio of around 5-10-5. You can use a liquid fertilizer or a slow-release granular fertilizer. Follow the instructions on the fertilizer package for application rates. Avoid over-fertilizing, as this can lead to excessive foliage growth at the expense of root development. Organic fertilizers, such as compost tea or fish emulsion, are also good options.
Leave a Comment