
Grow Purple Corn Rooftop: Imagine stepping onto your rooftop garden and being greeted by the vibrant, almost otherworldly hues of purple corn stalks swaying gently in the breeze. It’s not just a dream; it’s an achievable reality with a little know-how and a dash of DIY spirit! For centuries, purple corn has been a staple in Andean cultures, revered not only for its striking color but also for its incredible nutritional benefits, packed with antioxidants that are great for your health.
But why should you, a modern-day gardener, consider growing this ancient grain on your rooftop? Well, beyond the sheer visual appeal and the bragging rights of cultivating something so unique, growing purple corn offers a fantastic opportunity to connect with nature, learn about sustainable food practices, and enjoy fresh, homegrown produce right in the heart of the city. Plus, with space at a premium, rooftop gardening is becoming increasingly popular, and what better way to maximize your limited area than by growing something both beautiful and useful?
This DIY guide is designed to equip you with all the essential tricks and hacks you need to successfully grow purple corn rooftop, even if you’re a complete beginner. We’ll cover everything from selecting the right seeds and preparing your containers to providing optimal sunlight and warding off pesky pests. So, get ready to transform your rooftop into a thriving oasis of purple goodness – let’s get started!
Purple Majesty on the Rooftop: Your DIY Guide to Growing Purple Corn
Hey everyone! Are you up for an extraordinary garden project? I’m going to show you how to grow purple corn on your rooftop! Yes, you read that right, purple corn! It’s not only super cool to look at but also rich in antioxidants and totally delicious. Don’t worry, it’s easier than you think. Let’s get started!
What You Need: The Materials List
Before we begin, here’s a list of everything you’ll need:
- Purple Corn Seeds: Best sourced from a reputable supplier. Look for varieties suitable for container growing.
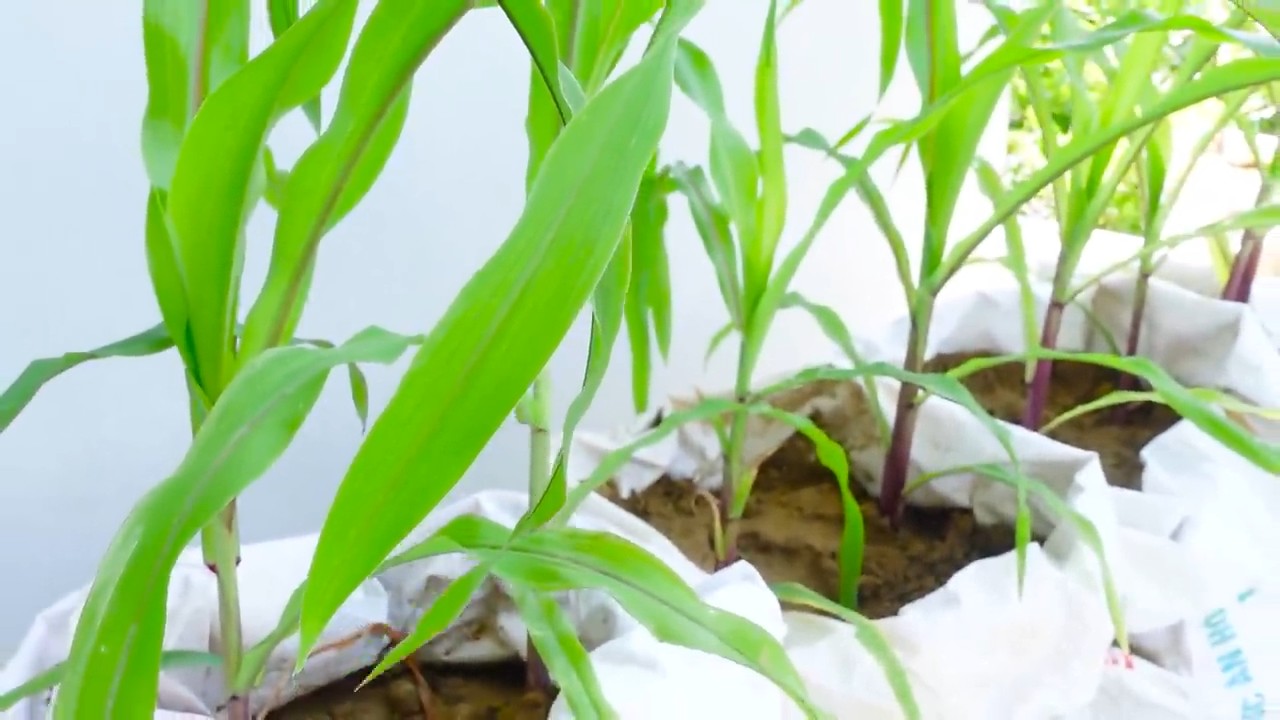
- Large Planters: At least 40 liters in volume per plant. Corn needs space for its roots.
- High-Quality Potting Soil: A mix of garden soil, compost, and coconut coir is ideal.
- Fertilizer: Slow-release or liquid fertilizer for corn.
- Watering Can or Hose: For irrigation.
- Plant Stakes or Bamboo Canes: To support the plants, especially in windy conditions.
- Pruning Shears: For removing side shoots.
- Gloves: To protect your hands.
- Drainage Material: Gravel or clay shards for the bottom of the planters.
- Sunglasses and Sunscreen: Don’t forget to protect yourself from the sun!
Preparation: The Foundation for Your Success
Before we start planting, we need to make a few preparations. This is important so the corn grows well later on.
- Choosing the Right Planters: Select large planters with adequate drainage holes. Corn has a deep root system and needs space. I recommend at least 40 liters in volume per plant.
- Creating Drainage: Fill the bottom of the planters with a layer of gravel or clay shards. This ensures good drainage and prevents waterlogging.
- Preparing the Soil: Mix high-quality potting soil with compost and coconut coir. Compost provides essential nutrients, and coconut coir improves water retention. I like to use a ratio of 2:1:1 (potting soil:compost:coconut coir).
- Choosing the Location: Corn needs a lot of sun! Choose a location on your roof that gets at least 6-8 hours of sun per day. Also, make sure the location is sheltered from the wind, as corn plants can easily be knocked over by strong winds.
Sowing: The Beginning of a Purple Dream
Now it’s time to get serious! Sowing is the first step to your own purple corn.
- Preparing the Seeds: Soak the purple corn seeds in lukewarm water for 12-24 hours. This speeds up germination.
- Sowing the Seeds: Fill the planters with the prepared soil. Make small holes (about 2-3 cm deep) approximately 20 cm apart. Place 2-3 seeds in each hole. This increases the probability that at least one seed will germinate.
- Covering the Holes: Cover the seeds with soil and press down lightly.
- Watering: Water the soil gently so that it is well-moistened. Be careful not to make the soil too wet.
- Keeping Warm: Place the planters in a warm and sunny spot. The ideal germination temperature is 20-25°C.
Care: Ensuring Your Corn Thrives Magnificently
Care is crucial for your purple corn to thrive magnificently. Here are a few tips you should follow:
- Water Regularly: Corn needs a lot of water, especially during the growth and flowering periods. Water regularly, but avoid waterlogging. It’s best to water early in the morning or late in the evening when the sun is not as strong.
- Fertilize: Corn is a heavy feeder and needs a lot of nutrients. Fertilize your plants regularly with a slow-release or liquid fertilizer for corn. I recommend fertilizing every 2-3 weeks.
- Remove Side Shoots: Regularly remove the side shoots (also called “suckers”) that grow from the leaf axils. This promotes the growth of the main stalk and the development of the corn cobs.
- Support: As the plants get taller, you should support them with plant stakes or bamboo canes. This prevents them from being knocked over by the wind.
- Watch for Pests: Regularly check your plants for pests like aphids or corn borers. If infested, you can use natural pesticides.
- Assist Pollination: Corn is wind-pollinated. If you only have a few plants, you can assist pollination by gently shaking the male flower tassels (the “flags” at the top of the plant) to distribute the pollen.
The Harvest: The Reward for Your Effort
After about 90-120 days, the time has finally come: Harvest time!
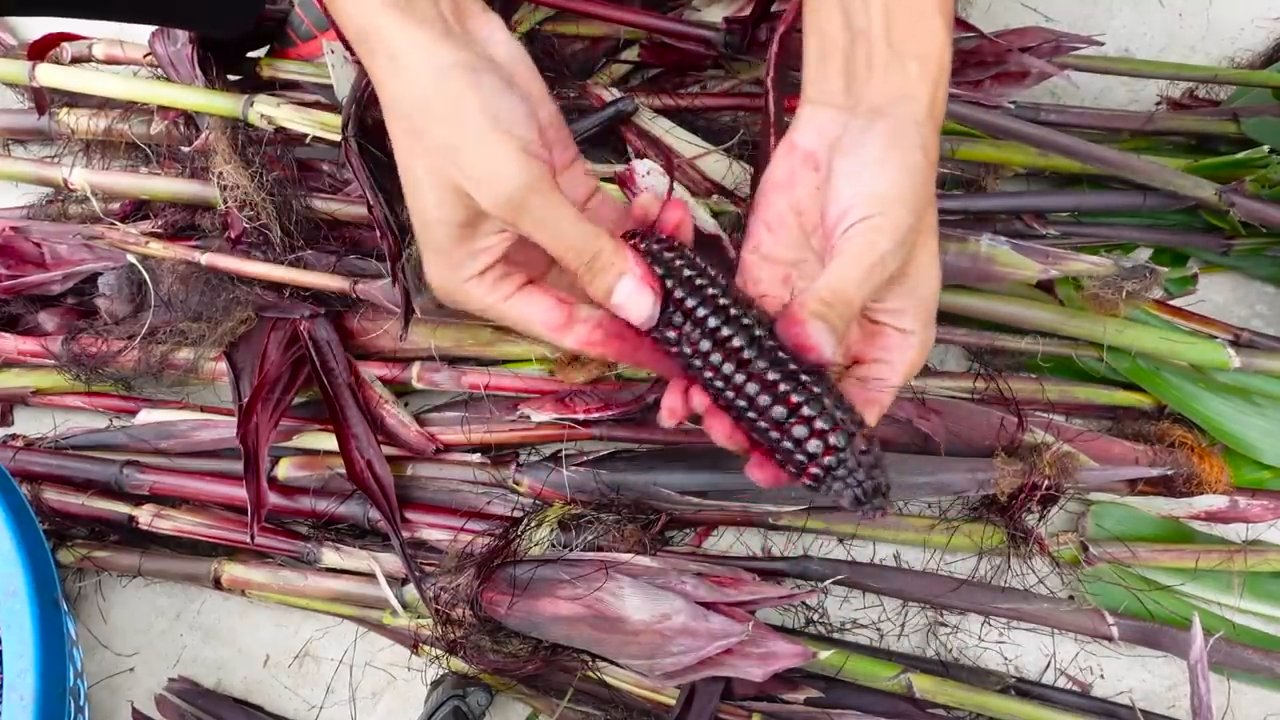
- Recognizing the Right Time: The corn cobs are ripe when the husks become dry and brown and the kernels are hard and plump.
- Harvesting the Cobs: Carefully break the corn cobs off the plant.
- Drying the Cobs: Let the corn cobs dry in a dry and airy place for a few weeks. This improves their storage life.
- Using the Kernels: You can use the dried corn kernels for various purposes:
- For Cooking: Purple corn can be cooked and eaten like regular corn. It has a slightly sweet taste.
- For Grinding: The kernels can be ground into flour, which can be used to make tortillas, polenta, or other dishes.
- For Popcorn: Some varieties of purple corn are also suitable for making popcorn.
- As Decoration: The dried corn cobs make a beautiful autumn decoration.
- For the Next Sowing: Save some of the best kernels for the next sowing.
Common Problems and Solutions
Problems can also occur when growing purple corn. Here are a few common problems and how you can solve them:
- Poor Germination: If the seeds don’t germinate, it could be due to low temperatures, dry soil, or poor seed quality. Ensure the correct temperature and moisture, and use high-quality seeds.
- Yellow Leaves: Yellow leaves can be a sign of nutrient deficiency. Fertilize your plants regularly with a suitable fertilizer.
- Pests: Aphids, corn borers, and other pests can infest the corn. Check your plants regularly and use natural pesticides if infested.
- Toppling in Wind: Corn plants can easily be knocked over by strong wind. Support your plants with plant stakes or bamboo canes.
- Poor Pollination: If the corn cobs are not well-filled, it could be due to poor pollination. Assist pollination by shaking the male tassels or placing the plants in a wind-sheltered area.
Additional Tips for Successful Cultivation
Here are a few more tips that can help make your purple corn cultivation even more successful:
Pay Attention to Crop Rotation: Do not grow corn in the same location every year.
Choose the Right Variety: There are different varieties of purple corn. Choose a variety that is suitable for container growing and that grows well in your climate.
Conclusion
So, there you have it! Growing purple corn on your rooftop isn’t just a quirky gardening experiment; it’s a rewarding journey that connects you to ancient traditions, provides you with a unique and nutritious food source, and adds a vibrant splash of color to your urban landscape. We’ve walked through the steps, from selecting the right seeds to troubleshooting common issues, and hopefully, you’re now feeling confident and inspired to embark on this exciting project.
Why is this DIY trick a must-try? Because it’s more than just growing corn. It’s about reclaiming space, fostering sustainability, and experiencing the magic of watching a seed transform into a beautiful, edible plant. Purple corn, with its rich anthocyanin content, offers a powerful antioxidant boost to your diet, far surpassing the nutritional value of regular yellow corn. Imagine the satisfaction of harvesting your own vibrant purple kernels, knowing you nurtured them from seedling to maturity, right on your own rooftop.
But the beauty of this project lies in its adaptability. Feel free to experiment with different varieties of purple corn. Some are better suited for specific climates, while others offer unique flavor profiles. Consider companion planting with beans and squash, following the traditional “Three Sisters” method, to create a self-sustaining ecosystem on your rooftop. You could also explore different container sizes and materials to optimize your growing space. Perhaps you’ll even discover a new and improved method for rooftop purple corn cultivation!
Don’t be afraid to get creative with your harvest. Beyond the traditional uses of corn, purple corn can be ground into flour for vibrant tortillas and breads, used to make a stunning purple corn syrup, or even brewed into a refreshing and healthy beverage like Peruvian chicha morada. The possibilities are endless!
We strongly encourage you to give this DIY project a try. It’s a fantastic way to connect with nature, learn new skills, and enjoy the fruits (or rather, the kernels) of your labor. And most importantly, we want to hear about your experience! Share your successes, your challenges, and your unique adaptations in the comments below. Let’s build a community of rooftop purple corn growers and learn from each other. Your insights could inspire others to take the plunge and transform their own urban spaces into thriving gardens. So, grab your seeds, prepare your containers, and get ready to witness the magic of growing your own purple corn rooftop oasis! Let us know how your **purple corn** journey unfolds!
Frequently Asked Questions (FAQ)
What are the best varieties of purple corn to grow on a rooftop?
The best varieties for rooftop growing are those that are relatively compact and adaptable to container gardening. Consider these options:
* **’Blue Hopi’ Corn:** This variety is known for its drought tolerance and shorter stature, making it well-suited for rooftop conditions. It produces beautiful blue-purple kernels.
* **’Oaxacan Green’ Corn:** While not strictly purple, this variety often exhibits purple hues and is prized for its flavor and adaptability. It’s a good choice for warmer climates.
* **’Cherokee White Eagle’ Corn:** This heirloom variety can display some purple coloration and is known for its resilience and adaptability.
* **Dwarf Purple Corn Varieties:** Look for specifically bred dwarf varieties of purple corn, as these are designed for smaller spaces and container gardening. These are often available from specialty seed suppliers.
Remember to check the seed packet for specific growing instructions and maturity dates.
How much sunlight does purple corn need on a rooftop?
Purple corn, like all corn varieties, requires a significant amount of sunlight to thrive. Aim for at least 6-8 hours of direct sunlight per day. If your rooftop doesn’t receive this much sunlight, you might consider using supplemental grow lights to ensure healthy growth and kernel development. Insufficient sunlight can lead to weak stalks, poor pollination, and reduced yields.
What size containers are best for growing purple corn on a rooftop?
The size of the container is crucial for providing adequate root space and stability for your corn plants. A minimum of 10-15 gallons per plant is recommended. Larger containers are always better, as they provide more room for root growth and help retain moisture. Consider using large plastic tubs, half-barrels, or even repurposed containers. Ensure that the containers have adequate drainage holes to prevent waterlogging.
How often should I water my rooftop purple corn?
Watering frequency will depend on the weather conditions, the size of your containers, and the type of soil you’re using. Generally, you should water deeply whenever the top inch of soil feels dry to the touch. During hot, sunny days, you may need to water daily. Avoid overwatering, as this can lead to root rot. Using a moisture meter can help you determine the moisture level of the soil and prevent both underwatering and overwatering.
How do I pollinate my purple corn on a rooftop?
Corn is wind-pollinated, so on a rooftop, you may need to assist with pollination, especially if you only have a few plants. When the tassels (the male flowers at the top of the plant) begin to shed pollen, gently shake the stalks to release the pollen. You can also collect the pollen in a small container and then dust it onto the silks (the female flowers emerging from the developing ears). Repeat this process every day for several days to ensure adequate pollination.
What are some common pests and diseases that affect purple corn, and how can I prevent them on a rooftop?
Common pests include corn earworms, aphids, and spider mites. Diseases can include fungal infections like rust and smut. To prevent these issues:
* **Inspect your plants regularly:** Look for signs of pests or diseases early on.
* **Use organic pest control methods:** Introduce beneficial insects like ladybugs, or use insecticidal soap or neem oil to control pests.
* **Ensure good air circulation:** Proper spacing between plants will help prevent fungal diseases.
* **Use disease-resistant varieties:** Choose varieties that are known to be resistant to common corn diseases.
* **Practice crop rotation:** If possible, rotate your crops each year to prevent the buildup of soilborne diseases.
How do I know when my purple corn is ready to harvest?
The harvest time for purple corn depends on the variety and your intended use. For fresh corn, harvest when the silks have turned brown and dry, and the kernels are plump and milky. For dried corn, allow the ears to dry on the stalk until the husks are completely brown and the kernels are hard. You can test the kernels by pressing your thumbnail into them. If they are hard and don’t release milky sap, they are ready to harvest.
Can I grow purple corn in a hydroponic system on my rooftop?
While it’s not the most common method, you can potentially grow purple corn in a hydroponic system, especially if space is limited. You’ll need a system that can support the relatively large size of corn plants and provide adequate nutrients. Deep water culture (DWC) or nutrient film technique (NFT) systems could be adapted for corn. However, keep in mind that corn requires a lot of nutrients and water, so you’ll need to monitor and adjust the nutrient solution carefully.
What are some creative ways to use my harvested purple corn?
Beyond traditional corn on the cob, purple corn offers a range of culinary possibilities:
* **Purple Corn Flour:** Grind the dried kernels into flour for making tortillas, breads, and other baked goods.
* **Chicha Morada:** Brew a traditional Peruvian beverage by boiling purple corn kernels with spices and fruits.
* **Purple Corn Syrup:** Extract the color and flavor to create a unique syrup for pancakes, waffles, or desserts.
* **Cornmeal:** Grind the dried kernels into cornmeal for polenta, cornbread, and other dishes.
* **Decorative Purposes:** Use the colorful ears for fall decorations.
How can I save seeds from my purple corn for future planting?
To save seeds, select healthy, well-formed ears of corn. Allow the ears to dry completely on the stalk. Once dry, remove the kernels from the cob and store them in an airtight container in a cool, dry place. Be aware that if your corn was cross-pollinated with other varieties, the seeds may not produce true-to-type plants. To ensure genetic purity, you may need to isolate your corn plants from other corn varieties during pollination.

Leave a Comment