
DIY homegrown grapes setup – sounds ambitious, right? But trust me, transforming your backyard into a mini-vineyard is more achievable (and rewarding!) than you might think. Forget those pricey, often lackluster grapes from the supermarket. Imagine plucking juicy, sun-ripened grapes straight from your own vine, bursting with flavor you just can’t find anywhere else.
Growing grapes at home has a rich history, dating back thousands of years. From ancient civilizations using grapes for wine to families cultivating them for fresh eating, this fruit has always held a special place. It’s a connection to the earth, a taste of tradition, and a whole lot of fun!
But why should you embark on this DIY adventure? Well, beyond the obvious deliciousness, growing your own grapes allows you to control exactly what goes into them. No harsh chemicals, no mystery ingredients – just pure, natural goodness. Plus, it’s a fantastic way to add beauty and value to your property. In this article, I’m going to share some simple, effective tricks and hacks to help you create your own DIY homegrown grapes setup, even if you’re a complete beginner. Get ready to unleash your inner grape grower!
DIY Homegrown Grapes: From Vine to Wine (or Juice!)
Hey there, fellow DIY enthusiasts! Ever dreamt of plucking juicy grapes straight from your own backyard? Well, dream no more! Growing your own grapes is totally achievable, even if you don’t have acres of land. I’m going to walk you through the whole process, from choosing the right variety to harvesting your delicious bounty. Get ready to get your hands dirty!
Choosing Your Grape Variety
Before we dive into the nitty-gritty, let’s talk grapes. Not all grapes are created equal, and the best variety for you will depend on your climate, your available space, and what you plan to do with your grapes (eating, juicing, winemaking).
* Climate Considerations: This is HUGE. Some grape varieties thrive in warm climates, while others are more cold-hardy. Research your USDA plant hardiness zone and choose varieties that are known to do well in your area.
* Space Requirements: Grapes need room to spread! Consider how much space you have available. Some varieties are more vigorous than others. If you’re limited on space, look for “table grapes” that are often less vigorous than wine grapes.
* Intended Use: Are you dreaming of homemade grape juice? Or perhaps a small batch of wine? Table grapes are great for eating fresh, while wine grapes have a higher sugar content and are better suited for fermentation. Juice grapes are often a good middle ground.
* Disease Resistance: Some grape varieties are more resistant to common grape diseases like powdery mildew and black rot. Choosing a disease-resistant variety can save you a lot of headaches (and fungicide!).
Some popular and relatively easy-to-grow grape varieties include:
* Concord: A classic American grape, known for its strong flavor and use in juice and jelly. Cold-hardy and relatively easy to grow.
* Niagara: Another popular American grape, with a sweet, slightly musky flavor. Great for eating fresh or making juice.
* Reliance: A seedless table grape that’s very cold-hardy. Perfect for snacking!
* Thompson Seedless: The most popular seedless grape in the world! Requires a long, warm growing season.
* Cabernet Sauvignon: A classic red wine grape. Requires a warm climate and careful pruning.
* Chardonnay: A popular white wine grape. Also requires a warm climate and careful pruning.
Once you’ve chosen your variety, it’s time to get planting!
Preparing Your Planting Site
Grapes need plenty of sunshine and well-drained soil. Choose a location that gets at least 6-8 hours of direct sunlight per day.
* Sunlight is Key: Grapes need sunshine to produce those sweet, juicy berries. The more sun, the better!
* Well-Drained Soil: Grapes hate soggy feet! Make sure your soil drains well. If you have heavy clay soil, amend it with compost or other organic matter to improve drainage.
* Soil pH: Grapes prefer a slightly acidic soil pH of around 6.0-7.0. You can test your soil pH with a soil testing kit and amend it accordingly.
* Spacing: Grapevines need room to spread. Space your vines 8-10 feet apart in rows that are 10-12 feet apart. This will allow for good air circulation and sunlight penetration.
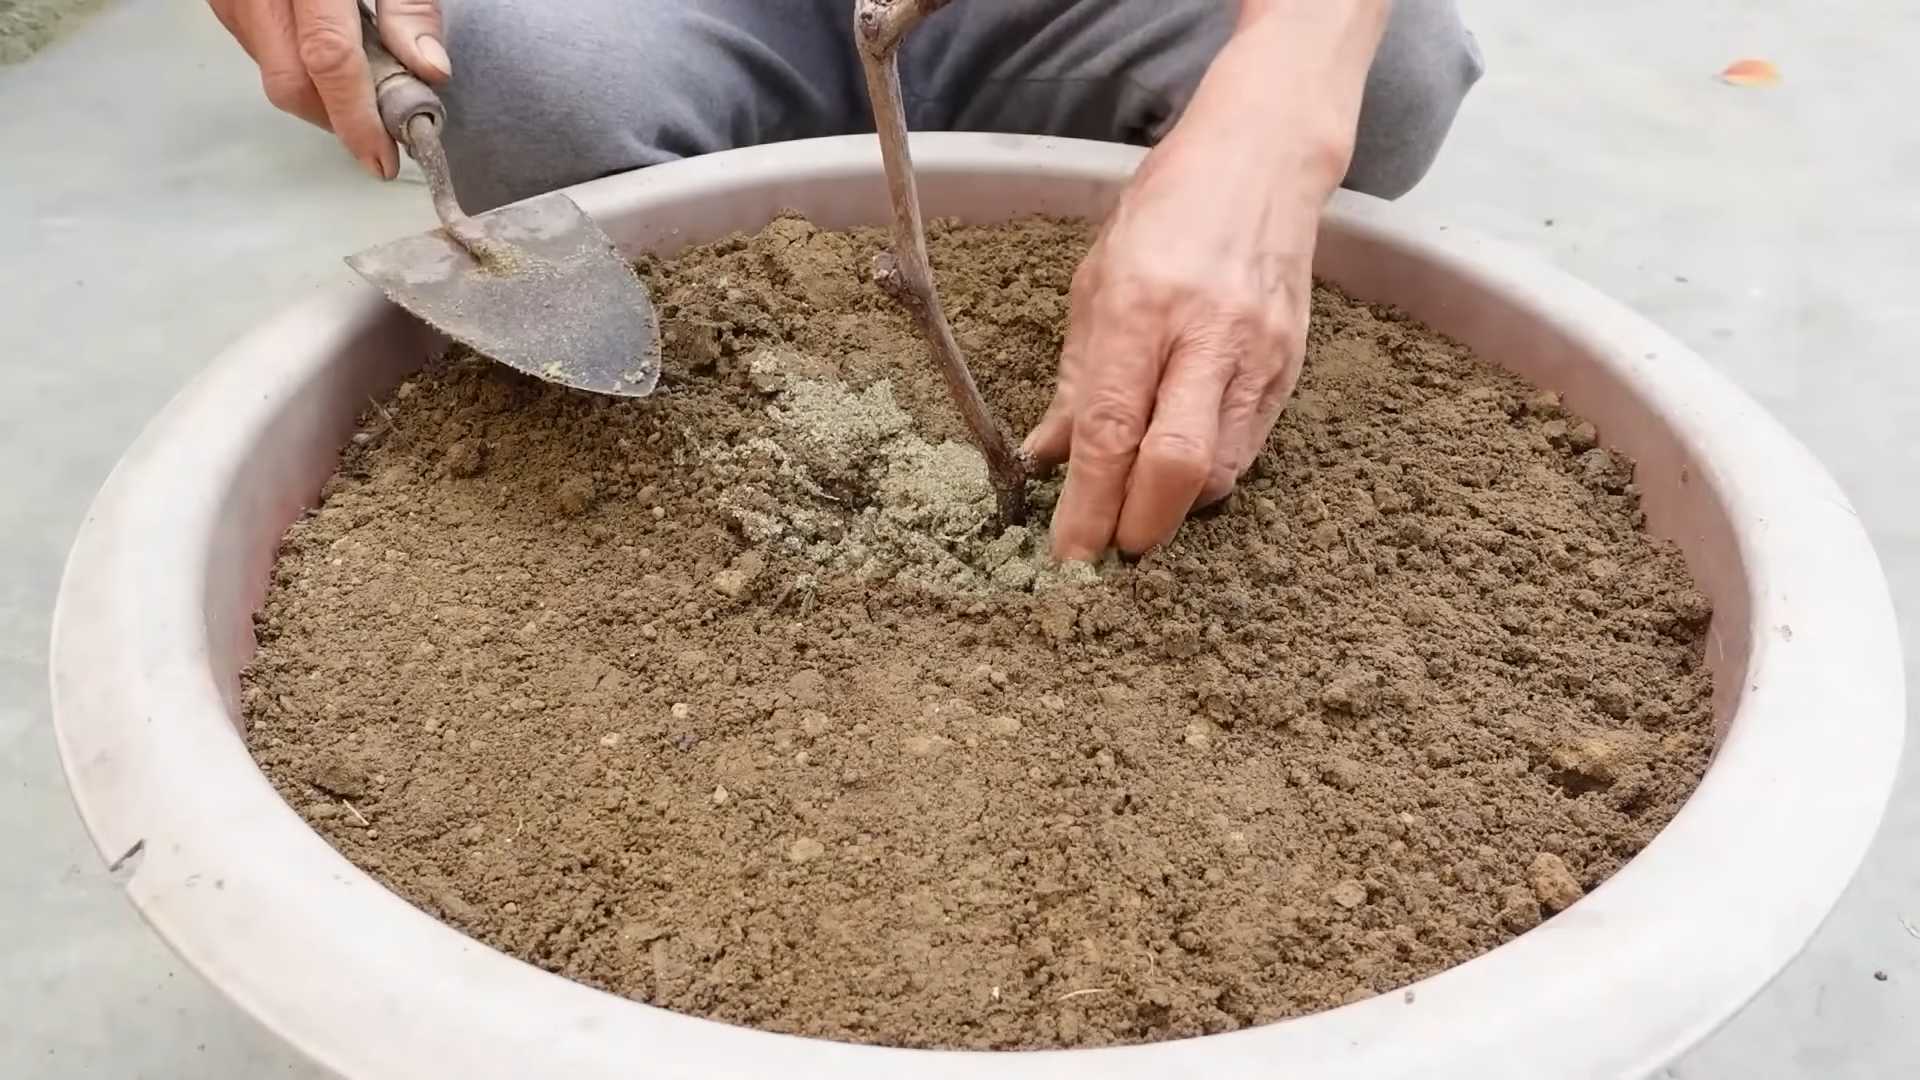
Planting Your Grapevines
Now for the fun part! Planting your grapevines is a relatively simple process, but it’s important to do it right to give your vines the best possible start.
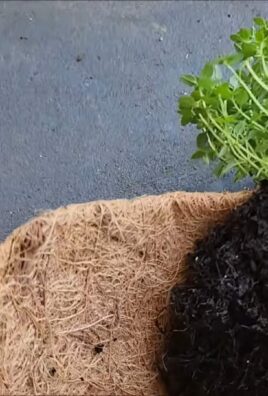
1. Dig the Hole: Dig a hole that’s twice as wide as the root ball of your grapevine and just as deep.
2. Amend the Soil: Mix some compost or other organic matter into the soil you removed from the hole. This will help improve drainage and provide nutrients for your grapevine.
3. Remove the Grapevine from its Container: Gently remove the grapevine from its container, being careful not to damage the roots. If the roots are circling the pot, gently loosen them before planting.
4. Plant the Grapevine: Place the grapevine in the hole, making sure that the top of the root ball is level with the ground.
5. Backfill the Hole: Backfill the hole with the amended soil, gently tamping it down as you go.
6. Water Thoroughly: Water the grapevine thoroughly after planting. This will help settle the soil and encourage root growth.
7. Mulch: Apply a layer of mulch around the base of the grapevine to help retain moisture and suppress weeds.
Training and Pruning Your Grapevines
Training and pruning are essential for growing healthy, productive grapevines. Training involves guiding the growth of the vine, while pruning involves removing unwanted growth.
* The Importance of Training: Training helps to establish the basic structure of the grapevine and ensures that it receives adequate sunlight and air circulation.
* The Importance of Pruning: Pruning helps to control the size and shape of the grapevine, promotes fruit production, and removes dead or diseased wood.
There are several different training systems for grapevines, but the most common are the cordon system and the cane system.
* Cordon System: In the cordon system, the main trunk of the grapevine is trained along a horizontal wire (the cordon). Fruiting spurs are then allowed to develop along the cordon.
* Cane System: In the cane system, the main trunk of the grapevine is trained vertically, and fruiting canes are selected each year from the previous year’s growth.
I personally prefer the cordon system for its simplicity and ease of maintenance. Here’s how to train your grapevine using the cordon system:
1. First Year: After planting, cut back the grapevine to one strong shoot. As the shoot grows, tie it to a stake or trellis.
2. Second Year: Select the strongest shoot and train it along the horizontal wire (cordon). Remove any other shoots that develop.
3. Third Year and Beyond: Allow fruiting spurs to develop along the cordon. Prune the spurs each year to maintain their shape and size.
Pruning is best done in late winter or early spring, before the buds begin to swell. Here are some general pruning tips:
* Remove Dead or Diseased Wood: This is always the first step in pruning.
* Remove Weak or Crowded Shoots: These shoots will not produce good fruit and will only compete with the stronger shoots.
* Shorten Fruiting Spurs: Shorten the fruiting spurs to 2-3 buds. This will encourage the development of new fruiting wood.
* Maintain the Shape of the Vine: Prune to maintain the desired shape and size of the grapevine.
Watering and Fertilizing Your Grapevines
Grapes need consistent watering, especially during dry periods. Water deeply and regularly, especially when the grapes are developing.
* Watering Schedule: Water your grapevines deeply once a week, or more often during hot, dry weather.
* Fertilizing: Fertilize your grapevines in the spring with a balanced fertilizer. Avoid over-fertilizing, as this can lead to excessive vegetative growth and reduced fruit production. I like to use a fertilizer specifically formulated for grapes.
Pest and Disease Control
Grapes can be susceptible to a variety of pests and diseases. Monitor your vines regularly and take action if you see any signs of trouble.
* Common Pests: Common grape pests include aphids, Japanese beetles, and grape phylloxera.
* Common Diseases: Common grape diseases include powdery mildew, black rot, and downy mildew.
Here are some tips for pest and disease control:
* Choose Disease-Resistant Varieties: As mentioned earlier, choosing disease-resistant varieties can significantly reduce your risk of problems.
* Maintain Good Air Circulation: Good air circulation helps to prevent fungal diseases. Prune your vines regularly to ensure good air circulation.
* Remove Diseased Leaves and Fruit: Remove any diseased leaves or fruit as soon as you see them.
* Use Organic Pest Control Methods: Consider using organic pest control methods, such as insecticidal soap or neem oil.
* Fungicides: If necessary, you can use fungicides to control fungal diseases. Be sure to follow the instructions on the fungicide label carefully.
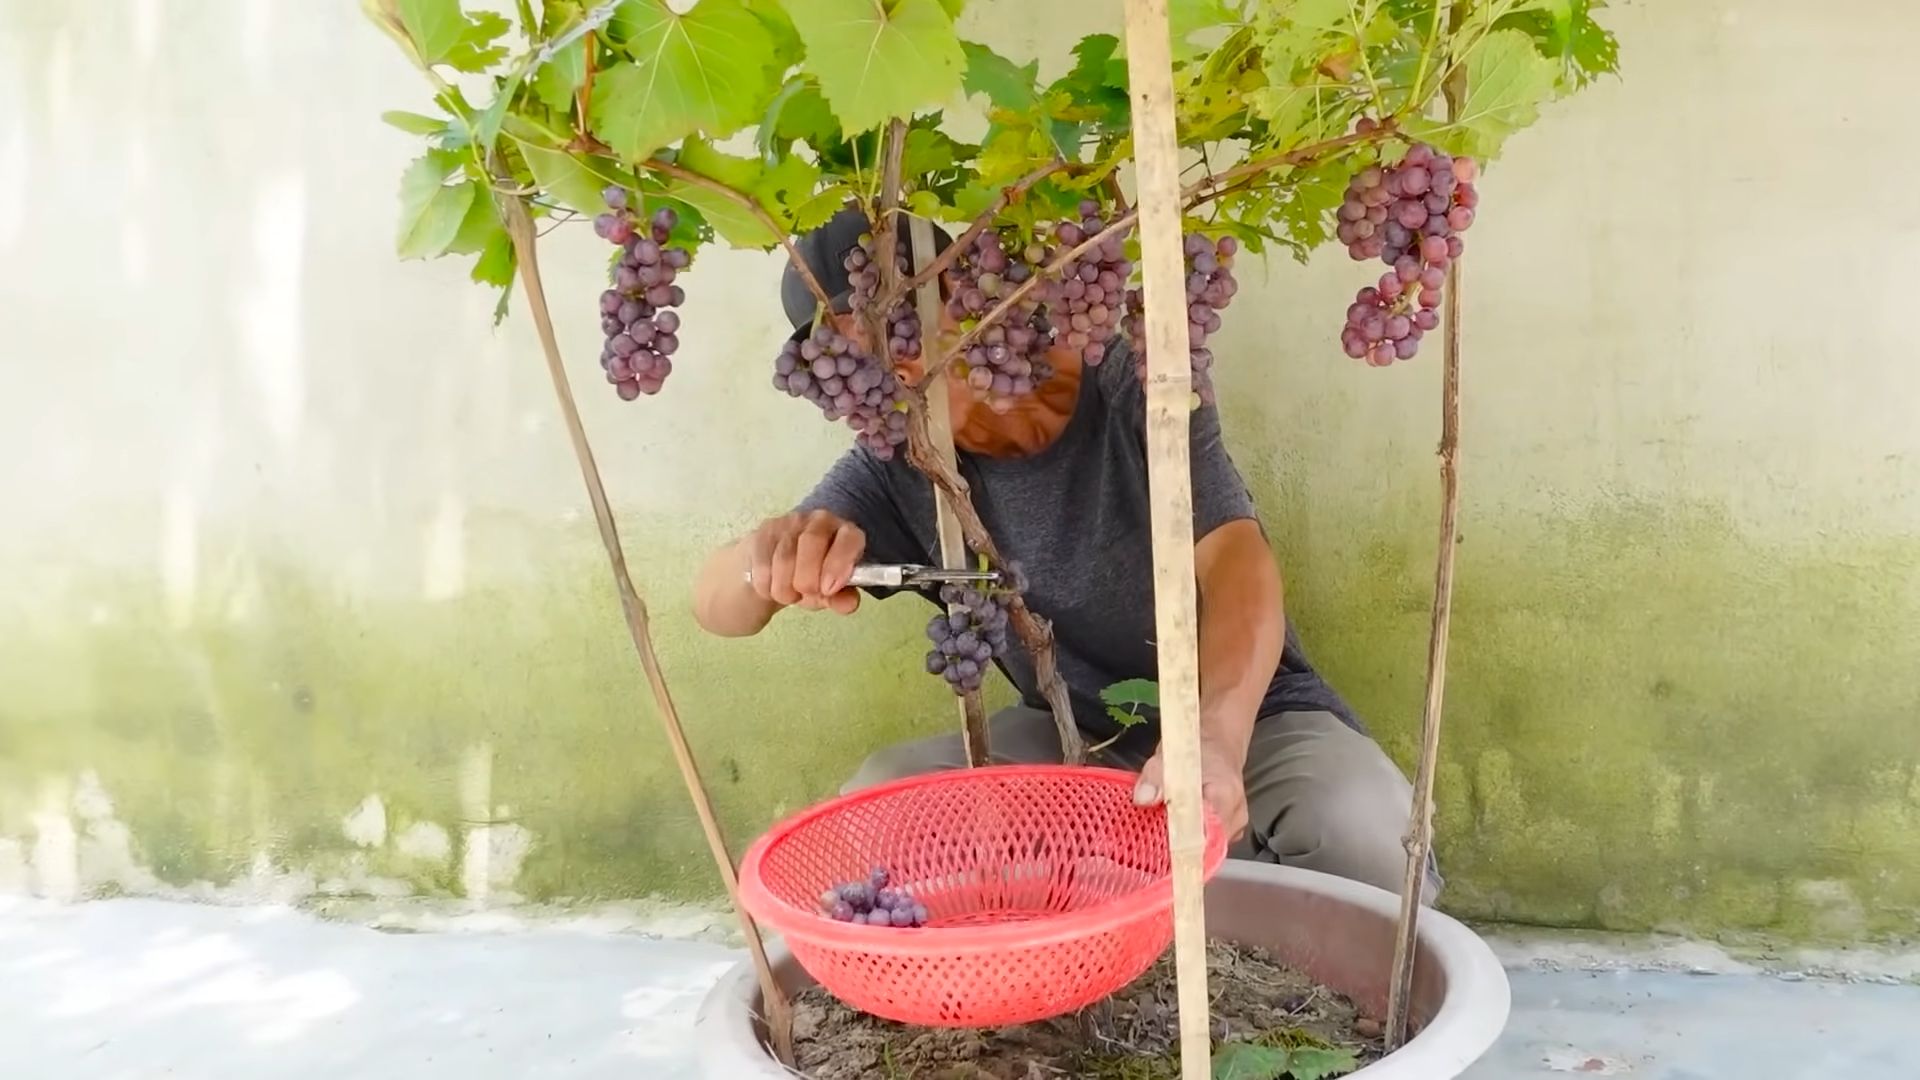
Harvesting Your Grapes
The moment you’ve been waiting for! Harvesting your grapes is the culmination of all your hard work.
* When to Harvest: Grapes are typically ready to harvest in late summer or early fall. The exact timing will depend on the variety and your climate.
* Signs of Ripeness: Look for these signs of ripeness:
* The grapes should be plump and juicy.
* The grapes should be easy to pull from the vine.
* The grapes should have a sweet taste.
* How to Harvest:
Conclusion
So, there you have it! Transforming your backyard, balcony, or even a sunny corner indoors into a thriving vineyard with your own DIY homegrown grapes setup is not just a possibility, it’s an incredibly rewarding experience waiting to happen. We’ve walked you through the essentials, from selecting the perfect grape variety for your climate and space to crafting a supportive trellis system and nurturing your vines to their full potential.
Why is this DIY project a must-try? Because it offers a unique blend of benefits that you simply can’t find elsewhere. Imagine the satisfaction of harvesting your own juicy, sun-ripened grapes, knowing exactly where they came from and how they were grown. Think of the cost savings compared to buying grapes from the store, especially if you enjoy them regularly. And consider the sheer beauty and tranquility that a flourishing grapevine adds to your living space. It’s a conversation starter, a source of pride, and a delicious treat all rolled into one.
But the best part? This is a project that you can truly make your own. Feel free to experiment with different grape varieties to find your personal favorite. If you’re short on space, consider growing grapes in containers on a patio or balcony. You can even try training your vines into unique shapes and patterns for an added touch of artistry.
Here are a few suggestions and variations to get your creative juices flowing:
* Vertical Gardening: If you’re limited on ground space, explore vertical gardening techniques. Train your grapevines up walls, fences, or even specially designed vertical planters. This not only maximizes space but also creates a stunning visual display.
* Grafting: For the more adventurous gardener, consider grafting different grape varieties onto a single rootstock. This allows you to enjoy a wider range of flavors and characteristics from a single plant.
* Companion Planting: Enhance your grape growing experience by incorporating companion plants. Herbs like basil and oregano can help deter pests, while flowers like marigolds can attract beneficial insects.
* Wine Making (Eventually!): Once your vines are mature and producing a substantial harvest, you can even try your hand at making your own homemade wine. This is a more advanced project, but it’s a fantastic way to take your DIY grape growing to the next level.
* Grape Juice and Jams: If winemaking seems daunting, don’t worry! You can still use your homegrown grapes to make delicious grape juice, jams, and jellies. These homemade treats are perfect for enjoying throughout the year.
We’re confident that with a little planning, effort, and patience, you can successfully grow your own grapes and enjoy the fruits (literally!) of your labor. So, what are you waiting for? Grab your gardening gloves, choose your grape variety, and get started on your DIY homegrown grapes setup today!
We’re eager to hear about your experiences. Share your photos, tips, and challenges in the comments below. Let’s build a community of DIY grape growers and learn from each other! We believe that everyone can enjoy the satisfaction of growing their own food, and grapes are a fantastic place to start. Happy growing!
Frequently Asked Questions (FAQ)
What is the best grape variety to grow for beginners?
For beginners, it’s best to choose grape varieties that are known for their disease resistance and ease of care. Some excellent options include:
* ‘Concord’: A classic American grape with a distinctive flavor, ‘Concord’ is very hardy and relatively easy to grow. It’s great for juice, jams, and jellies.
* ‘Niagara’: Another popular American grape, ‘Niagara’ is known for its sweet, musky flavor and its resistance to common grape diseases.
* ‘Reliance’: A seedless red grape that is very cold-hardy and disease-resistant. It’s a good choice for cooler climates.
* ‘Thompson Seedless’: While it requires a bit more care than some other varieties, ‘Thompson Seedless’ is a popular choice for fresh eating and is widely available.
Consider your local climate and growing conditions when making your final decision. Local nurseries can provide valuable advice on the best varieties for your area.
How much space do I need to grow grapes?
The amount of space you need depends on the grape variety and the training system you choose. In general, grapevines need at least 6-8 feet of space between plants in a row, and 8-10 feet between rows. However, you can grow grapes in containers on a patio or balcony if you don’t have much ground space. Choose a large container (at least 20 gallons) and select a compact grape variety. Vertical gardening techniques can also help maximize space.
How often should I water my grapevines?
Watering frequency depends on the climate, soil type, and age of the vine. Young grapevines need more frequent watering than established vines. In general, water deeply and less frequently, allowing the soil to dry out slightly between waterings. During hot, dry periods, you may need to water more often. Avoid overwatering, as this can lead to root rot. A good rule of thumb is to water when the top inch of soil feels dry to the touch.
What kind of fertilizer should I use for my grapevines?
Grapevines benefit from regular fertilization, especially during the growing season. Use a balanced fertilizer with a ratio of 10-10-10 or 12-12-12. Apply fertilizer in the spring, just before the vines begin to grow. Avoid over-fertilizing, as this can lead to excessive vegetative growth and reduced fruit production. You can also amend the soil with compost or other organic matter to improve its fertility and drainage.
How do I prune my grapevines?
Pruning is essential for maintaining the health and productivity of your grapevines. Pruning removes dead or diseased wood, improves air circulation, and encourages fruit production. The best time to prune grapevines is in late winter or early spring, before the buds begin to swell. The specific pruning method will depend on the grape variety and the training system you are using. Consult a local expert or gardening guide for detailed instructions on pruning your specific type of grape.
How do I protect my grapes from pests and diseases?
Grapevines can be susceptible to various pests and diseases, including Japanese beetles, aphids, powdery mildew, and black rot. To protect your grapes, practice good sanitation by removing fallen leaves and debris from around the vines. You can also use organic pest control methods, such as insecticidal soap or neem oil. For fungal diseases, consider using a copper-based fungicide. Monitor your vines regularly for signs of pests or diseases and take action promptly.
How long does it take for grapevines to produce fruit?
It typically takes 2-3 years for grapevines to begin producing fruit. The first year, the vines will focus on establishing their root system. In the second year, they will begin to grow more vigorously. By the third year, you should start to see some fruit production. However, it may take 4-5 years for the vines to reach their full production potential. Be patient and continue to care for your vines, and you will eventually be rewarded with a bountiful harvest.
Can I grow grapes indoors?
Yes, you can grow grapes indoors, but it requires careful planning and attention. Choose a sunny location with at least 6-8 hours of direct sunlight per day. You may need to supplement with artificial lighting if you don’t have enough natural light. Select a compact grape variety that is well-suited for container growing. Provide a sturdy trellis or support system for the vines to climb on. Water regularly and fertilize as needed. Be aware that indoor grapevines may not produce as much fruit as outdoor vines.
What are the benefits of growing my own grapes?
Growing your own grapes offers numerous benefits, including:
* Fresh, delicious fruit: Homegrown grapes are often more flavorful and juicy than store-bought grapes.
* Cost savings: Growing your own grapes can save you money on groceries, especially if you enjoy them regularly.
* Control over growing practices: You can choose to grow your grapes organically, without the use of harmful pesticides or herbicides.
* A rewarding hobby: Growing grapes can be a fun and rewarding hobby that connects you with nature.
* A beautiful addition to your landscape: Grapevines can add beauty and interest to your garden or yard.
* The satisfaction of DIY: There’s nothing quite like the satisfaction of harvesting your own homegrown grapes.
How do I know when my grapes are ripe?
Determining when grapes are ripe can be tricky, but there are a few key indicators to look for:
* Color: The grapes should be fully colored according to the variety. Red grapes should be a deep red or purple, green grapes should be a translucent green, and black grapes should be a deep black.
* Taste: The best way to determine ripeness is to taste the grapes. They should be sweet and juicy, with a pleasant flavor.
* Texture: The grapes should be firm but not hard. They should also be easy to pull from the vine.
* Sugar content: You can use a refract
Leave a Comment