
Cooking with Swiss Chard can feel intimidating, I know! You see those vibrant, leafy greens at the farmer’s market, and maybe you’ve even brought some home, but then… what do you do with them? Don’t worry, you’re not alone. Swiss chard, a nutritional powerhouse, has been cultivated for centuries, with roots tracing back to ancient Greece and Rome. It wasn’t just a food source; it was also valued for its medicinal properties.
But let’s be honest, knowing its history doesn’t automatically make it easier to prepare. That’s where this guide comes in! I’m going to share some simple, delicious, and foolproof ways of cooking with Swiss Chard. Think of it as unlocking a secret weapon in your kitchen.
Why do you need these tricks? Because Swiss chard is incredibly versatile, packed with vitamins and minerals, and can add a burst of flavor and color to your meals. Plus, learning to use it effectively reduces food waste and expands your culinary horizons. So, ditch the intimidation and get ready to discover the joy of cooking with this amazing vegetable!
Cooking with Swiss Chard: From Garden to Gourmet (Almost!)
Okay, so you’ve got a bunch of Swiss chard, maybe from your garden, maybe from the farmer’s market, and you’re staring at it wondering, “What do I *do* with this stuff?” Don’t worry, I’ve been there! Swiss chard is a nutritional powerhouse, and it’s surprisingly versatile. I’m going to walk you through everything you need to know, from prepping it to cooking it in a few delicious ways.
Preparing Your Swiss Chard: The Foundation for Flavor
Before we even think about recipes, we need to get that chard ready. This is a crucial step, because nobody wants gritty, tough chard on their plate.
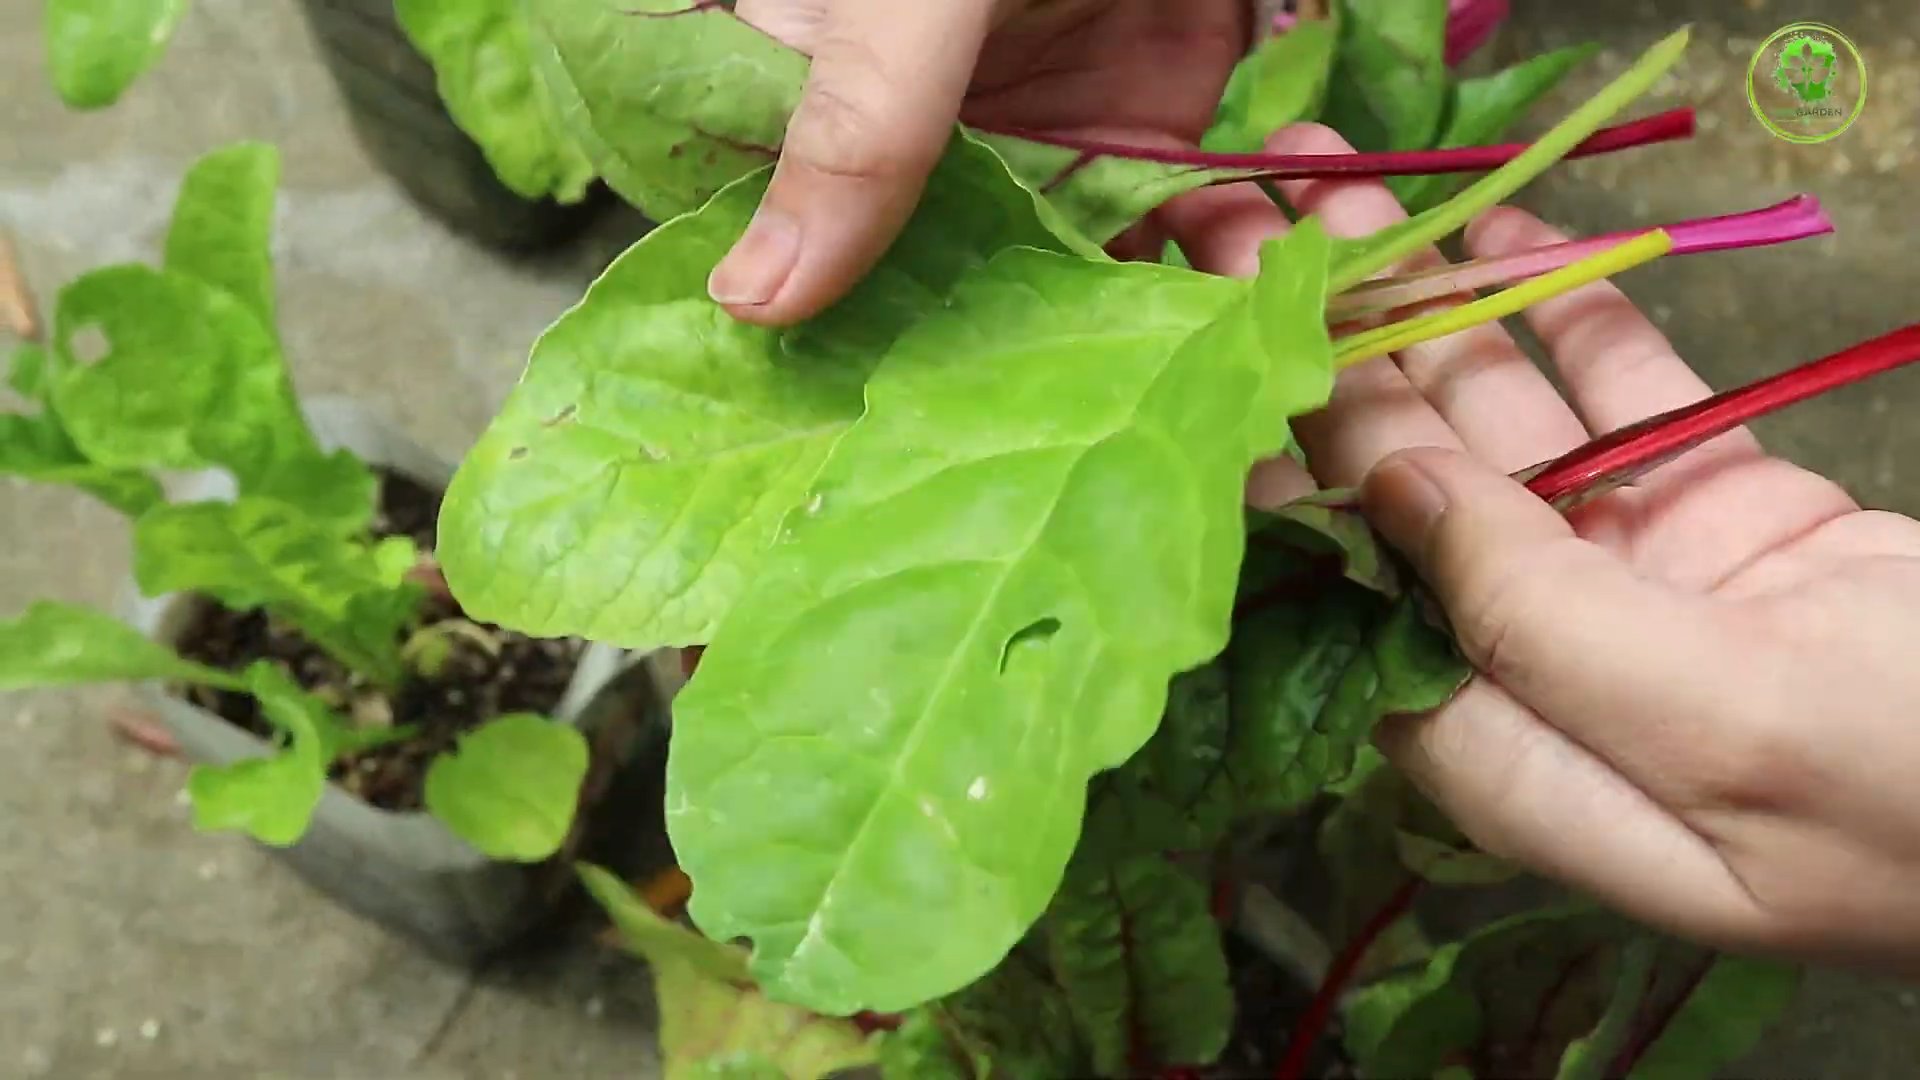
* Washing is Key: Swiss chard tends to hold onto dirt, especially around the base of the stalks.
* Stem vs. Leaf: The stems and leaves cook at different rates, so we’ll separate them.
* Chopping for Success: Consistent chopping ensures even cooking.
**Step-by-Step Instructions:**
1. Rinse Thoroughly: Fill a large bowl or your sink with cold water. Submerge the chard leaves and stalks, swishing them around to loosen any dirt. Let them sit for a minute or two, allowing the dirt to settle to the bottom. Lift the chard out of the water, leaving the dirt behind. Repeat this process until the water runs clear. I usually need to do this 2-3 times.
2. Separate Stems and Leaves: Lay a chard leaf flat on your cutting board. Using a sharp knife, cut along both sides of the stem, separating the leafy part from the central stalk. Stack the leaves together and set them aside. Repeat for all the chard.
3. Chop the Stems: Now, let’s tackle those stems. Depending on their thickness, you might want to halve or quarter them lengthwise. Then, chop them into bite-sized pieces, about 1/2 inch to 1 inch in size. I like to chop them a bit smaller if I’m planning on sautéing them.
4. Chop the Leaves: Stack the chard leaves on top of each other. Roll them up tightly like a cigar. Using your knife, slice the rolled leaves crosswise into ribbons. The width of the ribbons is up to you, but I usually aim for about 1-inch wide. This technique is called a chiffonade, and it’s perfect for leafy greens.
Sautéed Swiss Chard with Garlic and Olive Oil: A Classic
This is my go-to method for cooking Swiss chard. It’s quick, easy, and lets the natural flavor of the chard shine through. Plus, who can resist garlic and olive oil?
* Simple Ingredients, Big Flavor: Garlic, olive oil, and a pinch of red pepper flakes are all you need.
* Stems First, Leaves Second: Remember, the stems take longer to cook.
* Don’t Overcook: You want the chard to be tender-crisp, not mushy.
**Step-by-Step Instructions:**
1. Heat the Oil: In a large skillet or sauté pan, heat 2 tablespoons of olive oil over medium heat. Make sure the pan is large enough to accommodate all the chard without overcrowding it.
2. Sauté the Garlic: Add 2-3 cloves of minced garlic to the hot oil. Sauté for about 30 seconds, or until fragrant. Be careful not to burn the garlic, as it will become bitter.
3. Add the Stems: Add the chopped chard stems to the pan. Sauté for 3-5 minutes, or until they begin to soften. Stir occasionally to ensure even cooking.
4. Add the Leaves: Add the chopped chard leaves to the pan. Stir to combine with the stems and garlic.
5. Season and Cook: Season with salt, pepper, and a pinch of red pepper flakes (if using). Cook for 3-5 minutes, or until the leaves are wilted and tender-crisp. Stir frequently to prevent sticking.
6. Serve Immediately: Remove from heat and serve immediately. You can squeeze a little lemon juice over the top for extra brightness.
Swiss Chard and White Bean Soup: Comfort in a Bowl
This soup is hearty, healthy, and perfect for a chilly day. The Swiss chard adds a lovely earthy flavor and a boost of nutrients.
* Hearty and Filling: White beans provide protein and fiber.
* Versatile Vegetables: Feel free to add other vegetables like carrots, celery, or potatoes.
* Make it Vegetarian/Vegan: Use vegetable broth to keep it vegetarian or vegan.
**Step-by-Step Instructions:**
1. Sauté Aromatics: In a large pot or Dutch oven, heat 2 tablespoons of olive oil over medium heat. Add 1 chopped onion, 2 chopped carrots, and 2 chopped celery stalks. Sauté for 5-7 minutes, or until the vegetables are softened.
2. Add Garlic and Herbs: Add 2-3 cloves of minced garlic and 1 teaspoon of dried thyme (or other herbs of your choice) to the pot. Sauté for 30 seconds, or until fragrant.
3. Add Broth and Beans: Pour in 6 cups of chicken or vegetable broth. Add 1 (15-ounce) can of cannellini beans, rinsed and drained. Bring to a boil, then reduce heat and simmer for 15 minutes.
4. Add Swiss Chard: Add the chopped Swiss chard to the pot. Simmer for 5-7 minutes, or until the chard is tender.
5. Season and Blend (Optional): Season with salt and pepper to taste. If you prefer a creamier soup, you can use an immersion blender to partially blend the soup. Be careful when blending hot liquids!
6. Serve Warm: Serve warm with a drizzle of olive oil and a sprinkle of Parmesan cheese (if desired).
Swiss Chard and Ricotta Stuffed Shells: A Crowd-Pleaser
This is a bit more involved, but trust me, it’s worth the effort. These stuffed shells are creamy, cheesy, and packed with flavor.
* Comfort Food at its Finest: Pasta, cheese, and vegetables – what’s not to love?
* Make Ahead Friendly: You can assemble the shells ahead of time and bake them later.
* Customize the Filling: Add other vegetables or herbs to the ricotta filling.
**
Preparing the Swiss Chard and Ricotta Filling
**
1. Cook the Swiss Chard: Sauté the chopped Swiss chard with garlic and olive oil, as described in the “Sautéed Swiss Chard” recipe above. Let it cool slightly.
2. Combine Ingredients: In a large bowl, combine 15 ounces of ricotta cheese, 1/2 cup grated Parmesan cheese, 1 egg, the cooked Swiss chard, salt, pepper, and a pinch of nutmeg. Mix well to combine.
**
Assembling and Baking the Stuffed Shells
**
1. Cook the Pasta: Cook 1 box (12 ounces) of jumbo pasta shells according to package directions. Drain and rinse with cold water.
2. Prepare the Sauce: Spread a thin layer of your favorite marinara sauce in the bottom of a 9×13 inch baking dish.
3. Stuff the Shells: Using a spoon or a piping bag, fill each cooked pasta shell with the ricotta and Swiss chard mixture.
4. Arrange in Dish: Arrange the stuffed shells in the baking dish, seam-side up.
5. Top with Sauce and Cheese: Pour the remaining marinara sauce over the shells. Sprinkle with additional Parmesan cheese and mozzarella
Okay, so you’ve got a bunch of Swiss chard, maybe from your garden, maybe from the farmer’s market, and you’re staring at it wondering, “What do I *do* with this stuff?” Don’t worry, I’ve been there! Swiss chard is a nutritional powerhouse, and it’s surprisingly versatile. I’m going to walk you through everything you need to know, from prepping it to cooking it in a few delicious ways.
Preparing Your Swiss Chard: The Foundation for Flavor
Before we even think about recipes, we need to get that chard ready. This is a crucial step, because nobody wants gritty, tough chard on their plate.
* Washing is Key: Swiss chard tends to hold onto dirt, especially around the base of the stalks.
* Stem vs. Leaf: The stems and leaves cook at different rates, so we’ll separate them.
* Chopping for Success: Consistent chopping ensures even cooking.
**Step-by-Step Instructions:**
1. Rinse Thoroughly: Fill a large bowl or your sink with cold water. Submerge the chard leaves and stalks, swishing them around to loosen any dirt. Let them sit for a minute or two, allowing the dirt to settle to the bottom. Lift the chard out of the water, leaving the dirt behind. Repeat this process until the water runs clear. I usually need to do this 2-3 times.
2. Separate Stems and Leaves: Lay a chard leaf flat on your cutting board. Using a sharp knife, cut along both sides of the stem, separating the leafy part from the central stalk. Stack the leaves together and set them aside. Repeat for all the chard.
3. Chop the Stems: Now, let’s tackle those stems. Depending on their thickness, you might want to halve or quarter them lengthwise. Then, chop them into bite-sized pieces, about 1/2 inch to 1 inch in size. I like to chop them a bit smaller if I’m planning on sautéing them.
4. Chop the Leaves: Stack the chard leaves on top of each other. Roll them up tightly like a cigar. Using your knife, slice the rolled leaves crosswise into ribbons. The width of the ribbons is up to you, but I usually aim for about 1-inch wide. This technique is called a chiffonade, and it’s perfect for leafy greens.
Sautéed Swiss Chard with Garlic and Olive Oil: A Classic
This is my go-to method for cooking Swiss chard. It’s quick, easy, and lets the natural flavor of the chard shine through. Plus, who can resist garlic and olive oil?
* Simple Ingredients, Big Flavor: Garlic, olive oil, and a pinch of red pepper flakes are all you need.
* Stems First, Leaves Second: Remember, the stems take longer to cook.
* Don’t Overcook: You want the chard to be tender-crisp, not mushy.
**Step-by-Step Instructions:**
1. Heat the Oil: In a large skillet or sauté pan, heat 2 tablespoons of olive oil over medium heat. Make sure the pan is large enough to accommodate all the chard without overcrowding it.
2. Sauté the Garlic: Add 2-3 cloves of minced garlic to the hot oil. Sauté for about 30 seconds, or until fragrant. Be careful not to burn the garlic, as it will become bitter.
3. Add the Stems: Add the chopped chard stems to the pan. Sauté for 3-5 minutes, or until they begin to soften. Stir occasionally to ensure even cooking.
4. Add the Leaves: Add the chopped chard leaves to the pan. Stir to combine with the stems and garlic.
5. Season and Cook: Season with salt, pepper, and a pinch of red pepper flakes (if using). Cook for 3-5 minutes, or until the leaves are wilted and tender-crisp. Stir frequently to prevent sticking.
6. Serve Immediately: Remove from heat and serve immediately. You can squeeze a little lemon juice over the top for extra brightness.
Swiss Chard and White Bean Soup: Comfort in a Bowl
This soup is hearty, healthy, and perfect for a chilly day. The Swiss chard adds a lovely earthy flavor and a boost of nutrients.
* Hearty and Filling: White beans provide protein and fiber.
* Versatile Vegetables: Feel free to add other vegetables like carrots, celery, or potatoes.
* Make it Vegetarian/Vegan: Use vegetable broth to keep it vegetarian or vegan.
**Step-by-Step Instructions:**
1. Sauté Aromatics: In a large pot or Dutch oven, heat 2 tablespoons of olive oil over medium heat. Add 1 chopped onion, 2 chopped carrots, and 2 chopped celery stalks. Sauté for 5-7 minutes, or until the vegetables are softened.
2. Add Garlic and Herbs: Add 2-3 cloves of minced garlic and 1 teaspoon of dried thyme (or other herbs of your choice) to the pot. Sauté for 30 seconds, or until fragrant.
3. Add Broth and Beans: Pour in 6 cups of chicken or vegetable broth. Add 1 (15-ounce) can of cannellini beans, rinsed and drained. Bring to a boil, then reduce heat and simmer for 15 minutes.
4. Add Swiss Chard: Add the chopped Swiss chard to the pot. Simmer for 5-7 minutes, or until the chard is tender.
5. Season and Blend (Optional): Season with salt and pepper to taste. If you prefer a creamier soup, you can use an immersion blender to partially blend the soup. Be careful when blending hot liquids!
6. Serve Warm: Serve warm with a drizzle of olive oil and a sprinkle of Parmesan cheese (if desired).
Swiss Chard and Ricotta Stuffed Shells: A Crowd-Pleaser
This is a bit more involved, but trust me, it’s worth the effort. These stuffed shells are creamy, cheesy, and packed with flavor.
* Comfort Food at its Finest: Pasta, cheese, and vegetables – what’s not to love?
* Make Ahead Friendly: You can assemble the shells ahead of time and bake them later.
* Customize the Filling: Add other vegetables or herbs to the ricotta filling.
**
Preparing the Swiss Chard and Ricotta Filling
**
1. Cook the Swiss Chard: Sauté the chopped Swiss chard with garlic and olive oil, as described in the “Sautéed Swiss Chard” recipe above. Let it cool slightly.
2. Combine Ingredients: In a large bowl, combine 15 ounces of ricotta cheese, 1/2 cup grated Parmesan cheese, 1 egg, the cooked Swiss chard, salt, pepper, and a pinch of nutmeg. Mix well to combine.
**
Assembling and Baking the Stuffed Shells
**
1. Cook the Pasta: Cook 1 box (12 ounces) of jumbo pasta shells according to package directions. Drain and rinse with cold water.
2. Prepare the Sauce: Spread a thin layer of your favorite marinara sauce in the bottom of a 9×13 inch baking dish.
3. Stuff the Shells: Using a spoon or a piping bag, fill each cooked pasta shell with the ricotta and Swiss chard mixture.
4. Arrange in Dish: Arrange the stuffed shells in the baking dish, seam-side up.
5. Top with Sauce and Cheese: Pour the remaining marinara sauce over the shells. Sprinkle with additional Parmesan cheese and mozzarella cheese (if desired).
6. Bake: Bake in a preheated oven at 375°F (190°C) for 20-25 minutes, or until the cheese is melted and bubbly.
7. Let Rest: Let the shells rest for a few minutes before serving.
Swiss Chard Chips: A Healthy Snack Alternative
Craving something crunchy but want to avoid the guilt? Swiss chard chips are the answer! They’re easy to make and surprisingly addictive.
* Healthy and Delicious: A great way to sneak in some extra greens.
* Simple Ingredients: Just chard, olive oil, and salt.
* Crispy and Satisfying: A perfect alternative to potato chips.
**Step-by-Step Instructions:**
1. Preheat Oven: Preheat your oven to 300°F (150°C). Line a baking sheet with parchment paper.
2. Prepare the Chard: Wash and dry the Swiss chard leaves thoroughly. Remove the stems (you can save them for
Conclusion
So, there you have it! Mastering the art of cooking with Swiss chard doesn’t have to be intimidating. This simple DIY trick – blanching followed by a quick sauté – unlocks the vegetable’s full potential, transforming it from potentially bitter and tough to tender, flavorful, and vibrant. We’ve shown you how to tame its assertive nature and bring out its inherent sweetness, making it a welcome addition to your culinary repertoire.
Why is this DIY trick a must-try? Because it’s a game-changer. It addresses the two main challenges people face when cooking with Swiss chard: bitterness and texture. Blanching softens the leaves and stems, reducing bitterness, while the subsequent sauté allows you to build layers of flavor with aromatics like garlic, onions, and your favorite herbs. The result is a dish that’s both delicious and nutritious, packed with vitamins, minerals, and antioxidants.
But the beauty of this method lies in its versatility. Feel free to experiment with different variations to suit your taste. For a Mediterranean twist, add some sun-dried tomatoes, Kalamata olives, and a sprinkle of feta cheese. For an Asian-inspired dish, try sautéing the chard with ginger, garlic, soy sauce, and a touch of sesame oil. You can even incorporate it into your favorite pasta dishes, omelets, or frittatas for a healthy and flavorful boost. Consider adding a squeeze of lemon juice at the end for a bright, acidic counterpoint to the earthy flavors. Don’t be afraid to get creative and explore the endless possibilities that Swiss chard offers.
This method is not just about cooking Swiss chard; it’s about understanding how to treat vegetables with respect, bringing out their best qualities through simple techniques. It’s about empowering you to confidently incorporate more healthy greens into your diet. It’s about discovering the joy of cooking with fresh, seasonal ingredients.
We are confident that once you try this DIY trick, you’ll be amazed at how easy and rewarding it is to cook with Swiss chard. It will become a staple in your kitchen, a go-to ingredient for quick and healthy meals.
So, what are you waiting for? Grab a bunch of fresh Swiss chard from your local farmers market or grocery store and give this method a try. We’re eager to hear about your experiences! Share your creations, variations, and tips in the comments below. Let’s build a community of Swiss chard enthusiasts and inspire each other to explore the delicious possibilities of this often-overlooked vegetable. We can’t wait to see what you cook up! Remember, the key to delicious Swiss chard is proper preparation, and this DIY trick is your secret weapon.
Frequently Asked Questions (FAQ)
What exactly is blanching, and why is it necessary for Swiss chard?
Blanching is a cooking process where you briefly submerge vegetables in boiling water, followed by an immediate transfer to ice water to stop the cooking process. For Swiss chard, blanching serves several crucial purposes. First, it helps to soften the tough stems and leaves, making them more palatable. Second, it reduces the bitterness that can sometimes be present in Swiss chard, especially in older or larger leaves. Finally, it helps to preserve the vibrant color of the chard, making it more visually appealing. The ice bath is essential because it halts the cooking process, preventing the chard from becoming overcooked and mushy.
Can I skip the blanching step? What happens if I don’t blanch the Swiss chard?
While you *can* technically skip the blanching step, we strongly advise against it, especially if you’re new to cooking with Swiss chard. Without blanching, the stems will likely remain tough and fibrous, and the leaves may retain a bitter taste. The overall texture and flavor of the dish will be significantly compromised. If you’re short on time, you could try steaming the chard instead of blanching, but blanching generally yields the best results in terms of texture and flavor. If you absolutely must skip blanching, make sure to chop the stems very finely and cook them for a longer period of time than the leaves.
How long should I blanch the Swiss chard? Is there a risk of over-blanching?
The ideal blanching time for Swiss chard is typically 2-3 minutes. The exact time will depend on the size and thickness of the stems. You want the stems to be slightly softened but not completely cooked through. Over-blanching can result in mushy chard, so it’s important to keep a close eye on it. A good way to test for doneness is to pierce a stem with a fork; it should offer slight resistance but not be completely hard. Remember to immediately transfer the blanched chard to an ice bath to stop the cooking process.
What’s the best way to store leftover cooked Swiss chard?
Leftover cooked Swiss chard should be stored in an airtight container in the refrigerator. It will typically keep for 3-4 days. To reheat, you can simply microwave it, sauté it in a pan, or add it to soups or stews. Keep in mind that reheated Swiss chard may be slightly softer than when it was first cooked.
Can I freeze Swiss chard? If so, how should I prepare it for freezing?
Yes, you can freeze Swiss chard, but it’s important to blanch it first to preserve its quality. Blanch the chard for 2-3 minutes, then immediately transfer it to an ice bath. Once it’s cooled, drain it thoroughly and squeeze out any excess water. This will help prevent freezer burn. Pack the blanched chard into freezer bags or airtight containers, removing as much air as possible. Frozen Swiss chard can be stored for up to 8-12 months. When you’re ready to use it, thaw it in the refrigerator overnight or cook it directly from frozen.
What are some good flavor pairings for Swiss chard?
Swiss chard pairs well with a wide variety of flavors. Some popular pairings include:
* **Garlic and onions:** These aromatics add a savory depth to the chard.
* **Lemon juice:** A squeeze of lemon juice brightens the flavor and adds a touch of acidity.
* **Olive oil:** A healthy and flavorful cooking oil that complements the earthy taste of the chard.
* **Parmesan cheese:** Adds a salty and umami-rich element.
* **Pine nuts:** Provide a nutty crunch and flavor.
* **Raisins:** Offer a sweet and chewy contrast to the savory chard.
* **Bacon or pancetta:** Adds a smoky and salty flavor.
* **Red pepper flakes:** Provide a touch of heat.
* **Mushrooms:** Earthy mushrooms complement the chard’s flavor profile.
I’m having trouble finding Swiss chard. Are there any good substitutes?
If you can’t find Swiss chard, some good substitutes include spinach, kale, or collard greens. Keep in mind that each of these vegetables has a slightly different flavor and texture, so you may need to adjust the cooking time accordingly. Spinach is the most delicate of the three and will cook the fastest, while collard greens are the toughest and will require the longest cooking time.
Is Swiss chard healthy? What are its nutritional benefits?
Absolutely! Swiss chard is incredibly healthy and packed with nutrients. It’s an excellent source of vitamins A, C, and K, as well as minerals like magnesium, potassium, and iron. It’s also a good source of fiber and antioxidants. Swiss chard is low in calories and fat, making it a great addition to a healthy diet. The high vitamin K content is important for bone health, while the antioxidants help protect against cell damage.
Can I eat the stems of Swiss chard? Are they as nutritious as the leaves?
Yes, you can and should eat the stems of Swiss chard! They are perfectly edible and just as nutritious as the leaves. The stems are often slightly tougher than the leaves, which is why blanching is so important. The stems contain fiber, vitamins, and minerals. Don’t discard them!
What are the different varieties of Swiss chard, and do they taste different?
There are several varieties of Swiss chard, including rainbow chard (which has colorful stems in shades of red, yellow, and orange), green chard (with white stems), and ruby red chard (with bright red stems). While the different varieties may have slightly different appearances, their flavor is generally quite similar. Rainbow chard is often preferred for its visual appeal, but all varieties are equally nutritious and delicious.

Leave a Comment